

EditorsKeys Portable Vocal Booth Pro Studio Series, Portable Vocal Booth Pro Instruction Sheet
Page 1
INSTRUCTION SHEET
Portable Vocal Booth Pro - Second Edition - Instruction Sheet
Thank you for choosing the Editors Keys Portable Vocal Booth Pro. We’re sure you’ll love
using it. Setup is simple, follow the instructions below and get perfect vocals every time.
Specications:
Dimensions:(W)400mm,(H)320mm,(D)260mm
Weight:About 2.5KG
Microphones Supporting Set:
Max. Length:150mm
Moving Range:115mm
Supporting Height:105mm
Packaging Includes:
Vocal Booth: 1pc
Vocal Booth Stand: 1pc
Supporting Bar & Distance Adjusting Slice (include washers,nuts):1 set
Desk Mounts: 3pc
User Manual:1 pc
Page 2
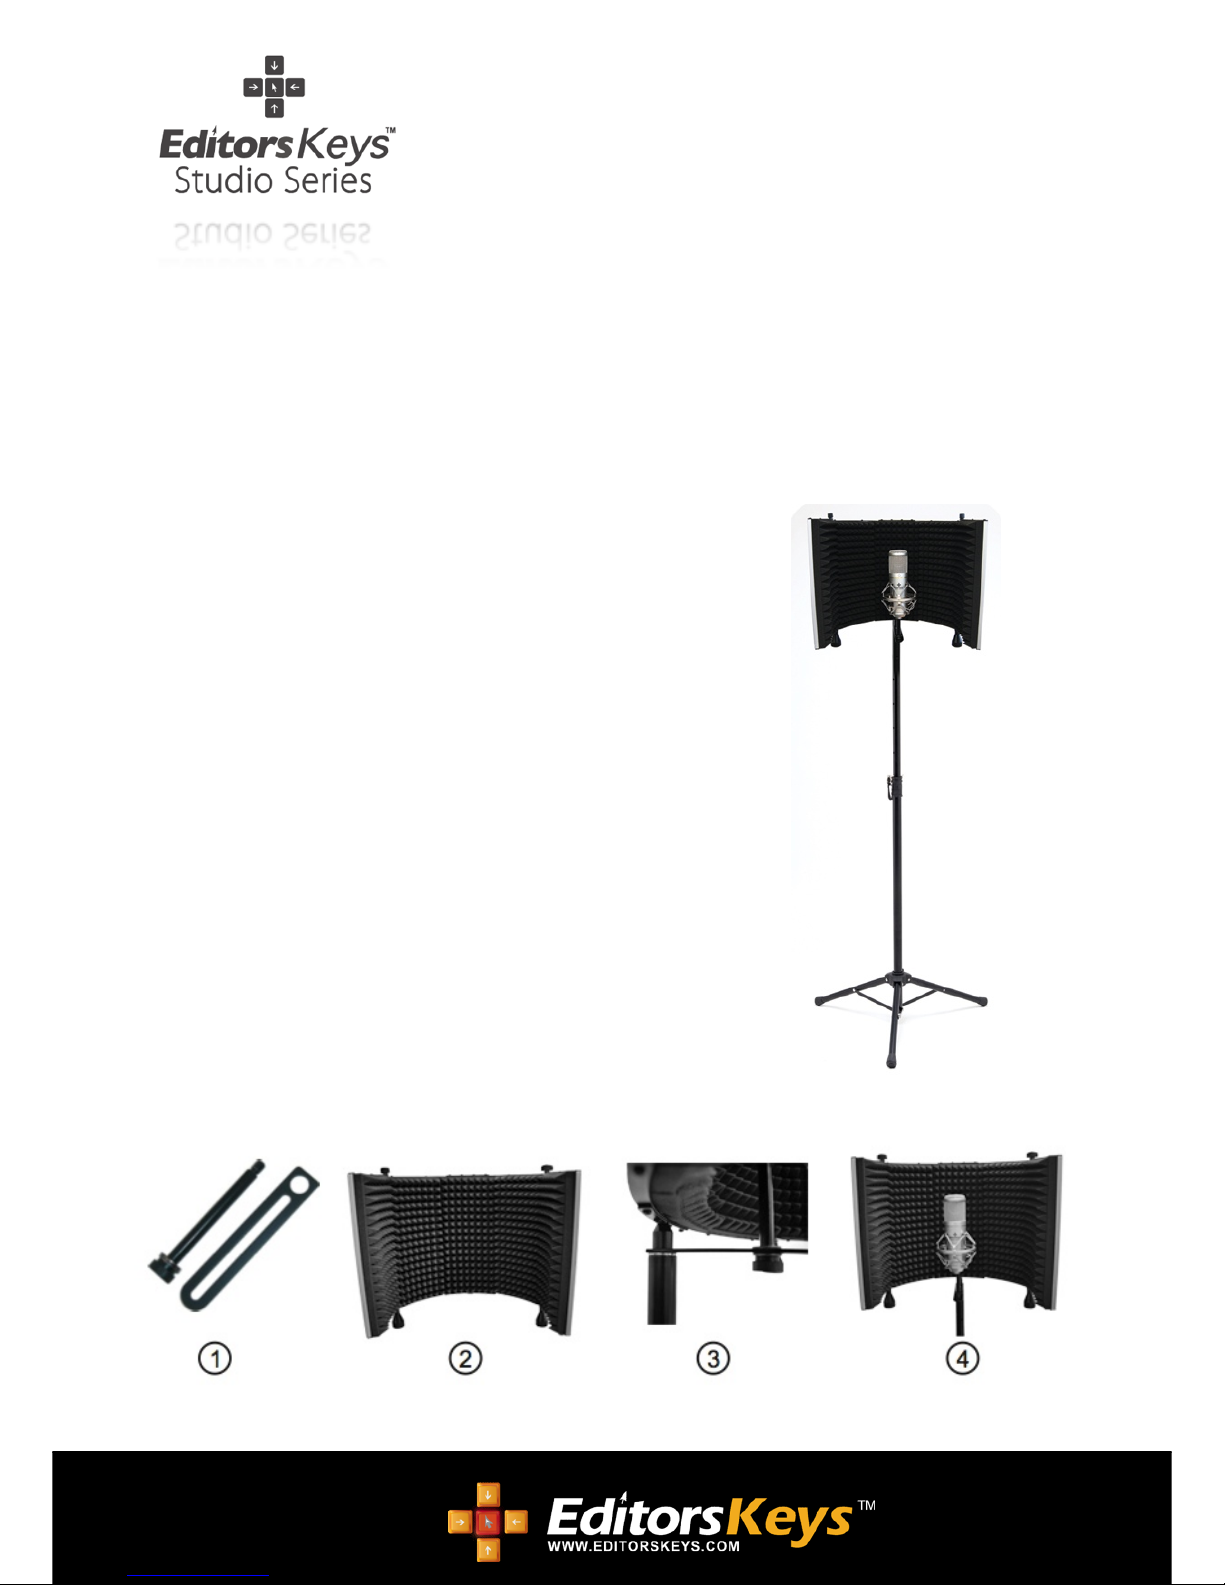
Vocal Booth Assembly:
I:Using with included Vocal Booth Stand:
1.) First of all, grab the microphone extender rod, (shown in pic 1 above.). You will need to place this on the top of
the Vocal Booth Stand screw mount, which pokes out of the top of the microphone stand.
2.) At the lower part of the Vocal Booth, in the centre, you will nd a screw hole. Simply screw this directly on top of
the microphone extender and microphone stand, taking great care to support the vocal booth head unit as you
screw it securely into place. (see pic 3 for example)
3.) Fix the mounting bar (in pic.1) into the microphone extender slot, putting a washer on each side, and fasten the
black screw. The thin side should end up in the centre of the Vocal Booth allowing you to secure your own shock
mount. (or supplied shock mount if you have purchased an Editors Keys microphone.) (see pic 4 above for example)
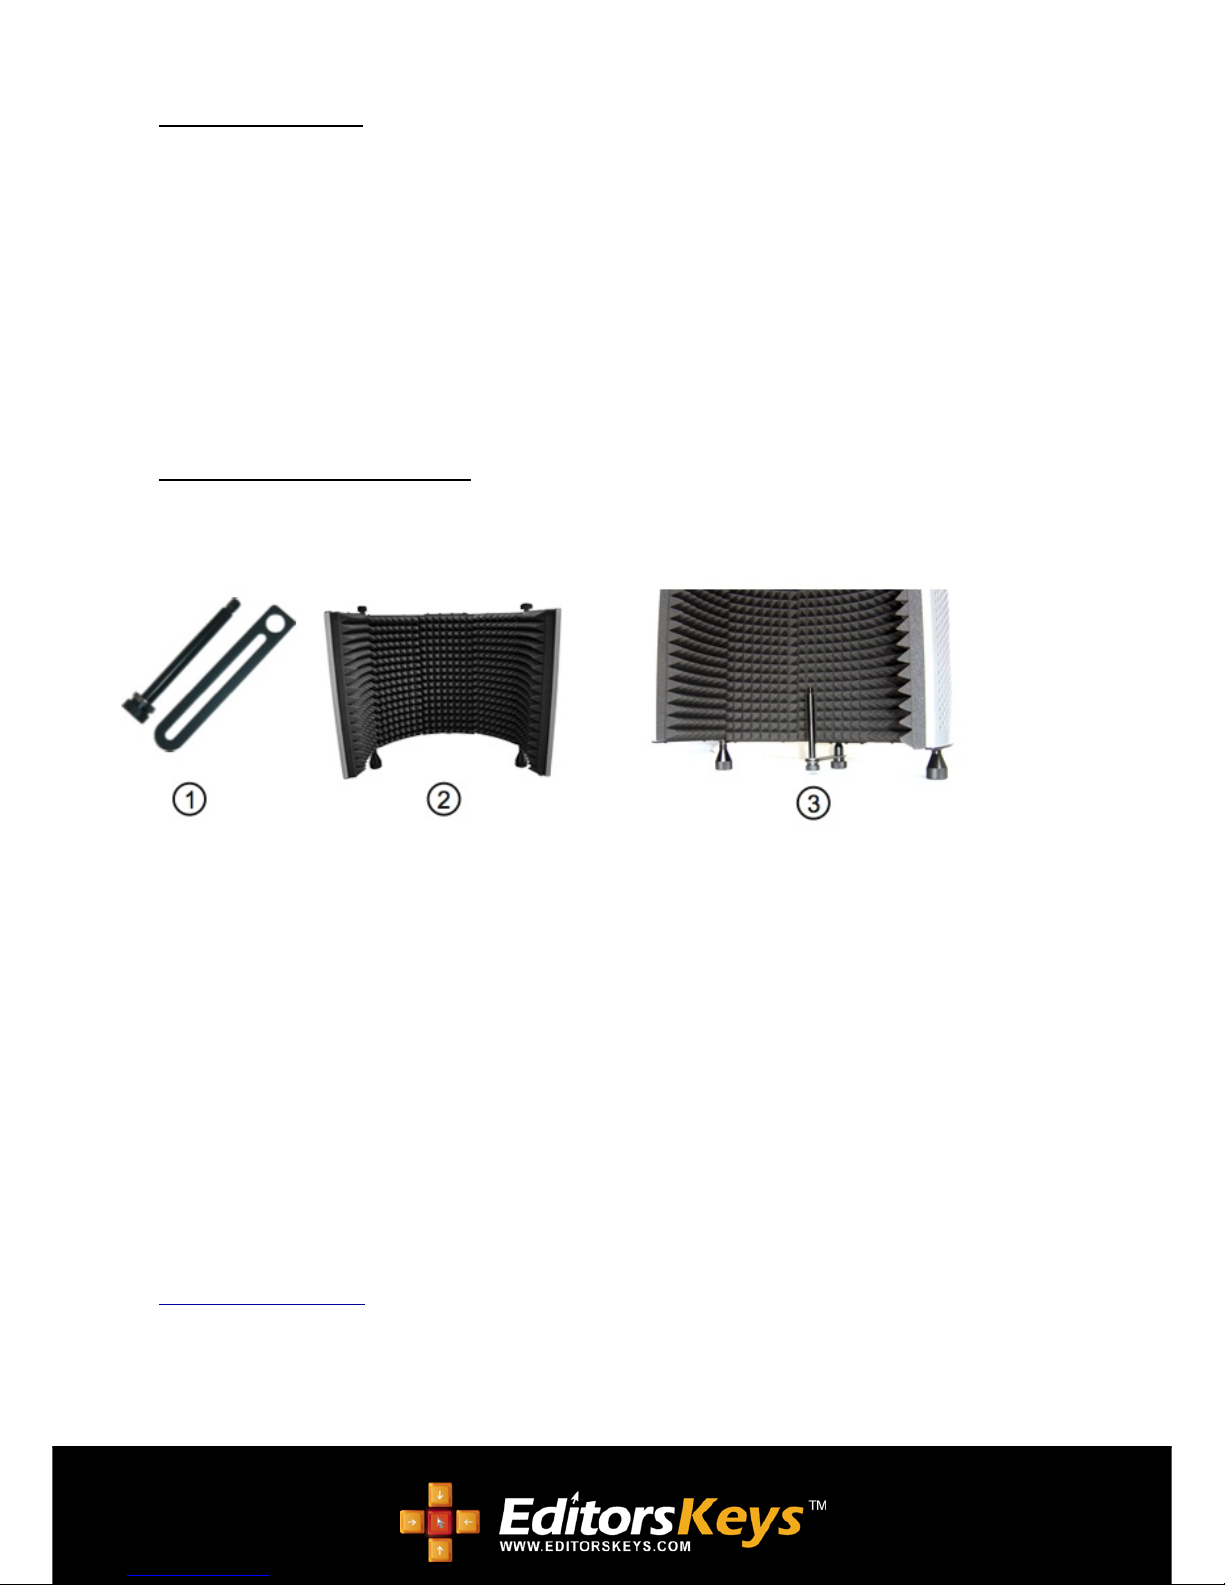
II:Using Directly on Recording Desk:
Unpack the vocal booth and its accessories from the Editors Keys packaging.
1.) First of all, grab the microphone extender bar (seen in pic 1 above.)
2.) Place the ‘hole’ on the microphone extender bracket over the attached desk stand screw , then screw the nut into
the centre-bottom of the vocal booth, until tightly fastened.
3.) Fix the mounting bar into the microphone extenders slot, putting a washer on each side, and fasten the black
screw. (for an example of how this should look sitting on your desk, see pic 3 above.)
4.) Microphone clip/shock mount can then be attached to the mounting bar, place the vocal booth onto your
recording desk. You’re now ready to record.
We wish you the very best, and would love to hear how you are using your Portable Vocal Booth
and please contact us for free advice. Also send us over some sound samples or video clips of
you using the booth. We love nothing more, than to see what creative things people are getting
up to with the Editors Keys products!
www.editorskeys.com
 Loading...