

Page 1

Quick Installation Guide
AC1200 Wireless LAN Dual Band
Concurrent MU-MIMO Repeater
RE-7478RPC
1
Page 2

Package Contents ......................................................................................... Page 3
Build Network Connections ........................................................................ Page 4
Repeater mode Network Setup ................................................................... Page 5
Client mode Network Setup ........................................................................ Page 10
AP mode Network Setup ............................................................................. Page 15
To enable/disable LED lights....................................................................... Page 19
2
Page 3
Package Contents
Before you starting to use this repeater, please check if there’s anything missing in the package,
and contact your dealer of purchase to claim for missing items:
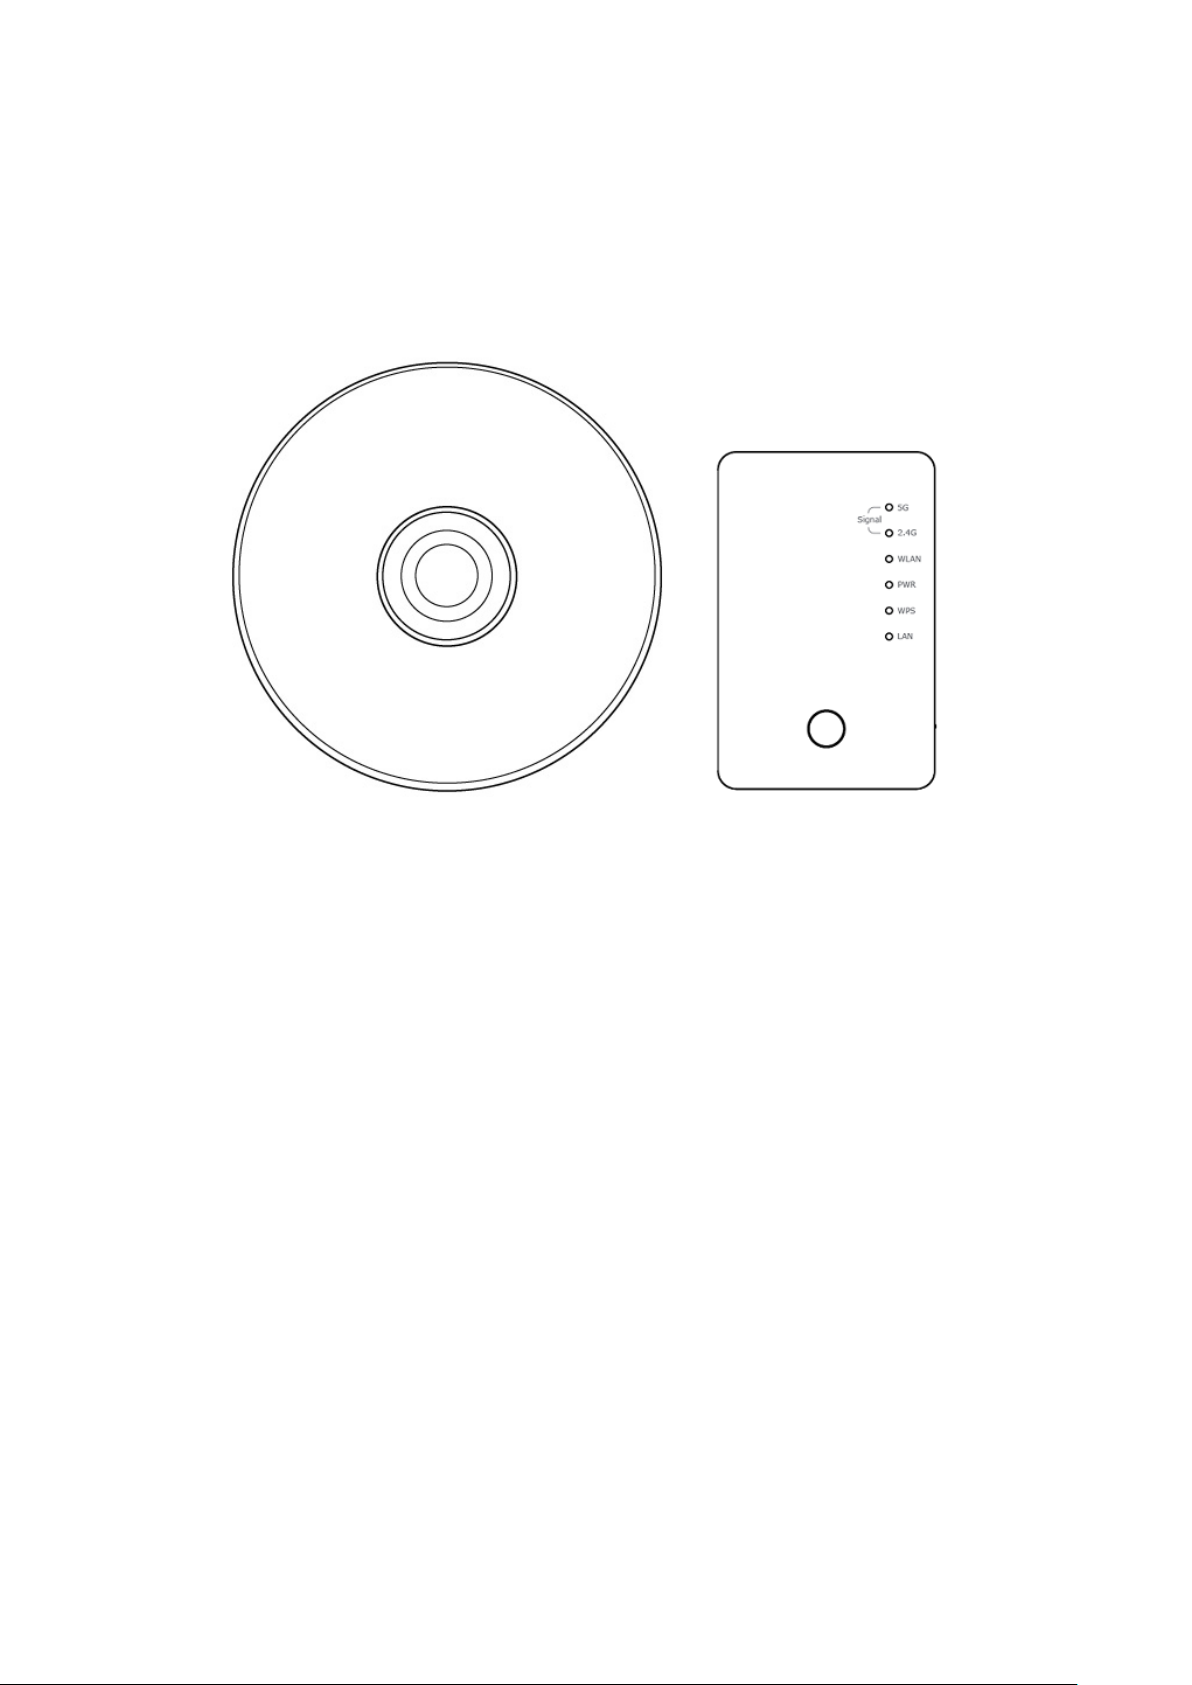
□ WiFi Repeater Unit (1 pcs)
□ User Manual and Quick Installation Guide CD-ROM (1 pcs)
3
Page 4
Build Network Connections
Please follow the following instructions to install this repeater:
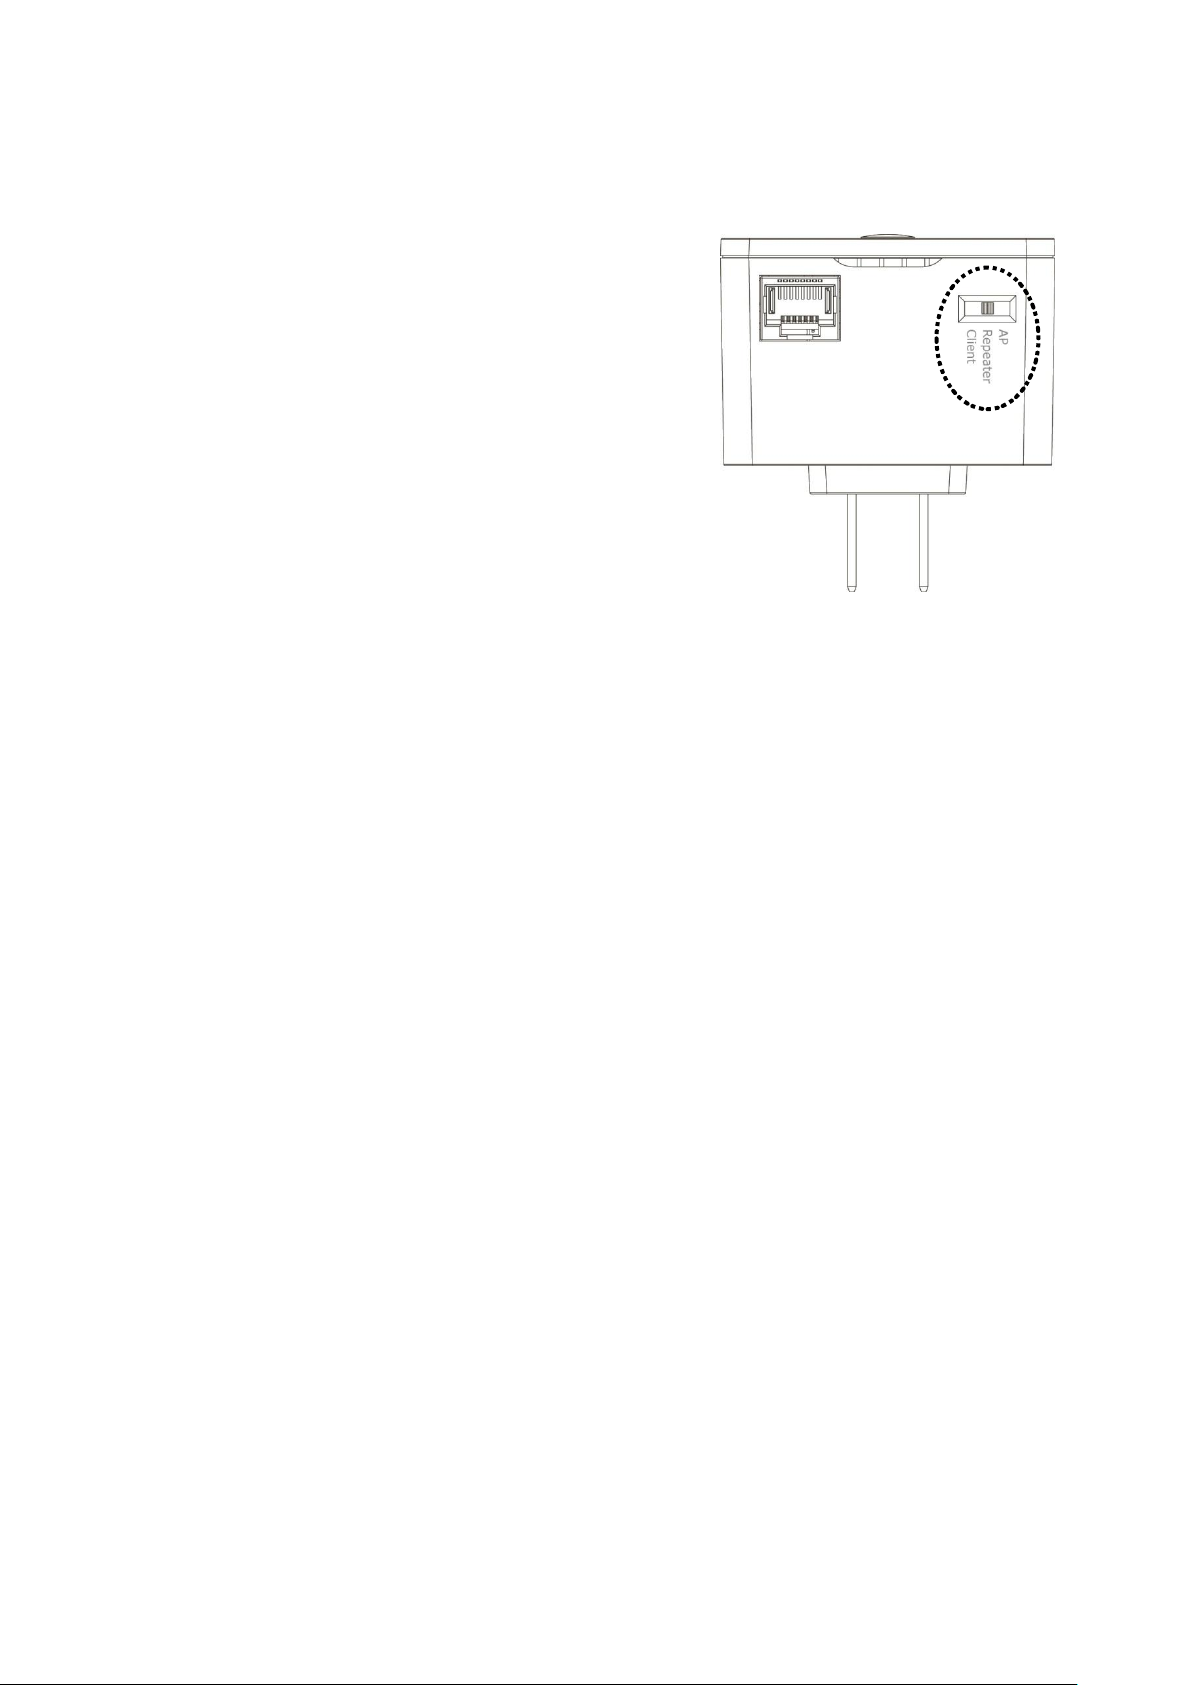
1. Select working mode:
AP: Work as wireless access point
(Serve wireless clients)
Repeater: Work as wireless repeater
(Extends wireless signal coverage)
Client: Work as wireless network client
(Become your computer’s wireless network card)
2. Place this repeater in an appropriate place after conducting a site survey.
3. Please check all LEDs on the front panel. ‘PWR’ LED should be steadily on. If ‘PWR’ LED
is still off, please check if the power outlet you’re using is working or contact your dealer of
purchase for assistance.
Besides WPS hardware button setup, you can also login Firmware for more advanced
settings. For detailed setup, see following pages.
4
Page 5
Repeater mode Network Setup
1. Switch mode selector to ‘Repeater’.
2. Insert wireless repeater into power outlet
on the wall. You should see ‘Power’
LED light up in few seconds.
If not, please check if the power outlet
you’re using is working.
This repeater is your Wi-Fi range extender !
It can extend your wireless signal and coverage and help you to solve wireless dead zone
problem.
For the first time setup, you can move repeater close to the access point you wish to connect,
after installation done, you can move the repeater to the place you wish to use.
You can build wireless connection via ‘Hardware WPS button’ or ‘Software web browser’.
If your broadband router or access point also supports ‘WPS button’, we recommend you to use
WPS button to establish connection, it is the fast and secure way without computer.
Using WPS button to build wireless connection:
5
Page 6
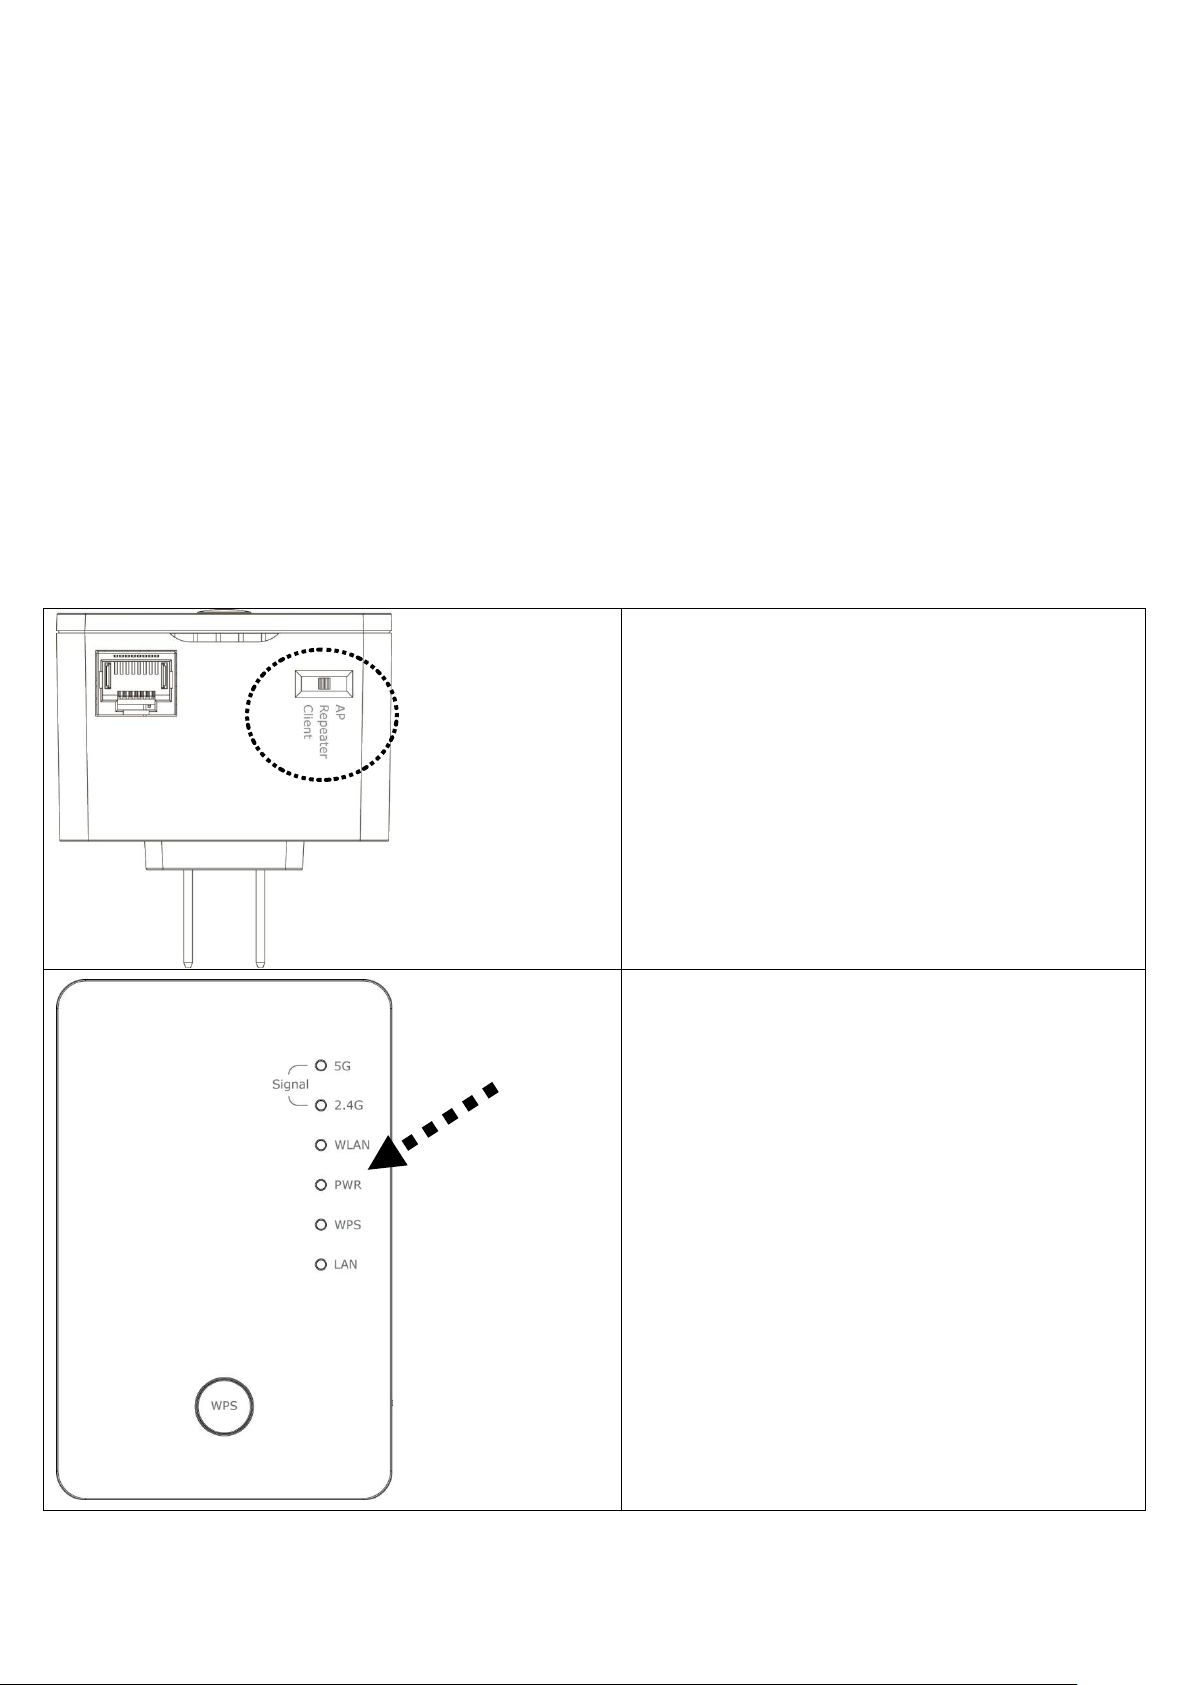
3. Press and hold WPS button on repeater
for 2 seconds, ‘WPS’ LED will start
flashing.
4. Press WPS button on the access point
you wish to connect within 2 minutes. If
the access point you wish to connect
does not have hardware WPS button, you
can also use its web configuration
menu’s WPS function to establish
connection. Or you can login this
repeater web UI to have quick setup
(detailed setup refers to following page)
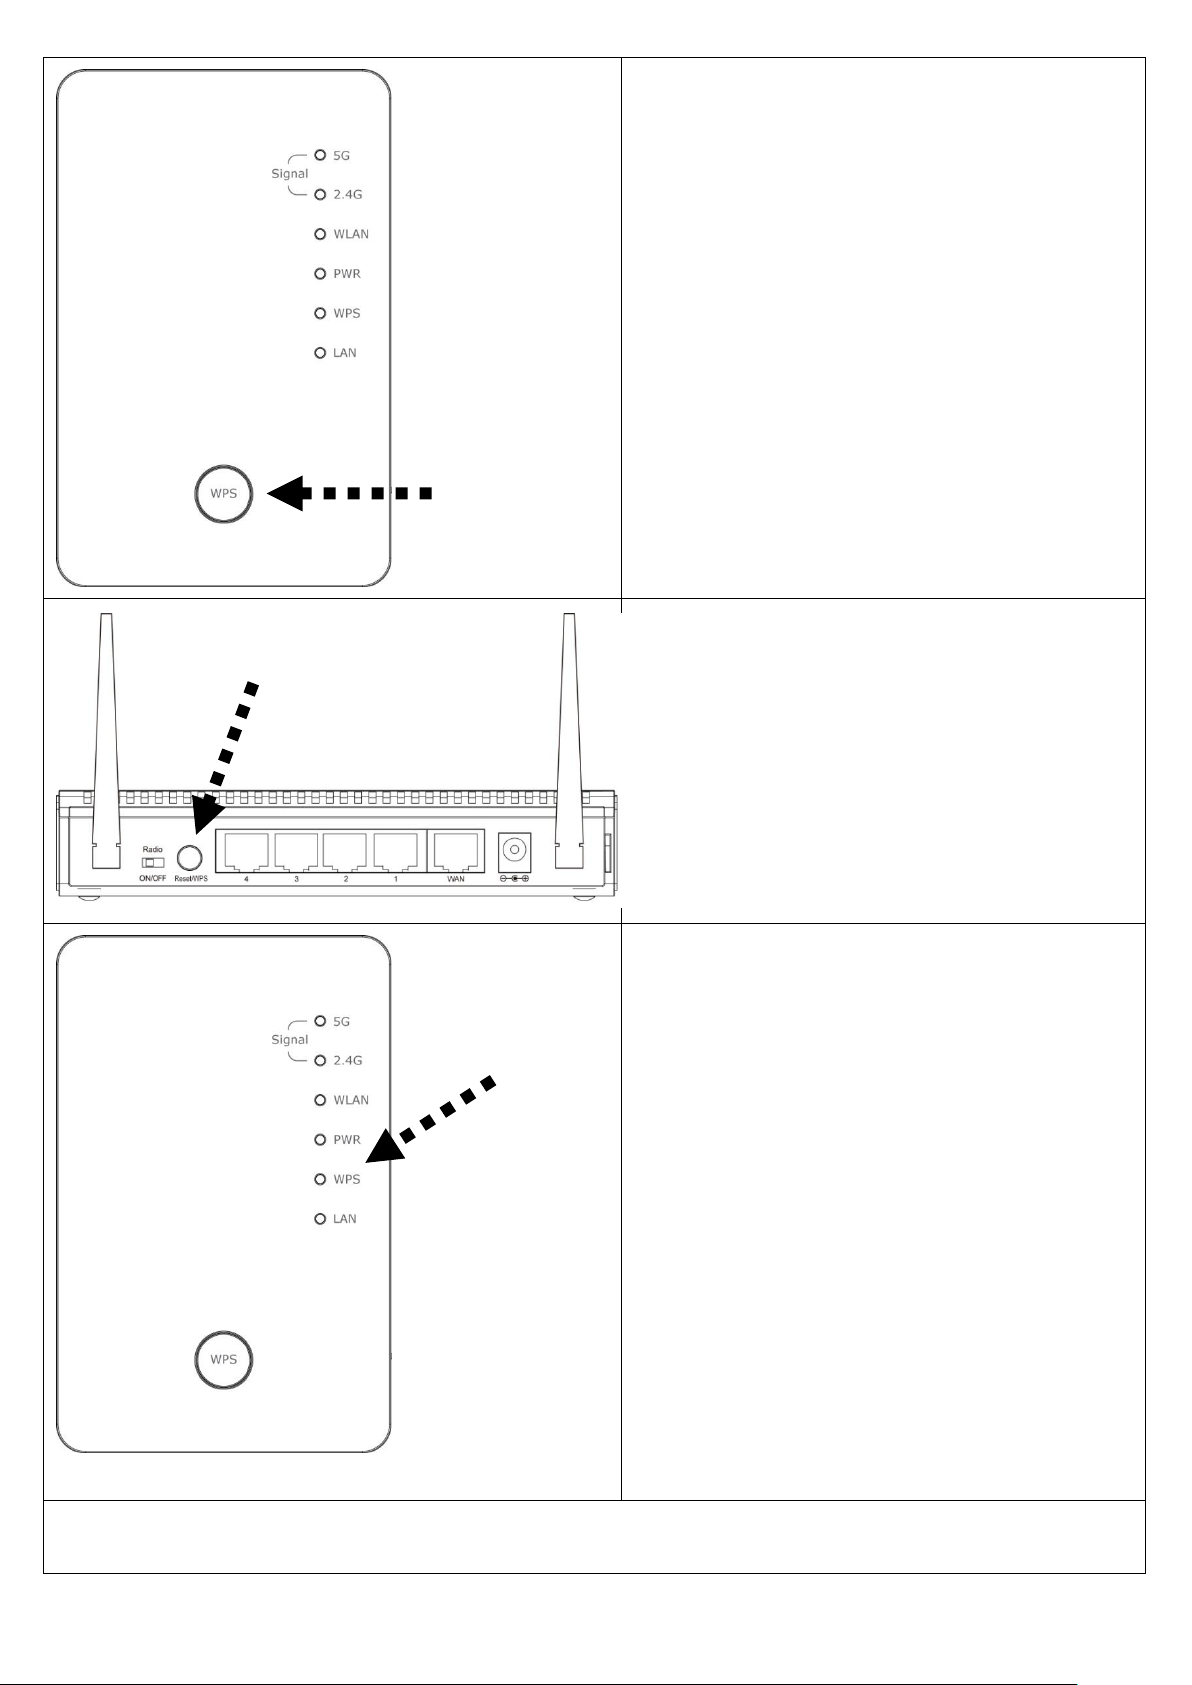
5. If WPS connection is successfully
established, the repeater will reboot
immediately to make your setting effect ;
if ‘WPS’ LED flashes fast, there’s
something error, please wait for 2
minutes until ‘WPS’ LED off, and try
from step(3) again.
When quick installation is successfully
done, ‘Signal” LED will turn on.
Please move repeater to the place you
wish to use, you can check ‘Signal’ LED
status to understand signal reception
level. (Steady light: Excellent, Flash:
Good, Fast flash: poor.)
Congratulations!
The setup is completely done, now you can start to enjoy wireless repeater.
6
Page 7
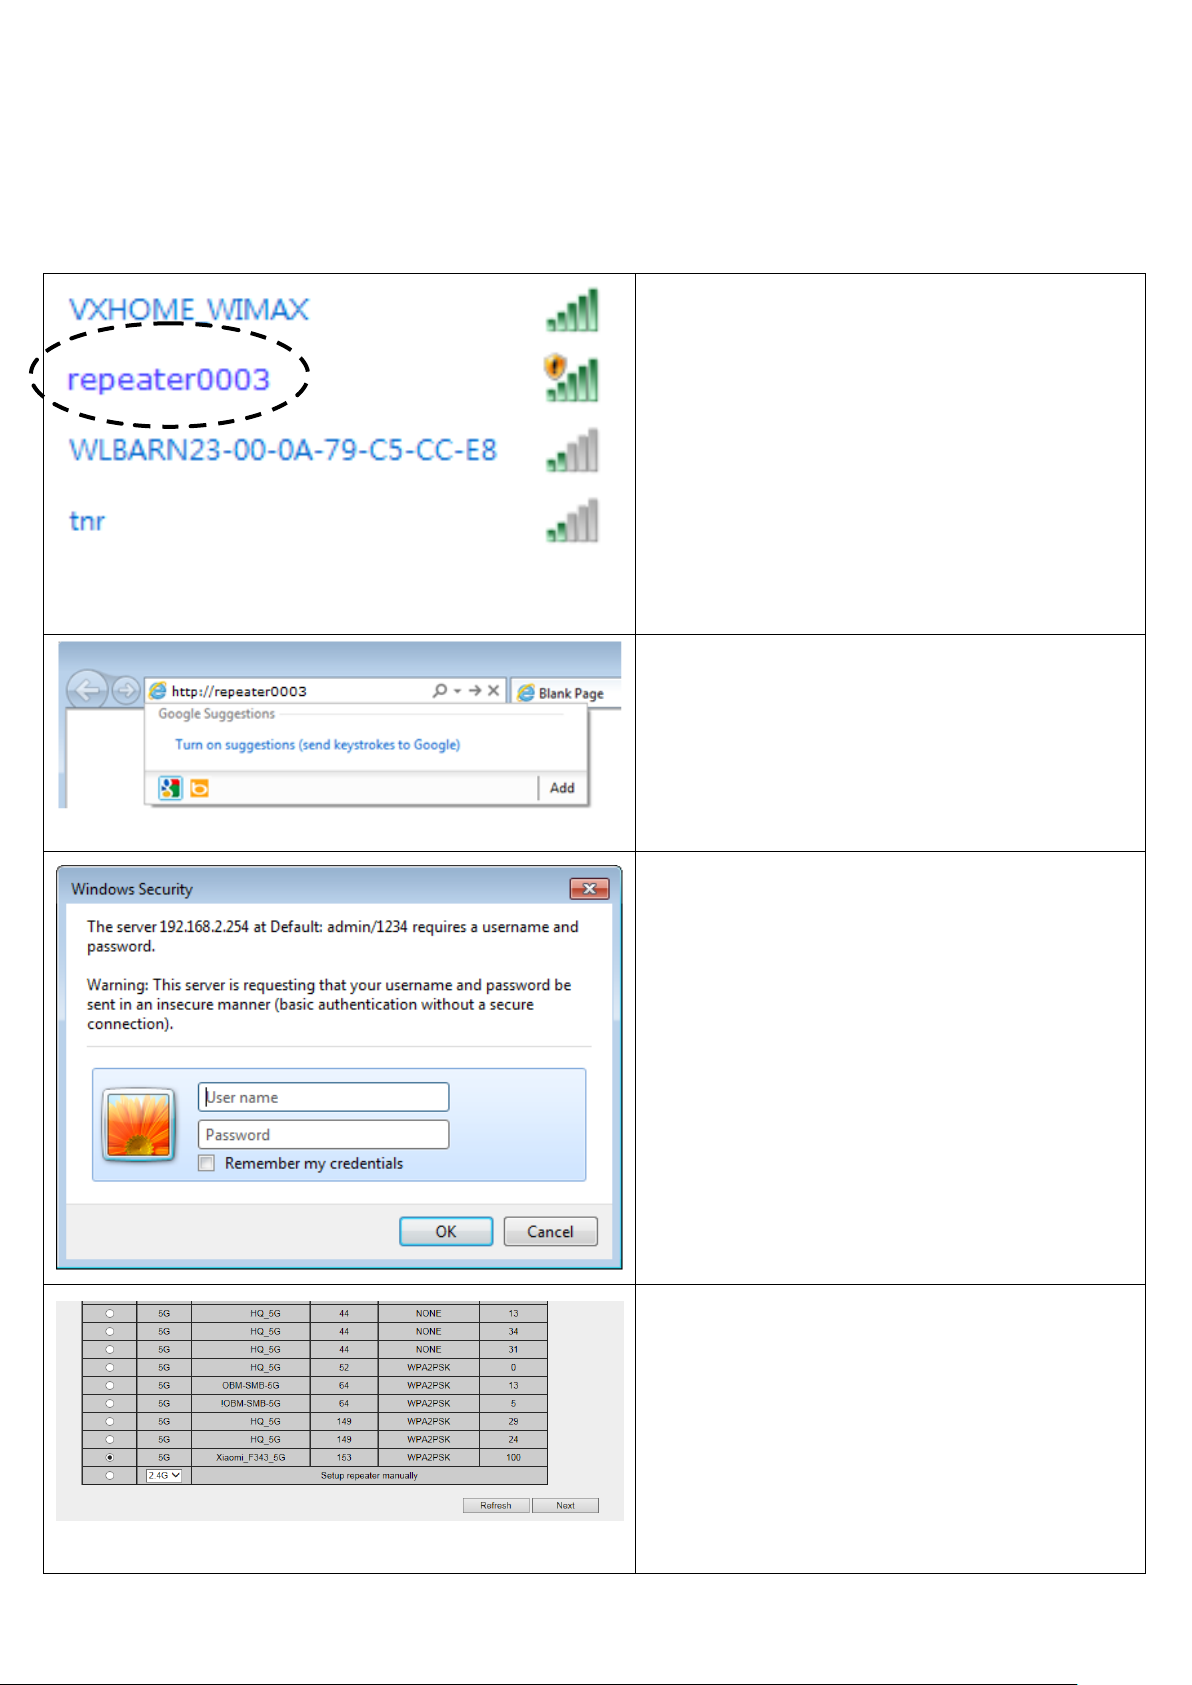
1. Use Ethernet cable to connect your
computer’s Ethernet port and wireless
repeater’s Ethernet port or use your
computer’s wireless configuration
utility to search for access point named
‘repeater0003’ and get connected.
Note: 0003 is an example, it’s the last 4
digits of device MAC number, find it on
each device label.
2. Open web browser and input
‘http://repeater0003’ in address bar.
Note: 0003 is an example, it’s the last 4
digits of device MAC number, find it on
each device label.
3. Wireless repeater will prompt you to
input username and password. Default
username is ‘admin’ and password is
‘1234’. Click ‘OK’ button to continue.
4. All wireless access points nearby will
be displayed on the list. Select it and
click ‘Next’ button to continue. If the
access point you wish to connect does
not appear here, please click ‘Refresh’
until it appears on the list, or try to
move wireless repeater closer to the
access point you wish to connect.
Using Web browser to build wireless connection:
Following procedure is for establishing connection via login WEB UI. Please make sure your
computer is DHCP client (obtain IP automatically from DHCP server)
7
Page 8

5. You’ll be prompted to input access
point’s wireless security key, input it in
‘KEY’ field and click ‘Next’ to
continue.
6. System will start to verify wireless key.
It will show you result within 20
seconds.
If key is wrong, please go back to check
your key again.
If key is correct, you can click ‘Next’ to
continue.
7. When key is correct, this Range
Extender will display the information
for you, you can press “Yes” button to
setup another band, or press “No” to the
bridge setup.
8. When you done to setup dual band
success (or setup single band
manually), you will see the page on the
below, press “Next” to continue.
9. After settings successfully, wireless
repeater will display the connection
information for you. Please press
“APPLY” to end the setting or press
“Back” to return the setup page.
8
Page 9

10. Please wait for few seconds for wireless
repeater to reboot. After reboot
complete, use your computer to connect
to wireless access point by the SSID
you set in last step and start using
network.
Congratulations!
The Quick Setup is completely done, now you can start to enjoy wireless repeater.
Note: If you hope to run Quick Setup again or had problem to login web UI, pls. hold on ‘WPS’
button for 10 seconds until ‘POWER’ LED blinking, device will start to reset to factory default.
9
Page 10

Client mode Network Setup
1. Switch mode selector to ‘Client’.
2. Insert wireless repeater into power
outlet on the wall. You should see
‘Power’ LED light up in few seconds.
If not, please check if the power outlet
you’re using is working.
Client mode can let your networking device have wireless capability; it will become your
networking device’s wireless network card. You can connect this device to Ethernet port of your
existing internet TV or DVD player or game console device with Ethernet cable.
Using WPS button to build wireless connection:
10
Page 11

3. Connect your computer and wireless
repeater by Ethernet cable.
4. Press and hold WPS button on repeater
for 2 seconds, ‘WPS’ LED will start
flashing.
5. Press WPS button on the access point
you wish to connect within 2 minutes.
If the access point you wish to connect
does not have hardware WPS button,
you can also use its web configuration
menu’s WPS function to establish
connection. Or you can login this
repeater web UI to have quick setup
(detailed setup refers to following
manual)
11
Page 12

6. If WPS connection is successfully
established, the repeater will reboot
immediately to make your setting
effect ; if ‘WPS’ LED flashes fast,
there’s something error, please wait for
2 minutes until ‘WPS’ LED off, and try
from step(3) again.
Please move repeater to the place you
wish to use, you can check ‘Signal’
LED status to understand signal
reception level. (Steady light: Excellent,
Flash: Good, Fast flash: poor.)
7. Congratulations! The setup is completely done, now you can start to enjoy wireless repeater.
Note: If you hope to run Quick Setup again or had problem to login web UI, pls. hold on
‘WPS’ button for 10 seconds until ‘POWER’ LED blinking, device will start to reset to
factory default.
1. Open web browser and input
‘http://repeater0003’ in address bar.
Note: 0003 is an example, it’s the last 4
digits of device MAC number, find it on
each device label.
Using Web browser to build wireless connection:
Following procedure is for establishing connection via login WEB UI:
NOTE: Please make sure your computer is DHCP client (obtain IP automatically from DHCP
server)
12
Page 13

2. Wireless repeater will prompt you to
input username and password. Default
username is ‘admin’ and password is
‘1234’. Click ‘OK’ button to continue.
3. All wireless access points nearby will
be displayed on the list. Select it and
click ‘Next’ button to continue. If the
access point you wish to connect does
not appear here, please click ‘Refresh’
until it appears on the list, or try to
move wireless repeater closer to the
access point you wish to connect.
4. You’ll be prompted to input access
point’s wireless security key, input it in
‘KEY’ field and click ‘Next’ to
continue.
5. System will start to verify wireless key.
It will show you result within 20
seconds.
If key is wrong, please go back to check
your key again.
If key is correct, you can click ‘Next’ to
continue.
6. Please recheck settings you made, and
click ‘Apply’ to continue.
13
Page 14

7. Please wait for few seconds for wireless
repeater to reboot. After reboot
complete, use your computer to connect
to wireless access point by the SSID
you set in last step and start using
network.
8. Use Ethernet cable to connect it to
Ethernet port of your networking
device.
9. Congratulations! The Quick Setup is completely done, now you can start to enjoy wireless
repeater.
Note: If you hope to run Quick Setup again or had problem to login web UI, pls. hold on
‘WPS’ button for 10 seconds until ‘POWER’ LED blinking, device will start to reset to
factory default.
14
Page 15

AP mode Network Setup
1. Switch mode selector to ‘AP’.
2. Insert wireless repeater into power
outlet on the wall. You should see
‘Power’ LED light up in few seconds.
If not, please check if the power outlet
you’re using is working.
You can build a wireless networking environment, please switch this device to wireless
access point mode and connect it to your wired router.
Using WPS button to build wireless connection:
15
Page 16

3. Connect the wireless repeater to ADSL
modem, router, or switch/hub in your
network through the LAN port of the
wireless repeater by Ethernet cable.
4. Press and hold WPS button on repeater
for 2 seconds, ‘WPS’ LED will start
flashing.
5. Press WPS button on the client device
you wish to connect within 2 minutes.
16
Page 17

6. If WPS connection is successfully
established, the repeater will reboot
immediately to make your setting
effect ; if ‘WPS’ LED flashes fast,
there’s something error, please wait for
2 minutes until ‘WPS’ LED off, and try
from step(3) again.
7. Open web browser and input
‘http://repeater0003’ in address bar.
Note: 0003 is an example, it’s the last 4
digits of device MAC number, find it on
each device label.
8. Wireless repeater will prompt you to
input username and password. Default
username is ‘admin’ and password is
‘1234’. Click ‘OK’ button to continue.
9. Please input a SSID (a name used to
identify this access point) in ‘Device
SSID’ field, then click ‘Next’ button.
Default SSID is repeater0003.
Note: 0003 is an example, it’s the last 4
digits of device MAC number, find it on
each device label.
17
Page 18

10. Select security type of wireless link
include 2.4Ghz and 5Ghz : Disable (no
security), WEP, WPA pre-shared key.
WEP encryption: Select key length (64
or 128bit), key format (Hex or ASCII
characters), Default Tx Key (usually
use ‘Key 1’), and input key characters
(refer to ‘Key Format’ you selected for
number of characters)
WPA pre-shared key: Select one WPA
Unicast Cipher Suite (usually use
default setting ‘WPA(TKIP)’),
Pre-shared Key Format: Passphrase
(alphanumeric characters) or Hex (64
Hex Characters), and input key
characters in ‘KEY’ field.
11. Please recheck settings you made, and
click ‘Apply’ to continue.
12. Please be patient while device
restarting, and you can access this
wireless repeater as wireless AP after
reboot is complete.
13. Congratulations! The setup is completely done, now you can start to enjoy wireless repeater.
Note: If you hope to run Quick Setup again or had problem to login web UI, pls. hold on
‘WPS’ button for 10 seconds until ‘POWER’ LED blinking, device will start to reset to
factory default.
18
Page 19

To enable/disable LED lights:
1. Click ‘Advanced Settings’ on the left.
After Quick Setup is done and wireless repeater is rebooted, you’ll enter into wireless r
epeater’s configuration menu for more settings that you wish to change.
19
Page 20

2. Check ‘Enable LED OFF’ mode to setup
LED behavior:
Turn off all LED: disabled all LED lights
Turn off all LED except POWER LED: all
LED lights will be disabled, except ‘POWER’
LED.
3. Click ‘Apply’ button to save changes.
For advanced settings and other features of this wireless repeater, please refer to user m
anual enclosed in supplied CD-ROM.
20
Page 21

Federal Communication Commission Interference Statement
Any changes or modifications not expressly approved by the party responsible for compliance could void your authority
to operate the equipment.
This equipment has been tested and found to comply with the limits for a Class B digital device, pursuant to Part 15 of
FCC Rules. These limits are designed to provide reasonable protection against harmful interference in a residential
installation. This equipment generates, uses, and can radiate radio frequency energy and, if not installed and used in
accordance with the instructions, may cause harmful interference to radio communications. However, there is no
guarantee that interference will not occur in a particular installation. If this equipment does cause harmful interference to
radio or television reception, which can be determined by turning the equipment off and on, the user is encouraged to try
to correct the interference by one or more of the following measures:
1. Reorient or relocate the receiving antenna.
2. Increase the separation between the equipment and receiver.
3. Connect the equipment into an outlet on a circuit different from that to which the receiver is connected.
4. Consult the dealer or an experienced radio technician for help.
FCC Caution
This device and its antenna must not be co-located or operating in conjunction with any other antenna or transmitter. This
device complies with Part 15 of the FCC Rules. Operation is subject to the following two conditions: (1) this device may
not cause harmful interference, and (2) this device must accept any interference received, including interference that may
cause undesired operation.
Federal Communications Commission (FCC) Radiation Exposure Statement
This equipment complies with FCC RF radiation exposure limits set forth for an uncontrolled environment.
This equipment should be installed and operated with a minimum distance of 20 centimeters between the
radiator and your body.
The equipment version marketed in US is restricted to usage of the channels 1-11 only.
This equipment is restricted to indoor use when operated in the 5.15 to 5.25 GHz frequency range.
Edimax Computer Company
3350 Scott Boulevard, Building #15, Santa Clara, CA 95054, USA
TEL:408-496 1105 #103
FAX:408-980 1530
21
Page 22

RED Compliance Statement
This equipment compliance with Directive 2014/53/EU.
Safety
This equipment is designed with the utmost care for the safety of those who install and use it. However, special attention
must be paid to the dangers of electric shock and static electricity when working with electrical equipment. All guidelines
of this and of the computer manufacture must therefore be allowed at all times to ensure the safe use of the equipment.
EU Countries Intended for Use
The ETSI version of this device is intended for home and office use in Austria, Belgium, Bulgaria, Cyprus, Czech,
Denmark, Estonia, Finland, France, Germany, Greece, Hungary, Ireland, Italy, Latvia, Lithuania, Luxembourg, Malta,
Netherlands, Poland, Portugal, Romania, Slovakia, Slovenia, Spain, Sweden, Turkey, and United Kingdom. The ETSI
version of this device is also authorized for use in EFTA member states: Iceland, Liechtenstein, Norway, and Switzerland.
EU Countries Not Intended for Use
None
22
Page 23

Specification
SoC + RF: Realtek RTL8197FE + RTL8812BRH
GbE PHY : Realtek RTL8211F
Flash: 8MB
SDRAM: 64MB
LAN Port: 10/100/1000M UTP Port x 1
Power: 5VDC, 1.5A Switching Power Module Inside
AC Power Input: 100-240V, 0.25A, 50-60Hz
Dimension: 59(W) x 91(H) x 40(D) mm excluding power plug
Temperature: 32~104°F (0 ~ 40°C)
Operating: 32~104°F (0~40°C)
Storage: -4~140°F (-20~60°C)
Humidity: 10-90% (NonCondensing)
Operating: 10~90% (NonCondensing)
Storage: Max. 95% (NonCondensing)
Certification: FCC, CE
23
 Loading...