


Edimax Technology Co 9574291705 User Manual

Quick Installation Guide
AC1300 Outdoor AP
GAP-429HOB
Quick Installation Guide
05-2016 / v1.0
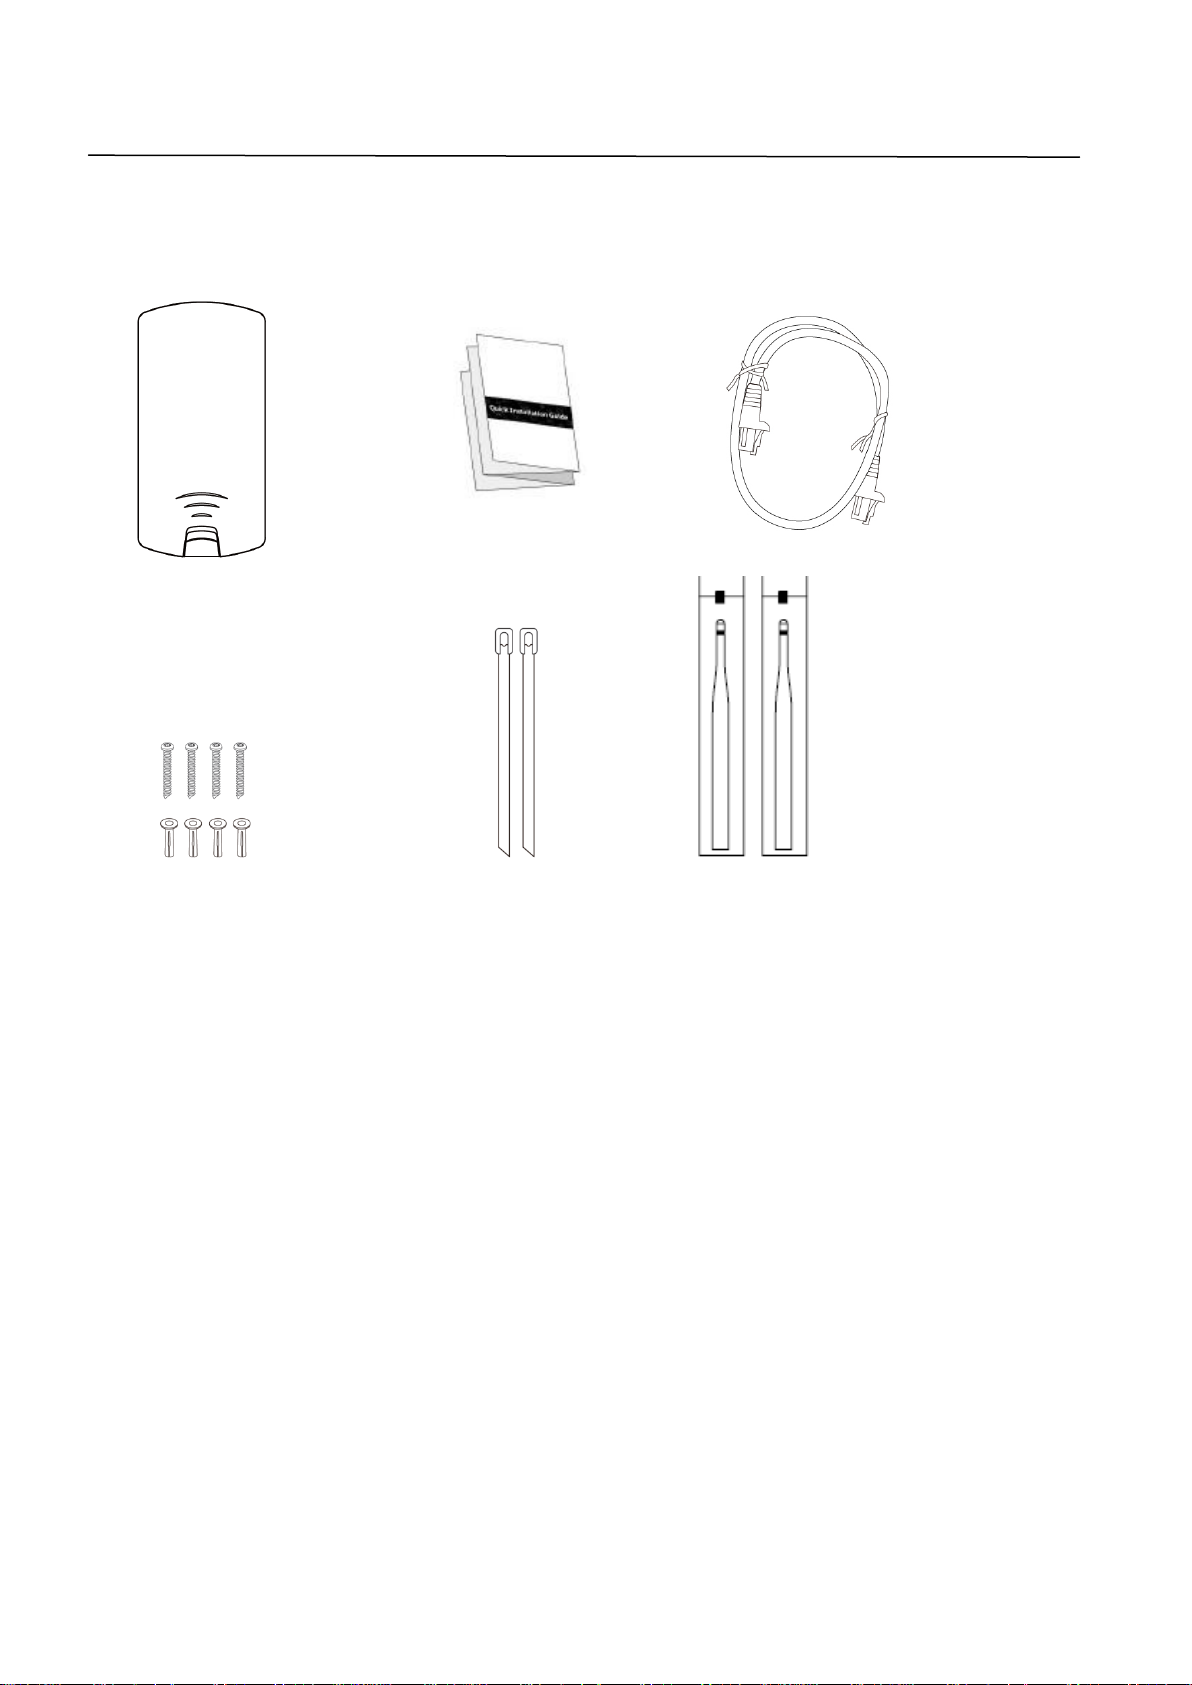
I. Product Information
1. Access Point
2. Quick Installation Guide
3. Ethernet Cable
4. Wall Mount Screws Kits
5. Pole Mount Ties
6. Antenna
1 2 3 4 5 6
I-1. Package Contents
2
I-2. System Requirements
B
A
C D
- Existing Ethernet cable, IEEE802.3at PoE Switch
- Computer with web browser for access point configuration
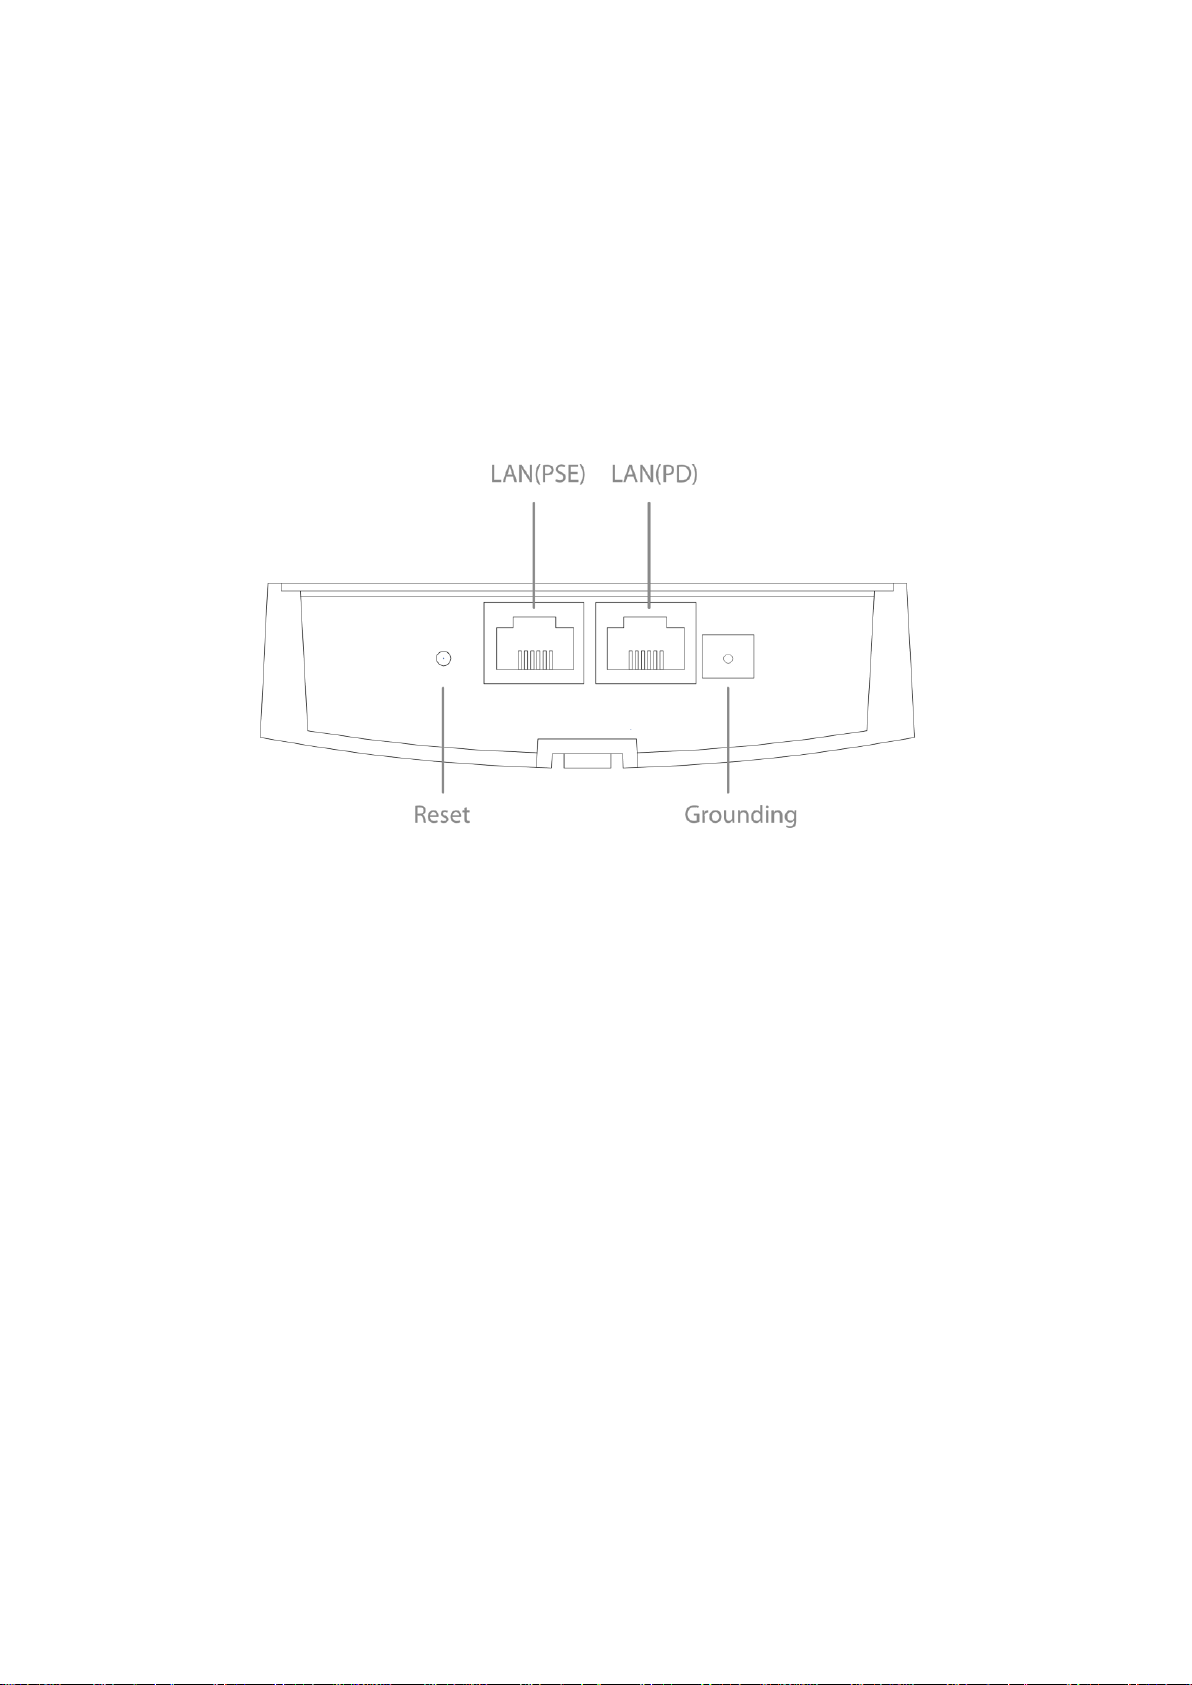
I-3. Hardware Overview
A. LAN1 port with Power over Ethernet (IEEE802.3at PoE PD-IN).
B. LAN2 port with Power over Ethernet (IEEE802.3af PoE PSE-OUT).
C. Reset Button.
D. Grounding Terminal.
3

I-4. LED Status
LED Behavior
5G
ON
5G Wireless is enabled.
Off
5G Wireless is disabled.
2.4G
ON
2.4G Wireless is enabled.
Off
2.4G Wireless is disabled.
LAN2(PSE)
ON
LAN2 port is connected.
Flashing
Traffic is passing through Ethernet port.
Off
LAN2 port is unconnected.
LAN1(PD)
ON
LAN1 port is connected.
Flashing
Traffic is passing through Ethernet port.
Off
LAN1 port is unconnected.
Status
ON
Booting up process
Off
No error occur
Power
ON
The access point is on.
Flashing
Long Flashing: Firmware upgrading
Off
The access point is off.
4
I-5. Reset
If you experience problems with your access point, you can reset the device
back to its factory settings. This resets all settings back to default.
1. Press and hold the reset button on the access point for at least 10
seconds. Then release the button.
You may need to use a pencil or similar sharp object to push the
reset button.
2. Wait for the access point to restart. The access point is ready for setup
when the Status LED is OFF.
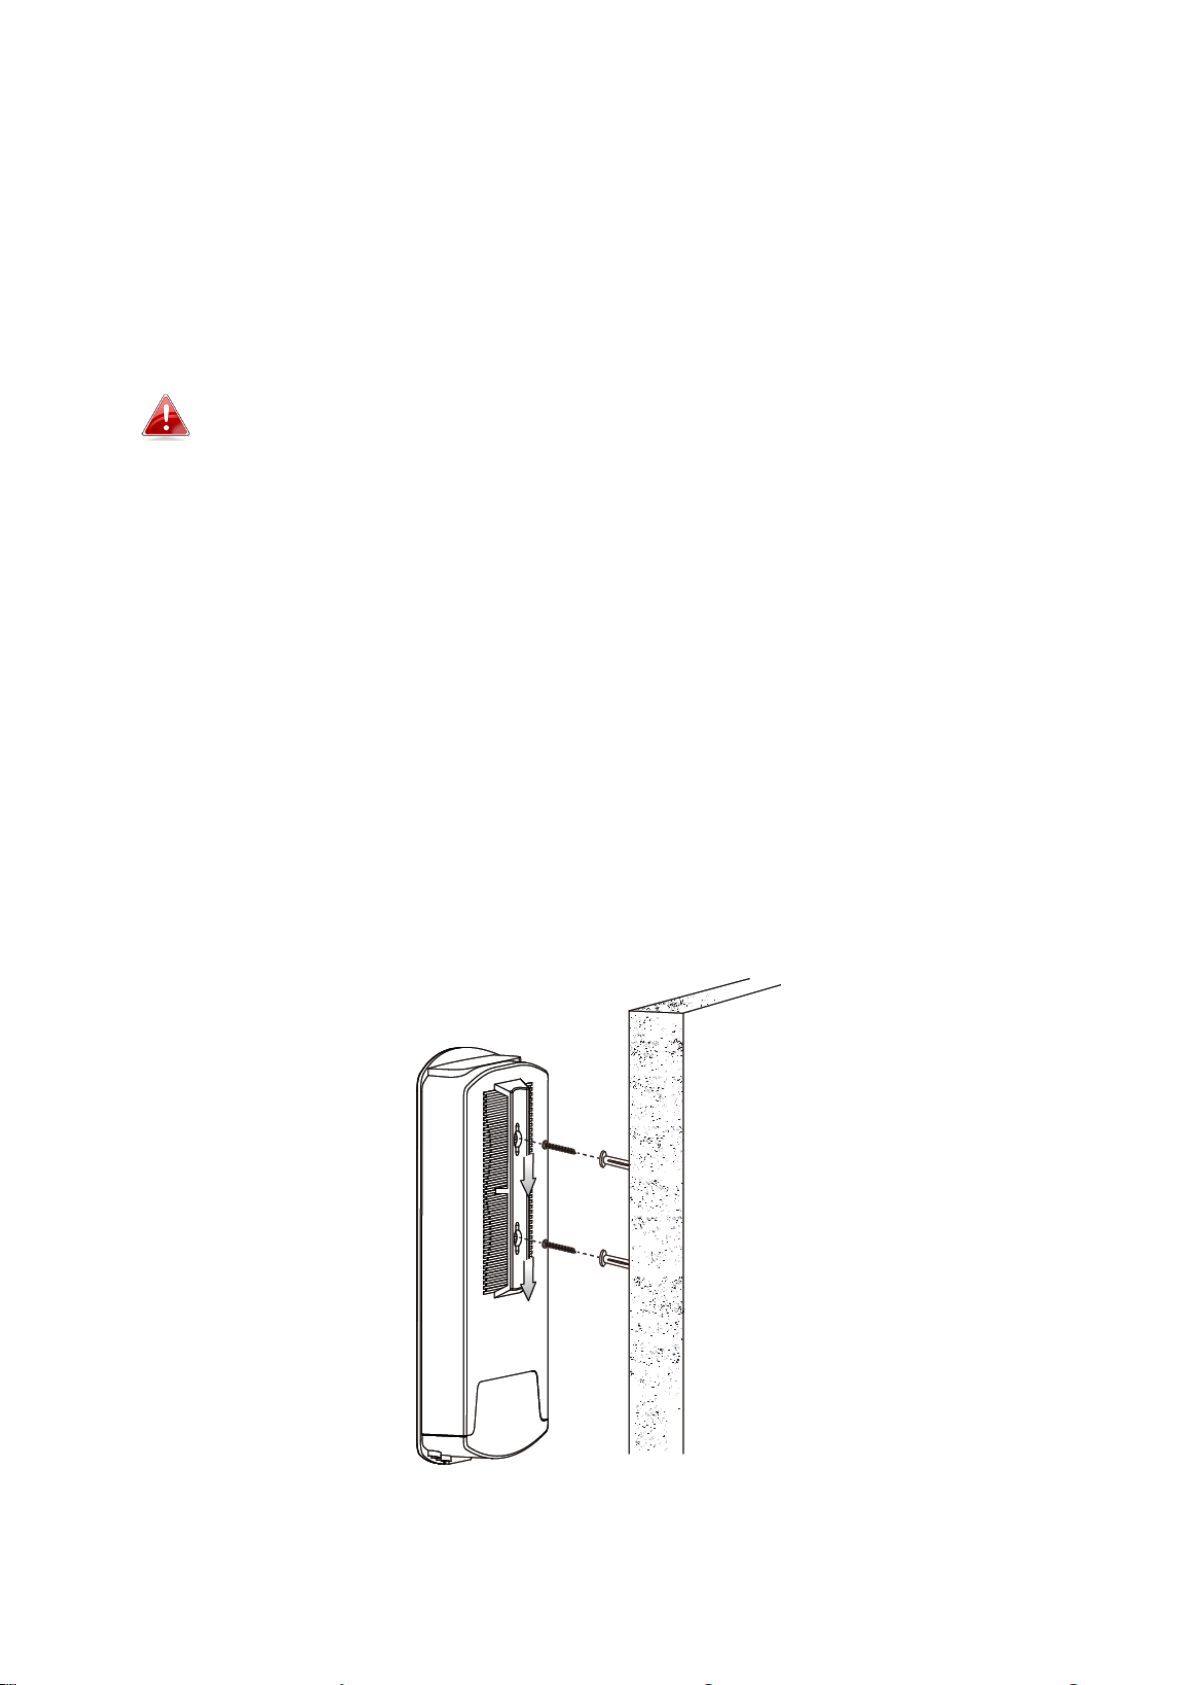
I-6. Mounting
The access point includes a mount for wall or pole which requires some
assembly.
Wall Mount
1. Attach the access point to a wall using the included screws and plugs.
5