

Edimax RE11S Quick Install Guide

RE11S
Quick Installation Guide
03-2017 / v1.0
I. Product Information
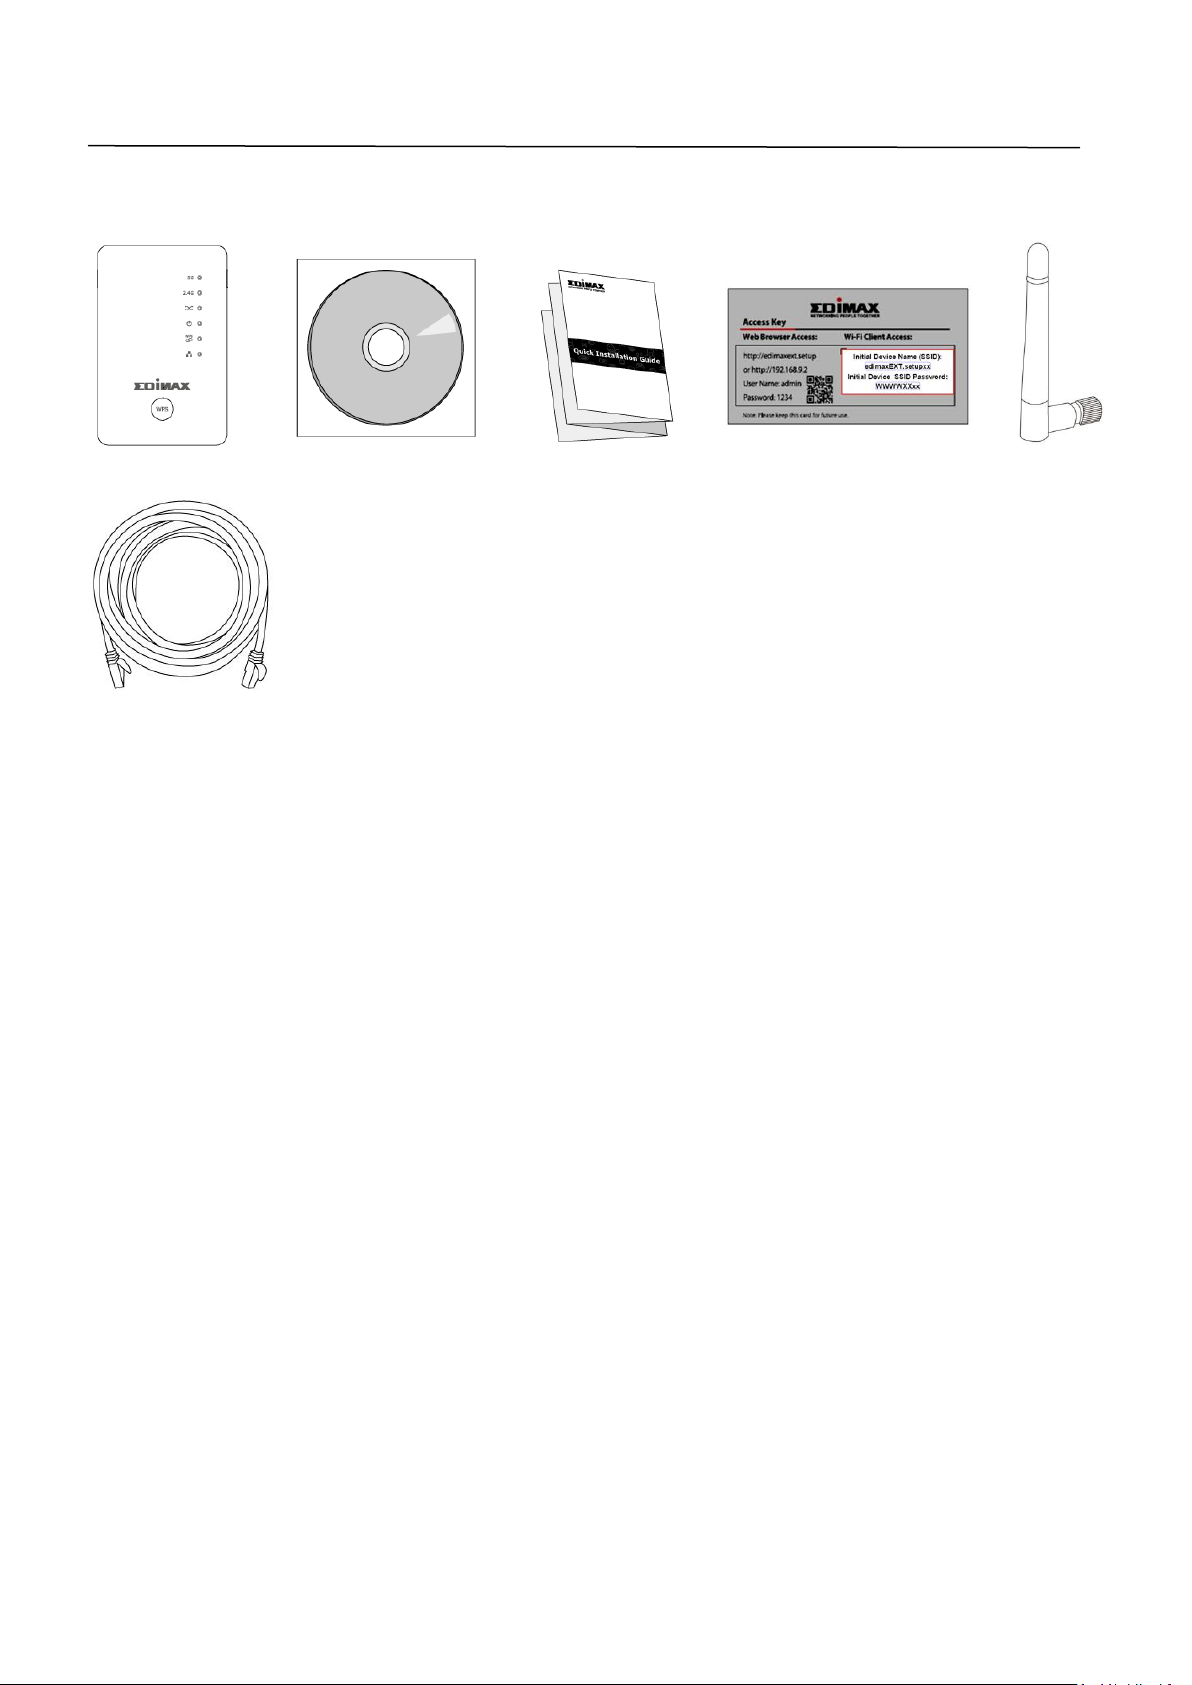
I-1. Package Contents
- RE11S Extender x 1
- CD with multi-language QIG & user manual
- Quick installation guide (QIG)
- Access key card
- Antenna x 2
- RJ45 cable
I-2. System Requirements
- Wi-Fi extender/Wi-Fi bridge mode: Existing 2.4GHz and/or 5GHz wireless
network.
- Access point mode: Cable/DSL modem.
- Computer with 2.4GHz 802.11/b/g/n Wi-Fi adapter, and web browser for
software configuration.
- Smartphone setup: iOS 4.3 or Android 4.x and above.
1
I-3. LED Status
LED
Color
Status
Description
Signal 5GHz
Blue
On
Excellent location.
Signal strength: 60 – 80%
Slow Flashing
Good location.
Signal strength: 40 – 60% & 80 - 100%
Quick Flashing
Poor location.
Signal strength: Below 40%
Off
No signal detected.
Signal 2.4GHz
Blue
On
Excellent location.
Signal strength: 60 – 80%
Slow Flashing
Good location.
Signal strength: 40 – 60% & 80 - 100%
Quick Flashing
Poor location.
Signal strength: Below 40%
Off
No signal detected.
Roaming
Status
Green
On
Extender is a master device.
Flashing
Syncing data.
Off
Extender is a slave device.
Power
Green
On
Extender is on.
Flashing
Resetting to factory default settings,
or system is booting up.
Off
Extender is off.
WPS
Green
On
WPS connection established (LED will
remain on for 30 seconds to indicate
a successful connection).
Flashing
WPS in progress (waiting for another
WPS device).
Off
No WPS in progress.
LAN
Green
On
LAN port connected.
Off
LAN port not connected.
All LEDs are disabled in green mode. The best signal strength is
60 – 80% since above 80% is likely too close to your router for the
extender to be effective.
2
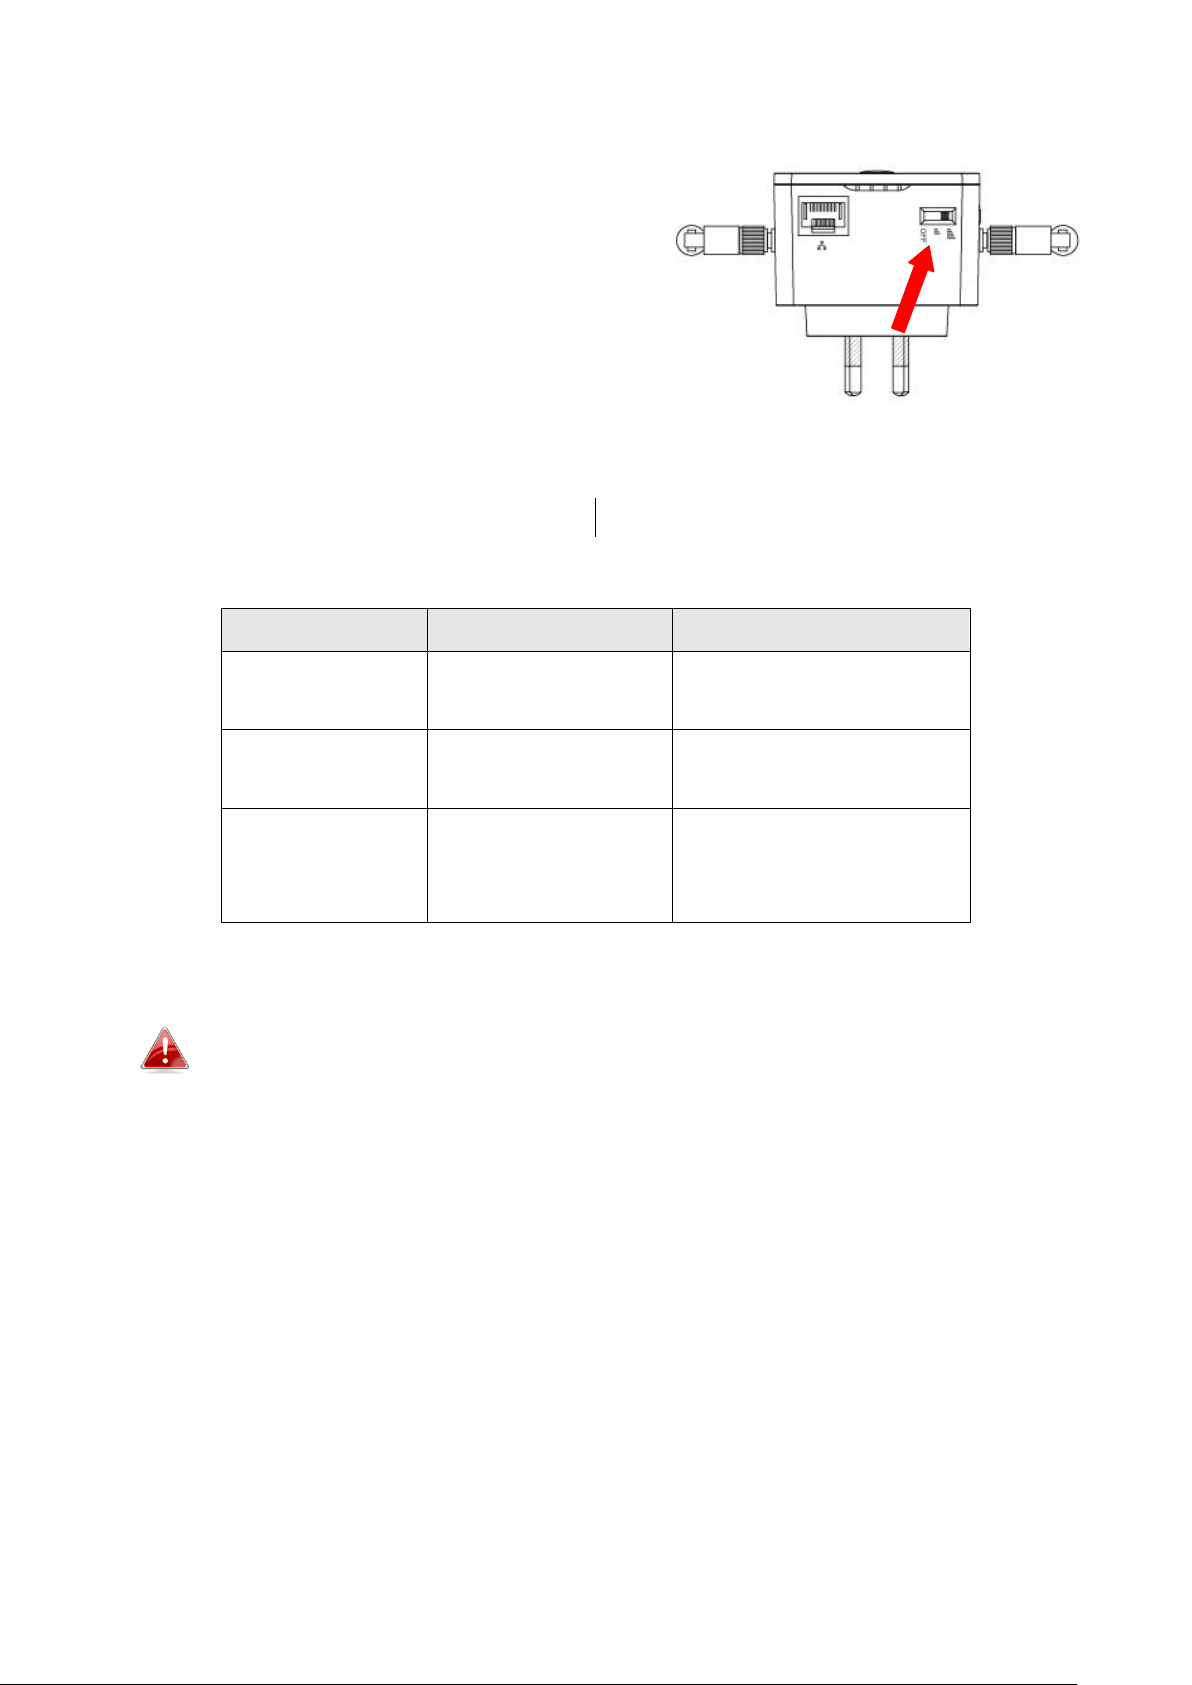
I-4. Switch
Mode
Switch Position
Description
Normal
Top
100% Wi-Fi power
Green Mode
Middle
25% Wi-Fi power
Sleep Mode
Bottom
Wi-Fi & LEDs off &
Disable Ethernet
Port
The RE11S includes a hardware switch on
the underside of the device which can
switch between normal, green mode and
sleep mode as shown in the table below.
“Wi-Fi power” refers to the strength of
the extender’s wireless radio signal (Tx).
If you are using the extender in a small or
medium sized space, you may not need the full power of the wireless radio.
Try it, and determine if you still have sufficient Wi-Fi coverage using green
mode. If so, you can save some energy.
Tx power can also be adjusted using the web-based U.I.
(Administration Wireless). Set the switch to “Normal”
before adjusting the Tx value in the web-based U.I.
3
II. Add Your RE11S To Your Network
Adding your RE11S extender to your network is easy with the WPS button.
New extenders automatically follow the Wi-Fi settings of the master RE11S
linked to your router.
If you don’t already have a master extender set up, follow the next chapter
III. Master Installation and install a master instead.
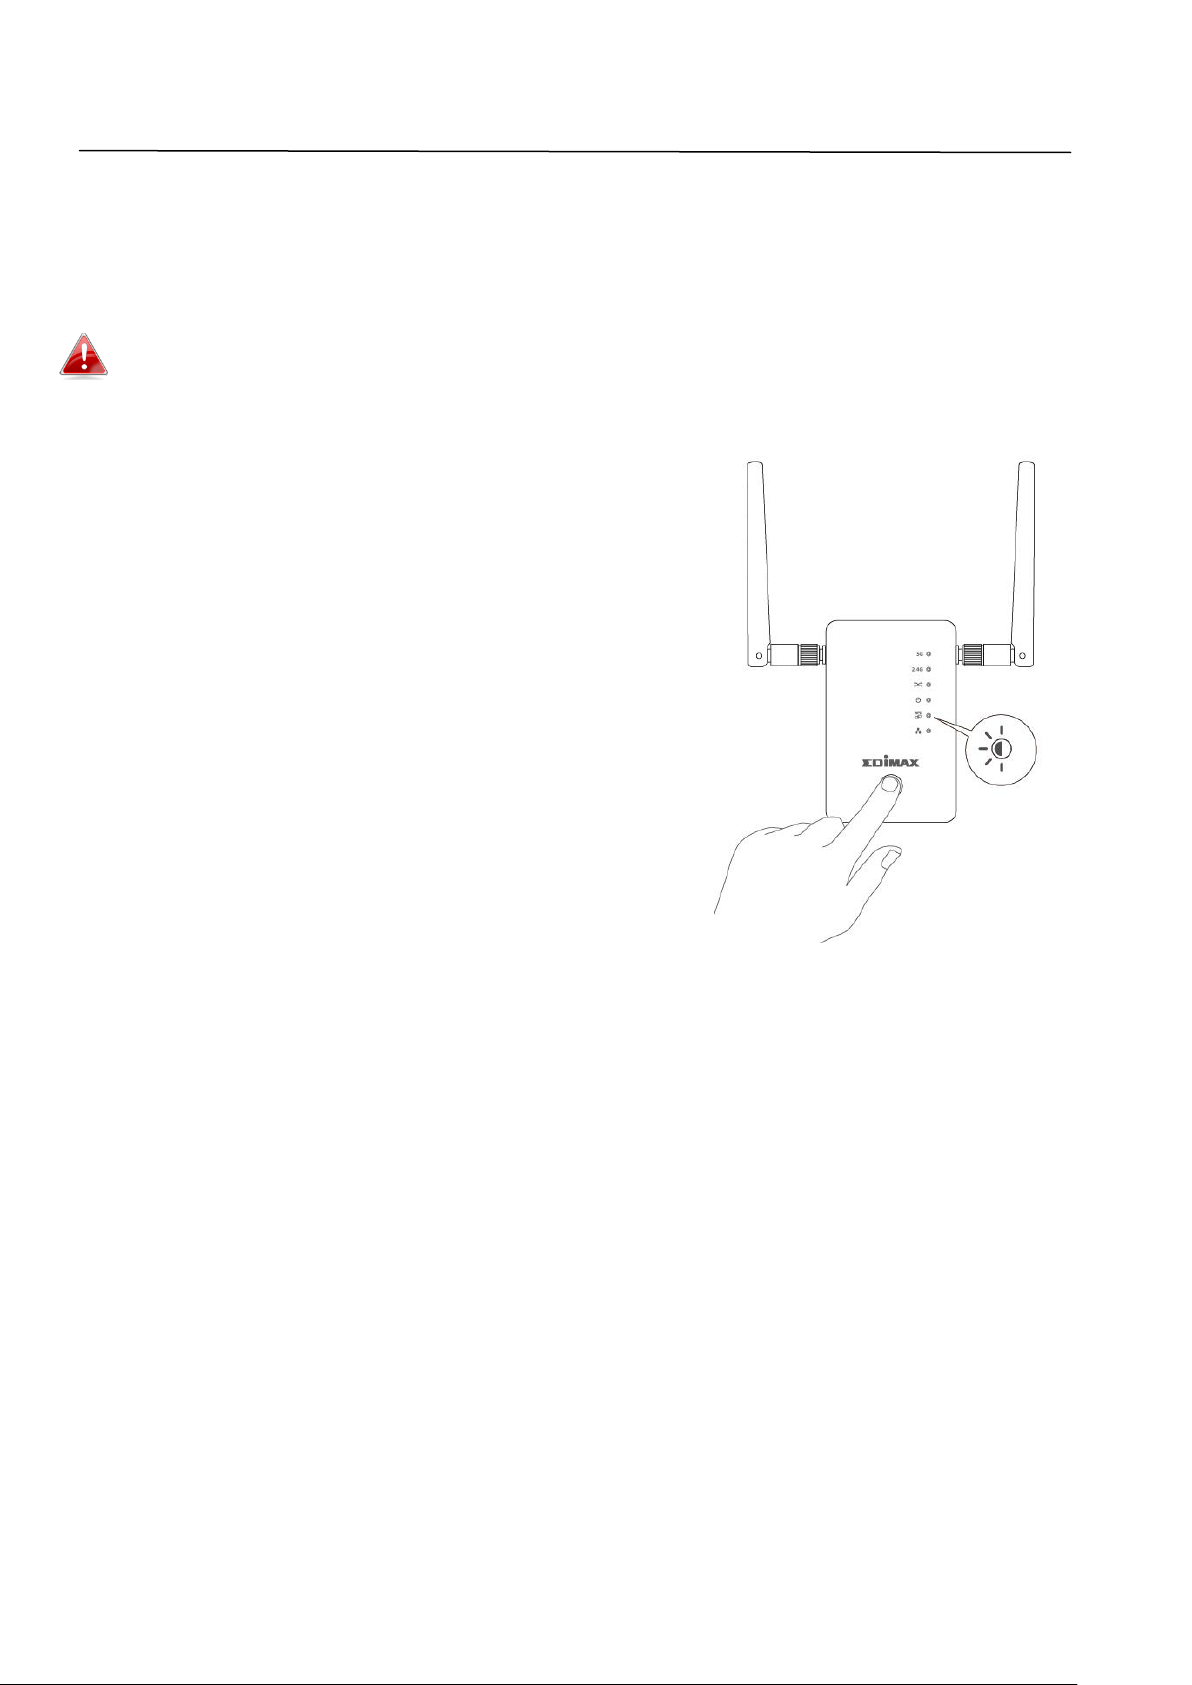
1. Press the WPS button on your master
extender for 3 seconds.
2. Within two minutes, press and hold the
WPS button for 3 seconds on the new
extender you would like to add (within
range of your master extender). The
extender’s green WPS LED should flash to
indicate that WPS is in progress.
3. Please wait while the devices will establish
a connection. This can take up to 2
minutes.
4. Both extenders’ green WPS LED should display on for 30 seconds to
indicate a successful connection. (If not, please restart each device and try
again). Roaming will be available automatically.
4

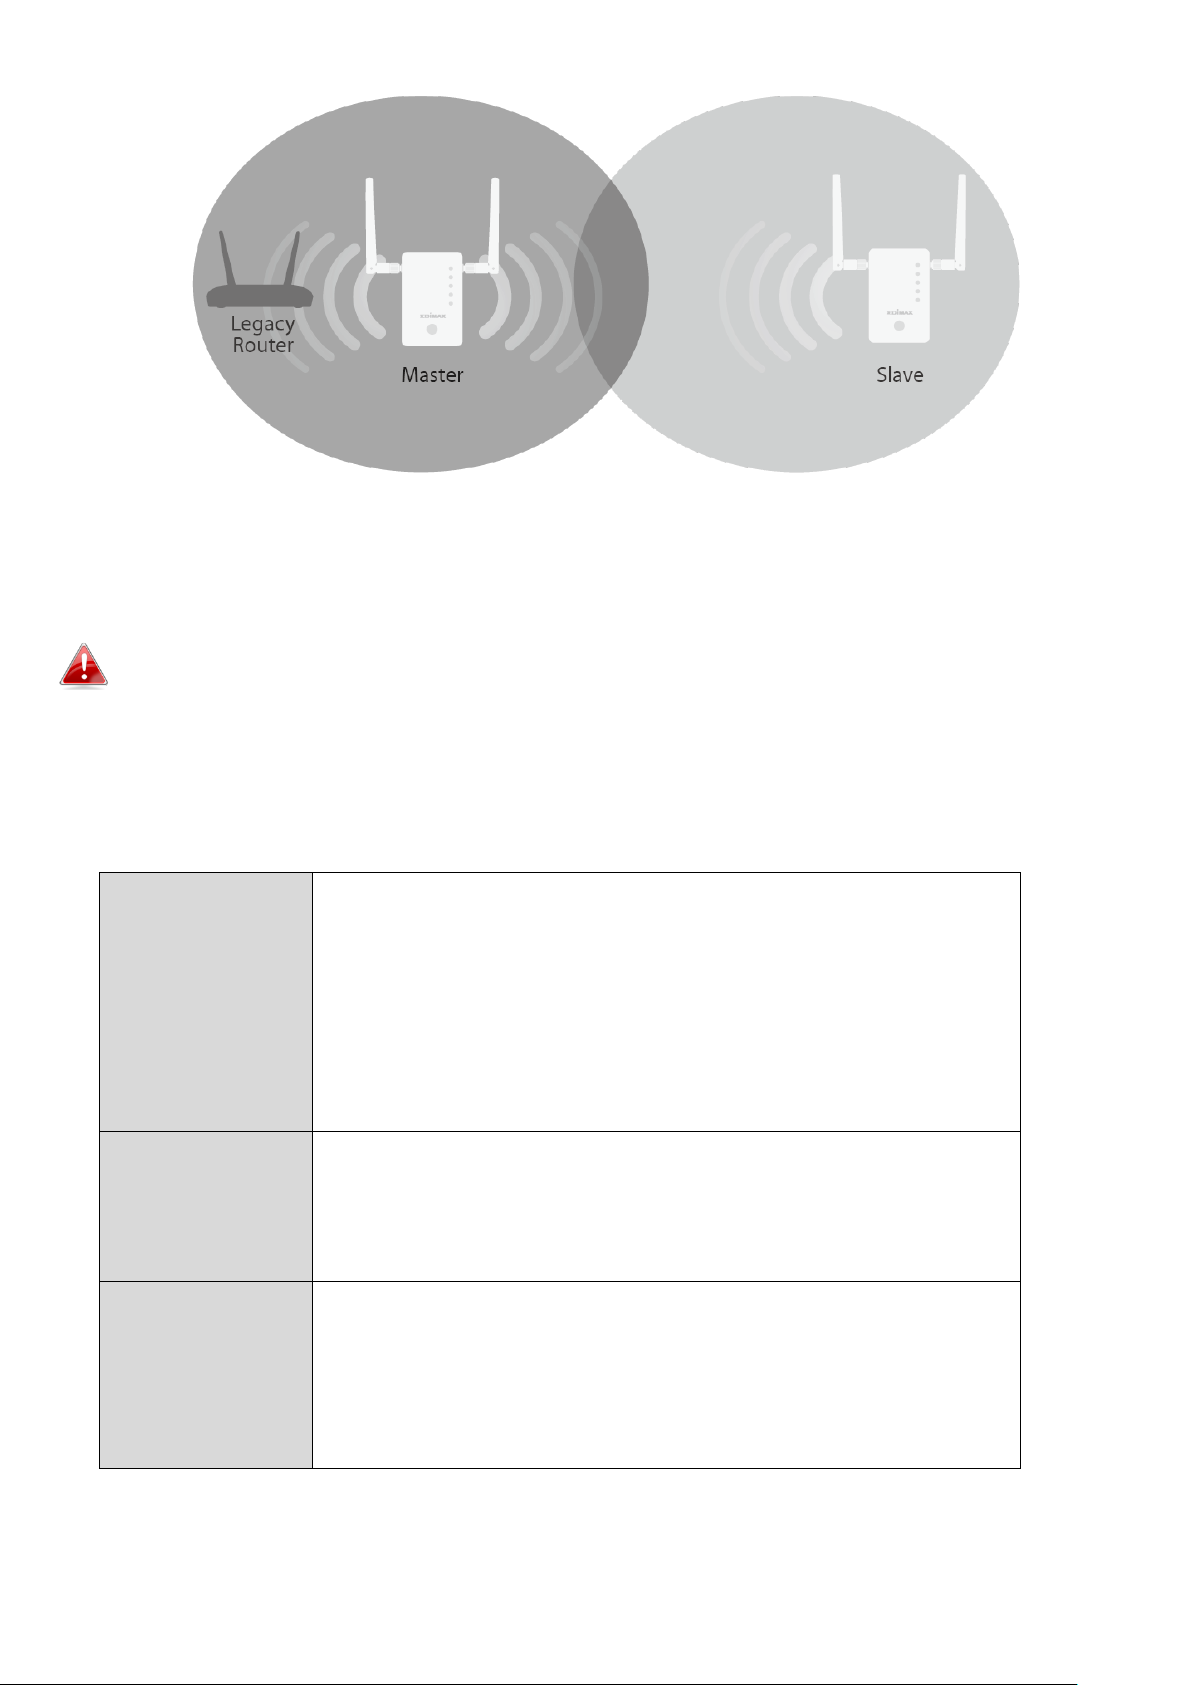
III. Master Installation
AP Mode
RE11S extenders support roaming. This means with two or more roaming
devices set up, your Wi-Fi devices (smartphones, tablets etc.) will
automatically connect to the best available Wi-Fi signal as you move around.
You only need to setup one extender to join your existing Wi-Fi network.
This acts a master extender.
Then, additional extenders can be added simply using the WPS button. These
extenders act as slaves and automatically follow the Wi-Fi settings of the
master.
5
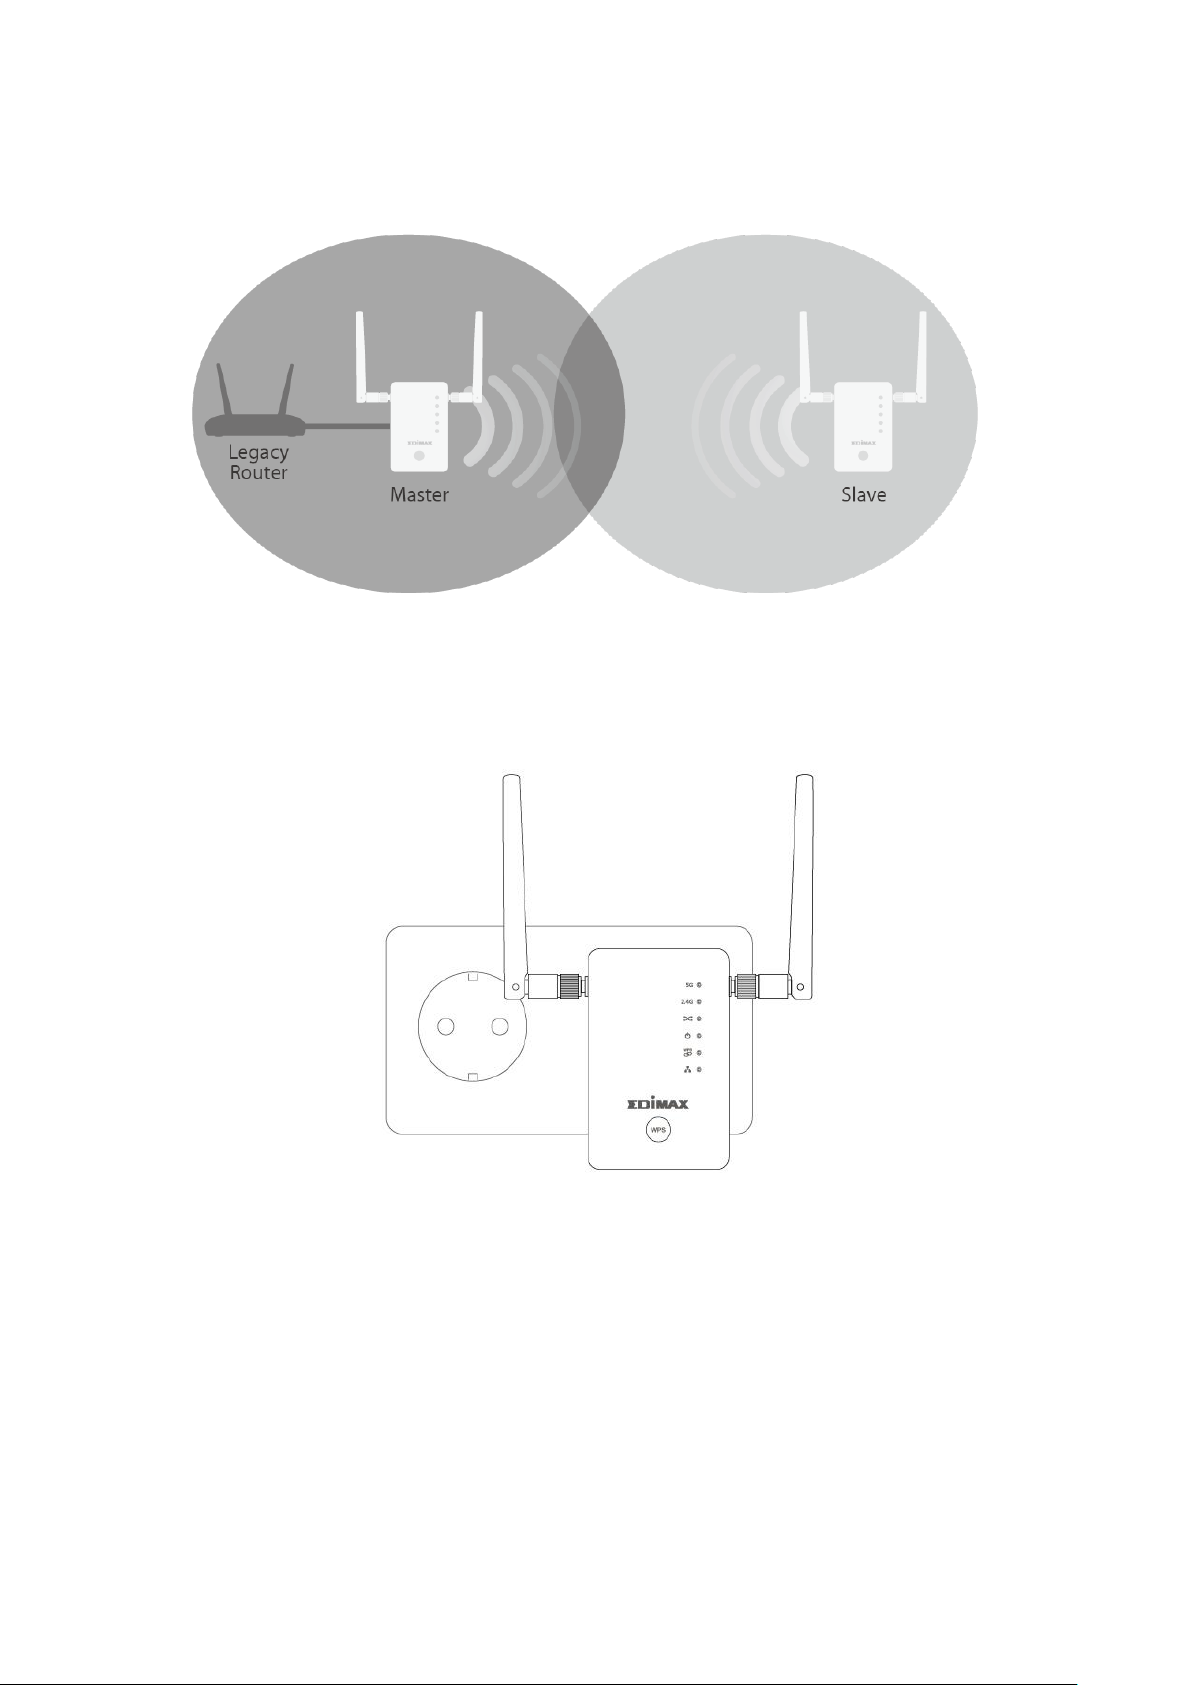
Wi-Fi Extender
The device connects wirelessly to your existing network
and repeats the wireless signal.
Location: The best location for your extender is roughly
in the middle between your existing wireless
router/access point and the dead zone. The extender
needs to receive a good Wi-Fi signal from your
router/access point.
Wi-Fi Access
Point
The device connects to an existing router via Ethernet
cable and provides wireless Internet access for your
network devices.
Location: Connected to your router via Ethernet cable.
Wi-Fi Bridge
(Wi-Fi
Adapter)
The device connects to an Ethernet device such as a
games console or smart TV via Ethernet cable and
provides wireless Internet access for that device.
Location: Within Wi-Fi coverage, close to your wired
network device.
Extender Mode
Each RE11S can function in one of three modes. To use roaming, setup your
master extender in Wi-Fi Extender or Wi-Fi Access Point mode.
Please ensure your router’s DHCP server is enabled. For most routers this is
enabled by default. If your DHCP server is disabled, you will need to assign
an IP address to your extenders. Refer to the user manual for more help.
Additional (slave) extenders will automatically be set to Wi-Fi Extender mode
via the WPS button.
6
III-1. Access Point Mode
The device connects to an existing router via Ethernet cable and provides wireless
Internet access for your network devices.
1. Connect the network port of your RE11S to the LAN port of your existing
router using an Ethernet cable.
2. Plug the RE11S into a power socket.
3. The green power LED will flash while the extender is starting up. The
device is ready when the green power LED displays on.
7
 Loading...