

Page 1
1 2
Page 2

ErP Announcement
Product: Internet Camera (IP Camera)
Purpose: 24 hour surveillance and transfer of footage for safety and health
reasons as intented use.
Detailed descripti on:
- Health pur pose s: Us ers can p ass through t he Internet (from anywhere)
to control the product (IP Camera). It's intended to watch and listen to
people who need to be cared for at home and automatically sends
e-mails and phone alerts to warn observers and ask for their attention.
The product also provides a record function to retain all images and
voice information for the sake of reference.
- Safety purposes: Users can initiate a “motion detect” function to
record and send e-mails to notify them when doors or window s are
opened – potentially by unwarranted persons.
- General purposes: Record/monitor environment footage and sound
and store them onto a hard disk as a record.
As we cannot predict when events of this nature may occur, we need for the
product to remain active and alert at all times. If the product had to go into
“standby/of f” mode, it would impact the effective ness of reco rding and warnin g
functions resulting in users not getting the inf ormation they need.
Based on the ErP official journal of European Union
Directives 2009/125/CE of the European parliament and of the council of
21 October 2009 Article 15 sector 5 part (a) and (b) as below:
“Implementing measures shall have no significant negative impa ct on t he
functionality of the product, from the perspective of the user.”
“Health, safety and environment shall not be adversely affected.”
We announce that the product need not comply with the (EC) No 1275
Stand by and on/off mode function of Implementing Measurement.
We will keep up to the newest Implementing Measurements in the future
and make the necessary changes if it's related to this product.
Page 3

Copyright© by Edimax Technology Co, L TD. all rights reserved. No part of this
publication may be reproduced, transmitted, transcribed, stored in a retrieval
system, or translated into any language or computer language, in any form or
by any means, electronic, mechanical, magnetic, optical, chemical, manual or
otherwise, without the prior written permission of this Comp any.
This company makes no represent at ions or warrant ies, either expre ssed or
implied, with respect to the contents hereof and specifically disclaims any
warranties, merchantability or fitness for any particular purpose. Any software
described in this manual is sold or licensed "as is". Should the programs prove
defective following their purchase, the buyer (and not this co mpany, its
distributor, or its dealer) assumes the entire cost of all necessary servicing,
repair, and any incidental or consequential damages resulting from any defect
in the software. Further, this company reserves the right to revise this
publication and to make changes from time to time in the contents hereof
without obligation to notify any person of such revision or changes.
The product you have purchased and the setup screen may appear sl ight ly
different from those shown in this QIG. For more detailed information about
this product, please refer to the User's Manual on the CD-ROM. The software
and specifications could be subjected to change without notice. Please visit
our web site www .edimax.com
brand and product names mentioned in this manual are trademarks and/or
registered trademarks of their respective holders.
for updates. All rights reserved including all
Linux Open Source Code
Certain Edimax products include softw ar e cod e developed by third
parties, including software code subject to the GNU General Public
License ("GPL") or GNU Lesser General Public License ("LGPL").
Please see the GNU (www.gnu.org) and LPGL
(www.gnu.org) Websites to view t he terms of each license.
The GPL Code and LGPL Code used in Edimax products are distributed
without any warranty and are subject to the copyright s of their authors.
3
Page 4

For details, see the GPL Code and LGPL Code licenses. You can
download the firmware-files at
http://www.edimax.com under "Download" page.
4
Page 5

1. Product Information
Congratulations on buying this Edimax IP Camera! You've chosen
well. This IP camera is ideal for all kinds of video surveillance from
home and office safety to child and pet monitoring purposes. This
Edimax IP camera is tailor made to stream live video over your
network, so you can view its footage from anywhere on your local
computers. Better yet, you can view its video and hear its sound live
via the Internet! The Edimax IC-3030 series features extremely high
picture quality matched by a high frame rate video streaming
because of advanced video compression. To get the best video
quality, select H.264, MPEG4 or M-JPEG, depending on your
network settings.
Before enjoying your new IP camera, please check the package
contents. If anything is missing, return this package to your dealer to
claim the missing contents.
2. Check your package contents
z 1 x IP Camera
z 1 x Power Adapter
z 1 x Detachable Antenna (IC-3030Wn only)
z 1 x Mounting Kit
z 1 x Category 5 Ethernet Cable
z 1 x Quick Installation Guide
z 1 x CD (Including Manual/Utility/Multi-Language QIG)
3. System Requirement
z CPU: Intel Pentium 4 2.4 GHz above or Intel Dual-Core
2.0GHz
z VGA Card Resolution: 1024 x 768 or above
z A CD-ROM Drive
z Hard Disk: At least 128MB (256MB recommended) of
available space
z OS: Windows 2000/XP/Vista/7
5
Page 6
4. Hardware Installation
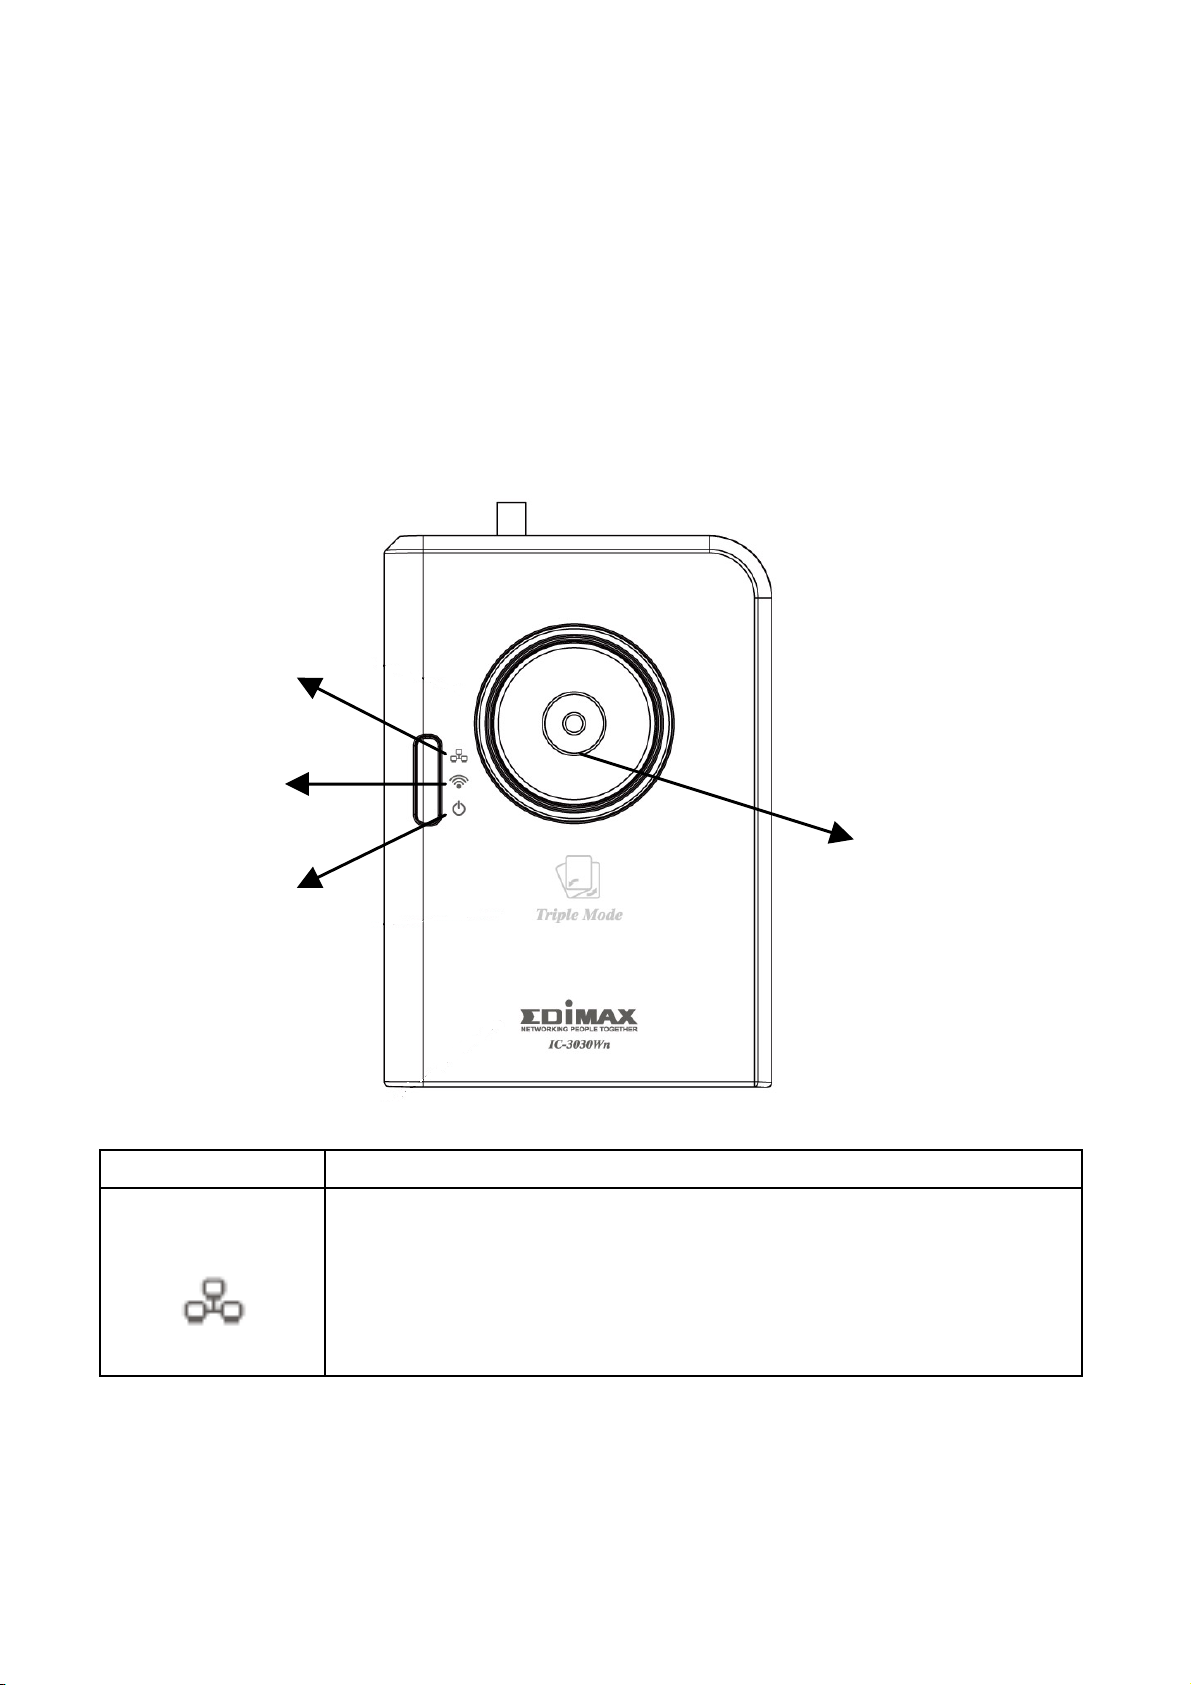
4.1 LED and Focusing
You can change the aim and focus of the camera by adjusting the
camera head's aim and adjusting the focus ring. Simply point it in
your direction of choice and rotate the focus ring to your preference.
Three LEDs indicate the camera's power and networking status.
LAN
Wireless
Power
LED Description
LAN
When the IP Camera is linked to a wired network,
this LED will li ght u p. Th e LED will f lash whi le video
is transmitted or received through a wired network.
Camera Focus Ring
6
Page 7

Wireless
When the IP Camera is linked to a wireless
(IC-3030Wn
& IC-3030
only)
Power
network, this LED will light up. The LED will flash
while video is transmitted or received through a
wireless network.
When the camera is powered on and ready for
access, this LED will light up.
7
Page 8
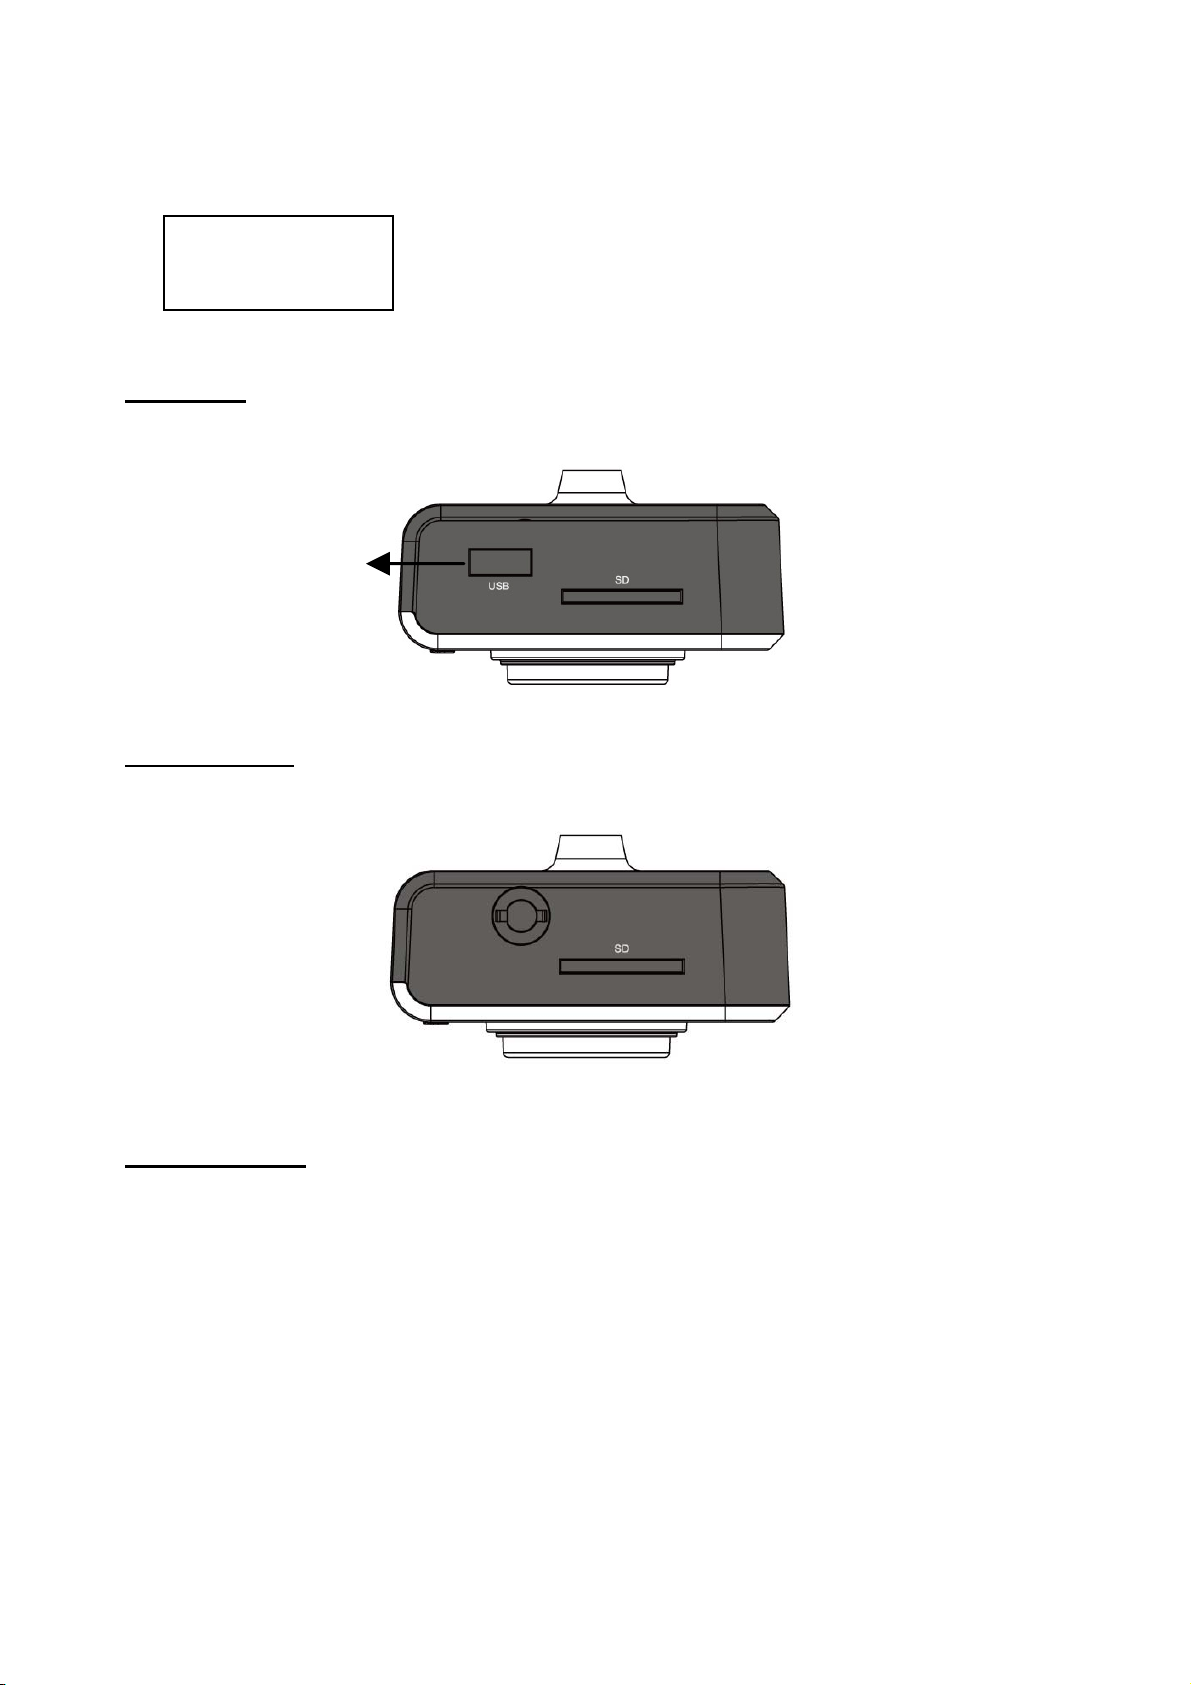
4.2 Camera Ports
Top View
IC-3030:
IC-3030Wn:
Wireless S MA
USB Port
SD Card Slot
Connector
IC-3030PoE:
SD Card Slot
SD Card Slot
8
Page 9

Reset to Default / WPS
Power Connector
Bottom View
Audio Connector
Microphone
Ethernet Connector
Name Description
USB Port*
(IC-3030
only)
SD Card
Slot
Wireless
SMA
Connector
(IC-3030Wn
only)
Accepts USB WiFi adapter** to enable wireless
Accepts SD / SD-HC memory card for image and
video storage
A standard reverse SMA connector allows any
reverse SMA connector antenna to connect to the
IP Camera.
9
Page 10

Press and hold WPS button for more than 5
y
Reset to
Default /
WPS
(IC-3030Wn
only)
Power
Connector
Ethernet
Connector
Audio
Connector
Microphone Built-in microphone for voice pick-up
seconds to reset the camera settings to factory
default.
Press the WPS button (click) on the IP Cam and
click on the Access Point that you want to
wirelessl
Connects to 12V DC power adapter
Connects to your local area network
Connects to external speaker for audio output
connect it to.
Note: The USB port only works with Ed imax U SB WiFi adapte rs .
Note: Edimax EW-7711HPn, EW-7711UAn, EW-7711USN,
EW-7711 UM n & EW-7711UTn
10
Page 11

4. Hardware Installation
1. Unpack your Edimax IP Camera from it s packaging and ensure
that all the items listed in Chapter 1 are there.
2. Connect the Edimax IP Camera to your network by attaching a
network cable from your switch or router to the LAN port on the
IP Camera.
3. Connect the power adapter to the IP Camera and plug the
adapter into a power outlet. When the IP Camera is ready, the
Power LED will light up.
Note: It is highly recommended to use only the power adapter
shipped with the IP Camera. Do NOT use any other power adapter
and avoid possible damage to your new device.
11
Page 12

5. Software Installation
The Installation Wizard will guide you through this simple process.
Below we tell you how to get it started up. The following example is
for Windows Vista. The procedure is similar for Windows
2000/XP/7.
1. Insert the Edimax CD into your CD-ROM drive. It should start
up automatically. If it doesn't, click on “Autorun.exe” in the
“Autorun” folder on the CD.
2. The Install Wizard will give you four options to choose from.
Here you can select program you wish to install. The following
installation steps are a demonstration of installing the
'Administrator Utility & Camera Viewer’. Click on 'setup utility'.
12
Page 13

3. The 'Install Wizard' should take you here. Click on ‘Next’ to
continue your installation.
4. Click on 'Next' to move to the next step. If you wish to install
the program to an alternate location, click on ‘Browse’ and
select a location.
13
Page 14

5. Click ‘Next’ to move on to the next step or make your
selections here.
14
Page 15

6. Click on ‘Install’ to install the program.
15
Page 16

7. Click ‘Finish’ to confi rm the software installation.
8. If you have Windows Defender or other 3rd party firewall
software, you may see the following or a similar message,
Please click ‘Unblock’ to allow your Edimax IP camera Utility
to pass through the firewall. Not doing so may cause the IP
camera utility to not function optimally.
16
Page 17

9. A new folder named ‘Internet Camera’ under ‘All Programs’ will
be created. Click on 'IP Cam Admin Utility' to connect to the IP
camera and use the camera's functions directly.
17
Page 18

10. After installation, the system will automatically run the
‘Administrator Utility’. On the first page, the cameras found in
your network will be listed. Select the one you wish to
configure and click on the ‘Configure Camera’ icon.
18
Page 19

11. You will be prompted to insert your user name and password.
The default user name is ‘admin’ (unchangeable), and the
default password is ‘1234’ (changeable). Click ‘OK’ to
continue.
12. The program will automatically detect the IP address status of
your network and suggest a free IP address for the IP Camera
using DHCP. You can accept the suggested address or enter
the values manually. If you enter the values manually, ensure
that the ‘Subnet Mask’ is the same for both the camera and the
PC. Since the IP Camera works through the network (TCP/IP
Protocol) the IP address setting must be correct for you to
access the IP camera. Click ‘OK’ to apply your configuration.
19
Page 20

6. WEB Management Interface
You can use your WEB browser (Internet Explorer 5.5 or above) to
connect to the IP camera. Type the IP address (see 5.12) in the
address bar of your web browser. Bookmark the address for ease of
future use. You’ll be prompted to insert a us er name and password:
User name: admin / Password: 1234
Once you're logged on, you will see the following message appear
at the top of Internet Explorer. Click on the message, and click
‘Install ActiveX Control…’
20
Page 21

21 22
Page 22

When you see this message, click ’Install’. ActiveX co n tro l w i ll b e
installed, allowing you to access the IP camera.
You should now be able to see the images and hear the sounds
captured by the Edimax IP camera. For advanced functions, please
refer to instructions in the user manual (also on CD-RO M).
Page 23

R&TTE Compliance Statement
This equipment complies with all the requirements of DIRECTIVE
1999/5/EC OF THE EUROPEAN P ARLIAMENT AND THE
COUNCIL of March 9, 1999 on radio equipment and
telecommunication terminal Equipment and the mutual recognition
of their conformity (R&TTE)
The R&TTE Directive repeals and replaces in the directive
98/13/EEC (Telecommunications Terminal Equipment and Satellite
Earth Station Equipment) As of April 8, 2000.
Safety
This equipment is designed with the utmost care for the safety of
those who install and use it. However, special attention must be paid
to the dangers of electric shock and static electricity when working
with electrical equipment. All guidelines of this and of the computer
manufacturer must therefore be allowed at all times to ensure the
safe use of the equipment.
EU Countries Intended for Use
The ETSI version of this device is intended for home and office use
in Austria, Belgium, Denmark, Finland, France, Germany, Greece,
Ireland, Italy, Luxembourg, Bulgaria, Cyprus, Czech Republic,
Estonia, Hungary, Latvia, Lithuania, Malta, Poland, Romania,
Slovakia, Slovenia, the Netherlands, Portugal, Spain, Sweden, and
the United Kingdom.
The ETSI version of this device is also authorized for use in EFTA
member states: Iceland, Liechtenstein, Norway, and Switzerland.
EU Countries not intended for use
None
23
Page 24

24
 Loading...