

Page 1
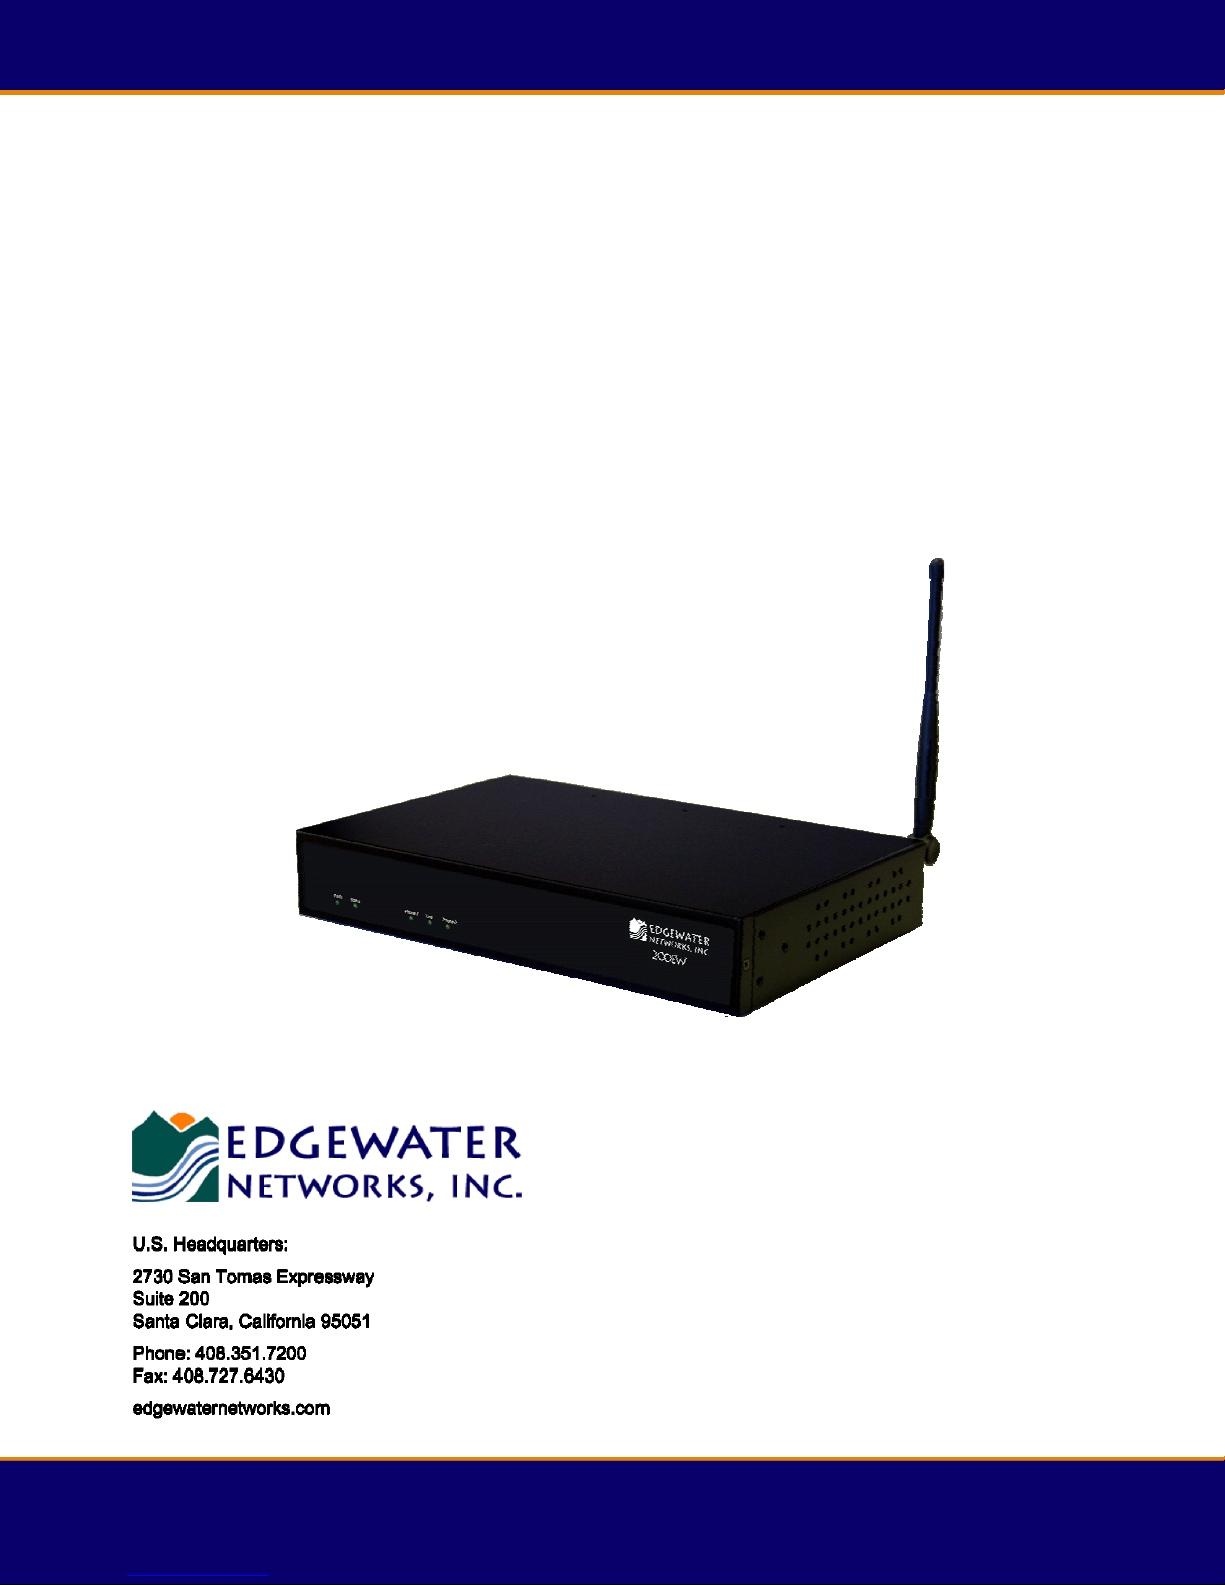
200EW/E Converged
Networking Router
Quick Start Guide
Version 1.0
200-4562-001
Page 2

Please read this guide thoroughly as it describes the basic installation of
the device. Refer to online help for assistance when deploying and
configuring the device in a specific environment.
This guide also provides an example of a typical 200EW/E deployment
that can be used as a guideline for your installation.
Requirements for Installation
• A computer with a web browser such as Microsoft Internet Explorer or
Netscape Navigator or any other browser of your choice
Before You Start
• At least one Ethernet cable
• Following information supplied by the VoIP Service Provider:
o IP address of the WAN interface if DHCP is not being used.
o IP address of the Softswitch
Note: The 200EW/E has wireless capability, whereas the 200E
does not.
Page 1 of 7
Page 3
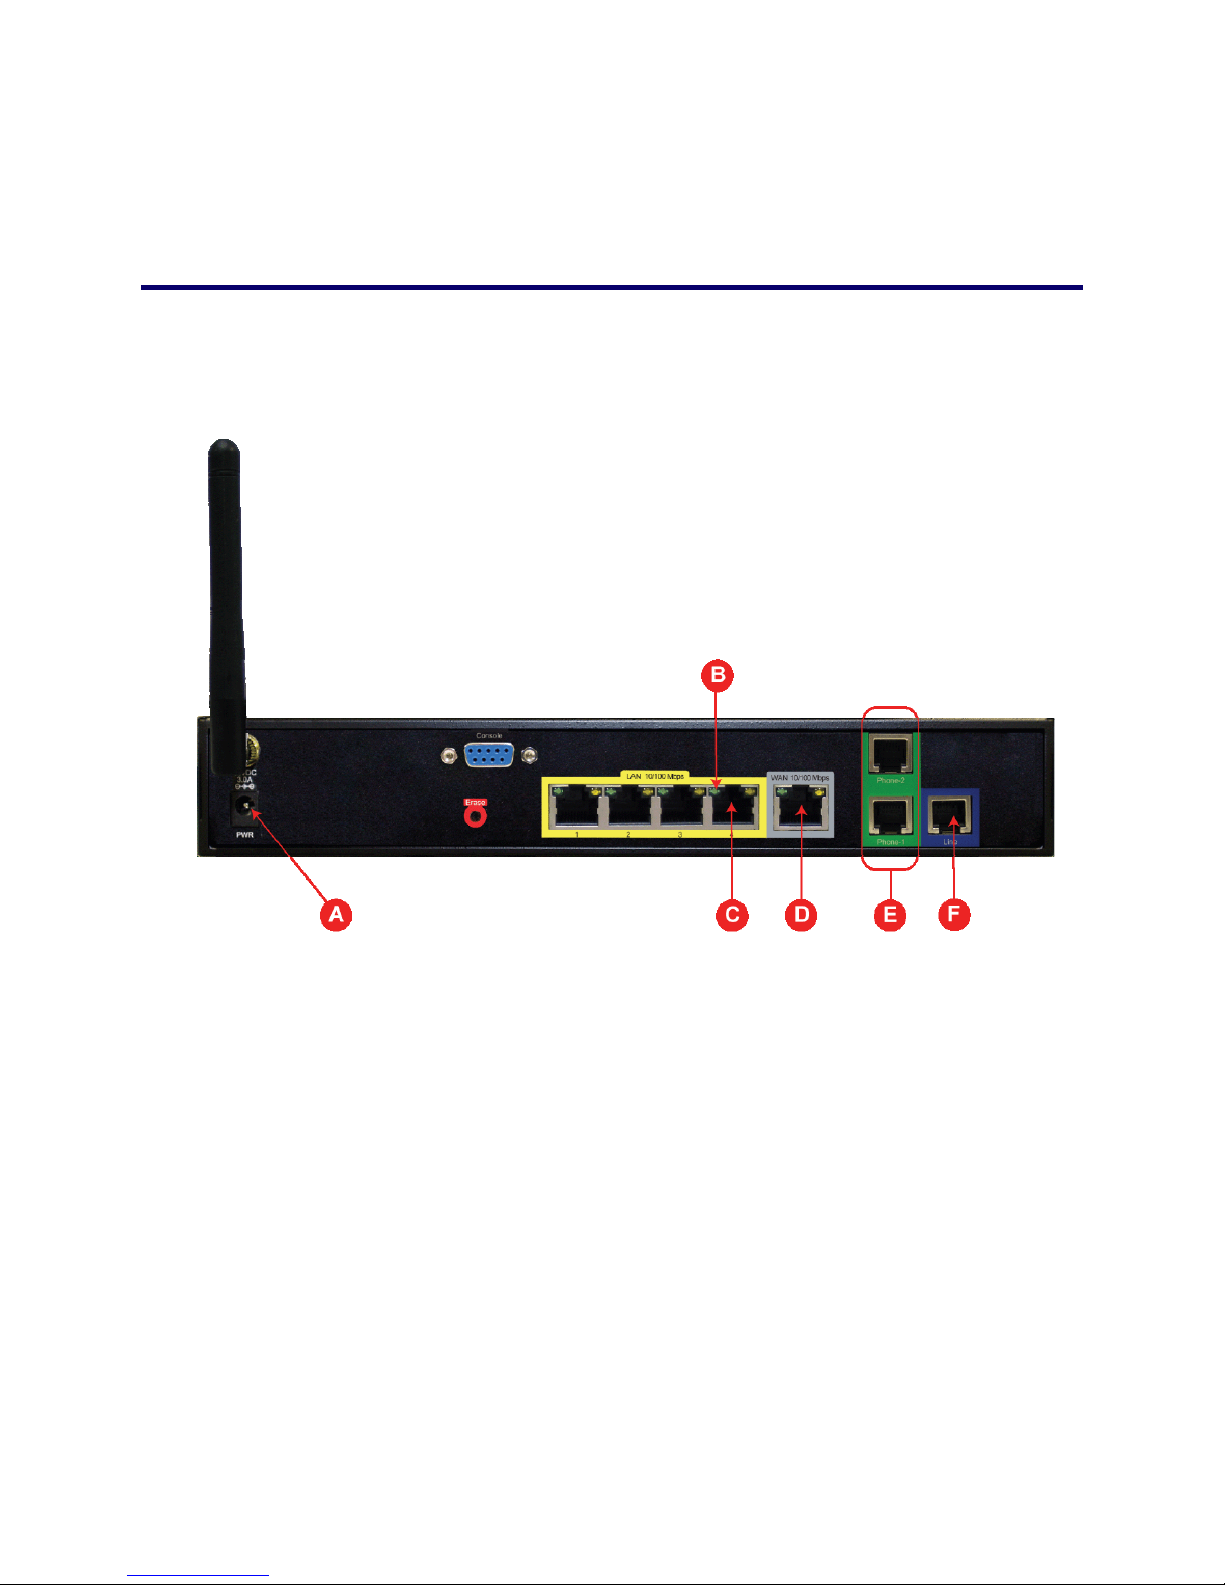
Step 1 − Connecting the Cables
Instructions
1. Connect one end of an Ethernet cable to local LAN port 4 of 200EW/E denoted by “C” in
the above diagram. Connect the other end of the cable to your computer’s Ethernet port.
2. Make sure that the green LED denoted by “B” is solid green indicating that the link is up.
3. Connect one end of an Ethernet cable to the WAN port denoted by “D” and the other
end of the cable to a cable or xDSL modem.
4. Connect the PSTN line to port denoted by “F” in the above diagram.
5. Connect the regular phones or key system to ports denoted by “E” in the above diagram.
6. Plug one end of the power adapter into an AC outlet and the other end into the power
receptacle on 200 denoted by “A” in the above diagram. Make sure that the power and
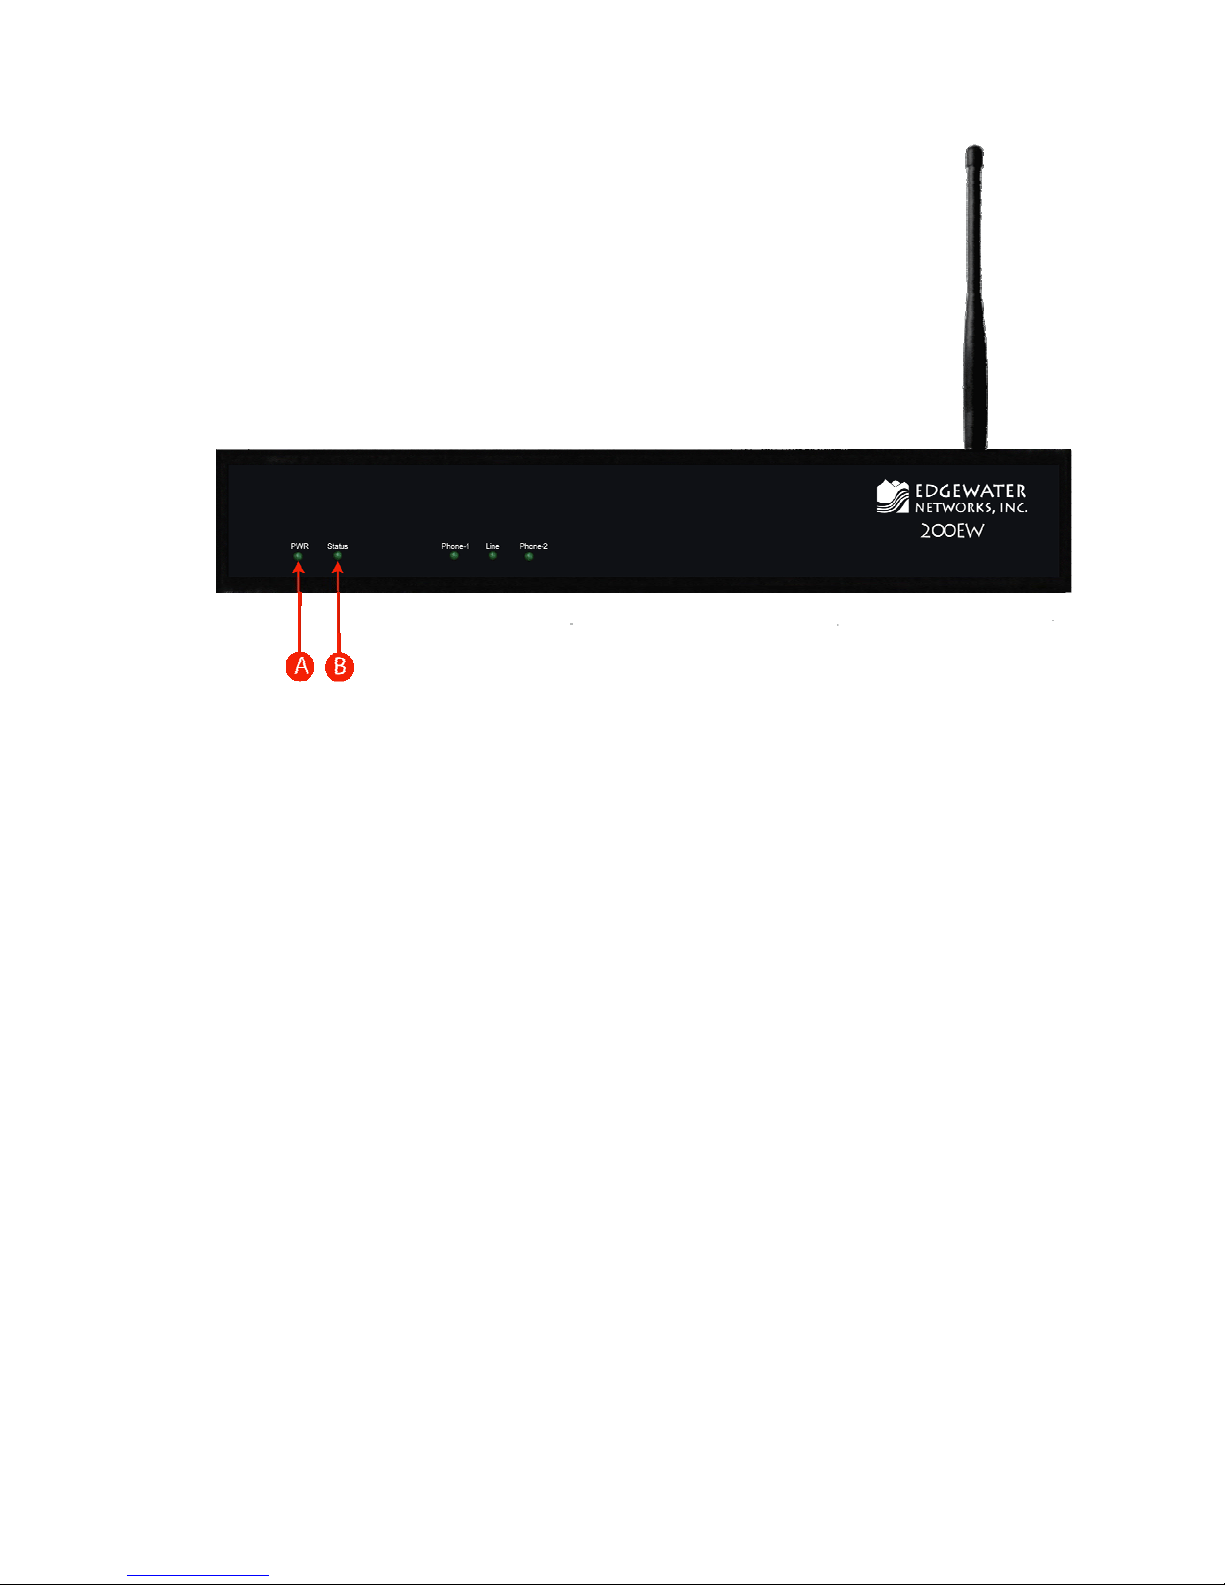
status LEDs denoted by “A” and “B” in the diagram below are solid green after a short
while.
Page 2 of 7
Page 4
Page 3 of 7
Page 5
Step 2 − Configuring the EdgeMarc
1. The EdgeMarc device comes preconfigured with 192.168.1.1 local LAN address with a
subnet mask of 255.255.255.0. Configure your computers Ethernet adapter’s IP address
to any address other than 192.168.1.1 in the same subnet mask, for example
192.168.1.10.
2. Launch a web browser on the PC and enter the following URL:
press Enter
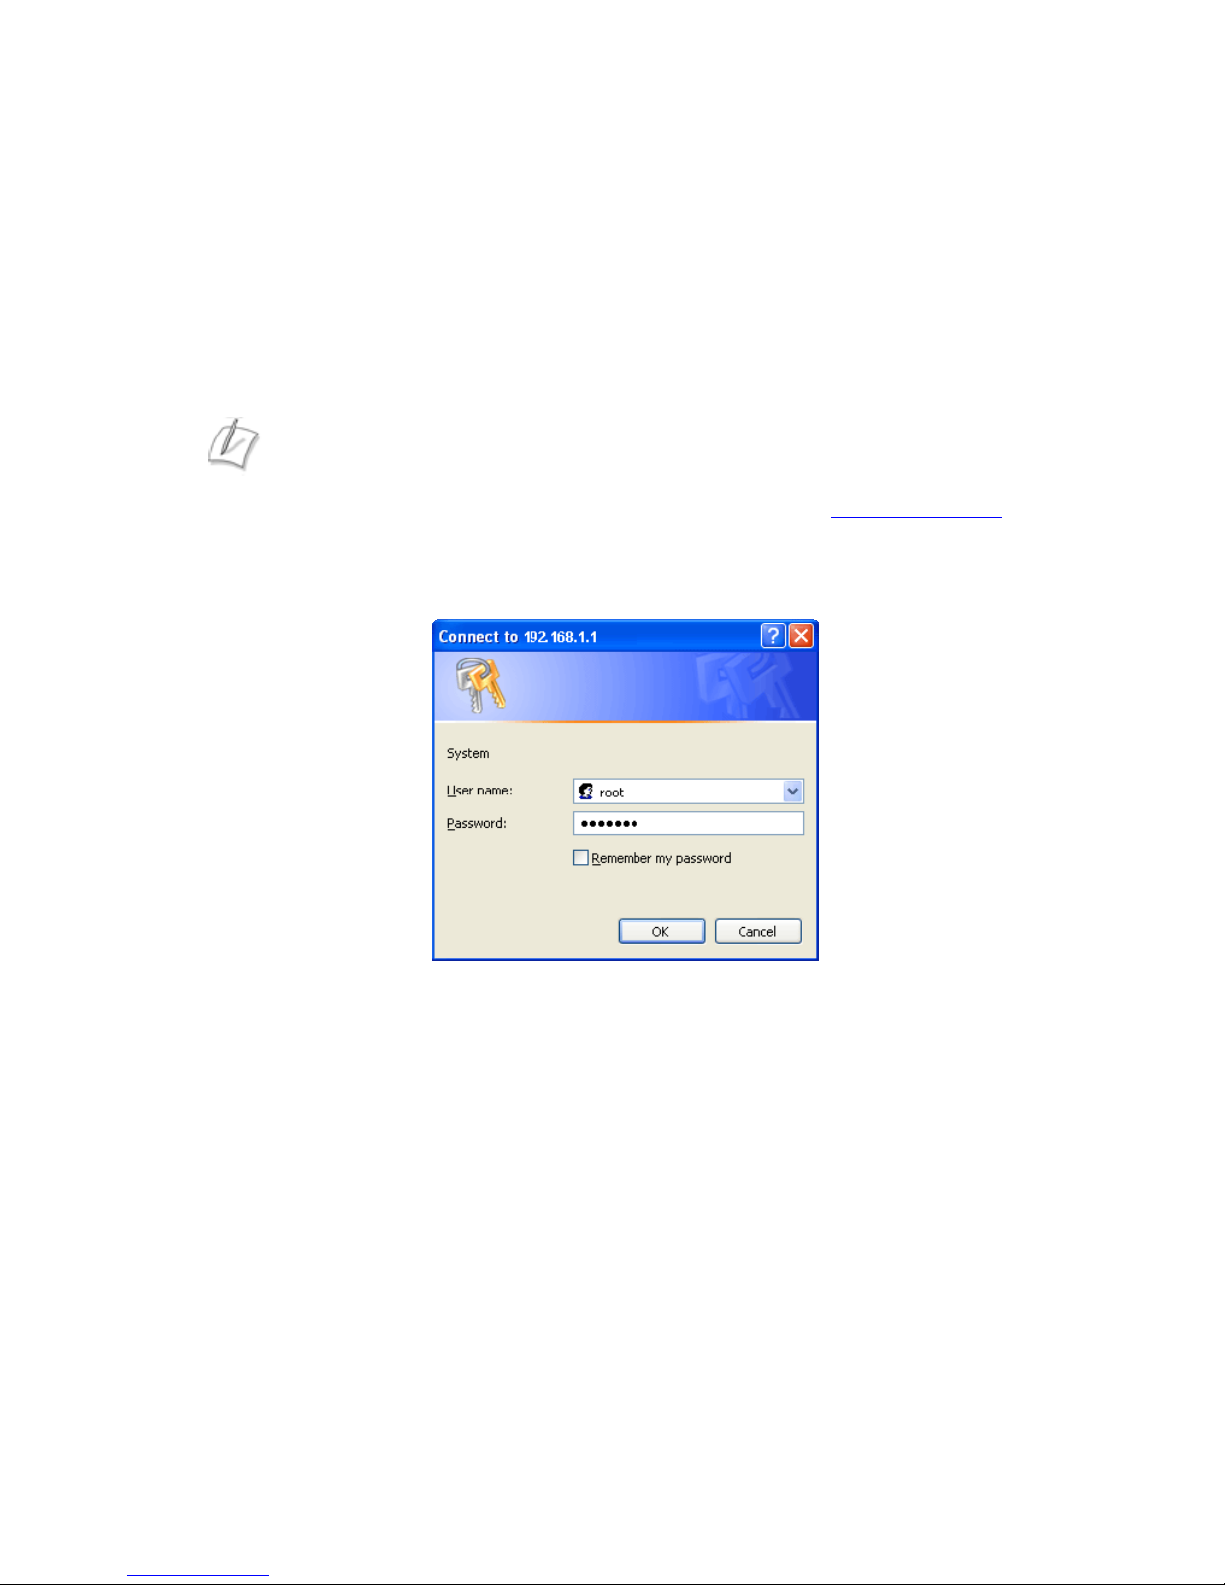
3. The following login window should appear:
4. Enter “root” in the User name field and “default” in the Password field.
Note: If you’re using a LAN switch, it must support 100Mbps full duplex.
http://192.168.1.1 and
5. The System page should appear next if message of the day is not enabled. If it is then
click on the System link under “Configuration Menu”.
6. From the Configuration Menu on the left, configure the following:
• Network – To configure WAN and LAN ports
• DHCP Server (optional) – Configure according to your specific needs.
Page 4 of 7
Page 6

Step 3 − Plan Your Configuration
The EdgeMarc 200EW/E can be deployed as a gateway router in a network. It can also be
deployed in a network behind an existing firewall. Based on your deployment criteria, consult
the following documents for further configuration:
• EdgeMarc 200 Series Converged Networking Router Hardware Installation Guide
• VoIP Operating System (VOS) for EdgeMarc User Manual
Helpful Hints
Although not recommended, the 200EW/E and IP phones can be installed behind an existing
enterprise firewall. In this instance, the firewall will have to be configured to allow access to and
from the 200EW/E’s public IP address for the following ports:
Port Type Firewall Ports to Open
UDP
RTP
TCP
Telnet
FTP
MGCP
NTP
SIP
IP phones normally point to a local NTP server for their time reference. The NTP port 123
needs to be opened if your network does not have an NTP server.
161 (SNMP) and 162 (SNMPTRAP)
1056 to 1255
SSH TCP 22 for remote management & TCP 80 for WAN
configuration-downloads
23
TCP 21 for stateful TCP-session control from 200 to Edgewater
FTP server
2427, 2429, 2432, and 2727
123
5060 and 5075
Note: Traffic shaping for this configuration is only available if the enterprise data
devices are also installed behind the 200EW/E.
Page 5 of 7
Page 7

The web page configurations for the various 200EW/E deployments are shown below. The two darkershaded rows indicate the minimum configuration required for each deployment.
200EW/E GUI
Configuration
Page
Network
VoIP/ALG
NAT
Firewall
DHCP
Traffic Shaper
Traffic Simulator
System
Please visit our website at
Assistance Center at 408.351.7255 for additional information or assistance.
200EW/E as
Gateway
Router
Yes Yes Yes
Yes Yes Yes
Yes Optional Yes
Yes Optional, but
Yes Yes (but should be
Yes Yes Optional (depends on
Only for
testing
As needed As needed As needed
www.edgewaternetworks.com or contact the Edgewater Technical
200EW/E within
existing infrastructure
recommended
disabled if DHCP server
already exists)
Only for testing Only for testing
200EW/E behind an
existing firewall
Optional, but
recommended
Yes (but should be
disabled if DHCP server
already exists)
network topology)
Edgewater Networks, Inc.
2730 San Tomas Expressway
Suite 200
Santa Clara, CA 95051
Phone: (408) 351-7200
Copyright© 2007, Edgewater Networks, Inc. All rights reserved.
Converged Networking. Simplified.
Page 6 of 7
 Loading...