

Edge Products Back-up camera Installation Instructions Manual
Installation Instructions
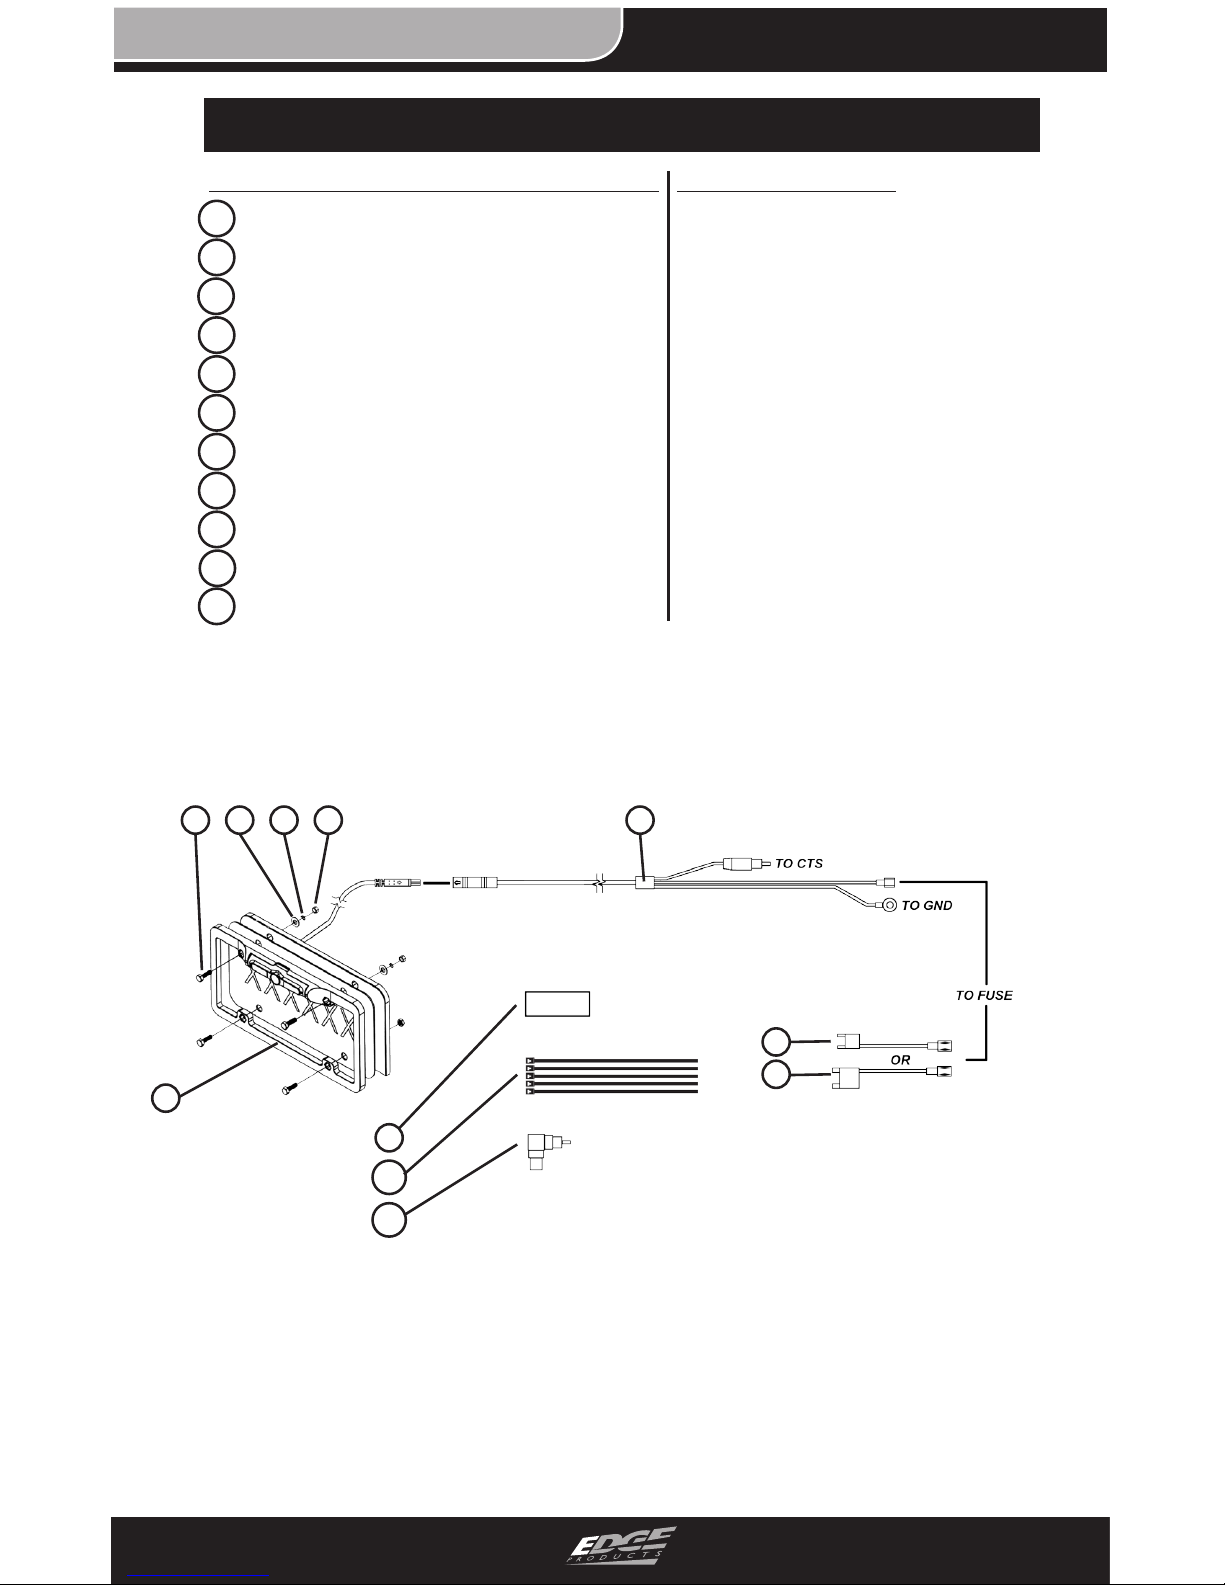
TABLE OF CONTENTS
Installation Instructions
2
EAS
INSTALLATION INSTRUCTIONS
2
BACK-UP CAMER A
PARTS LIST
ITEM DESCRIPTION QTY
EXPLODED CAMERA ASSEMBLY
REQUIRED TOOLS
SCISSORS
ALLEN WRENCH (SUPPLIED)
3/8” WRENCH/SOCKET
1/4” DRILL BIT
POWER DRILL
(NOTE: The drill and drill bit
may be needed in order to resize the existing mount holes
for bolt insertion. If the camera
is ever removed, continue to
use the supplied hardware to
mount your licence plate.)
1
2 3 4 5 6
7
8
9
10
11
1
2
3
4
5
6
7
8
9
10
11
CAMERA (1 EA)
BOLT (4 EA)
FLAT WASHER (4 EA)
LOCK WASHER (4 EA)
NUT (4 EA)
CABLE (1 EA)
SMALL FUSE ADAPTER (1 EA)
LARGE FUSE ADAPTER (1 EA)
3M SEALANT TAPE (1 EA)
ZIP TIES (5 EA)
RCA ELBOW (1 EA)

3
TABLE OF CONTENTS
Installation Instructions
EAS
3
INSTALLATION INSTRUCTIONS
BACK-UP CAMER A
MOUNTING THE CAMERA
1. Remove the LICENSE
PLATE from your vehicle and
align it with the back side of
the CAMERA as shown in the
gure below.
2. If an auxiliary hole exists
behind the license plate, insert
the CAMERA CABLE through
it and make sure the connector
is easily accessible for routing.
3. Align the CAMERA and
LICENSE PLATE with the
bumper/trunk holes and insert
the (4) bolts.
5. With the bolt in place, slide
the FLAT WASHER and LOCK
WASHER over the backside of
the bolt and fasten with a nut.
6. Tighten until snug.
SEALING THE CABLE
CAMERA
LICENSE
PLATE
BUMPER/
TRUNK
CAMERA
CABLE
1. Plug the CABLE into the
CAMERA CABLE as shown.
2. Trim one end of the 3M
SEALANT TAPE as shown.
3. Wrap the seam on the connection made in step 1 to
improve the seal.
4. Firmly press/squeeze the
wrapped tape to create the best
seal and adhesion possible.
CAMERA
CABLE
MAIN
CABLE
TRIM LINER
AND DISCARD
ADHESIVE
PAD
TAPE
TAPED
SEAM
 Loading...