

Edge Lighting Vessel 10 Glass User Manual
© 2013 Edge Lighting. All Rights Reserved.
1718 W. Fullerton Ave
Chicago, IL 60614
Tel: 773-770-1195
Fax: 773-935-5613
www.edgelighting.com
info@edgelighting.com
VESS-S-10-WHGL
Installation Instructions for Vessel 10 Glass Suspension
IMPORTANT INFORMATION
- This product can ONLY be ceiling mounted.
- This product can mount to either a 4" square electrical box
with round plaster ring or an octagon electrical box.
SAVE THESE INSTRUCTIONS!
Install the Fixture
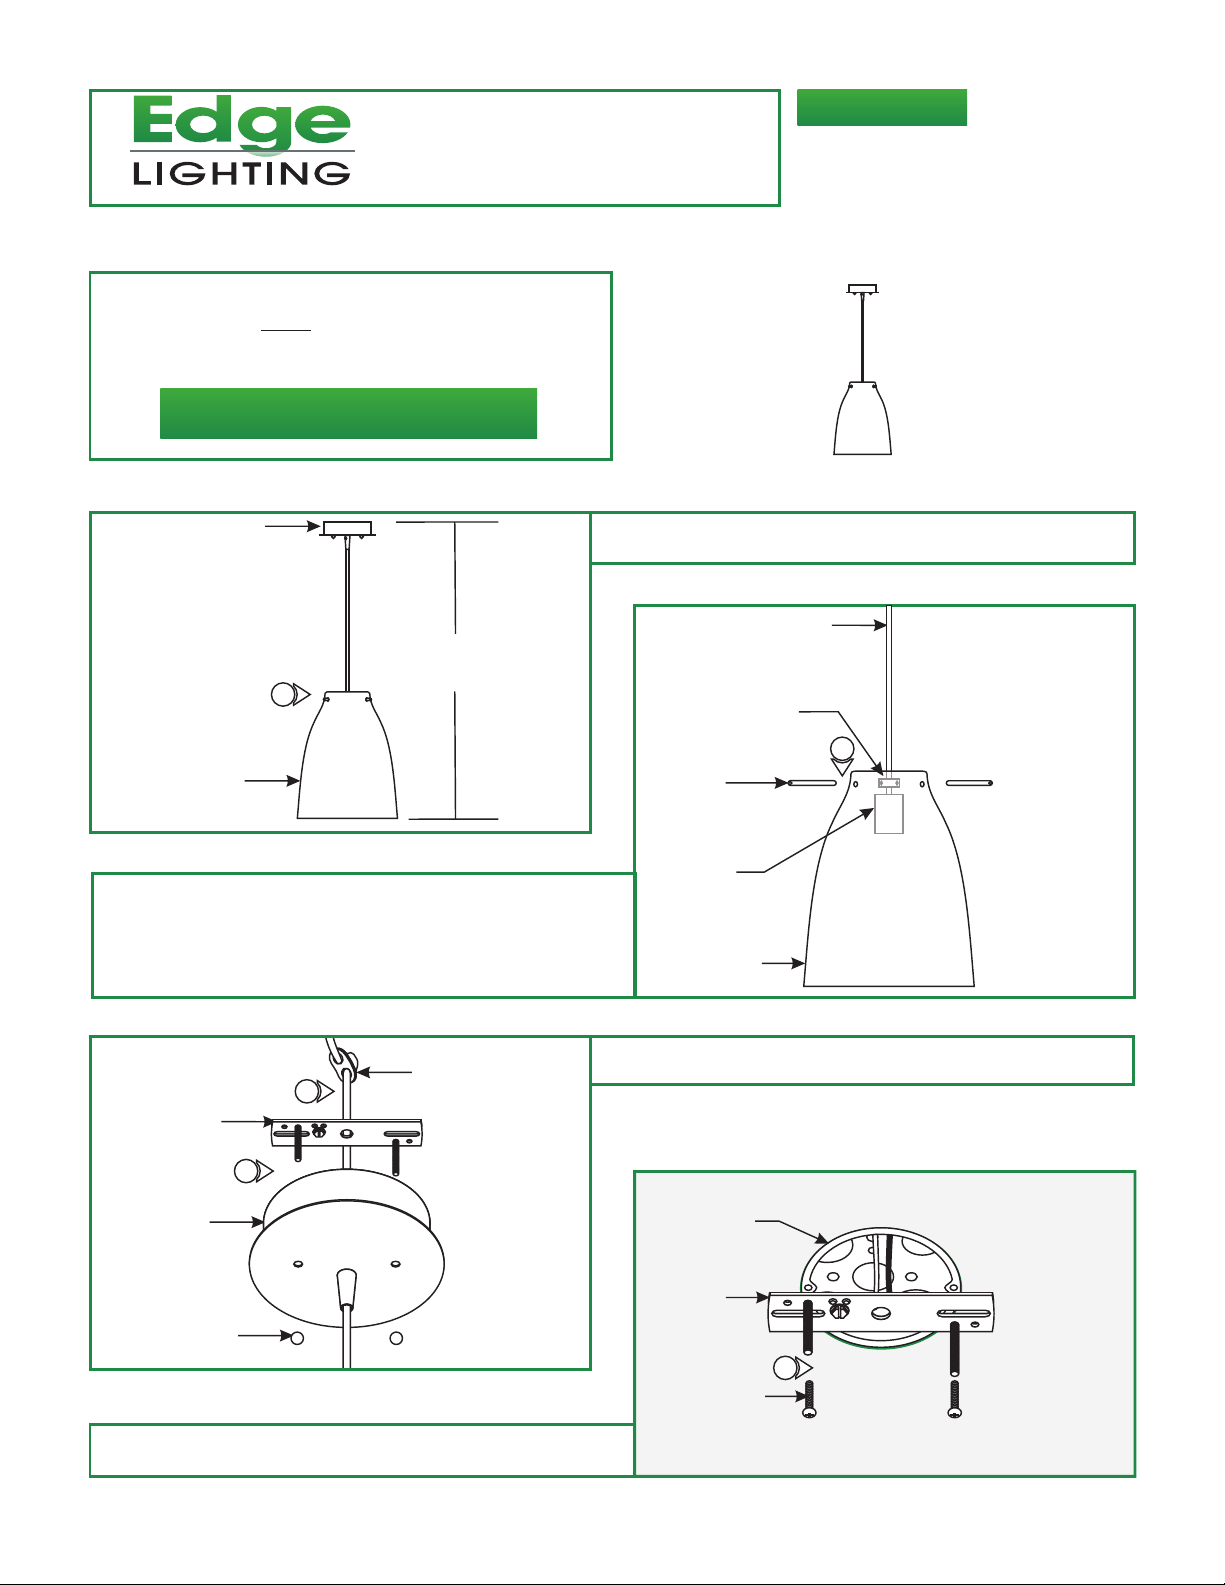
A
CANOPY
1: Determine the desired fixture height (H), from the bottom of
the shade to the top the canopy.
904-VESS-S-10-WHGL-02
H
1
SHADE
2: Place the glass shade completely over the socket assembly.
3: Align the socket hub holes to the glass shade holes.
While holding the glass shade in place, secure it by
tightening the three thumb post.
C
4
CROSSBAR
ASSEMBLY
4
CANOPY
CORD CLIP
B
SOCKET HUB
THUMB
POST
SOCKET
SHADE
4:
Loosen the threaded caps, to remove the crossbar assembly
and also entangle the cord from the cord clip.
D
ELECTRICAL
BOX
CORD
2
THREADED CAP
5: Mount the crossbar assembly to the electrical box holes
with the provided two #8-32 screws.
CROSSBAR
ASSEMBLY
5
#8-32 SCREW
1
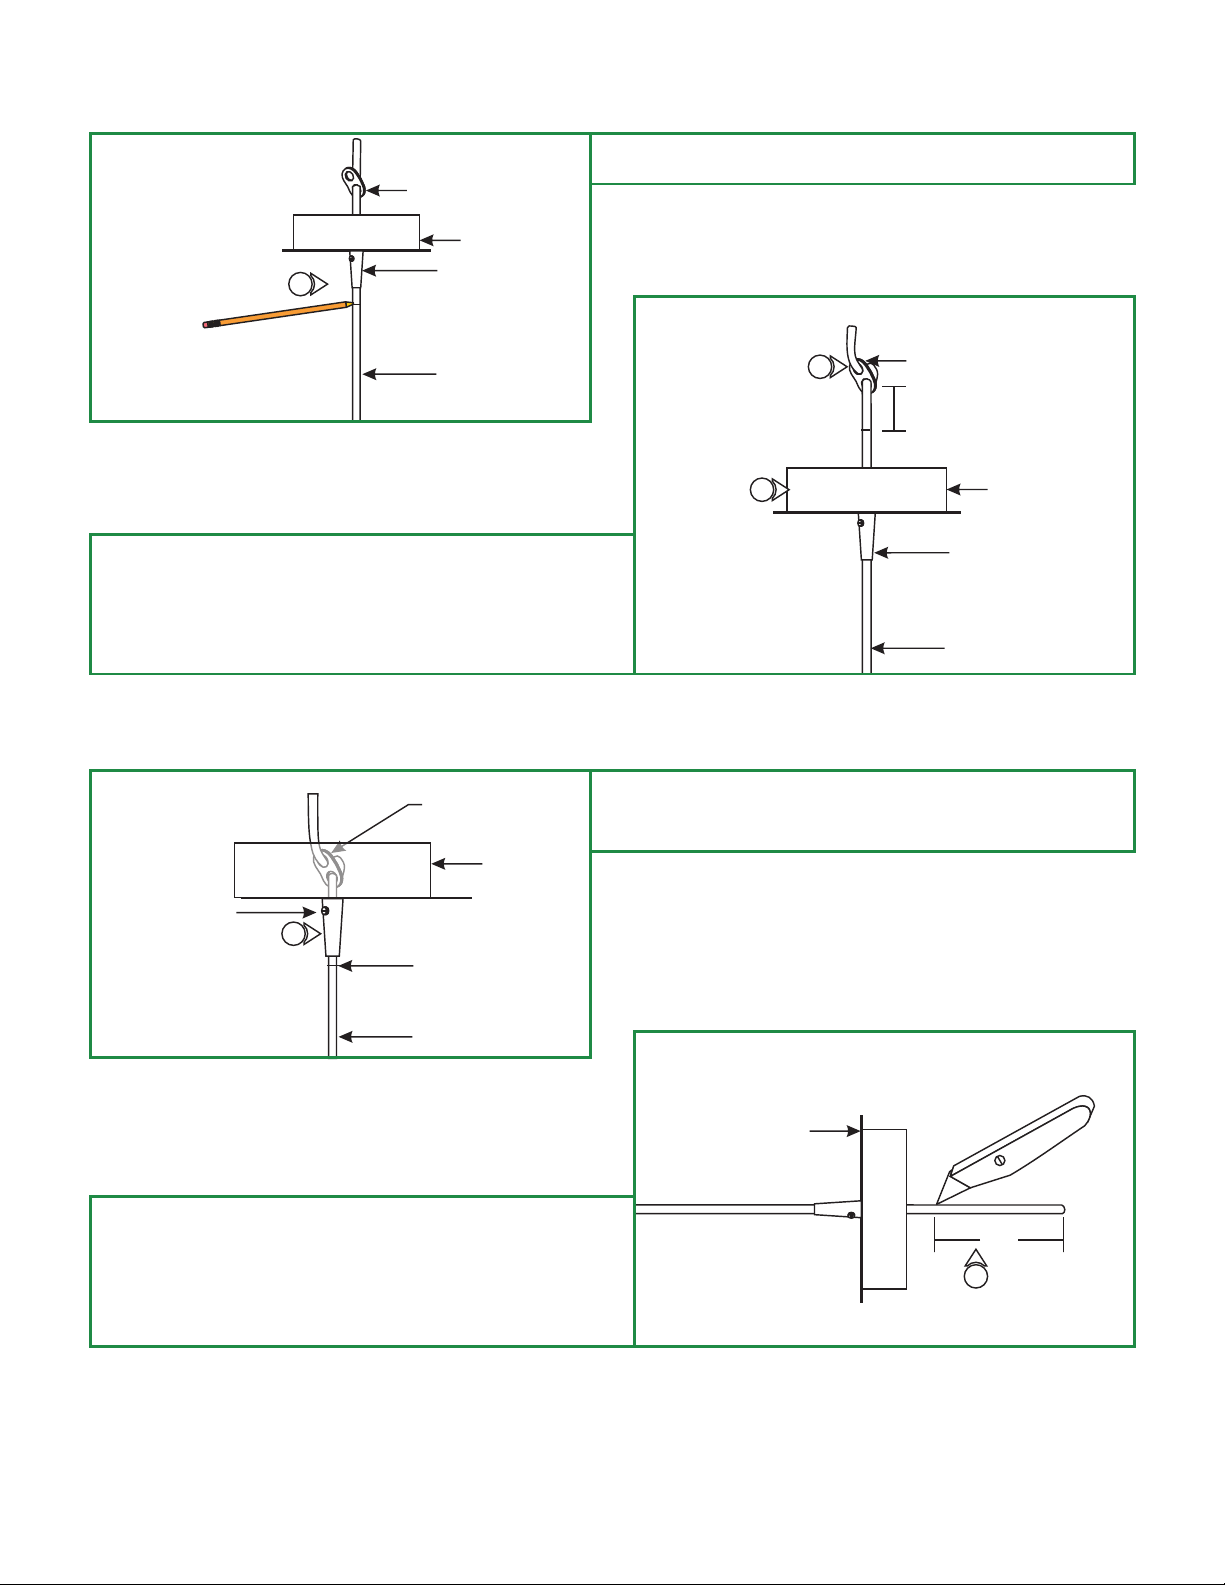
E
6: Adjust the fixture height and mark the cord below the
CORD CLIP
CANOPY
6
STRAIN RELIEF
canopy strain relief.
F
CORD
7: Feed the cord inside the canopy so that the marked line
is exposed behind the canopy.
8: Place the cord clip 1" above the marked line by feeding
the cord through the second cord clip hole and pulling
the cord to lock the cord clip in place.
G
STRAIN RELIEF
9
CORD CLIP
CANOPY
MARKED LINE
8
7
9: Slide the canopy up and make sure that the marked line
is right underneath the strain relief. Tighten the strain
relief screw to secure the cord in place.
CORD CLIP
1"
CANOPY
STRAIN RELIEF
CORD
CORD
10: Leave 6" of the cord behind the canopy for power
connections. Cut the excess cord.
11: From the end of the cord remove 4" of the cord insulation.
12: Strip 1/4" of the insulation from the wires ends
H
CORD
CANOPY
4"
11
2
 Loading...