

Page 1

© 2009 Edge Lighting. All Rights Reserved.
1718 W. Fullerton Ave
Chicago, IL 60614
Tel: 773-770-1195
Fax: 773-935-5613
www.edgelighting.com
info@edgelighting.com
VSKY-RD-14-F1-_
904-VSKY-RD-14-F1-04
Installation Instructions for Vanilla Sky Round 14
Fluorescent Version)
IMPORTANT INFORMATION
- This product is ETL listed for indoor dry locations.
- This product is ceiling mounted only.
- This product can mount to either a 4" square electrical box
with round plaster ring or an octagon electrical box.
SAVE THESE INSTRUCTIONS!
Install the Fixture
1: R
A
MOUNTING
CROSSBAR
emove the two thumb nuts from the threaded studs and
detach the mounting crossbar from the fixture assembly.
(Compact
FIXTURE
ASSEMBLY
THUMB NUT
2: Mount the mounting crossbar to the electrical box holes with
the two provided #8-32 screws
C
MOUNTING
CROSSBAR
5
1
4
THREADED
STUD
4
B
MOUNTING
CROSSBAR
#8-32 SCREW
3: Make sure that the mounting crossbar is grounded in
accordance with local electrical codes.
4: Connect the white fixture wire to the neutral power wire with
a wire nut.
5: Connect the black fixture wire to the hot power wire with a
wire nut.
2
ELECTRICAL
BOX HOLE
2
FIXTURE ASSEMBLY
1
Page 2
D
CEILING
THREADED
STUD
7
THUMB NUT
ELECTRICAL
BOX
6
6: Place all wires and wire nuts connections inside electrical box.
7: Align and push the canopy holes onto threaded studs and
tighten the thumb nuts completely to secure the canopy in
place.
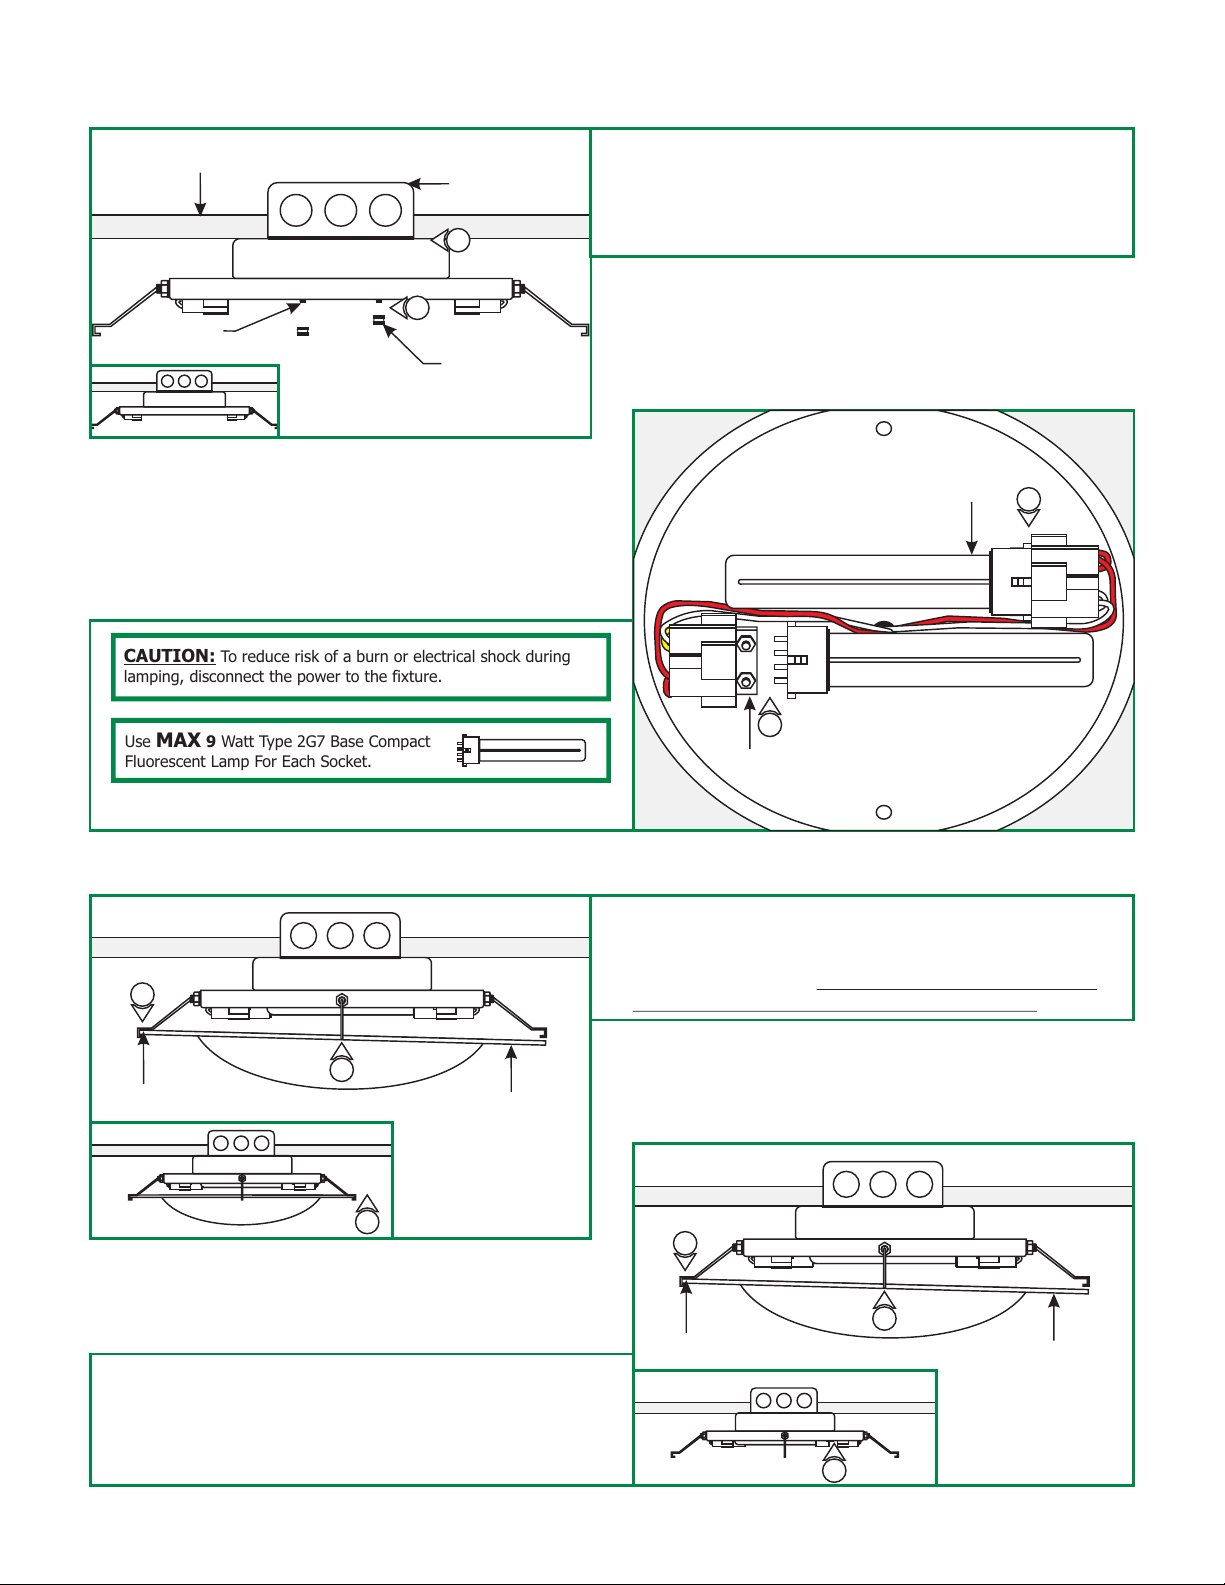
E
Install the Lamp & Glass Shade
CAUTION:
lamping, disconnect the power to the fixture.
Use MAX 9 Watt Type 2G7 Base Compact
Fluorescent Lamp For Each Socket.
1: Push the lamp pins completely into the socket holes.
To reduce risk of a burn or electrical shock during
F
2
2
SPRING CLIP
ROUND GLASS SHADE
LAMP
1
SOCKET
2: Place the edge of the round glass shade into two adjacent
spring clips. Slightly push the glass shade against these two
spring clips and simultaneously slide the other edge into the
other two spring clips. Make sure that the round glass
shade sits properly into the four spring clips.
1
Replace the Lamp
2
1: While holding the glass shade unhook one spring clip at a
time until the glass shade is free.
2: Remove the old lamp and then follow "Install the Lamp &
Glass Shade" steps to complete lamp replacement.
G
1
SPRING CLIP
1
ROUND GLASS SHADE
2
2
 Loading...