

Edge Lighting TV LED User Manual
1718 W. Fullerton Ave
Chicago, IL 60614
Tel: 773-770-1195
Fax: 773-935-5613
www.edgelighting.com
© 2011 Edge Lighting. All Rights Reserved.
info@edgelighting.com
Installation Instructions for TV LED
IMPORTANT INFORMATION
- RISK OF FIRE:
the ground for wet locations.
- This product is for wall mount applications only.
- This product can mount to a standard 4" electrical box
with a plaster ring or an octagon electrical box.
- This product is not dimmable.
SAVE THESE INSTRUCTIONS!
This product must be installed 4 ft above
Install the Fixture
TV-W-L1-_
904-TV-W-L1-03
A
BACKPLATE
1
M5 SET SCREW
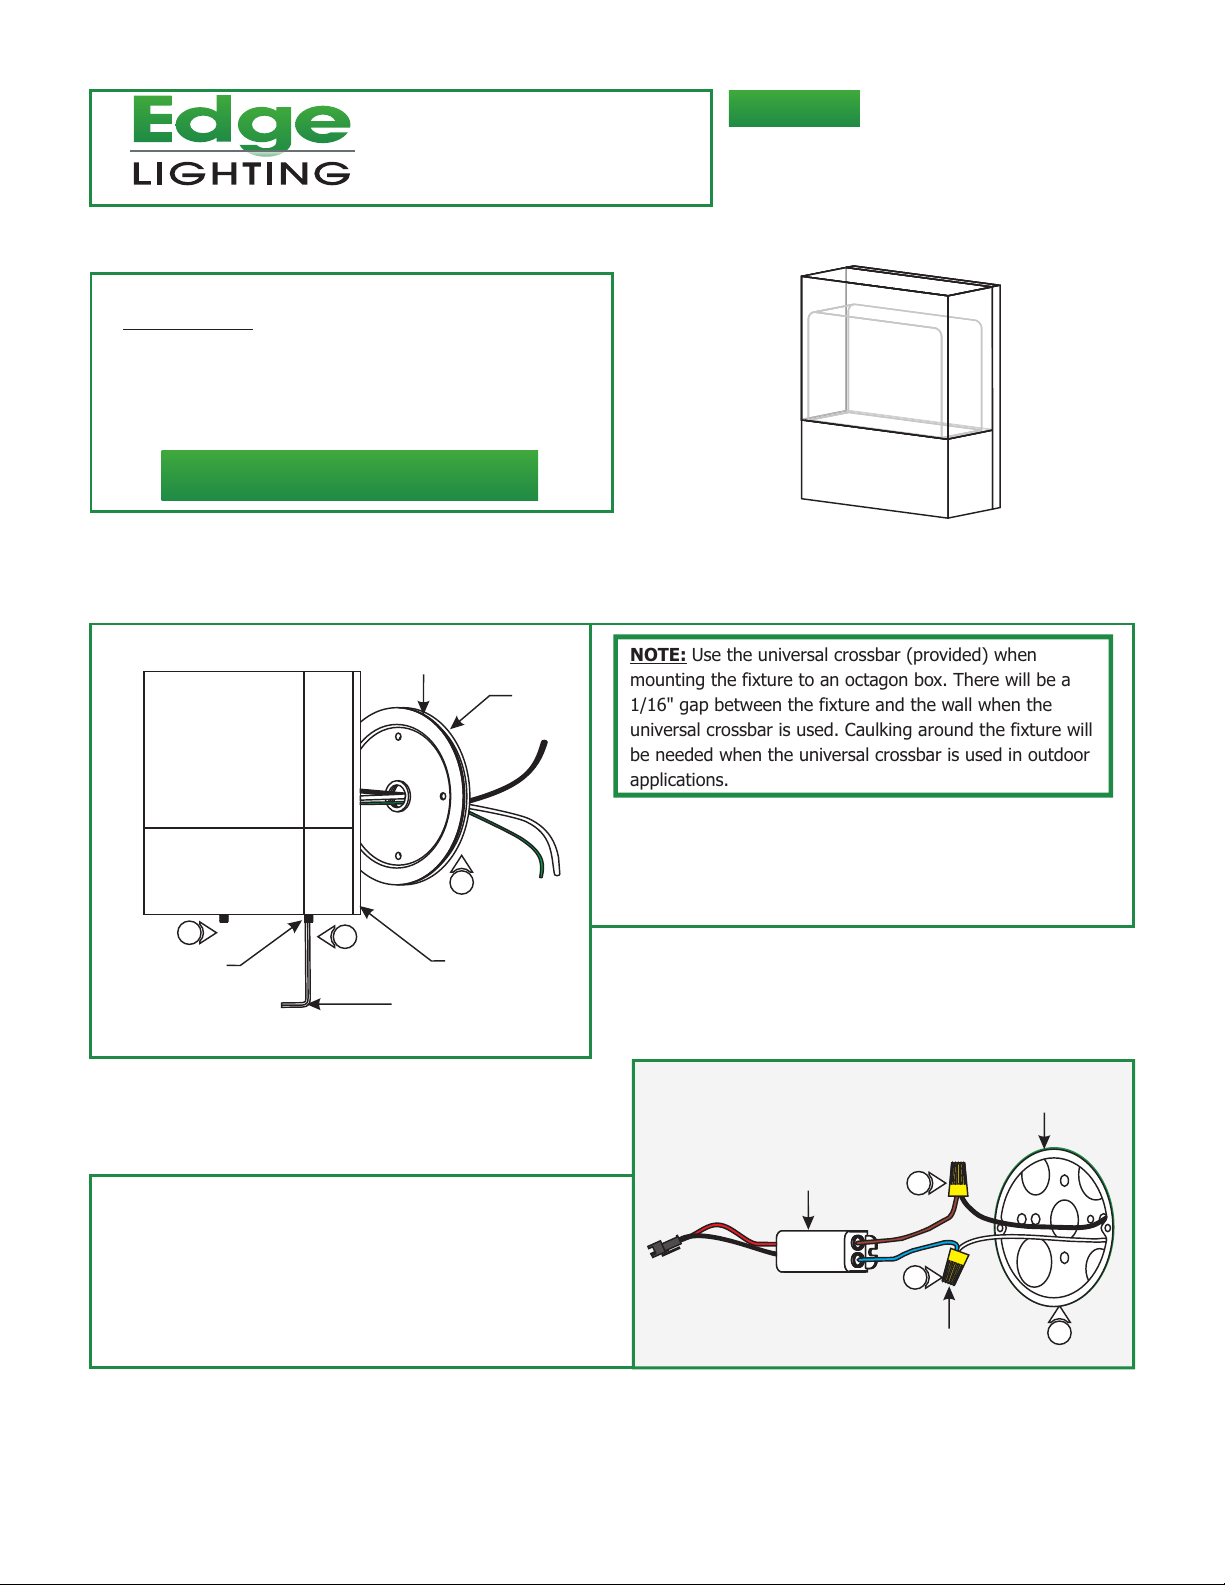
3: Connect the blue (NEUTRAL) LED driver wire to the neutral
power wire with a wire nut.
1
FIXTURE BODY
2.5MM ALLEN
WRENCH
SILICONE
GASKET
2
NOTE: Use the universal crossbar (provided) when
mounting the fixture to an octagon box. There will be a
1/16" gap between the fixture and the wall when the
universal crossbar is used. Caulking around the fixture will
be needed when the universal crossbar is used in outdoor
applications.
1: Back out (do not remove) the two M5 set screws on bottom
of the fixture with the provided 2.5mm Allen wrench.
2: Slide the backplate along with the silicone gasket away from
the fixture, do not remove them.
B
LED DRIVER
4
ELECTRICAL BOX
4: Connect the brown (HOT) LED driver wire to the hot power
wire with a wire nut.
5: Place the LED driver and wire connections inside the
electrical box.
3
WIRE NUT
5
1
C
LED DRIVER
CONNECTOR
ELECTRICAL
BOX HOLE
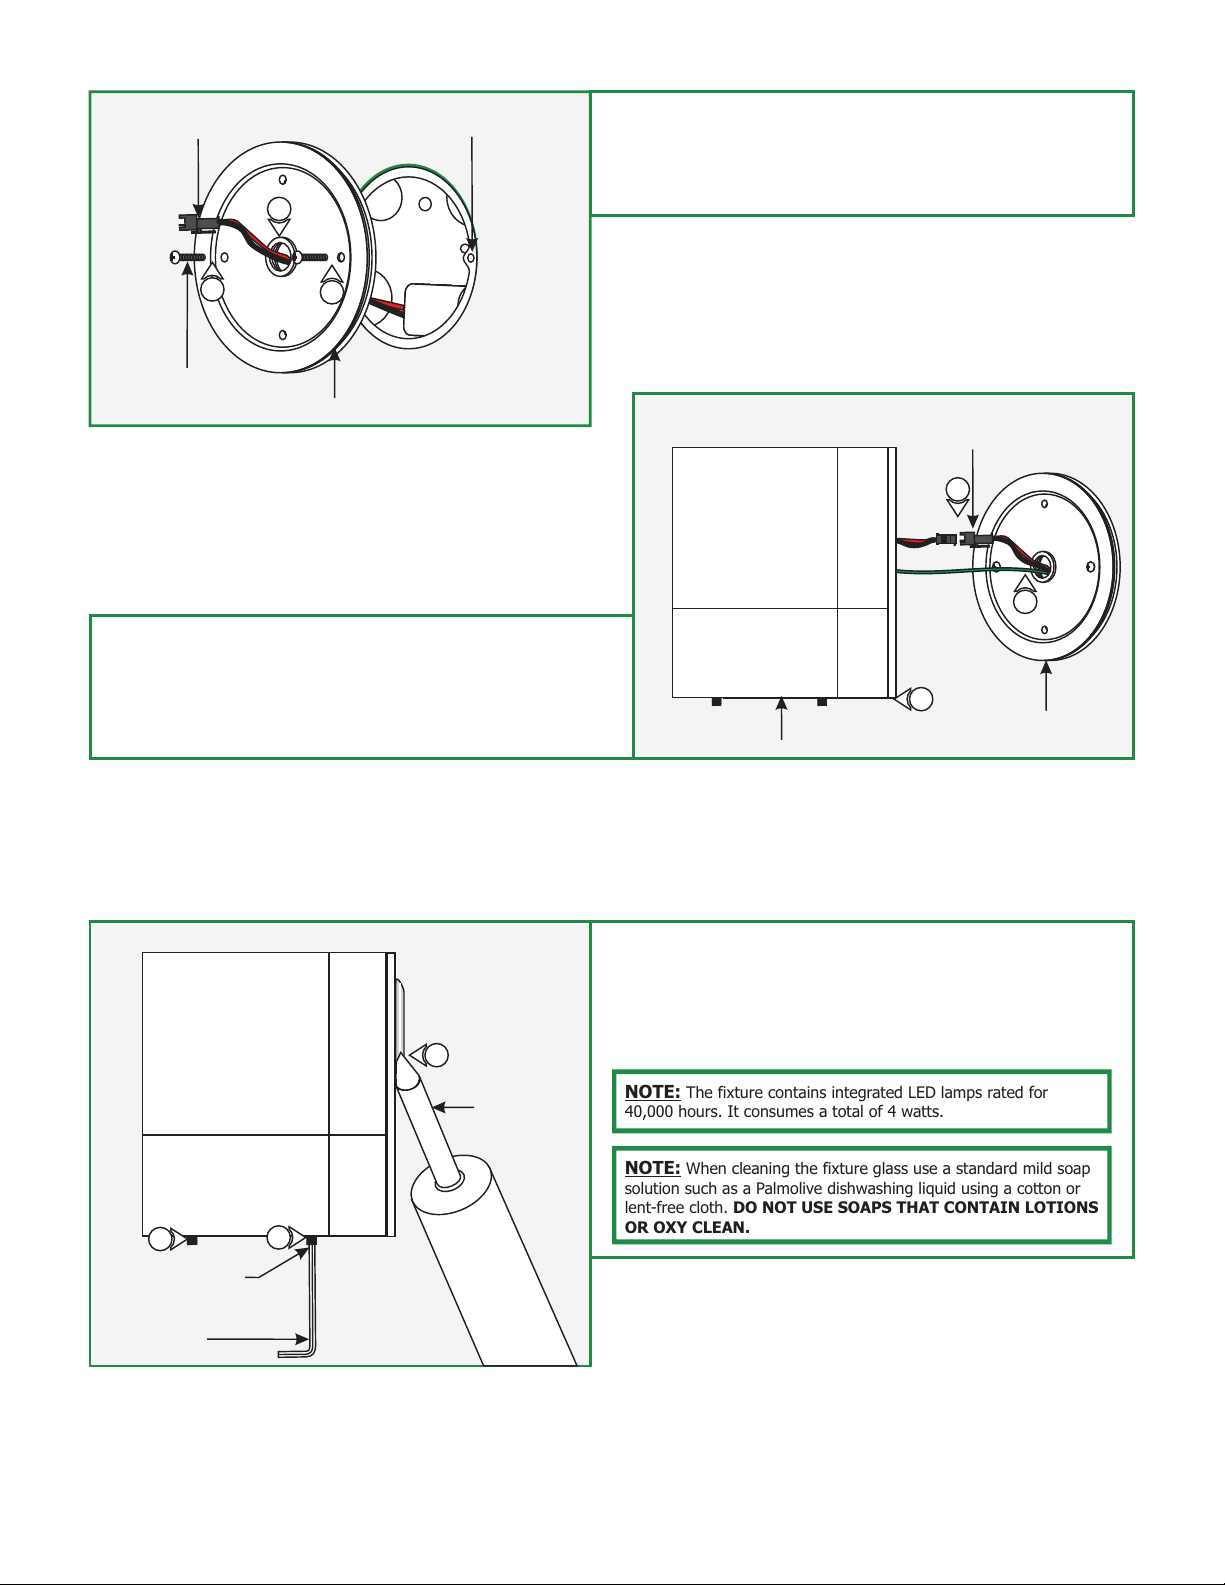
6: Feed the LED driver connector into the back of the gasket
and backplate.
7: Mount the backplate to the electrical box holes with the two
6
#8-32 screws provided.
7
#8-32 SCREW
7
BACKPLATE
8: While holding the fixture, snap the fixture connector to the
LED driver connector making sure the connectors are locked
in place.
9: Make sure the backplate is grounded in accordance with local
electrical codes.
D
LED DRIVER
CONNECTOR
8
9
9
BACKPLATE
FIXTURE
E
10
M5 SET SCREW
2.5MM ALLEN
WRENCH
10
11
WATER PROOF
SEALANT
10: Place the fixture completely onto the backplate. Tighten the
two M5 set screws on the bottom of the fixture
with the 2.5mm Allen wrench.
11: For Outdoor Installation: Caulk around the fixture
canopy with a water proof sealant.
NOTE: The fixture contains integrated LED lamps rated for
40,000 hours. It consumes a total of 4 watts.
NOTE: When cleaning the fixture glass use a standard mild soap
solution such as a Palmolive dishwashing liquid using a cotton or
lent-free cloth. DO NOT USE SOAPS THAT CONTAIN LOTIONS
OR OXY CLEAN.
2
 Loading...