

Page 1
1718 W. Fullerton Ave
Chicago, IL 60614
Tel: 773-770-1195
Fax: 773-935-5613
www.edgelighting.com
© 2009 Edge Lighting. All Rights Reserved.
info@edgelighting.com
Installation Instructions for Taos Round
IMPORTANT INFORMATION
- This product is ETL listed for indoor and outdoor locations.
- RISK OF FIRE:
the ground for wet locations.
- This product is for wall mount applications only.
- This product can mount to either a 4" square electrical box
with round plaster ring or an octagon electrical box.
- This product is not dimmable.
SAVE THESE INSTRUCTIONS!
This product must be installed 4 ft above
TAOS-W-RD-LED-_
904-TAOS-W-RD-LED-06
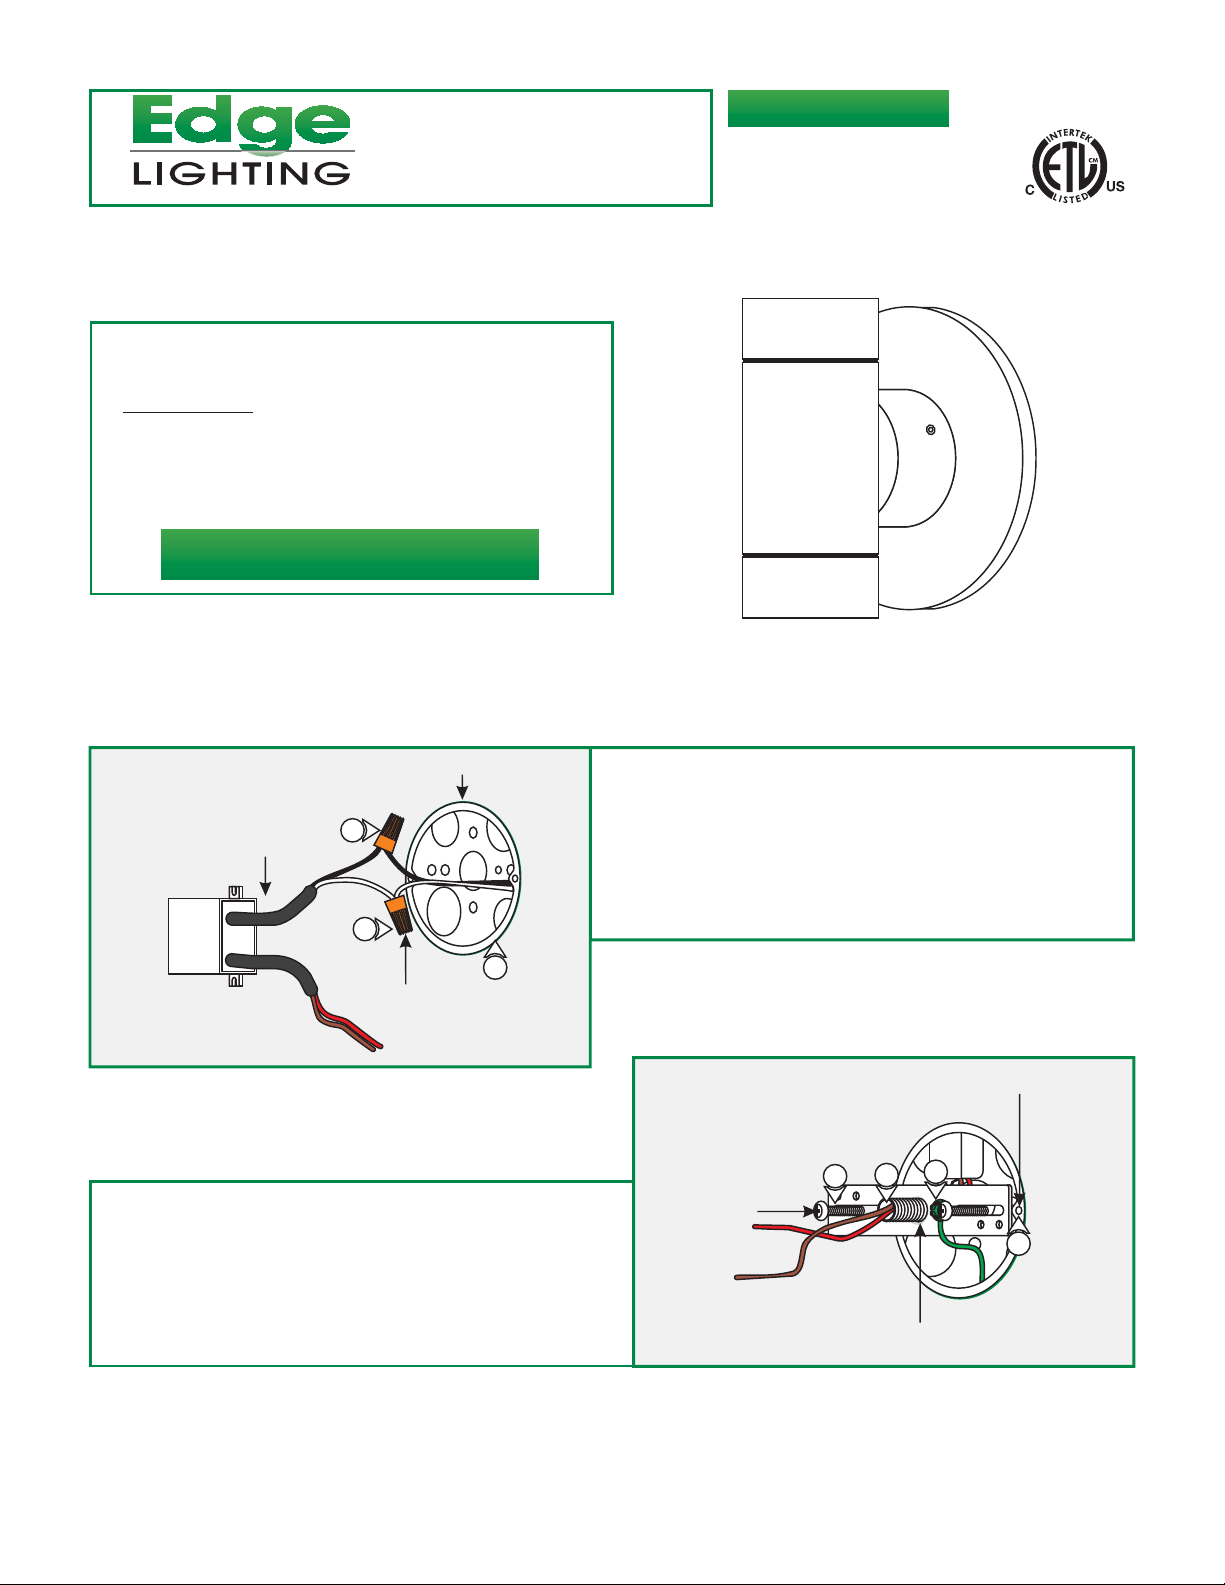
Install the Fixture
A
LED DRIVER
4: Mount the crossbar assembly to the electrical box holes with
the provided #8-32 screws.
5: Feed the brown and red LED driver wires through the
crossbar assembly center hole.
ELECTRICAL BOX
2
1
3
WIRE NUT
1: Connect the white (NEUTRAL) LED driver wire to the neutral
power wire with a wire nut.
2: Connect the black (HOT) LED driver wire to the hot power
wire with a wire nut.
3: Place the LED driver and wire nut connections inside the
electrical box.
B
4
#8-32 SCREW
ELECTRICAL BOX HOLE
6
5
6
6: Make sure the crossbar assembly is grounded in accordance
with local electrical codes.
CROSSBAR ASSEMBLY
CENTER HOLE
1
Page 2
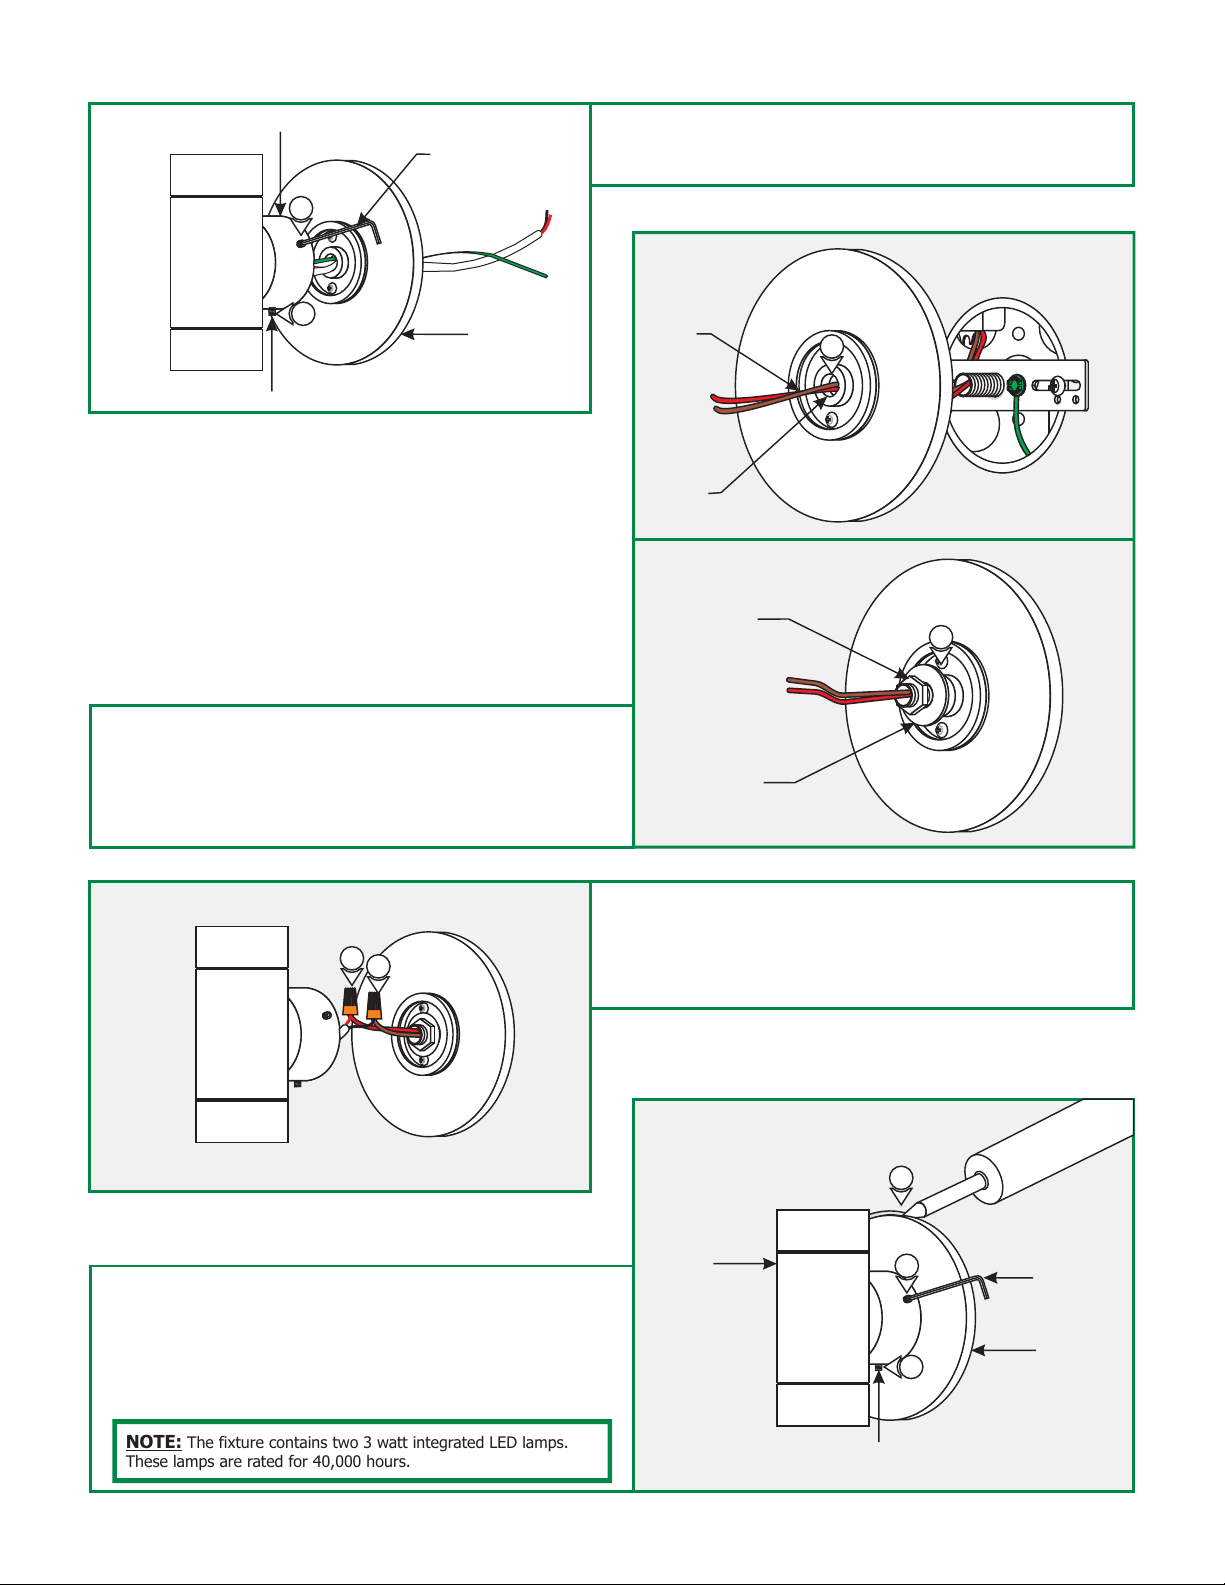
C
FIXTURE BODY
7
2MM ALLEN WRENCH
7: Loosen the two M4 set screws on the fixture body (Do
Not Remove) with the provided 2mm Allen wrench and
carefully pull the canopy off of the fixture body.
D
7
CANOPY
M4 SET SCREW
8: Feed the LED brown and red driver wires through the canopy
center hole, washer, and nut provided.
9: Slide the canopy back onto the crossbar assembly nipple
(make sure the gasket is in place) and secure the canopy to
the crossbar assembly by tightening the nut.
LED DRIVER
WIRE
CANOPY
CENTER HOLE
WASHER
8
NUT
9
E
10
11
12: Place all wires and wire nut connections inside the fixture
body. Slide the fixture body completely onto the canopy and
tighten the two M4 set screws with the 2mm Allen wrench.
13: For installation in wet location, caulk around the fixture
canopy with waterproof construction sealant.
NOTE: The fixture contains two 3 watt integrated LED lamps.
These lamps are rated for 40,000 hours.
10: Connect the red fixture wire to the red LED driver wire (+)
with a wire nut.
11: Connect the black fixture wire to the brown LED driver wire
(-) with a wire nut.
F
13
FIXTURE
BODY
M4 SET SCREW
12
12
2MM ALLEN
WRENCH
CANOPY
2
 Loading...