

Page 1
© 2012 Edge Lighting. All Rights Reserved.
1718 W. Fullerton Ave
Chicago, IL 60614
Tel: 773-770-1195
Fax: 773-935-5613
www.edgelighting.com
info@edgelighting.com
DOT-RD-1W-30D-30K_
DOT-RD-1W-90D-30K_
DOT-SQ-1W-30D-30K_
904-DOT-02
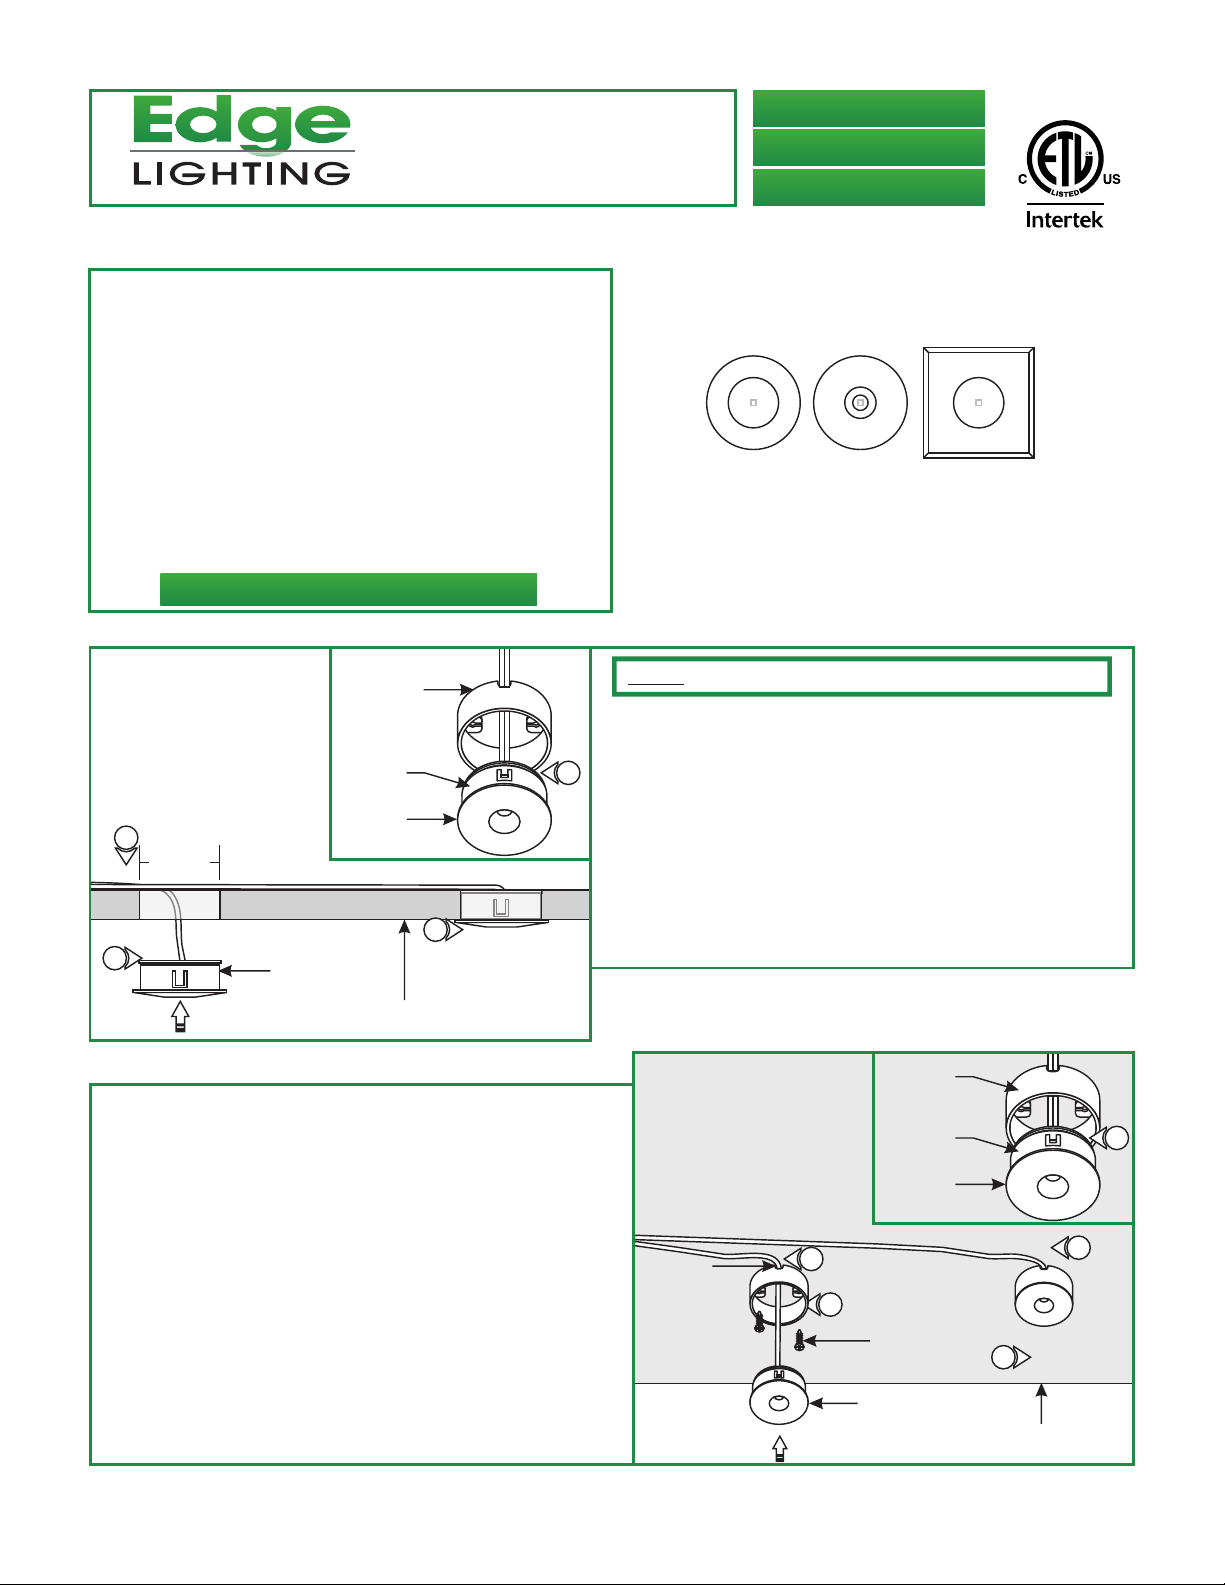
Installation Instructions for DOT LED Round & Square
IMPORTANT INFORMATION
- This product is type IC and can be installed as recessed
(access above the installed location is required)
mount
.
or surface
- It is recommended to use the HUB-4P or HUB-8P to power
the Dot Lights.
- This product should be used with a 12VAC TEB-60L-12
power supply when it is to be dimmed with a low-voltage
electronic dimmer or with a 12VDC TEB-60L-12DC power
supply.
- This installation instruction shows typical installation.
- This product is suitable for damp locations and is
inherently protected.
SAVE THESE INSTRUCTIONS!
Recessed Mount Installation
A
MOUNTING
RING
SPRING
CLIP
1
NOTE: Omit the steps below if surface mounting the Dot Lights.
1: Remove the mounting ring and discard it.
2: Mark the location where the Dot LED light is going to be
recessed.
3028534
3
1.14"
(2.9cm)
4
DOT LED
DOT LED
5
SURFACE
1: Remove the mounting ring.
2: Use the mounting ring as a template to mark the screw
location where the Dot LED light is going to be installed.
3: Use a 1/16" drill bit to drill pilot holes on marked locations.
4: Feed the Dot LED wires through the mounting ring. Hold
the cord against the notch on the mounting ring while
installing the mounting ring to the pilot holes with the
provided two Phillips screws.
5: Pull the cord through the notch on the mounting clip and
snap the Dot LED light into the mounting ring.
6: Repeat the steps 1 through 5 for the remaining Dots and
then follow the "Power the Dot Lights" steps.
3: Drill out the marked location with a 1-1/8" circular saw.
4: Feed the Dot LED light wires through the cut out hole and
snap the Dot LED light into the hole.
5: Repeat the steps 1 through 4 for the remaining Dots and
then follow the "Power the Dot LED" steps.
Surface Mount Installation
B
NOTCH
4
4
MOUNTING
RING
DOT LED
PHILLIPS
SCREW
DOT LED
SPRING
CLIP
5
6
SURFACE
1
1
Page 2
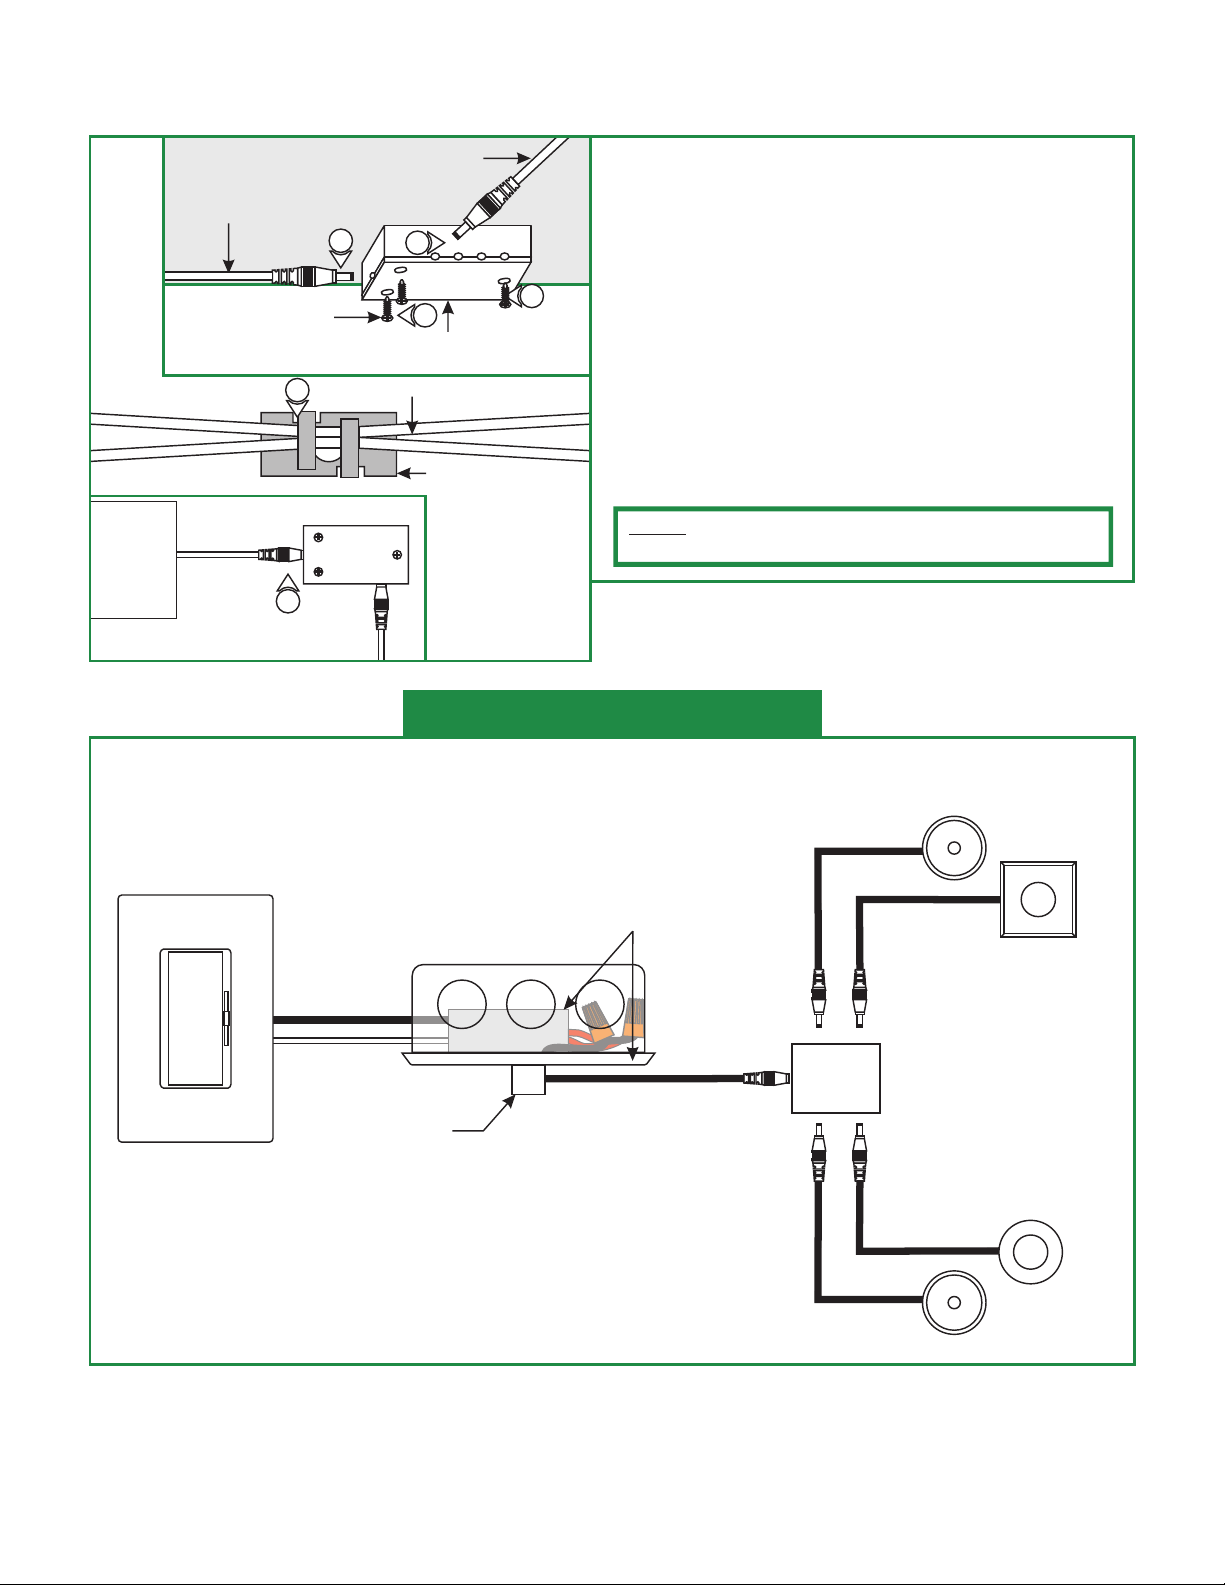
Power the Dot Lights
C
POWER
SUPPLY
AC POWER CORD
4
PHILLIPS
SCREW
6
7
DOT LED AC CORD
5
3
HUB
CORD
CLIP
HUB
TYPICAL WIRING DIAGRAM
1: Mark the location where the hub is going to be installed.
2: Use a 1/16" drill bit to drill pilot holes on marked locations.
3: Mount the hub to the pilot holes with the three Phillips
screws provided.
3
4: Connect the AC Power cord into the single port of the hub.
5: Connect each LED Dot AC cord into one port.
6: Use the provided clips to manage the Dots and Hub cords.
7: Connect the Hub AC power cord to the 12 volt power supply
wires. Refer to the instructions provided with the power
supply.
NOTE:
Each Dot contains a 1 watt LED consuming a total of 1
watt.
ELECTRONIC LOW VOLTAGE
DIMMER OR SWITCH
BLACK (HOT)
WHITE(NEUTRAL)
120VAC
RECTANGLE
CANOPY COVER
(3RE-WH)
RECTANGLE
ELECTRICAL BOX
TE-60L-12AC
TE-60L-12AC-3RE-WH
6FT
HUB-4P
3FT
12VAC
12VAC
DOT LED CABINET LIGHTING.
1W PER FIXTURE
EDGE # DOT-RD-1W-30D-30K-SA
DOT-RD-1W-90D-30K-SA
DOT-SQ-1W-30D-30K-SA
2
 Loading...