

904-CPL-12-01
© 2009 Edge Lighting. All Rights Reserved.
1718 W. Fullerton Ave
Chicago, IL 60614
Tel: 773-770-1195
Fax: 773-935-5613
www.edgelighting.com
info@edgelighting.com
CPL-12-_
Installation Instructions for Cody 12" Canopy Mount Picture Light
IMPORTANT INFORMATION
- This product is ETL listed for indoor location.
- This product is wall mounted only.
- This product can mount to either a 4" square electrical box
with round plaster ring or an octagon electrical box.
- This instruction shows a typical installation.
SAVE THESE INSTRUCTIONS!
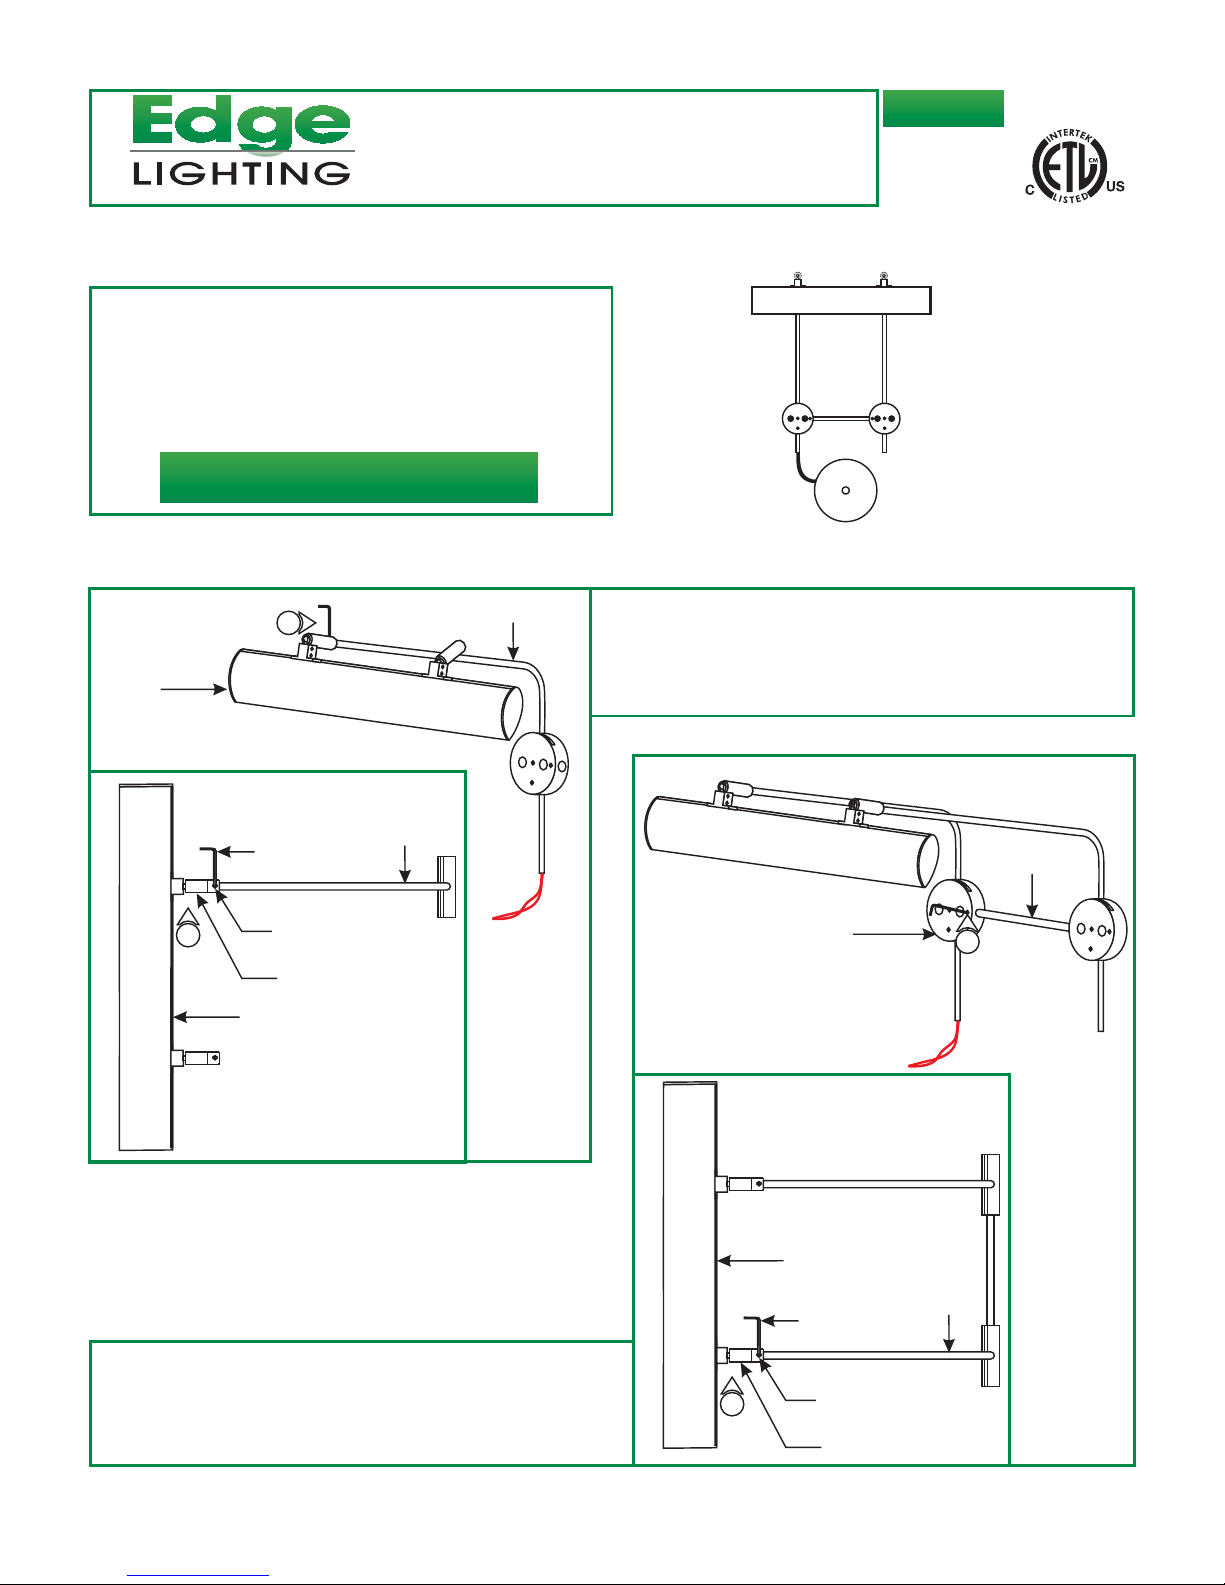
Install the Fixture
A
HEAD
1
ARM
1: Rotate the Cody's head perpendicular to the arm making
sure the arm is completely inserted into the head swivel
connector. Tighten the M3 set screw on the swivel connector
with the provided 1.5mm Allen wrench to secure the head in
place.
B
1.5MM ALLEN
WRENCH
1
M3 SET SCREW
SWIVEL
CONNECTOR
HEAD
ARM
MOUNTING BRACKET
JOINING ARM
2
2: Insert the loose arm assembly (provided in the box) into the
other swivel connector, insert the joining arm into the
mounting bracket of the first arm. Tighten the M3 set screw
on the swivel connector with the
and mounting bracket
1.5mm Allen wrench.
HEAD
1.5MM ALLEN
WRENCH
2
M3 SET SCREW
SWIVEL
CONNECTOR
ARM
1
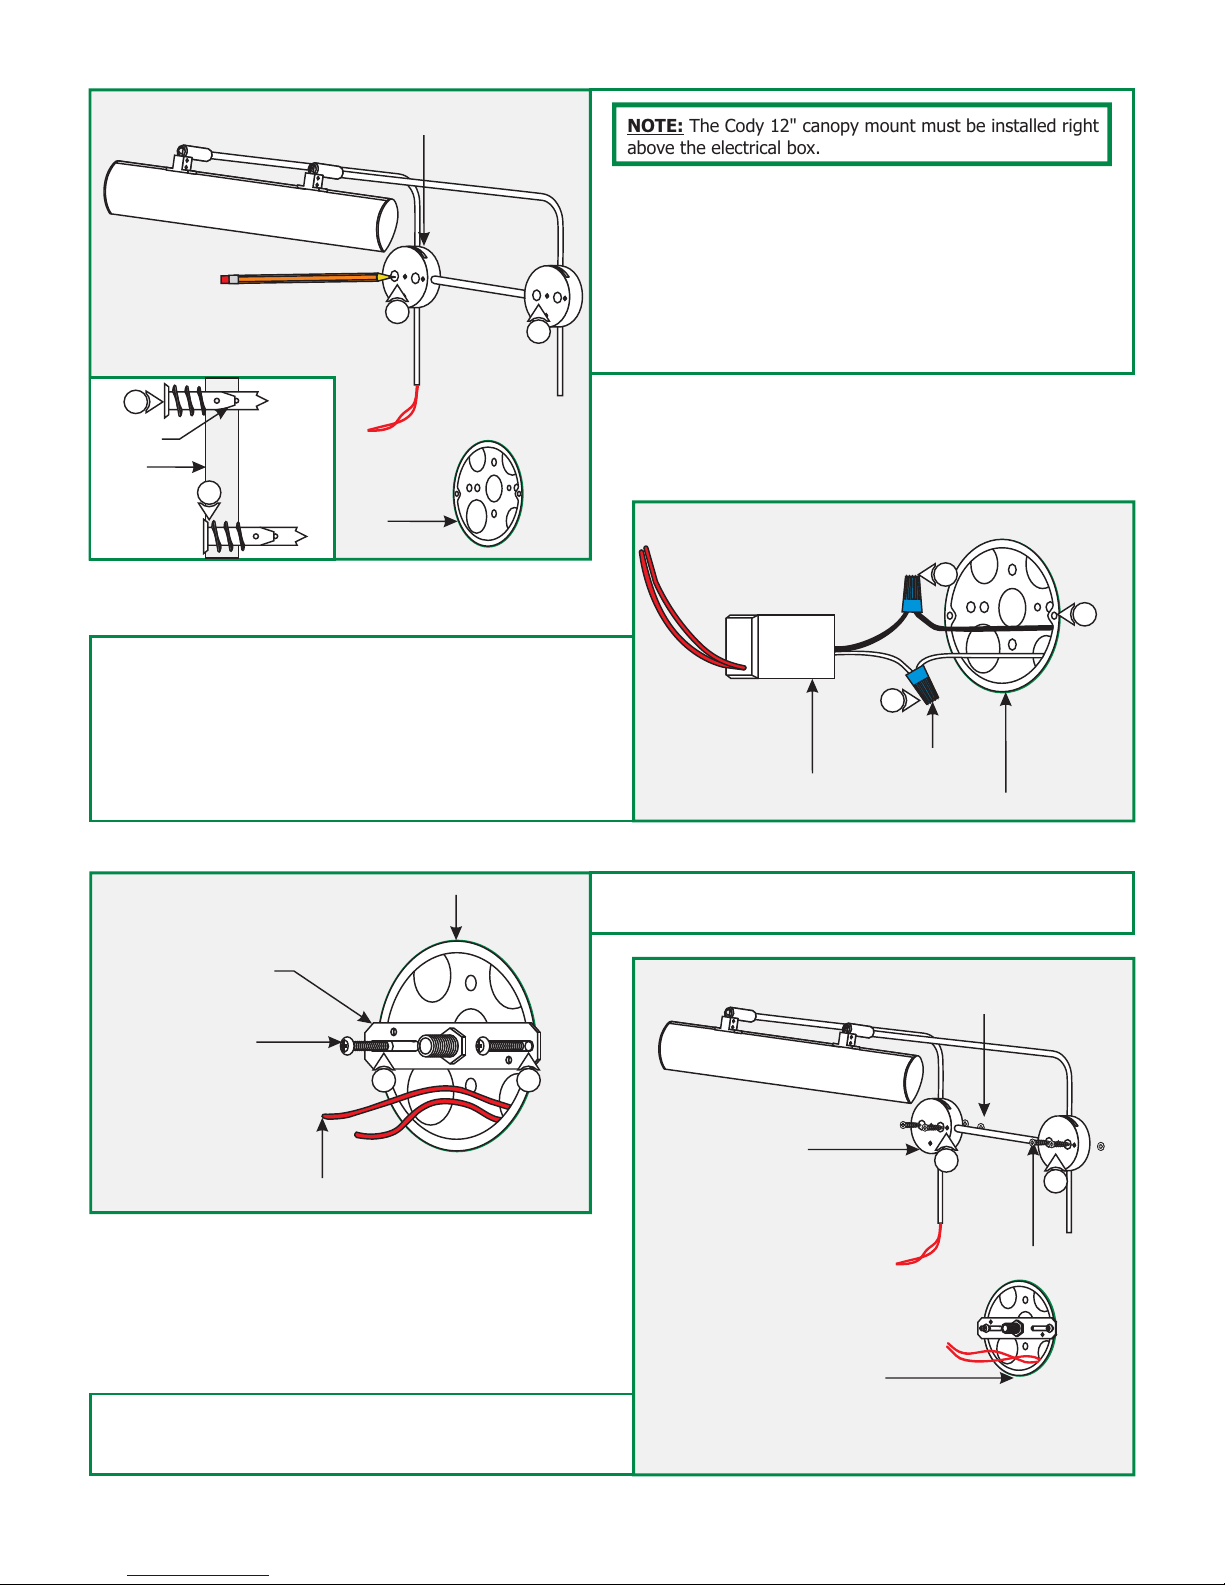
C
4
ANCHOR
WALL
5
6: Connect the white LED power supply wire to the neutral
power wire with a wire nut.
7: Connect the black LED power supply wire to the hot power
wire with a wire nut.
8: Place the LED power supply and all wire connections inside
the electrical box.
MOUNTING BRACKET
3
3
ELECTRICAL
BOX
NOTE: The Cody 12" canopy mount must be installed right
above the electrical box.
3: Hold the two mounting brackets against the wall above the
electrical box. Using a level, align the mounting brackets
and mark the four bracket holes on the wall.
4: Tap the anchors onto the marked points into the wall up to
the threaded portion with a hammer.
5: Screw the threaded portion of the anchors in with the a
Phillips screwdriver.
D
7
8
6
WIRE NUT
LED POWER SUPPLY
ELECTRICAL BOX
E
CROSSBAR
ASSEMBLY
#8-32 SCREW
POWER WIRE
10: Line up the mounting bracket holes with the anchors and
secure the fixture to the anchors with the four #8 screws
provided.
ELECTRICAL BOX
9
9
9: Mount the crossbar assembly to the electrical box holes with
the provided #8-32 screws.
F
ANCHOR
MOUNTING BRACKET
ELECTRICAL BOX
10
10
#8 SCREW
2

G
2MM ALLEN WRENCH
ARM
11: To adjust the height, loosen the four M4 set screw on
the mounting brackets with the provided 2mm Allen
wrench. Adjust the Cody to the desired height by sliding it
up or down. Tighten the four M4 set screws with the 2mm
Allen wrench.
M4 SET SCREW
MOUNTING BRACKET
12: Connect each low voltage LED power supply wire (red
wire) to one fixture wire with a wire nut.
13: Place the excess wires and wire nuts inside the electrical
box.
14: Line up the canopy cut out edge with the fixture wires.
Place the canopy onto the electrical box and tighten the
thumb nut to the crossbar assembly nipple.
I
MOUNTING BRACKET SLOT
11
11
H
THUMB
NUT
15: Hang the frame cable into the two mounting bracket slots.
CUTOUT
14
13
12
12
15
FRAME CABLE
16: Rotate the fixture head to properly wash the picture with
light.
NOTE: The Cody 12" contains 12 watt integrated LED lamps.
These lamps are rated for 50,000 hours.
15
J
FIXTURE HEAD
PICTURE
16
3
 Loading...