

Edge Lighting Alice Mirror LED User Manual
1718 W. Fullerton Ave
Chicago, IL 60614
Tel: 773-770-1195
Fax: 773-935-5613
www.edgelighting.com
© 2014 Edge Lighting. All Rights Reserved.
info@edgelighting.com
Installation Instructions for Alice LED
IMPORTANT INFORMATION
- This product is wall mounted only.
- Supply power to mirror in accordance with local electrical
codes.
- This instruction shows a typical installation.
- This product is dimmable with ELV dimmers.
- Ensure that power to the junction box is turned OFF
before beginning any electrical work.
SAVE THESE INSTRUCTIONS!
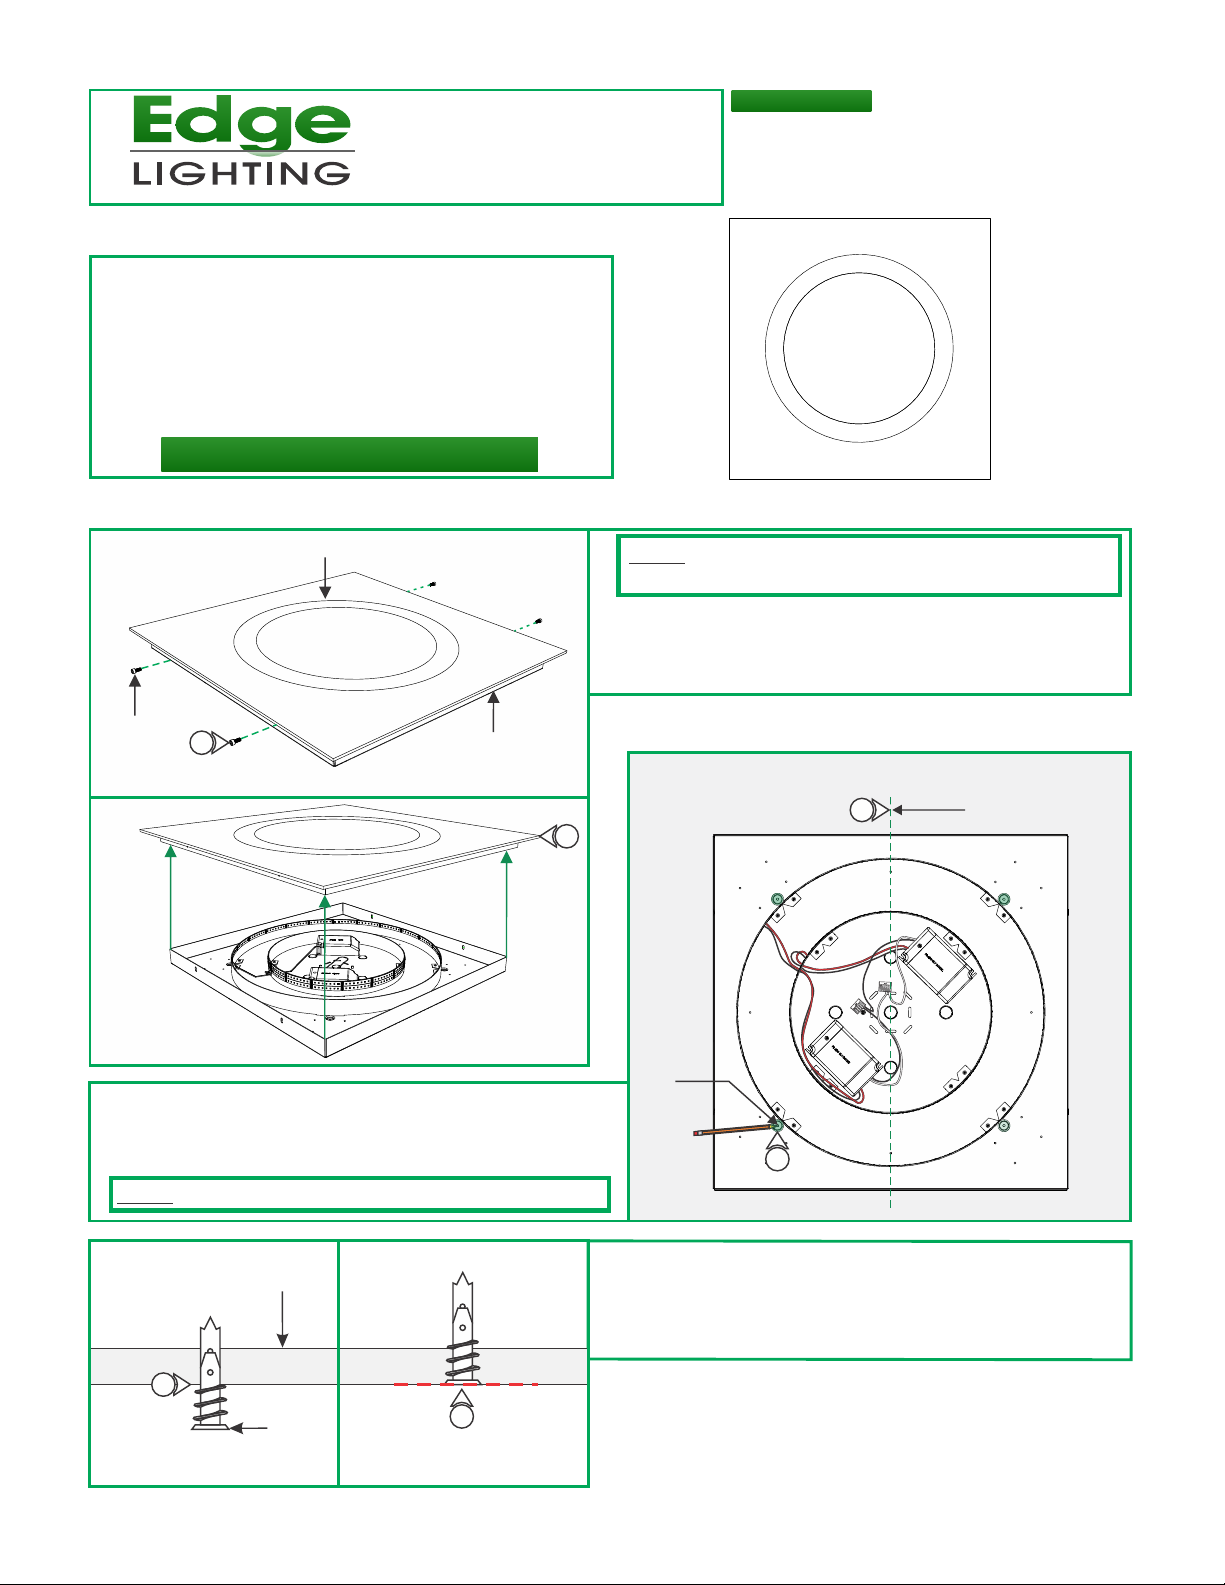
Install the Mounting Plate
ALICE-28-LED
904-ALICE-28-LED-02
A
M6 SCREW
1
3: Align the mounting plate hole with the power line conduit or
junction box. Use the mounting plate as a template to
mark four mounting holes (highlighted in GREEN) onto the
wall.
NOTE: Make sure that the mounting plate is leveled horizontally.
MIRROR
MOUNTING
PLATE
2
NOTE: It is recommended that more than one person install this
product.
1: Loosen and remove the four M6 screws on the top and
bottom of the mounting plate with the 3mm Allen wrench.
2: Pull the mounting plate completely out of the mirror.
B
3
MOUNTING
HOLE
3
ALIGN CENTER WITH
JUNCTION BOX
H
4: Tap the anchors onto the marked points up to the threaded
WALL
4
ANCHOR
BE FLUSH TO WALL
5
ANCHOR MUST
portion with a hammer.
5: Screw in the threaded portion of the anchors with a Phillips
screwdriver.
1
D
MOUNTING
PLATE
WALL
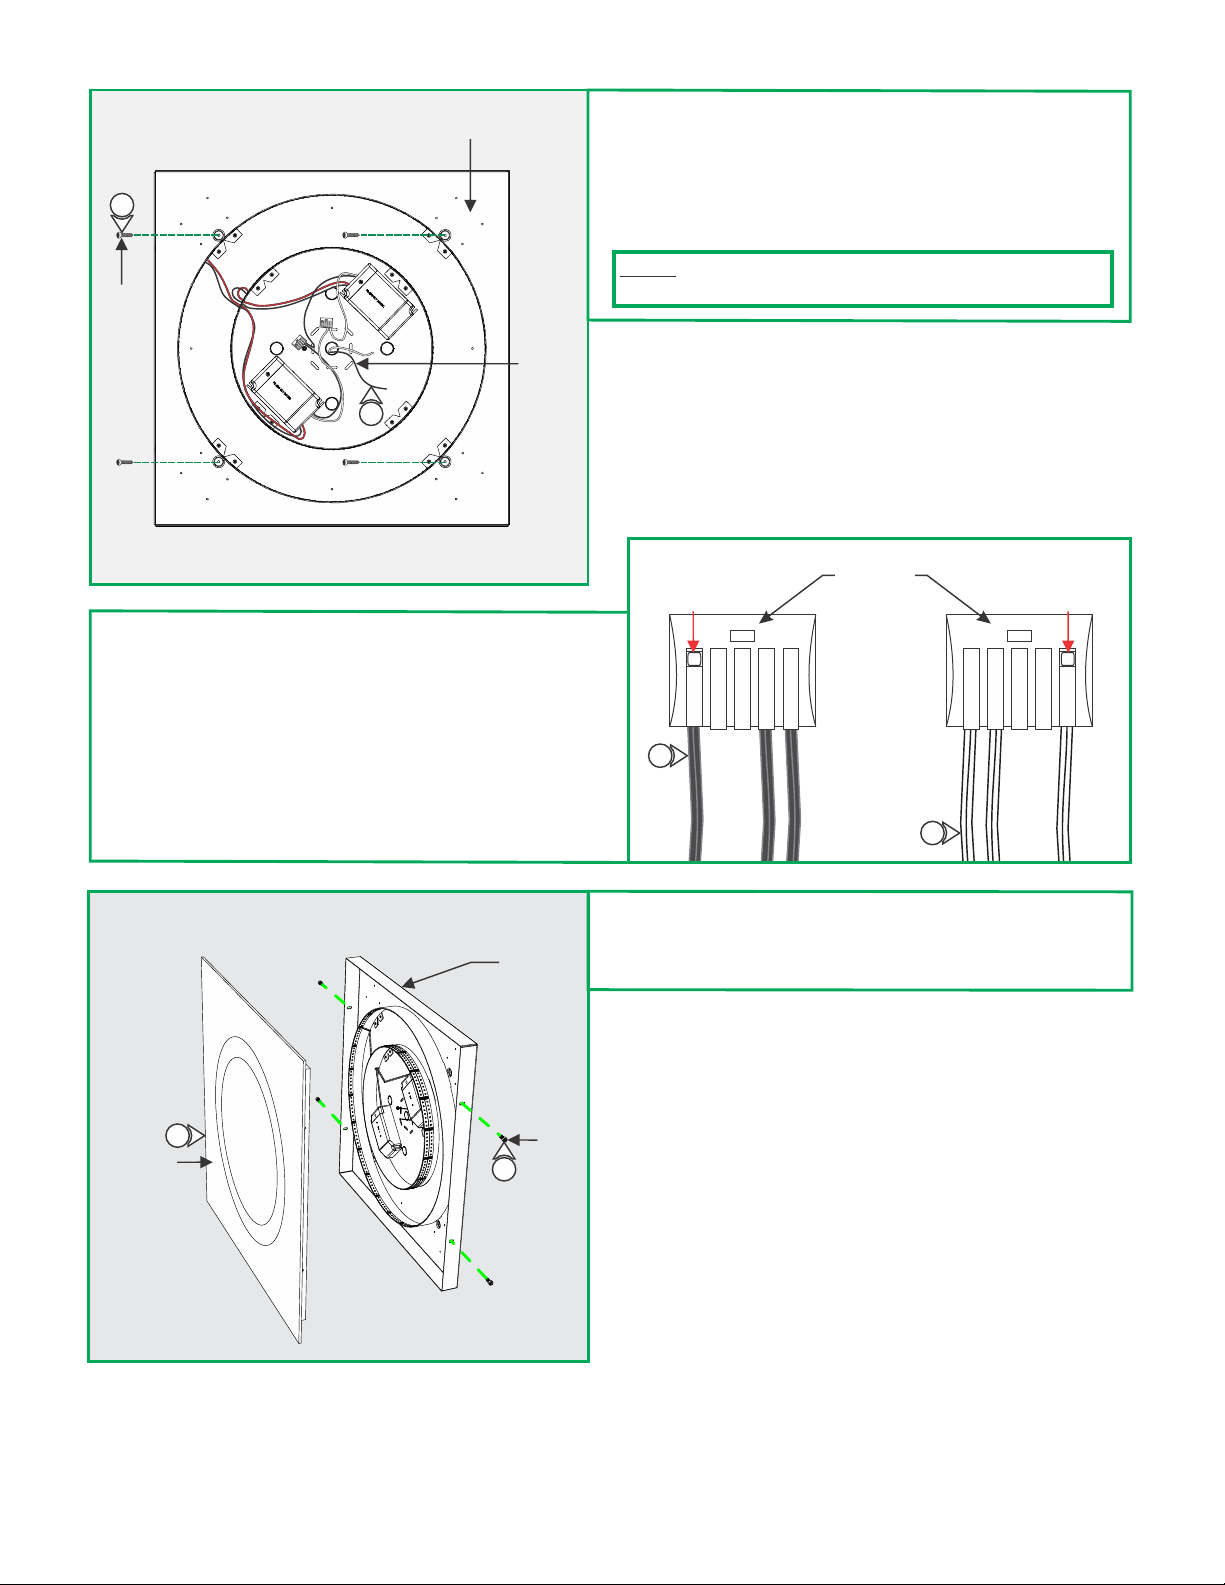
6: Feed the 120 VAC power wires through the mounting plate.
7: Line up the mounting plate holes with the anchors and
secure it with the four #8-32 screws provided.
7
#8-32
SCREW
(4X)
6
120 VAC
POWER
WIRES
9: On the Wago connector that connects the 120V hot
transformer wires, pull up an available lock lever and insert
the 120VAC hot power wire. Press the lock lever down to
connect and lock into place.
10: On the Wago connector that connects the 120V neutral
transformer wires, pull up an available lock lever and insert
the 120VAC neutral power wire. Press the lock lever down
to connect and lock into place.
11: Turn ON power to the fixture to test the LED strip.
8: Ensure the mounting plate is grounded in accordance with
local electrical codes.
NOTE: Contains integrated 24V LED lights consuming a total of 75
Watts.
E
120
VAC
HOT
WIRE
PUSH
DOWN
TO LOCK
9
WAGO
CONNECTORS
(2X)
PSU
HOT
WIRES
PSU
NEUTRAL
WIRES
10
PUSH
DOWN
TO LOCK
120
VAC
NEU
WIRE
F
MIRROR
12
MOUNTING
PLATE
M6
SCREW
13
12: Carefully place the mirror onto the mounting plate.
13: Secure the mirror to the mounting place by tightening four
M6 screws using the 3mm Allen wrench.
2
 Loading...