

Page 1
© 2009 Edge Lighting. All Rights Reserved.
1718 W. Fullerton Ave
Chicago, IL 60614
Tel: 773-770-1195
Fax: 773-935-5613
www.edgelighting.com
info@edgelighting.com
M2-24-_
M2-48-_
M2-96-_
904-M2-96-02
Installation Instructions for
Monorail 2 Circuit 24", 48", & 96"
IMPORTANT INFORMATION
- This product is ETL listed for indoor dry locations.
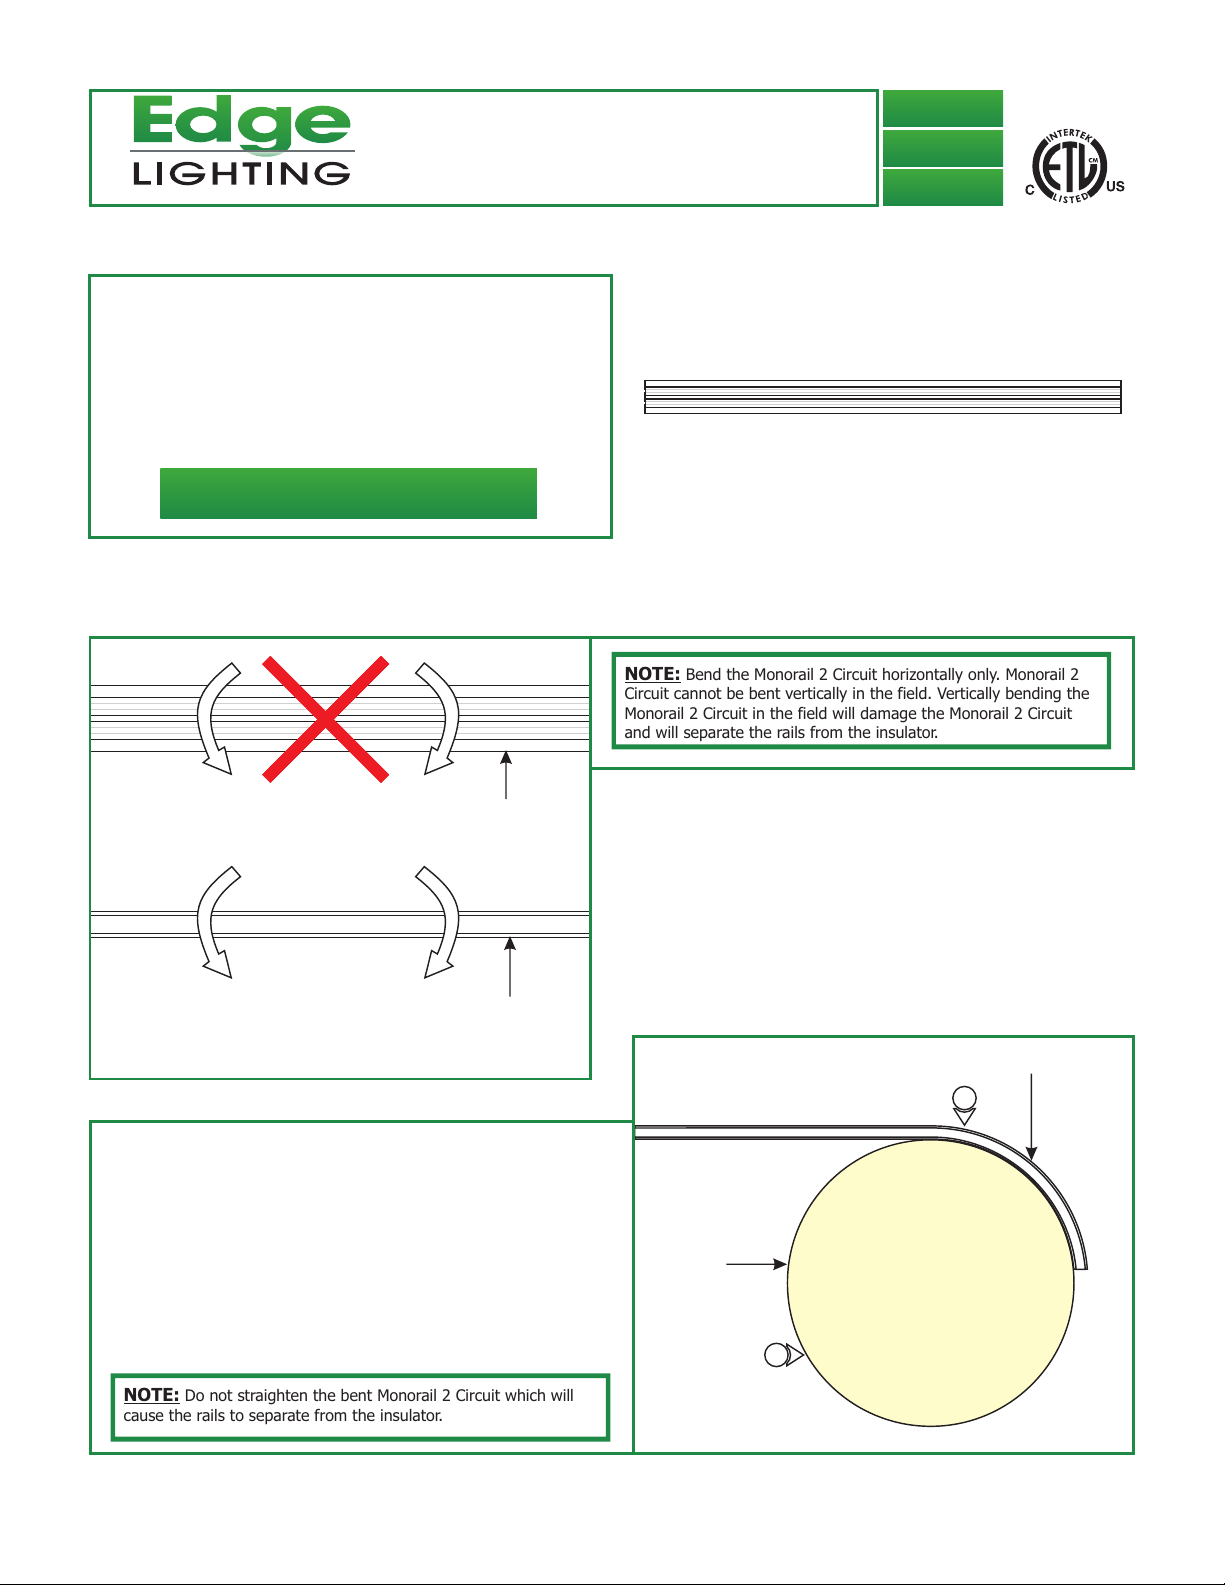
- Monorail 2 Circuit is bendable horizontally to a radius as
small as 12". The Monorail 2 Circuit cannot be bent
vertically in the field.
- The product is intended to be used with Edge Lighting
Monorail 2 Circuit systems only.
SAVE THESE INSTRUCTIONS!
Bend the Monorail 2 Circuit
A
VERTICAL BENDING
FRONT OF
THE MONORAIL
2 CIRCUIT
NOTE: Bend the Monorail 2 Circuit horizontally only. Monorail 2
Circuit cannot be bent vertically in the field. Vertically bending the
Monorail 2 Circuit in the field will damage the Monorail 2 Circuit
and will separate the rails from the insulator.
HORIZONTAL BENDING
1: Determine the radius of the curve or circle.
2: Draw the curve on plywood and cut out the pattern from the
plywood.
3: Secure the plywood in place.
4: Hold one edge of the Monorail 2 Circuit against the plywood.
Start bending the Monorail 2 Circuit against the plywood
until the desired curve or circle is achieved.
NOTE: Do not straighten the bent Monorail 2 Circuit which will
cause the rails to separate from the insulator.
TOP OF THE
MONORAIL
2 CIRCUIT
B
CIRCULAR
PLYWOOD
MONORAIL 2 CIRCUIT
4
1
1
Page 2
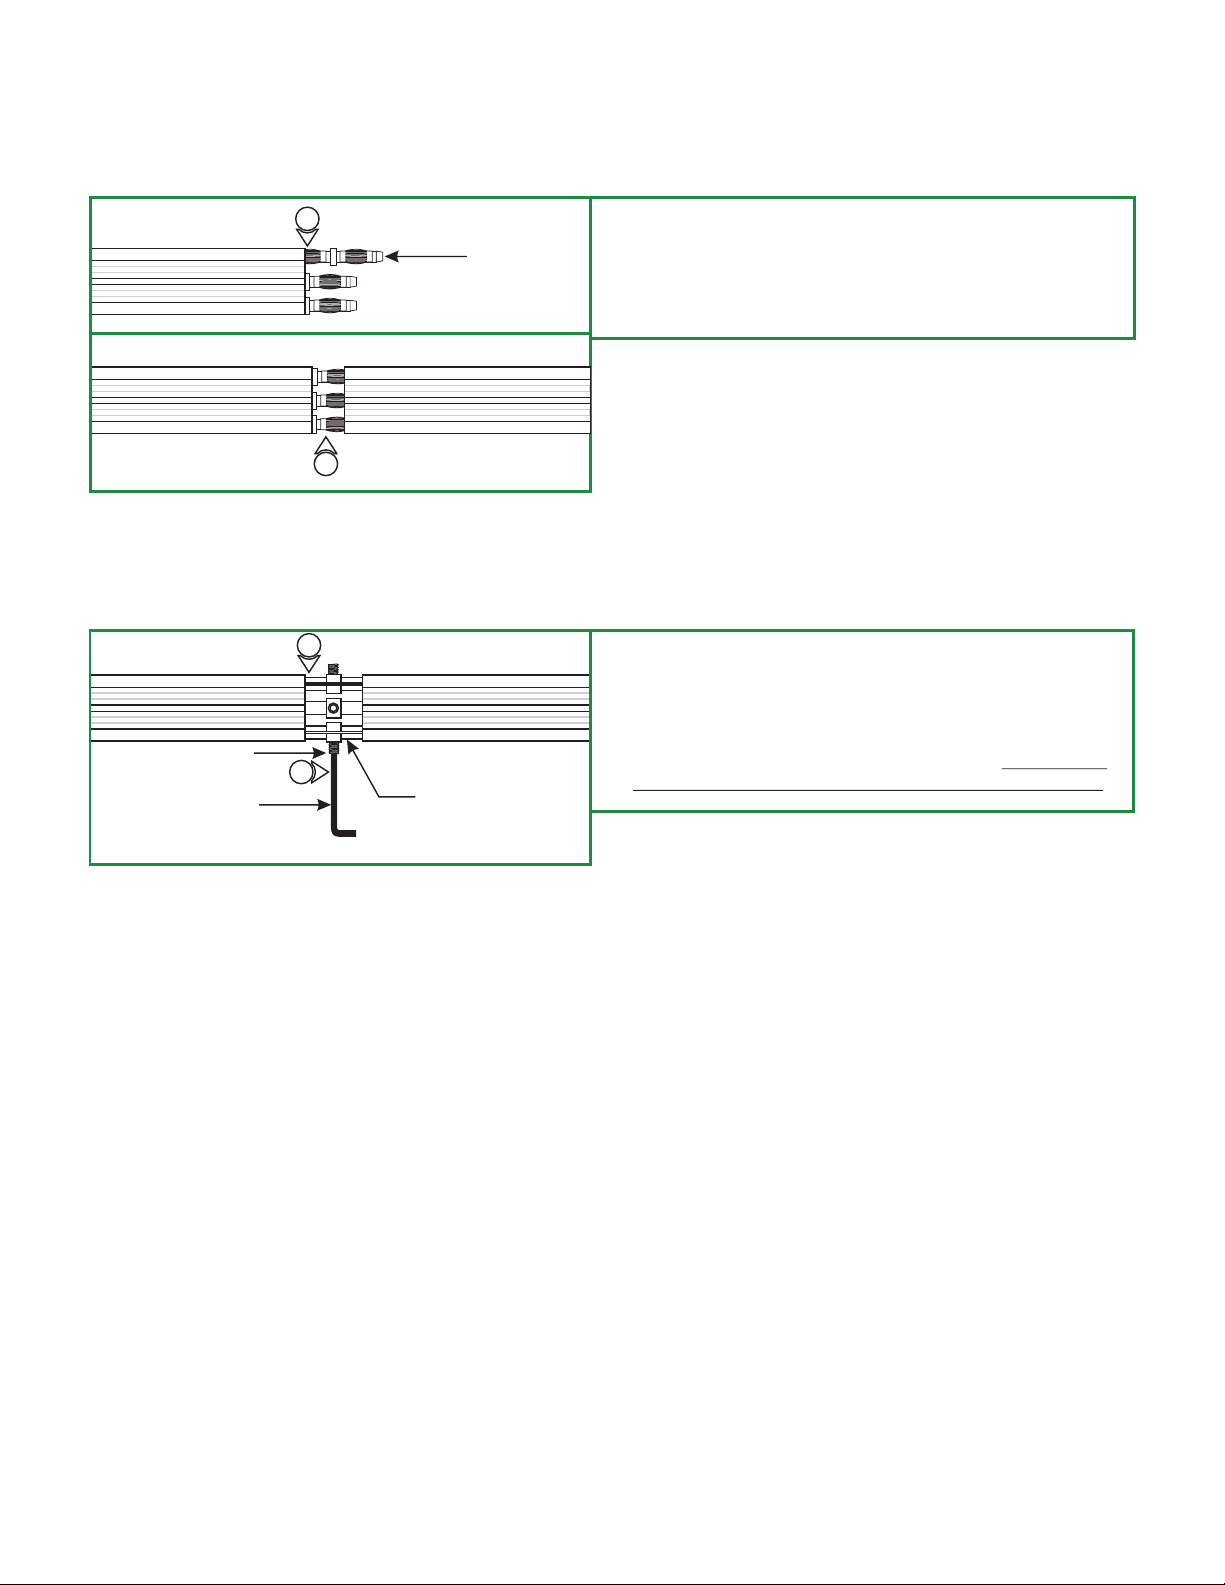
Joining Monorail 2 Circuit Sections
with Conductive Conductive Connectors
C
1
STRAIGHT
CONDUCTIVE
CONNECTOR
2
1: Push the straight conductive connectors completely into the
end of one Monorail 2 Circuit section.
2: Push the other Monorail 2 Circuit section entirely onto the
straight conductive connectors.
Joining Monorail 2 Circuit Sections
with Straight Isolating Connectors
D
#6-32 SET SCREW
1/16 ALLEN
WRENCH
1
2
STRAIGHT ISOLATING
CONNECTOR
1: Push the straight isolating connectors completely into one
Monorail 2 Circuit section end and push the other Monorail 2
Circuit section entirely onto the straight isolating connectors.
2: Tighten the #6-32 set screw on each of the isolating
connectors firmly with the 1/16 Allen wrench. Do not over
tighten the set screws as this may strip the threads.
2
 Loading...