

Page 1
Version: CF/SD/USB 80612
Page 2

1
Content Index
1. Introduction
1.1 Features……………………………………………………………………….p. 2
1.2 Specification………………………………………………………………..…p. 4
2. Function Overview
2.1 Synchronous & Asynchronous of Copy/Compare/Copy+Compare..……p. 5
2.2 Set Up Function
2.3 Utility Function………………………………………………………..…….. p. 11
2.4 Function List……………………………………………….…………..……..p. 12
3. Installation Guide
3.1 Hardware Installation Guide………………………………..…………….....p.13
3.2 Illustration……………………………………………………..………..………p.13
2.2.1 Copy Area—Quick Copy Mode (setup 6.2) ……..…...…….p.8
2.2.2 Asynchronous Hold time(setup 6.4) ………………..……....p. 8
2.2.3 Ignore Size (setup 6.5)………………………………....…… p. 9
Page 3
2
I. Introduction
FAT table
FAT table
1.1 Features
Not a PC system, no risk of virus infection. Instant power on and off.
Simple one touch copy, real time information shown on the LCD screen
Support Synchronous and Asynchronous copy/compare/erase
High speed copy up to 12MB per second, CF duplicator copy up to 30MB per second
Real time copy and compare technology to guarantee data copy success and complete
Superior embedded technology, the most cost effective product
What is the difference between SD/USB/CF duplicator and PC based duplicator:-
Multi-task processing and single job processing. Unlike a PC based duplicator,
which processes each job one by one, our SD/USB duplicator can work like a
work station which can process multiple jobs simultaneously. Each channel
works independently.
Efficiency. SD/USB/CF duplicator is specially designed for duplicating. It can
perform mass duplicating jobs for a long period of time.
No risk of virus. SD/USB/CF duplicator is an embedded system, it only copies
whatever is on the source. When the system is turned off, nothing will be left in
the system including any viruses. Totally no risk of virus infection
No mistake of copying the wrong files. There are so many files stored in a PC, it
is very likely that an operator could copy the incorrect file.
Instant system on and off. No need to wait for system boot up or shut down.
Easy and fast.
No limitation of card capacity or format.
.
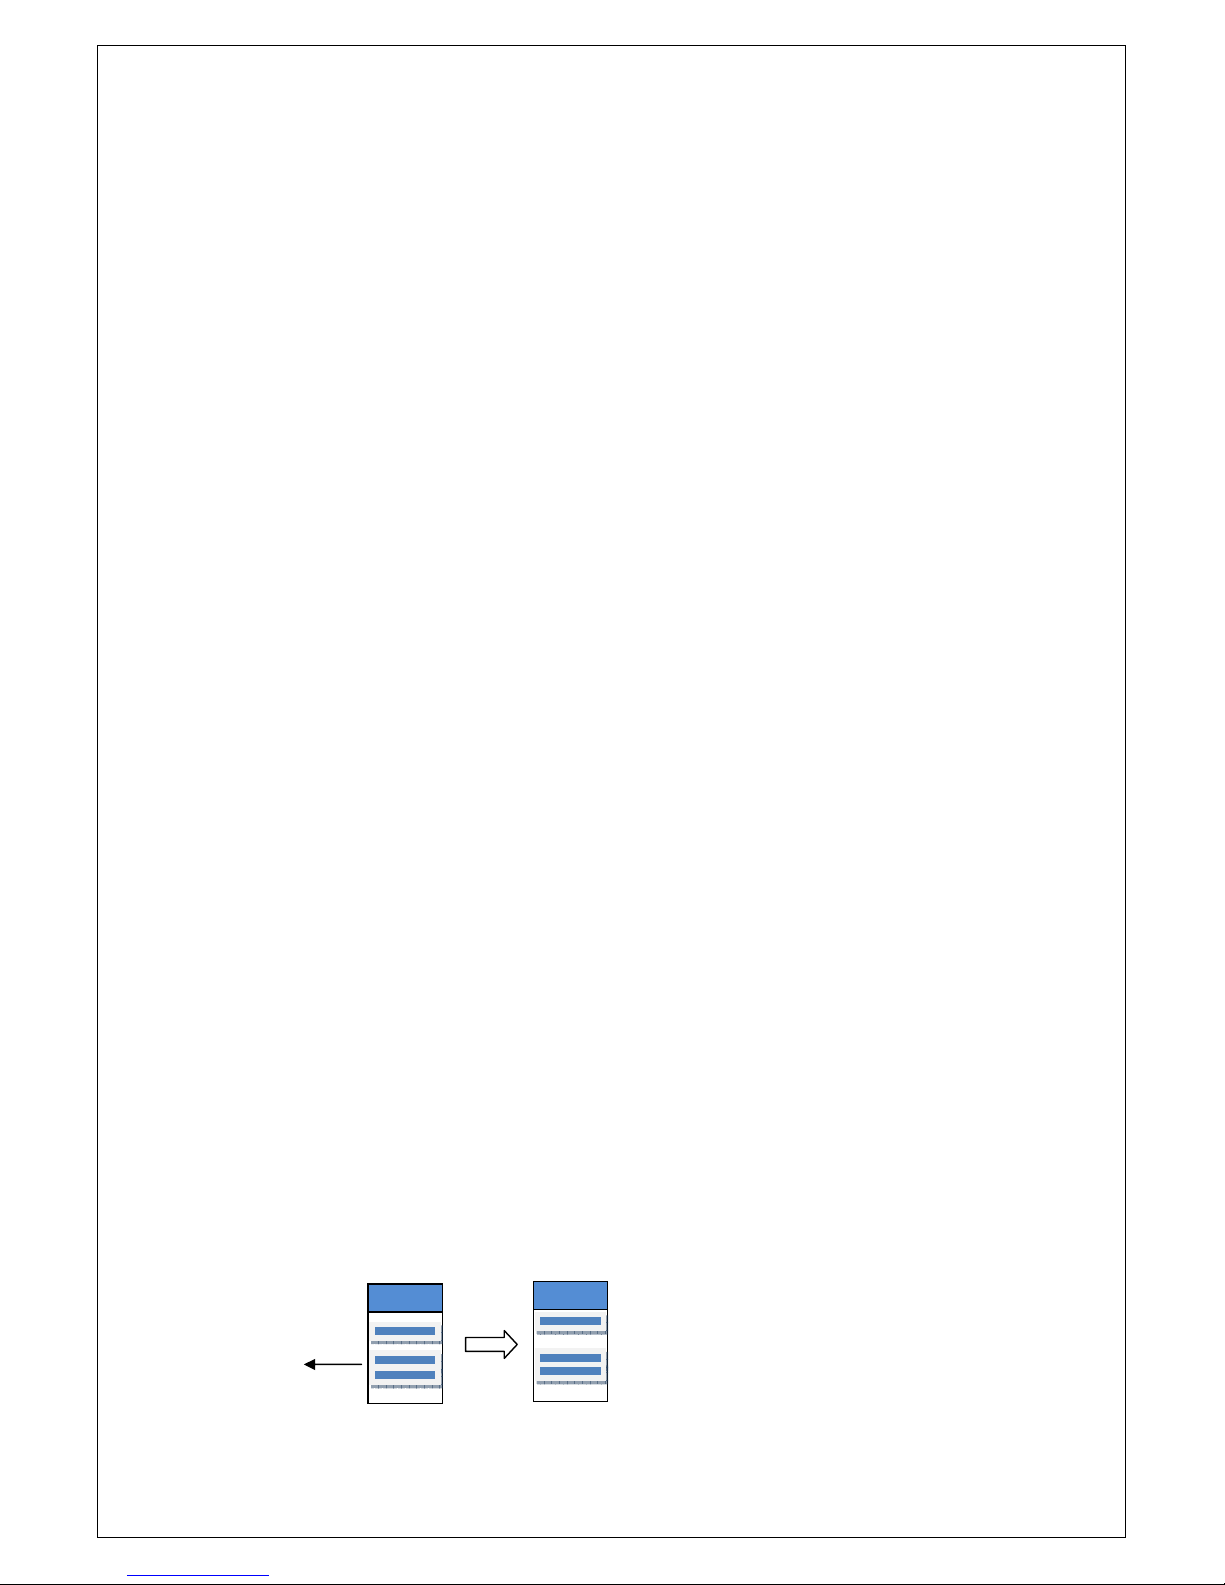
If the source card format’s file system is FAT16 or FAT32, the system will
①
automatically detect its content and copy the content data directly to the target
flash cards. This will help speed up the copy process, making it fast & efficient.
.
②
For example:
Source flash Target flash
FAT 16/32 data
For FAT16/32 file system, the
SD/USB duplicator will only copy the
content, no need to copy the whole
device
Page 4

3
.
If there is any non FAT16/32 file format such as NTFS, then you can copy
③
such data by turning off the copy area function in setup 6.2, the system will copy
whatever the source is to the target flash cards. *Please refer to Setup function 6.2
for Copy Area for details.
If you didn’t turn off the “Copy Area” function and you try to copy not FAT16/32 file
format data, then as soon as you start the COPY, the error (Red) LED will
illuminate. You can then press key to check each Flash Card’s status, there
will be an error message of “Not FAT format”.
Page 5
4
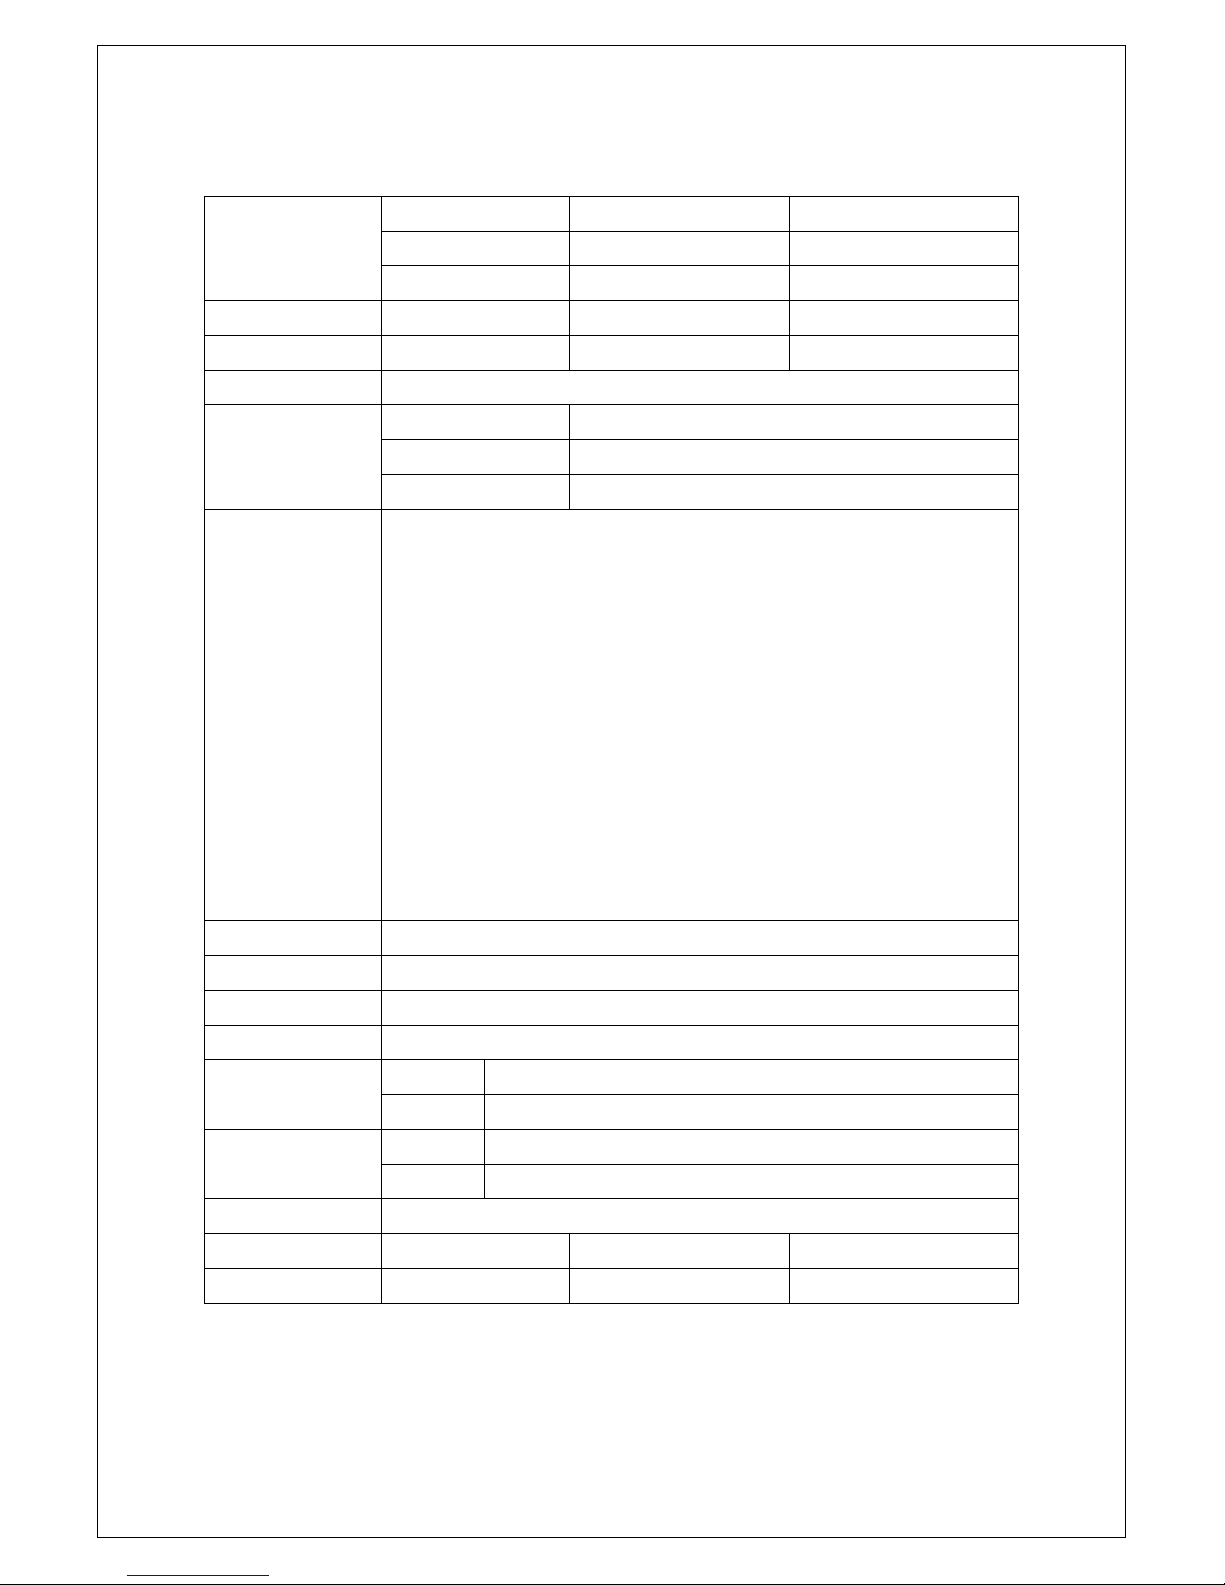
1.2 Model & Specification
SD703 SD707 SD711
Model
Target 1:3 1:7 1:11
Buffer Memory 64MB 256MB 256MB
Operation Stand Alone
Support Media
Features
UB703 UB707 UB711
CF707
SD Duplicator SD/Micro SD/MMC/RS-MMC/MMC Mobile/SDHC
USB Duplicator USB1.1, UBS2.0
CF Duplicator CompactFlash TM,
1. Independent and simultaneous operation at each slot channel.
Asynchronous copy technology. Automatic load data to buffer
2.
memory, each slot copy independently and continuously. No limit of
copy q'ty.
3. Up to 12MB per second bandwidth at each slot channel (CF can up to
30MB per second)
4.
Compatible with most common formats such as FAT16, FAT32.
5. Copy, Compare, Copy+Compare function for selection
6. Compare technology guaranteed data copy integrity
7. Auto FAT source analysis to enhance copy speed
8. Flash Firmware update
Display 2X16 Monochrome LCD display
Power Supply Maximum below 50W
Control Button 4 push buttons (Up, Down, OK, Esc)
LED 2 LED(Green/Red) on each slot
Humidity
Temperature
Safety CE, UL, ROHS
System Dimension
Weight 2.5 kg 4.5 kg 7.5 kg
Working 20%~80%
Storage 5%~95%
Working 00C~75oC
Storage -200C~850C
32*20*11.3 cm 29*19.2*17.2 cm 43.7*19.2*27.1 cm
Page 6

5
2. Function Overview
2.1
About Synchro & Asynchro Copy/Compare/Copy+Compare
This duplicator can auto detect and support two copy modes:
Synchronous
Asynchronous
When you plug in a source flash card and press the OK key of Copy or Compare function,
the system will then start to scan the source to check the content size of the source. If the
source content size is less than system’s buffer memory, then it will automatically start
asynchronous copying. If the source content size is larger than the system’s buffer
memory, it will detect this and show the total number of how many target flash cards are
ready for copy or it will auto start synchronous copying when target flash cards are fully
loaded.
What is Synchronous and Asynchronous copying:
Synchronous
have to plug in a source and have targets plugged in. Copy will start either when
you press the OK key or the system will automatically start copying when cards
slots are fully loaded.
means all flash cards have to copy simultaneously. You
Asynchronous
memory, after reading and comparing has finished it will then start copying
immediately as soon as there is any device flash card is plugged. You can copy
continuously by plugging in one after one. You can take out a flash card which
has finished copying, and continue to put another flash card in its place. Repeat
the process until you’ve completed your copying. You can turn off the
Asynchronous function and keep Synchronous copying mode no matter what
the content size is, please check setup function 6.6.
Notes: After SD/USB/CF dupe copy, the target flash cards data and format will same
as source flash card. Original data in target flash cards will be covered over i.e.
erased.
will firstly read the source data into the system’s buffer
Page 7

6
How to make Synchronous and Asynchronous Copying.
Synchronous Copying
–-> When source content size is larger than system buffer memory.
.
Plug in the source flash card. Select either copy/compare/copy+compare
①
function and then press OK.
USB(963M) 450M
0 ready
.
Plug in the target flash cards. The LCD will show the number of target flash
②
plugged in and ready for copying,
USB(963M) 450M
3 ready
.
When all flash cards are plugged in, press the OK key to start copying. Or when
③
all slots are plugged in the system will automatically start copying.
COPY 450M
15% 0:32 68M
Progressed time & %
Content size
Progressed size
Note: When copying is in process, the green LED’s will flash. When the copying
has finished the green LED’s will stop flashing but will remain illuminated. If an
error occurs the red LED will illuminate.
Page 8

7
Asynchronous Copy
-- Only when the source content size is less than the system buffer
memory.
.
Plug in the source flash and press OK key. The system will start to read the
①
source content into system’s buffer. It will then immediately start to copy once a
target flash card has been plugged in.
USB(58M)
Reading source data into system buffer
Reading….
Pass: 0 Working
Starts copying when targets are plugged in
Fail: 0 3
.
During copying each card slot’s green LED will flash, DON’T take out the card
②
while copying. When copying has finished the Green LED will stop flashing and
remain illuminated, then you can take out the card and put in another new flash
card. The q’ty of copy Pass/Fail and in “working” process will be displayed on
the LCD. The Red LED will only illuminate when there is a copying error.
.
You can repeatedly take out cards which have finished copying and plug in a
③
new flash card. The LCD will show accumulated q’ty of copied pass/fail cards
and the cards still in the copying process.
Copy finished number
The q’ty of flash card in process
Pass: 5 Working
Fail: 0 2
Note 1:
The buffer memory for each model is:
Model 1:3 1:7 1:11
Buffer 64MB 256MB 256MB
Note 2:
During Asynchronous copying, you can press key to check each
Flash Card’s copying status and progress.
When there is an error (Red LED on), you can also press key to check
each Flash Card’s status.
Page 9

8
2.2 SET UP Functions
Exit?
2.2.1 Copy Area—Quick Copy Mode (Setup 6.2)
ON—Only Data Area. When this function is ON, the system will automatically
analyse the source flash card’s file format. If the file format is FAT12/16/32 file
system which the duplicator recognises then the system will only copy the
content data instead of copying the whole flash card including the empty space.
For example a 2GB flash card which is FAT32 file format and has only 50 MB of
data inside, the system will only copy that specific 50MB of data. Which will only
take a few seconds to copy the source.
OFF—Whole Media (RAW card copy). If the Copy Area function was set to
OFF the system will copy the whole flash card, including the empty space and
format. This function is used when you have a flash source which has an
unknown file format and you don’t want the system to be confused by such a
format.
2.2.2 Asynchronous Hold time (Setup 6.4)
This is to set the time to exit asynchronous copying when you’ve temporarily finished
copying and you’ve pulled out all the devices but you haven’t exited the copying job.
This is to prevent you from mistakenly overwriting a source device when you’d like to
start a new source copy but you forgot to stop the previous asynchronous copying job.
The default setting is 30 seconds. When the system detects that all the flash cards
have been pulled and no new cards have been plugged in after 30 seconds the LCD
will display:
Wait too long
Press OK to exit this Asynchronous or press ESC to keep this status.
Page 10

9
FAT table
FAT table
2.2.3 Ignore Size (Setup 6.5)
The purpose of this function is to set the flash card capacity tolerance between the
source and target. The default setting is “Don’t Care” that means there is no limit of
tolerance between the source and target. If you require the source and target flash
cards to be limited to a certain capacity tolerance then you can set the % of the
tolerance.
A.
How to keep the Source and Target within a certain tolerance.
If the setting is 3%, this means the capacity between source and target devices allows
only 3% tolerance. You can increase the tolerance % depending on your requirements.
*For example if your source device has a capacity of 1919MB, that means the acceptable
target devices’ capacity will be limited to between 1976MB to 1861MB.
If the capacity difference between the source and target is larger than the tolerance
setting then when you start to copy the error (Red) LED will illuminate. You will then see a
message “not correct size” when you press key to check each flash card status.
B.
What will happen if setting a higher tolerance %?
When you set a higher % it will let the source flash copy to all kind of targets which have
a greater capacity difference from the source flash cards. For example to copy a 1GB
source device to 2GB target devices or from a 4GB device to 1GB targets the content
size must be less than 1GB.
2.1 If a source device has a
example 1GB to 2GB:
Size tolerance % should be set to “don’t care”.
Example: A. Source B. Target
1GB 2GB
The data is randomly located instead of
sequentially located in each flash card
smaller capacity
Copy OK
Warning:
The target 2GB will become 1GB when it
read on PC. You can only restore its 2GB
capacity by re-formatting the device.
than the target devices, for
.
Page 11

10
X
2.2
If a source flash has a
2GB copy to 1GB:
Set the tolerance % to a higher level or set “don’t care” (no limit).
The copy result i.e. pass or fail will depend on if the content data is within the capacity
of the target devices. Even if the content size is small, there are two results: (as
shown in illustrations 1 and 2)
Illustration 1. When a FAT16/32 content is within the target flash card’s capacity
A. Source B. Target
2GB 1GB
(FAT16/32 Data
a. Flash card’s data is located randomly (as illustrated in A) not sequentially.
)
greater capacity
O
O --
-- Copy OK
Copy OK
O O
----
Copy OK Copy OK
within the 1GB area.
than the target flash for example
. Because the data is
Illustration 2. When the content is located beyond the target flash card’s capacity.
A . Source B. Target
2GB 1GB
FAT16/32 Data
** The copy will fail because the data was stored beyond the 1GB area. The duplicator will
copy whatever the data is, it won’t change the data’s location.
XXXX --
-- Copy
Copy Fail
----
Copy Copy
outside of the 1GB area.
Fail
. Because the data is
FailFail
Page 12

11
Utility Functions
1 Erase
○
Quick Erase (function 5.1) will only erase the FAT index table of each flash card,
and Full Erase (function 5.2) will completely erase the whole flash card.
Therefore full erase will take more time.
2 System update
○
This is to update the system’s firmware version. Please save and un-zip the update
file to your SD/USB/CF drive (please don’t put it in a folder). Select function 5.3
system update, and press OK, the system will automatically start system updating.
When it’s finished, please turn off the system for 5 seconds and then turn it on
again. The new version of firmware will have been uploaded.
Operational tips:
○1 DON’T pull out any flash card which is in the copying process. When a flash card is
copying the green LED light will flash. Never pull out any card whose LED is flashing,
this may not only damage the flash card but also the system hardware circuit.
○2 Some users may like to use a USB converter to copy other different types of flash
cards, such as CF, SD, or Memory stick etc. Since the quality and stability of each USB
converter in the market is very different, a poor quality USB converter may cause the
damage to the machine and also the copy quality or Flash card.
Page 13

12
2.4 Function List
Function Description
1. Copy This option makes USB/SD flash copy.
:
2. Compare
3. Copy+Compare
4. Information
4.1 USB/SD Info
4.2 System Info
5. Utility
5.1 Quick Erase USB/SD
5.2 Full Erase USB/SD
5.3 System Update This operation can upgrade the system firmware via the USB
This option makes a bit-by-bit comparison between the master
source and all other copied flash cards.
This option will make a copy first and then compare the copied
flashes with the source immediately after the copy has finished.
This feature will show USB/SD flash’s basic information such as
flash type, content size, and available space.
This feature will show information of the duplicator system, including
controller model number, buffer memory capacity and software
version.
This operation can quickly erase the index of the USB/SD flash in
the Writer bay.
This operation will completely erase data of USB/SD flash in the
Writer bay. It takes longer than Quick Erase.
6. Setup
6.1 Start-up Menu
6.2 Copy Area
(Quick Copy Mode)
6.3 Button Beep
6.4 Asyn Hold Time
6.5 Ignore Size
6.6 Asynchronous
6.7 Language Set system language interface.
You can select which function is shown first when the duplicator is
turned on.
ON to copy FAT16/32 file content. OFF to copy non FAT (RAW card)
copy file format.
You can choose whether to hear a beep or not when a button is
pressed.
To set how long the system should wait to ask if to continue or exit
the function of Asynchronous copying job.
To set the tolerance % of the source and target capacity tolerance.
The default setting is “don’t care”. No limit of capacity tolerance.
To set the function of Asynchronous copy mode. To keep all copies
in Synchronous method.
Page 14

13
3 INSTALLATION GUIDE
3.1 Hardware Installation Guide
Please use a new IDE which is enclosed with the duplicator.
Please install the IDE cable as shown in the illustration shown below: Don’t interlace
the IDE cables and ensure each one is securely connected to the IDE socket.
3.2 Illustration
1-3 USB/SD
**
Don’t use the Port#1 to connect IDE cable. This port has no function, start from Port#2.
1-7 USB/SD
Page 15

14
1-11 USB/SD
Page 16

15
1-7 CF
Page 17

16
 Loading...