

Page 1
VT-100
Introduction
Welcome, and thank you for choosing Edesix’s VideoTag VT-100.
This simple guide will lead you through the setup-process of your VT-100 device and
accompanying accessories.
Charging your device
Upon receiving your VT-100 VideoTag, it is recommended that you fully charge the device
before usage. To enable charging you will require one of the following:
Solo Docking Station (VB-300-SOLO)
Connected to your laptop or PC
14 Port Docking Station (VB-300-DOCK14)
Connected to a power supply
Please note: Your VT-100 camera can also be charged directly using a USB adapter
Page 2
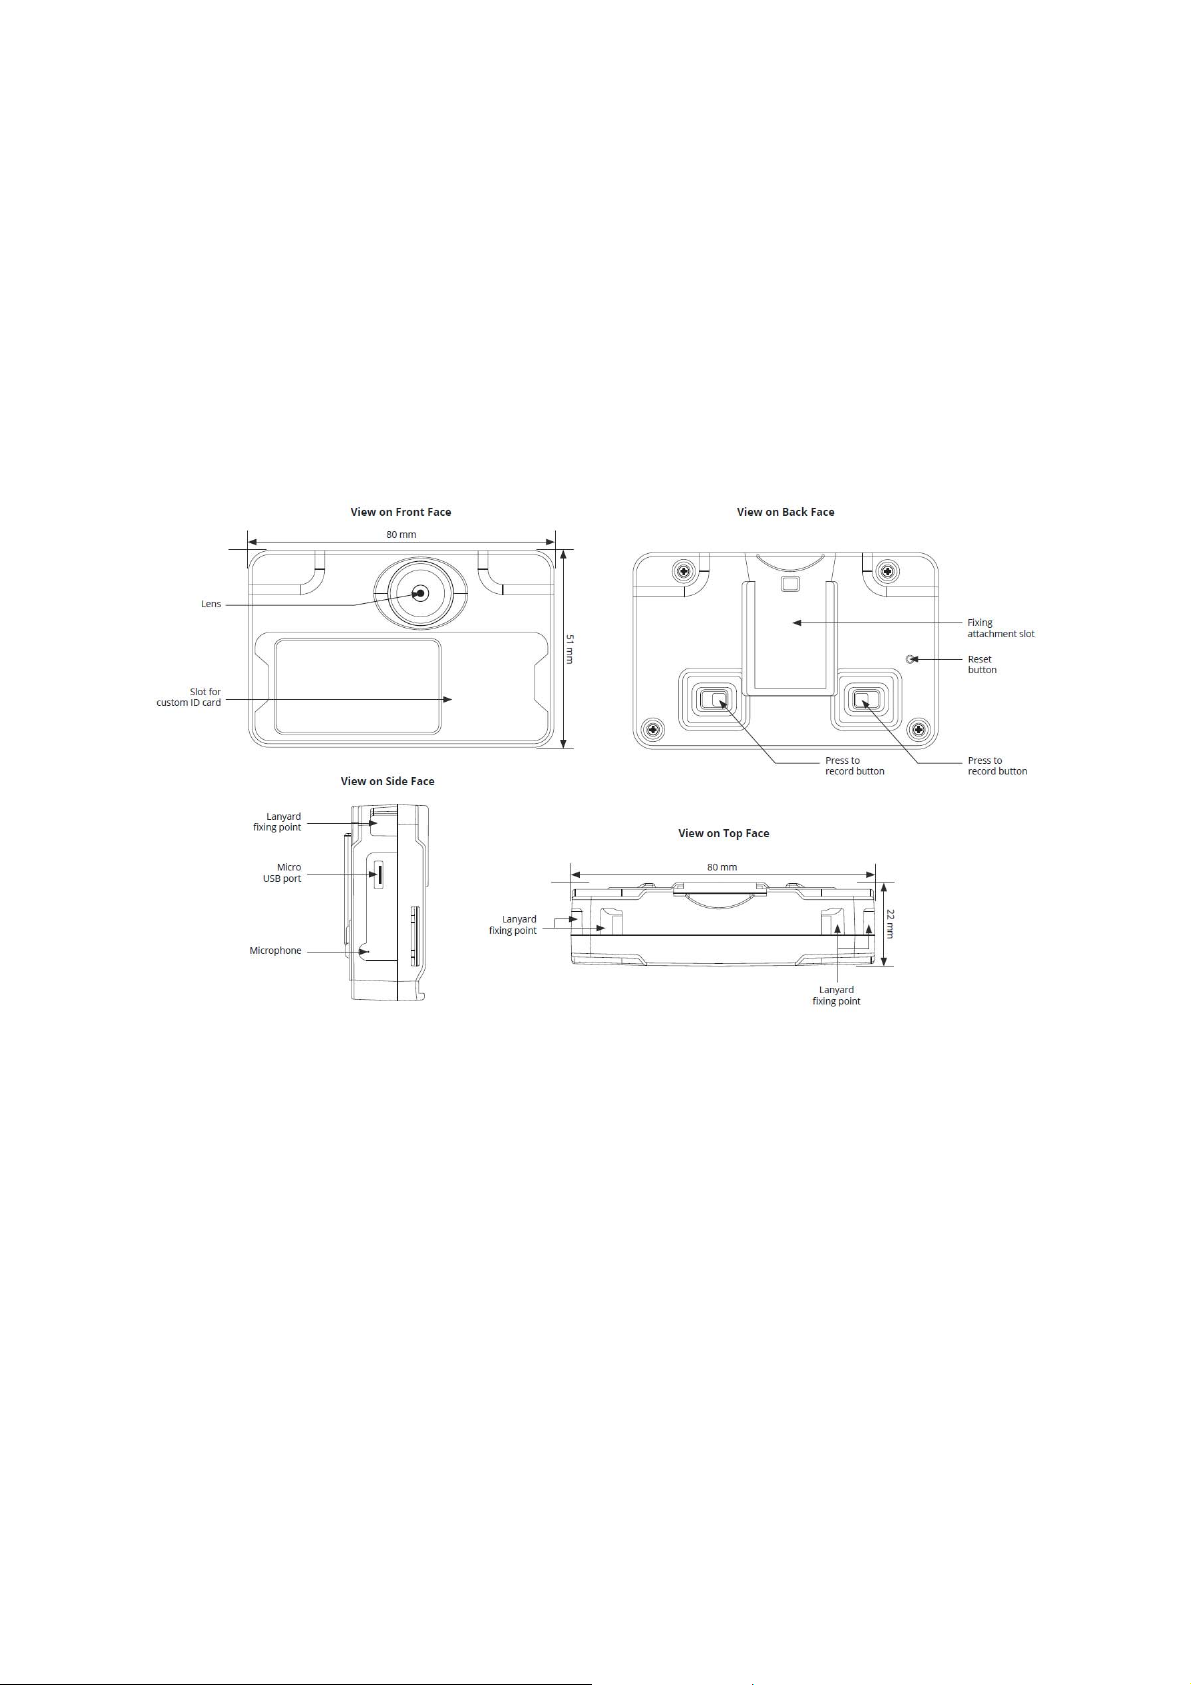
Mounting Your Device
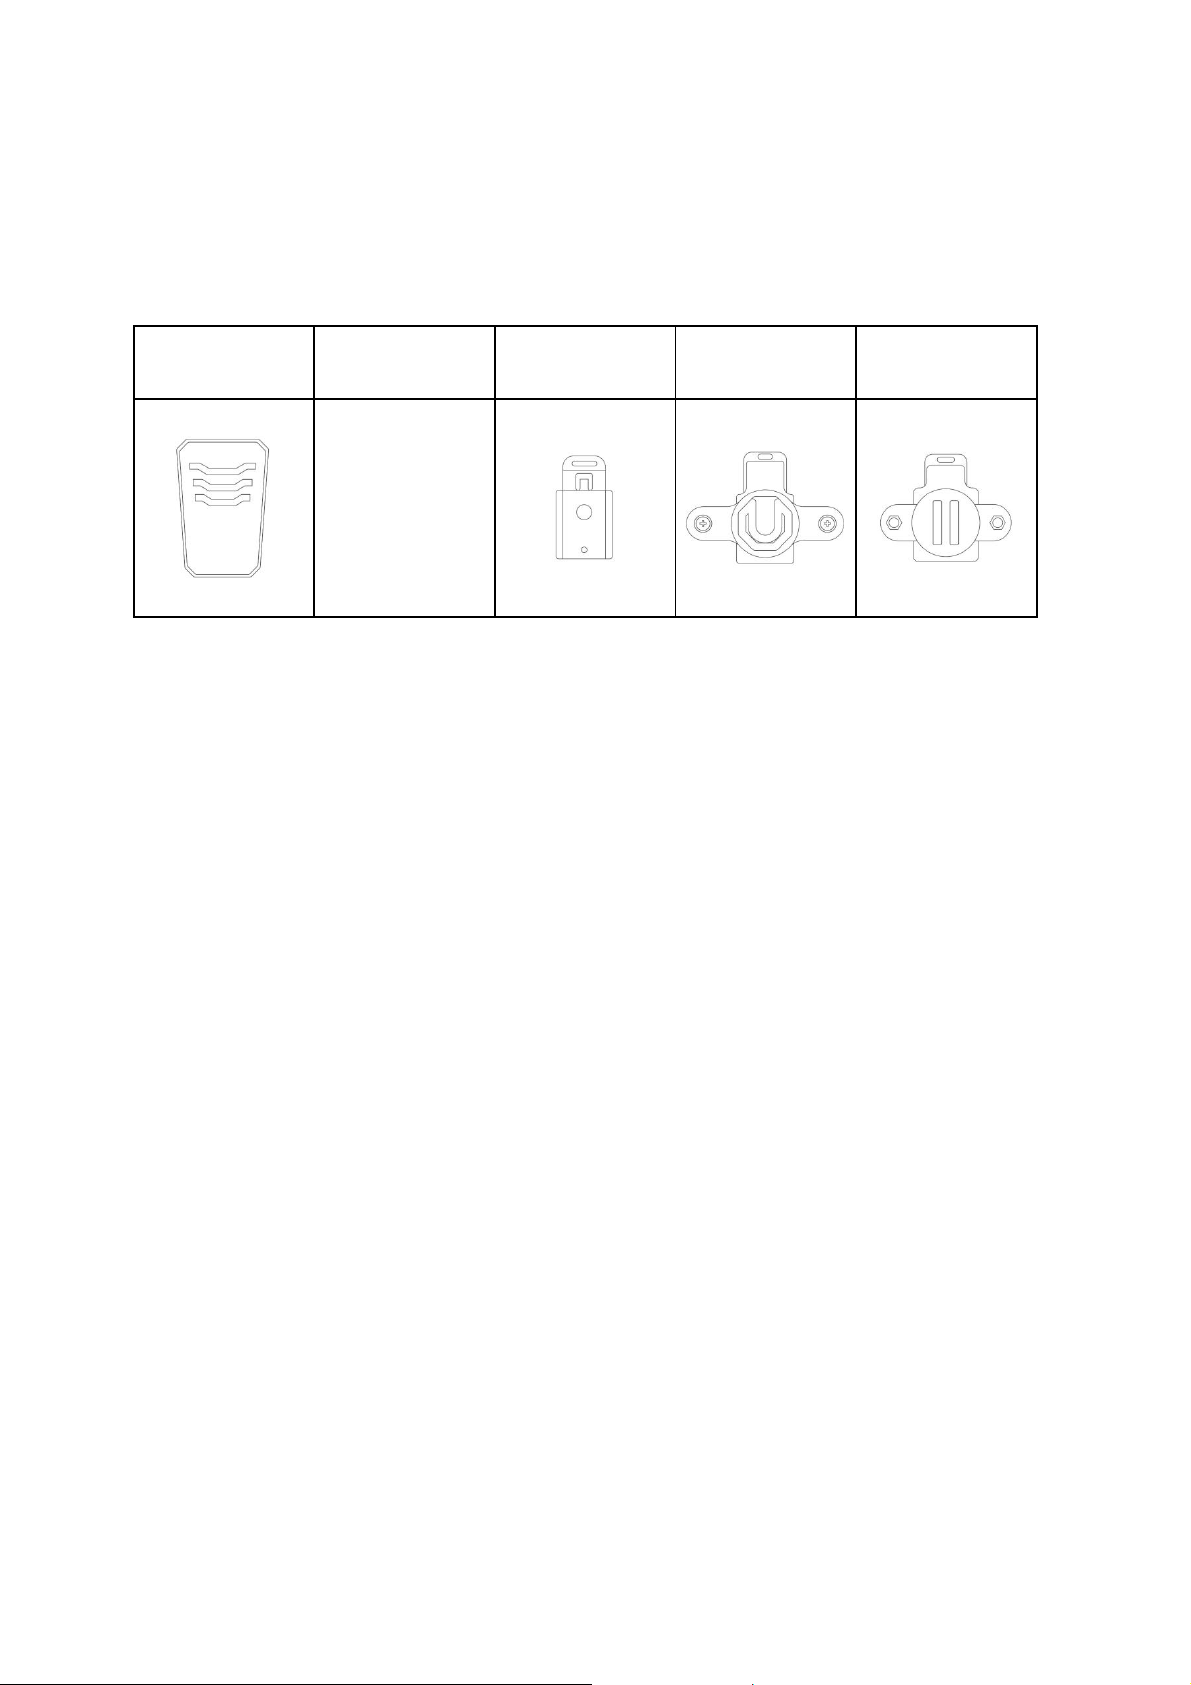
A variety of different mounting options are available for the VT-100. It can be mounted at any
angle and will automatically orient the video it captures. Brief instructions for mounting with
the most common attachments can be found below.
VB-300-EXTFIX-CROC
To attach, slide the attachment into the mounting rail on the back of your VT-100 device until
a firm click is heard and the attachment point is firmly held in place.
To detach, use a flat head screwdriver to carefully pull the lip of the attachment plate away
from the body of the VT-100 and firmly pull the attachment out of the rails. NOTE: it may be
necessary to rotate the Crocodile Clip 90 degrees first.
VB-100LANYARD
VB-300-EXTFIX-PLATE
VB-300-EXTFIX-KF-ALT
VB-300-EXTFIX-SPORT
Using Your Device
To Start/Stop Recording
Recording can be started and stopped by pressing one of the two buttons on the rear of the
VT-100. The red recording light on the back of the unit will indicate that recording is in
progress.
To start recording, press one of the two buttons on the rear of the VT-100.
To stop recording, press and hold one of the two buttons on the rear of the VT-100.
Configuring your device
Prior to using your VT-100 VideoTag, your device must be configured and assigned to you
using VideoManager. For detailed information on how to configure your device, please refer
to the VideoManager User Guide.
WiFi Configuration
Your WiFi profile might have been configured for you by your system administrator.
Your administrator may allow you to add your own personal WiFi networks - you can
manage these in the Account Settings once you are logged into VideoManager.
Page 3

When powered on, your VT-100 can connect to WiFi in order to make a video stream
f
f
f
f
available. For this reason, it is necessary to configure the WiFi profiles for your device.
This is a simple process to be conducted by administrators of the system:
In VideoManager, select the Devices tab.
Go to the Settings dropdown, and select Wifi Profiles.
Create a Wifi Profile using the Create Wifi Profile button.
You will be required to enter a name for the Profile, as well as specifying whether it should
become the system default or not.
Looking after your Device
Wipe with a soft cloth. If necessary the lens cover can be cleaned with a soft lint free wipe
impregnated with isopropyl alcohol. Avoid all other solvents or cleaning agents.
FCC STATEMENT:
Product Name Model
Edesix VideoTag VT‐100
This device complies with Part 15 of the FCC Rules. Operation is subject to the
following two conditions:
(1) This device may not cause harmful interference, and
(2) This device must accept any interference received, including interference
that may cause undesired operation.
Warning: Changes or modifications not expressly approved by the party
responsible for compliance could void the user's authority to operate the
equipment.
NOTE: This equipment has been tested and found to comply with the limits for
a Class B digital device, pursuant to Part 15 o
the FCC Rules. These limits are
designed to provide reasonable protectionagainstharmfulinterferenceina
residential installation.
This equipment generates uses and can radiate radio frequency energy and, i
not installed and used in accordance with the instructions, may cause harmful
interference to radio communications. However, there is no guarantee that
interference will not occur in a particular installation. I
this equipment does
cause harmful interference to radio or television reception, which can be
determined by turning the equipment off and on, the user is encouraged to try
to correct t he interference by one or more o
the following measures:
Reorient or relocate the receiving antenna.
Page 4

Increase the separation between the equipment and receiver. Connect the
equipmentintoanoutletonacircuitdifferentfromthattowhichthereceiver
is connected.
Consult the dealer or an experienced radio/TV technician for help.
RF warning statement:
The device has been evaluated to meet general RF exposure requirement. The device
can be used in portable exposure condition without restriction.
Contact Details:
Edesix Ltd.
16 Forth Street
Edinburgh
EH1 3LH
United Kingdom
 Loading...