

Page 1

Edelbrock Nitrous Systems
Installation Instructions
P/N 73802 - 2 5/8” Nitrous Pressure Gauge
NOTE: Please consult the Edelbrock System Installation
Instructions for the proper way to interact safely with Nitrous
Oxide. Please take all safety precautions when working on any
nitrous oxide injection system.
WARNINGS:
• USE ONLY Teflon sealant for all tapered pipe threads.
No sealant is required on AN flare fittings. Do not use
any oil on threads.
• This gauge is supplied with a special restrictor fitting
that must be installed on the braided line leading to
the nitrous gauge.
• USE ONLY -4AN Teflon lined high-pressure stainless
steel-braided line when installing this gauge. All
fittings must have a minimum working pressure of
2000 psi.
Mechanical Section
1. If you are not familiar with nitrous oxide systems and
their installations, do not install this gauge. Have a
qualified technician install it for you.
2. Determine where the nitrous gauge will be mounted
and the source of the pressure (bottle outlet or nitrous
solenoid inlet fitting). Then determine the length of
steel-braided line required. This line must be purchased
due to the vast number of applications this gauge is
used in.
3. Secure the -4AN stainless steel- braided line to the back
of the gauge using included female fitting.
4. Install gauge in desired location. Gauges can be
mounted in under dash panels or on window cowling.
Mounting cups can also be used (Auto Meter #3203 or
#3204). Secure gauge with mounting bracket provided.
5. Make sure the nitrous bottle valve is closed and all lines
are free of pressure.
6. Secure an in-line gauge adapter (not supplied) in a
vice . Install the special restrictor fitting (supplied with
gauge) in the in-line gauge adapter. Be sure to use
liquid Teflon sealant on all tapered pipe threads for a
good seal. No sealant is required on AN fittings. Do
not over tighten as this may result in stripped threads
or a broken fitting.
7. Remove the main nitrous feed line from the bottle or
the nitrous solenoid. Install the in-line gauge adapter
with the special restrictor fitting either on the nitrous
bottle or nitrous solenoid. Re-install the main nitrous
feed line. Install the braided line from the nitrous
gauge to the restrictor fitting.
8. Reconnect all lines.
9. Open the nitrous bottle valve and check for leaks.
Black - Good Ground
White - To Dash 12V(+) Lighting
Steel-braided line to
gauge
Special Restrictor Fitting
(included)
In-Line
Gauge Adapter
Steel-braided line
to gauge
Special Restrictor Fitting
(included)
Main Nitrous Feed
-4AN fitting with wrench flat.
(Use caution, do not over tighten)
Nitrous
Solenoid
IN OUT
In-Line Gauge
Adapter
Nitrous Bottle
Use Teflon Sealing
Compound where
symbol indicates.
(Tape not
recommended on
these threads)
Page 2
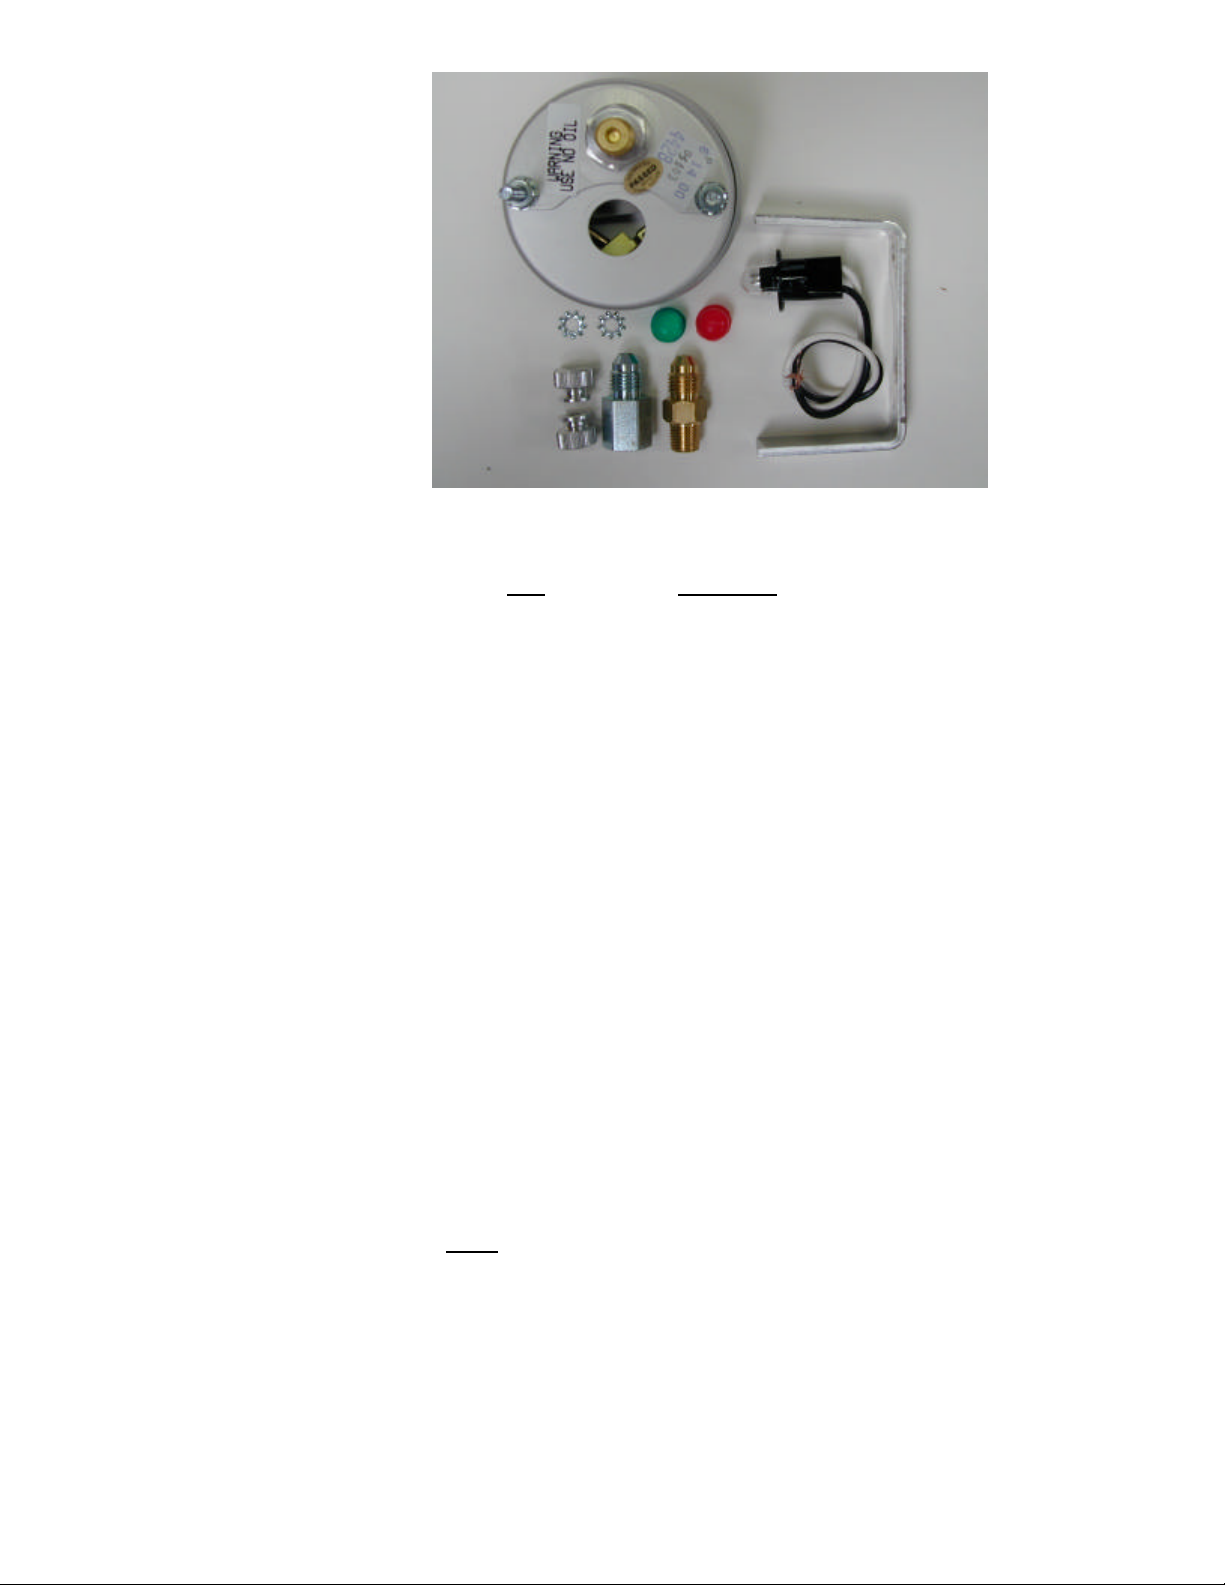
Bill Of Materials
Qty. Description
1 0-1400 psi Nitrous gauge
1 Gauge light with harness
2 Star washers
2 Attaching screws
1 Gauge bracket
1 Red light cover
1 Green light cover
1 Special restrictor fitting
1 Female AN adapter
NOTES:
• If gauge mounting is other than in-dash or under dash, mounting provisions may have to be determined by the
installer.
• Test all fittings and hoses for any leakage. If any leaks are detected, determine the cause of the leak and repair.
Do not operate vehicle if any leaks are detected.
Electrical Section
For maximum electro-luminescent life, do not wire lighting to direct ignition switched 12-volt source. The lighting power
source should be routed through OEM dash control, or a separate rheostat. Power can be achieved by tapping into the
factory dash lighting through either the fuse panel or from a 12 volt dash light wire. This will allow you to control the light
intensity. Use the appropriate connectors for your particular application. Connectors are not included due the vast
number of applications. The white wire MUST be connected to the power source and the black wire to a good ground.
Damage to electronic circuit could occur if connected incorrectly.
Edelbrock Corporation, 2700 California St., Torrance, CA 90503
Tech Line (800) 416-8628
Tech Hours: 7:00 am—5:00 pm PST, Weekdays
©2000 Edelbrock Corporation
Rev. 7/21/00
 Loading...