

Page 1
TORQUE ARM #5280
For 1984- 2002 Camaro/Firebird
INSTALLATION INSTRUCTIONS
Please read and study these instructions before installing your new torque arm. If you have any questions,
please contact us at our Technical Hotline: 1-800-416-8628, 7:00 am – 5 pm, Monday through Friday, Pacific
Standard Time.
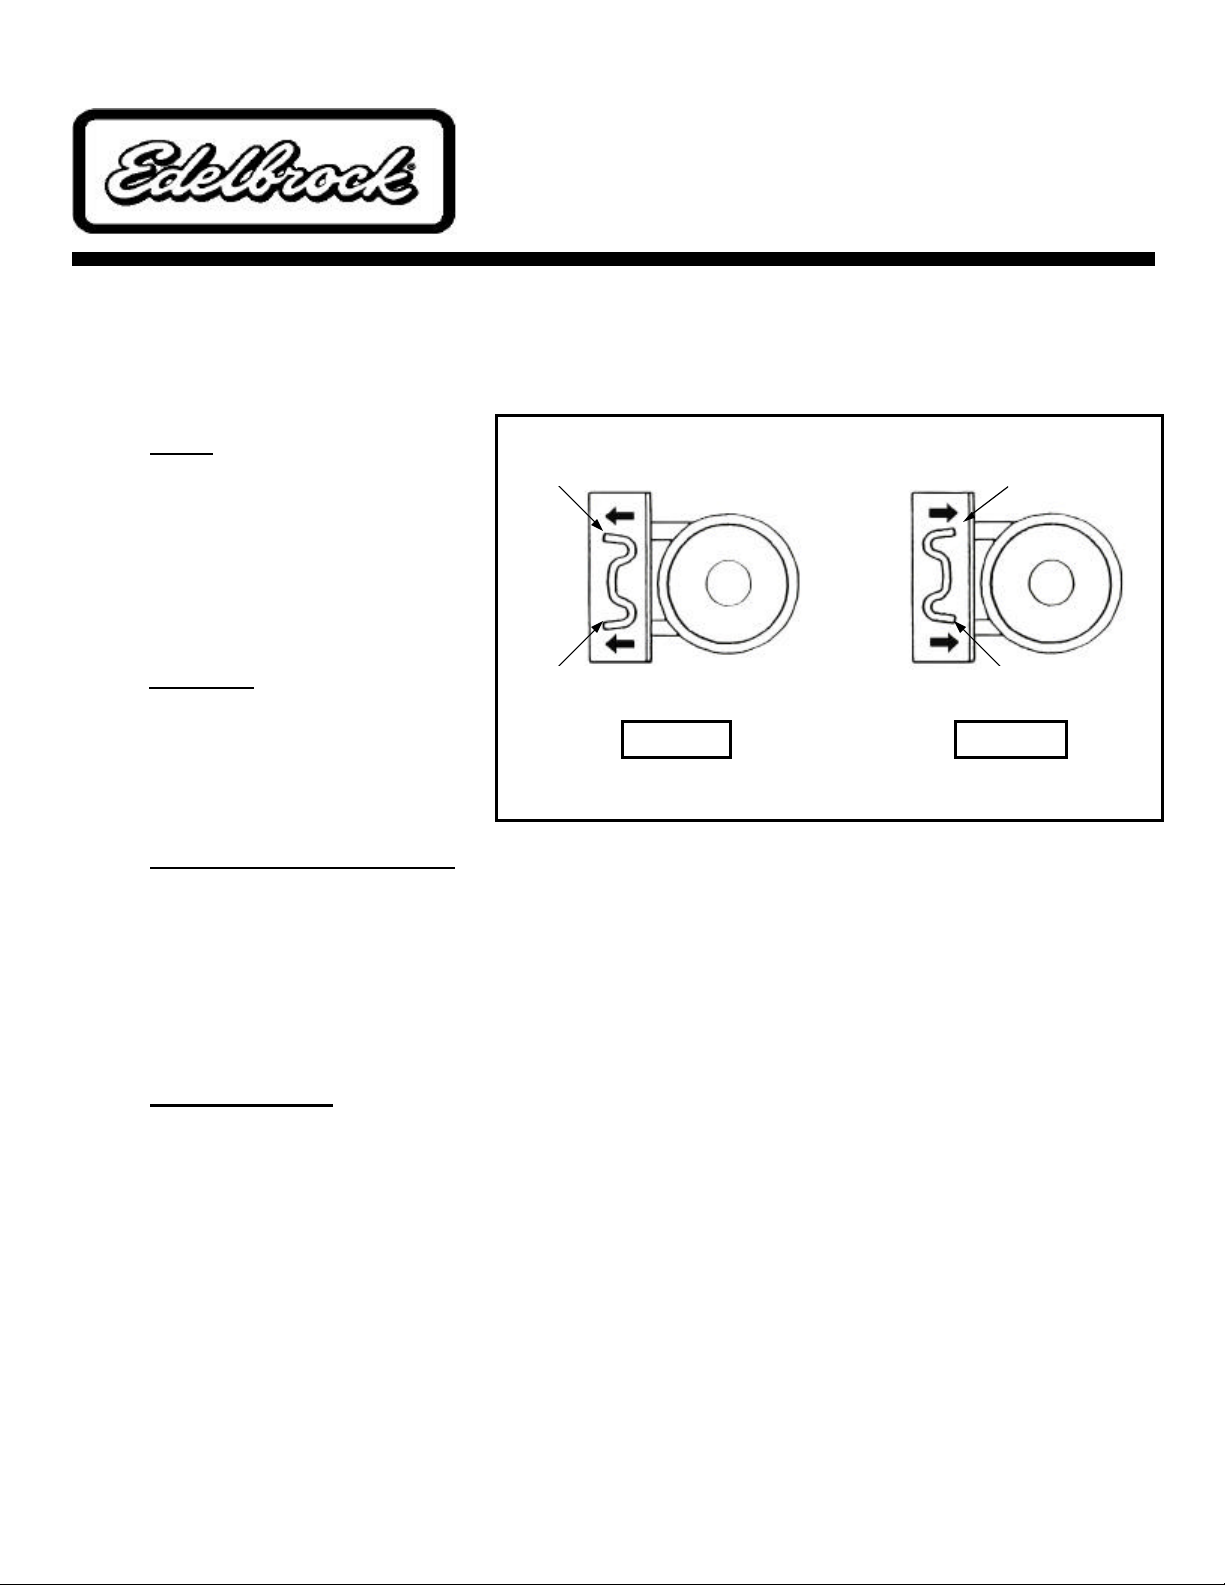
• NOTE:
This torque arm is designed to fit
1984-2000 Camaro/Firebird with
Lip
Viewed From Rear of Transmission
front torque arm locator lips
facing away from driveshaft. See
Figure 1.
• CAUTION:
Installation requires being under
raised vehicle. Support vehicle
Lips Facing Away
From Driveshaft
Correct Incorrect
on level and stable ground, using
proper load ra ted jack stands.
• PREPARATION CHECKLIST: The following equipment is required:
Fig. 1
ü Jack
ü Jack stands (4 required)
ü Drill with 7/32 drill bit or gr inder to remove rivets
ü 13mm, 15mm, 21mm Socket and wrenches
ü Torque wrench
ü Thread lock compound
Lip
Lips Facing
Towards Driveshaft
• INSTALLATION:
1. Place vehicle on level, stable ground (i.e. concrete driveway).
2. Raise vehicle and support under the frame so rear end can be raised and lowered if needed.
Removing rear wheels is not required, but can be helpful.
3. Unbolt front bushing bracket from transmission.
4. Unbolt rear of torque arm from rear end. To remove bolts, it may be necessary to raise or lower
rear end. Remove torque arm from chassis.
5. Remove front bushing and bushing bracket from O.E.M. arm.
Page 2
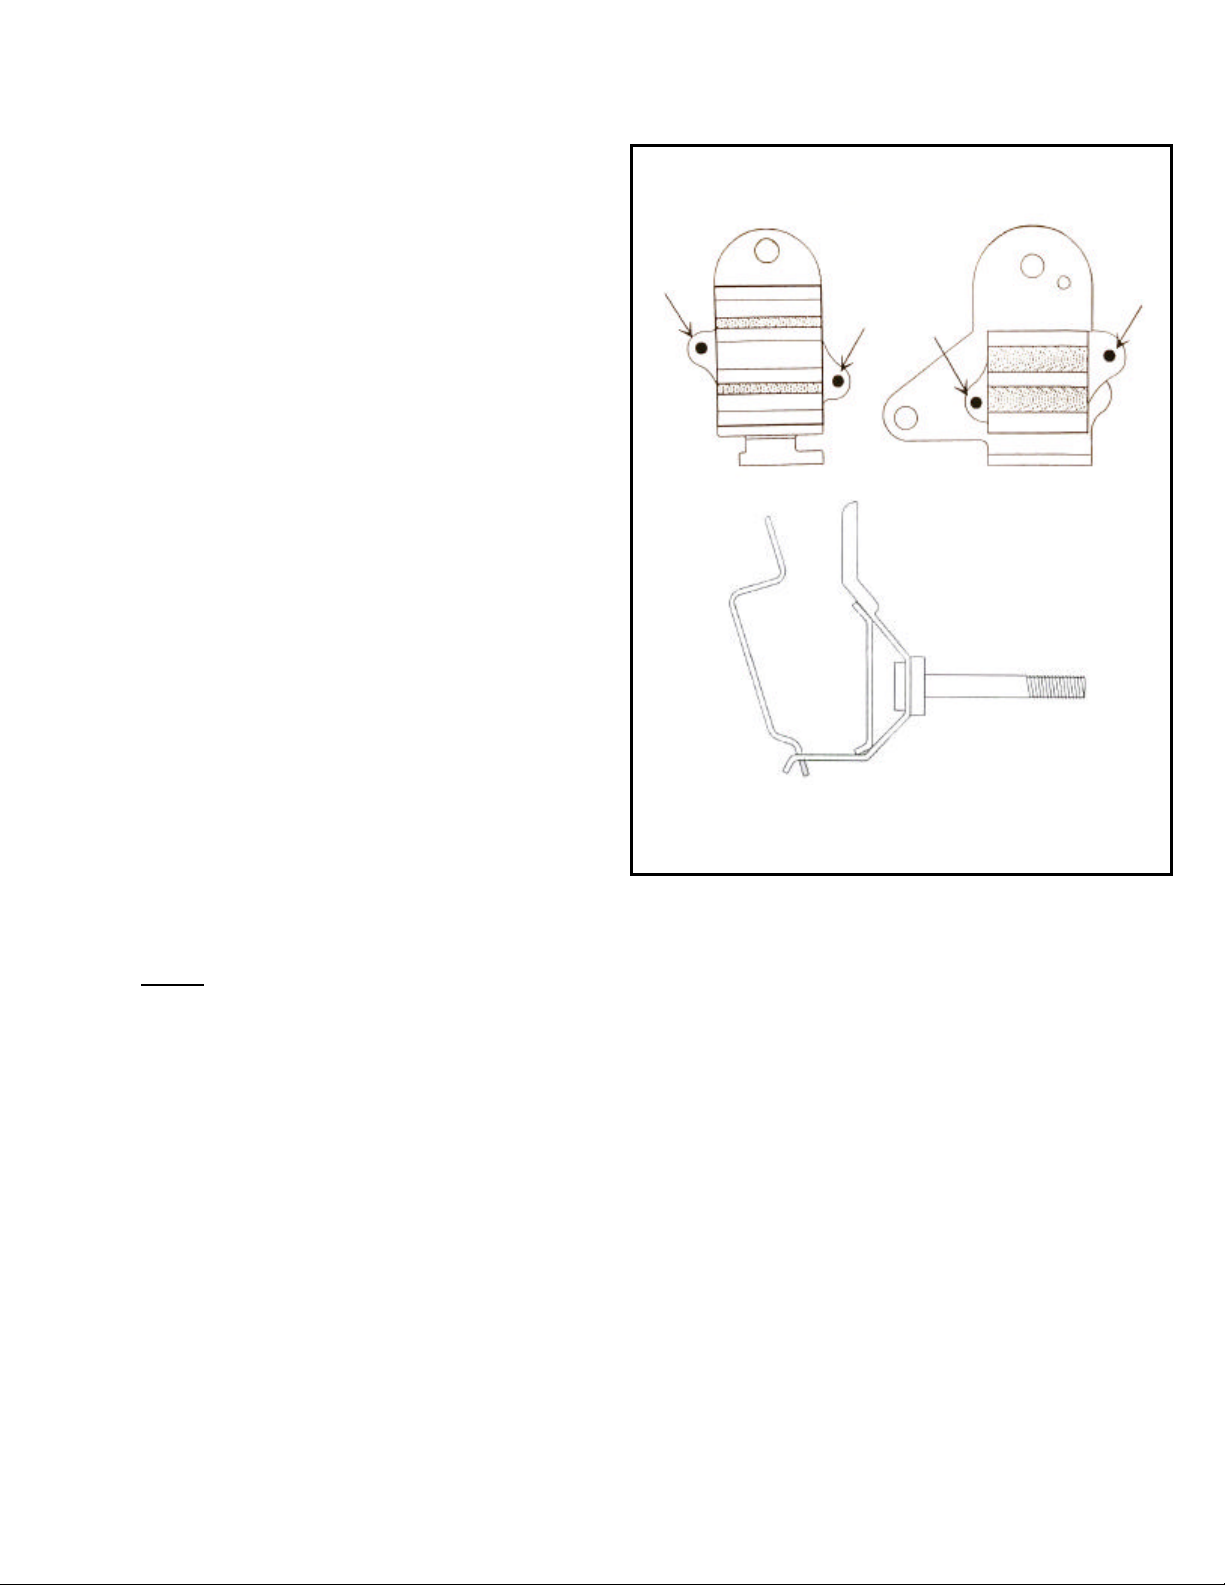
6. Drill or grind off rivet heads (Figure 2) and
disassemble bracket. Remove O.E.M.
bushing from bracket assembly.
7. Install inner bracket onto transmission.
8. Place the new torque arm under vehicle
and onto rear end with factory bolts and
washers. Use supplied washers between
rear end housing and torque arm bracket,
only if needed. Use thread-locking
compound. Leave bolt loose at this time.
9. Grease inside of new polyurethane bushing
with supplied grease, and install onto
torque arm with part number on bushing
facing rear of vehicle. Position in inner
bracket.
10. Install outer bracket and tighten at this
time.
11. Torque rear bolts to 97 ft./lbs.
12. After driving approximately 10 miles,
re-torque all bolts and check on regular
basis.
Rivet
Outer Bracket Inner Bracket
Rivet
Rivet
Rivet
Inner/Outer Bracket
Fig. 2
• NOTE:
To further upgrade your suspension, use other Edelbrock suspension, components, such as: springs,
shocks, trailing arms, panhard rod, strut tower brace, and sub-frame connectors.
Edelbrock Corporation, 2700 California Street, Torrance, California 90503
Toll-Free Tech Line (800) 416-8628
Tech E-mail: edelbrock@edelbrock.com
2001 Edelbrock Corporation Revised 7/01 (R&D)
 Loading...