

Page 1

Strut Tower Brace for 1998-2002 Camaros/Firebirds
Catalog #5229
INSTALLATION INSTRUCTIONS
PLEASE study these instructions carefully before installing your new strut tower brace. If you have any questions or
problems, contact our Technical Hotline at: 1-800-416-8628 from 7:00 am t- 5:00 pm, Monday-Friday, Pacific
Standard Time or e-mail us at: Edelbrock@Edelbrock.com. Please fill out and mail your warranty card.
• Application: Designed for 1998-02 Camaros and Firebirds with 5.7 LS1 V8. This strut tower brace is much more
effective than other brands because it triangulates the front sturt towers to the vehicle firewall. The firewall mounting
point virtually eliminates all strut tower flex by transferring sideload into two mounting points instead of just one.
• Tools Needed: In addition to common hand tools, you will need 9/16" wrenches, 15mm deep socket, 13mm socket,
#50 torx bit socket, a drill, and 3/8" drill bit.
• NOTE: On vehicles with automatic transmissions, the transmission dipstick will end up between the two main brace
tubes. The dipstick tube may need to be slightly repositioned for better fit. This can be done by taking a piece of tubing
large enough to slip over the dipstick tube and bending the end of the dipstick tube up and toward the passenger side,
while holding the back of the transmission tube. Be careful not to kink the transmission dipstick tube.
INSTALLATION
1. Remove the nuts and bolts on top of each strut tower
that will locate end brackets (use end brackets for
reference) of the strut tower brace. Position end
brackets onto strut towers (as shown). DO NOT BOLT
DOWN AT THIS TIME.
2. Pop up plastic covers on wiper arms and remove nut.
NOTE: Wiper arms will need to re-installed in the
same position as removed.
3. Remove plastic shrouding to gain access to the wiper
well. This will make installation much easier.
4. Position the main brace assembly, as shown. Install
the 3" bolts into the end of the main brace. Align the
strut tower brace assembly and end brackets to locate
the position on the firewall that will need to be drilled.
Mark the firewall, then remove main brace assembly
and drill two 3/8" dia. holes in the firewall.
5. Re-install the main brace assembly into position.
Install the reinforcing plate into the wiper well area.
NOTE: R.T.V. silicone can be used on reinforcing plate
to hold in place for future removal of the main brace
assembly.
6. Install the two 1" bolts with flat washers and lock
washers supplied into firewall reinforcing plate, do not
tighten. Install 3" bolts, nylock nuts, and flat washers
(flat washers go against head of bolt) into end brackets
and main brace. Re-install the stock nuts and bolts on
top of strut towers.
NOTE: Check for clearance between strut tower brace
and any underhood components, A/C lines, cable,
hoses, etc.
7. Align the strut tower brace assembly. Tighten the
factory strut tower nuts and bolts first, then tighten the
3" bolts on the main brace. Finally, tighten the firewall
reinforcing plate bolts.
• NOTE: To further upgrade your F-body suspension,
use other quality Edelbrock suspension products such
as springs, shocks, torque arm, panhard rod, subframe
connectors, and lower trailing arms.
©2005 Edelbrock Corporation
Brochure No. 63-0333
Page 1 of 2
Catalog #5229
Rev. 2/05
Page 2
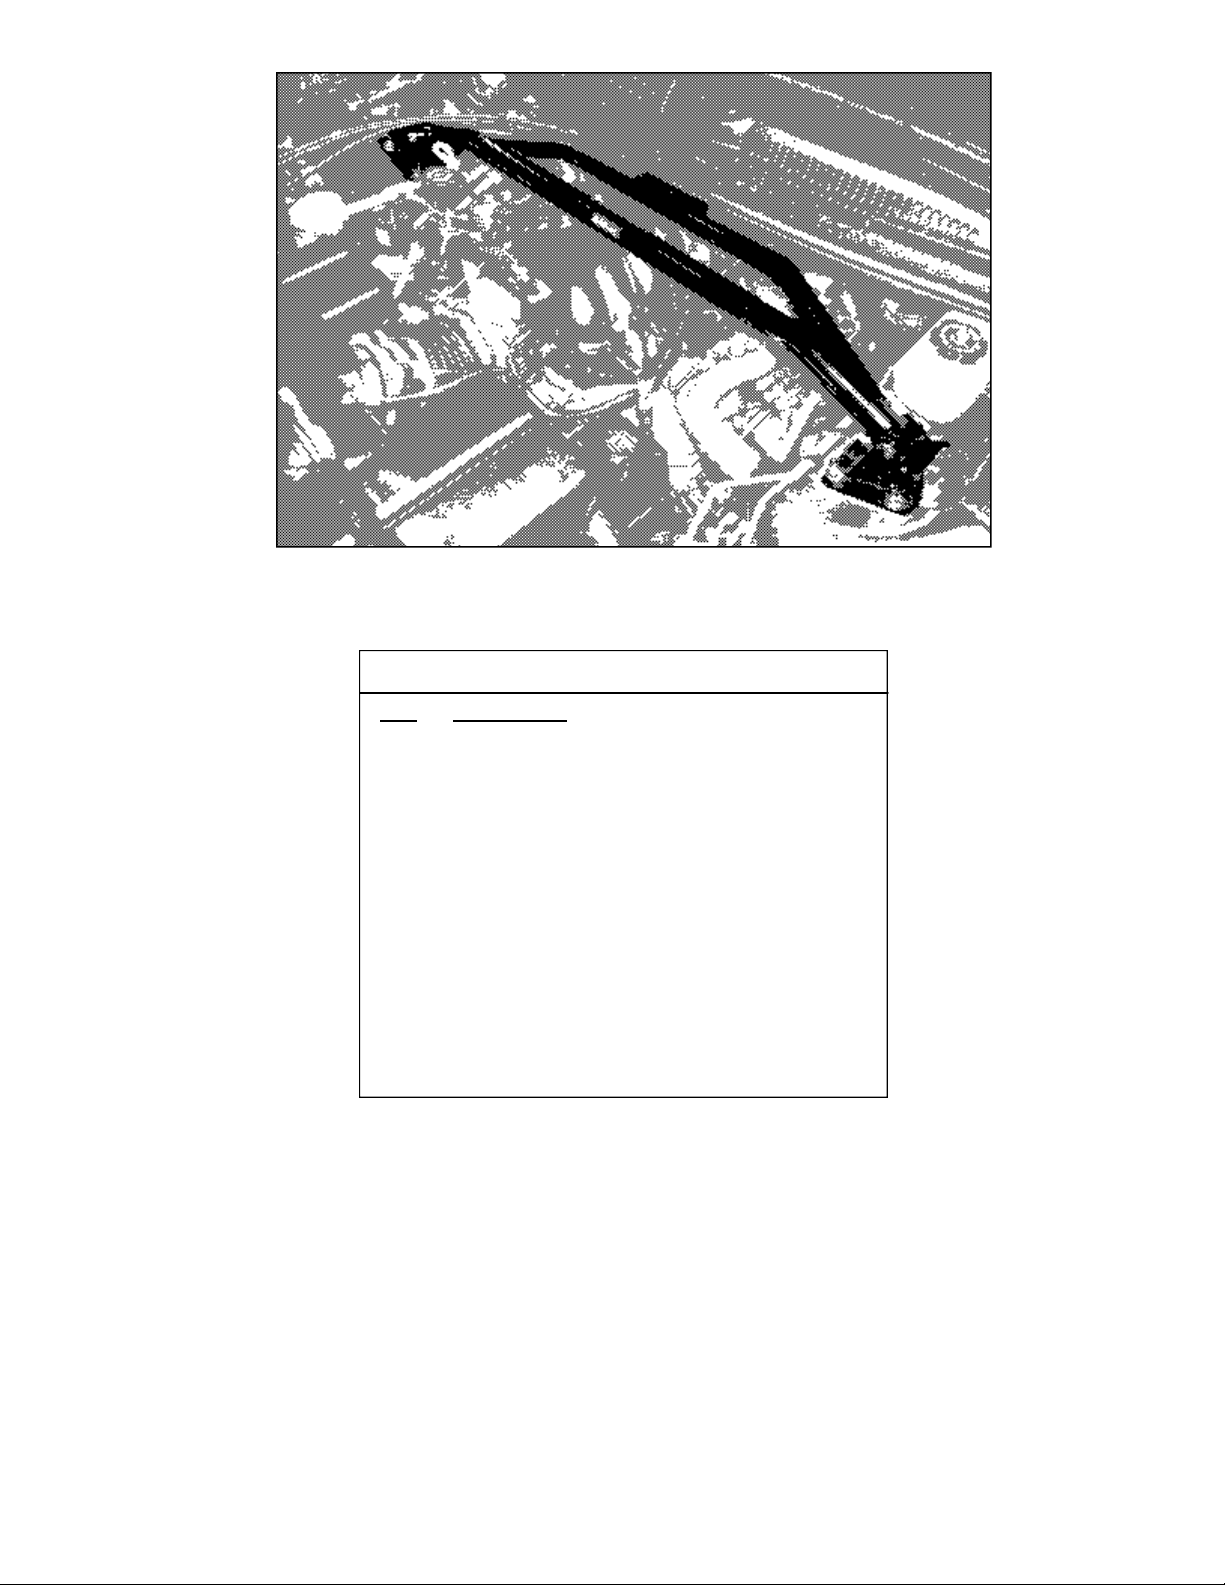
Strut Tower Brace Mounted in Vehicle
KIT CONTENTS
Qty. Description
❑ 1 Main Brace Assembly
❑ 1 End Support Bracket (Left) #25-4034
❑ 1 End Support Bracket (Right) #25-4035
❑ 1 Firewall Reinforcing Plate with Welded Nuts
❑ 2 3/8”-16” x 3” bolts (for end brackets)
❑ 2 3/8”-16” x 1” bolts (for reinforcing plate)
❑ 2 3/8” Nylock Nuts (for end brackets)
❑ 2 3/8” Lock Washers (for reinforcing plate)
❑ 4 3/8” AN Flat Washers (2 install next to bolt
head on each 3” bolt, 2 install on firewall plate)
©2005 Edelbrock Corporation
Brochure No. 63-0333
Edelbrock Corporation
2700 California St.
Torrance, CA 90503
Tech-Line: 800-416-8628
E-Mail: Edelbrock@Edelbrock.com
Page 2 of 2
Catalog #5229
Rev. 2/05
 Loading...