

Page 1
Catalog #3581
Rev. 7/06 - RS/mc
©2006 Edelbrock Corporation
Brochure #63-3581Page1 of 2
EDELBROCK SINGLE TANK FUEL PUMP KIT
For Performer MPFI Installations (Except 1995 Tahoe)
Catalog #3581
INSTALLATION INSTRUCTIONS
PLEASE study these instructions carefully before beginning this installation. Most installations can be accomplished with common tools and
procedures. However, you should be familiar with and comfortable working on your vehicle. If you do not feel comfortable performing this installation,
it is recommended to have the installation completed by a qualified mechanic. If you have any questions, please call our Technical Hotline at:
1-800-416-8628, 7:00 am - 5:00 pm, Pacific Standard Time, Monday through Friday or e-mail us at Edelbrock@Edelbrock.com
.
IMPORTANT NOTE: Proper installation is the responsibility of the installer. Improper installation
will void your warranty and may result in poor performance and engine or vehicle damage.
DESCRIPTION: This Fuel Pump Kit is necessary to complete the installation of all Performer Multi-Point Fuel Injection (MPFI) systems for 1987-95 TBI-
equipped Chevy/GMCs with single fuel tank (except 1995 Tahoe, which may use the original equipment fuel pump). Dual fuel tank vehicles must use
Dual Fuel Pump Kit #3580. Installation of this part is covered in the Performer Multi-Point Fuel Injection System installation instructions. For your
convenience, we have re-printed the fuel pump installation portion of those instructions here.
INSTALLATION PROCEDURE
1. FUEL PUMP INSTALLATION
For the TBI multipoint conversion, it is necessary to install a highpressure fuel pump (#3581 for single tank vehicles, sold separately).
IMPORTANT NOTE: On trucks with dual tank set-ups, it will be
necessary to install Edelbrock Dual Fuel Tank Conversion Kit
#3580, available from your Edelbrock dealer, or call Edelbrock
directly for sales or dealer assistance. Dual tank vehicles do
not require removal of the tanks or pick-up bed, as the new fuel
pump kit #3580 mounts on the vehicle frame. See installation
instructions supplied in kit.
To install pump
#3581 on single
tank vehicles, you
must gain access
to the top of your
fuel tank. If you
have a Suburban,
you will need to
drain the fuel tank
and drop from the
rear of the vehicle.
If you have a truck,
we recommend
removing the bed
to reach the fuel
tank. On truck
beds, you will
usually find eight
mounting bolts,
two ground wires,
a couple of
weather pack electrical connectors (near license plate area), and
you will need to disconnect your fuel fill neck from the bed. With all
bed bolts and wires disconnected, four people can lift off the bed.
This takes about 20-30 minutes, which is much faster than draining
and removing tank.
With bed removed
you will see top of
the fuel tank. Use a
cleaning brush and/
or compressed air
and clean the top of
fuel sending unit
area so no debris
enters the fuel tank
when removing this
assembly. Disconnect two fuel lines, two hoses, and an electrical
connection with a ground wire. There is a center fuel pump sending
unit assembly lock ring holding the assembly into the tank.
Using a hammer and brass punch, gently strike open edge of lock
ring in a counter clockwise direction. Keep hitting until lock ring
rotates enough to release. Again blow or brush top area clean and
carefully remove the entire assembly.
Be careful on removal! Take your time!
Ground
Connections
Fuel Tank
®
Page 2
Catalog #3581
Rev. 7/06 - RS/mc
©2006 Edelbrock Corporation
Brochure #63-3581Page2 of 2
Edelbrock Corporation • 2700 California St. • Torrance, CA 90503
Tech-Line: 1-800-416-8628 • E-Mail: Edelbrock@Edelbrock.com
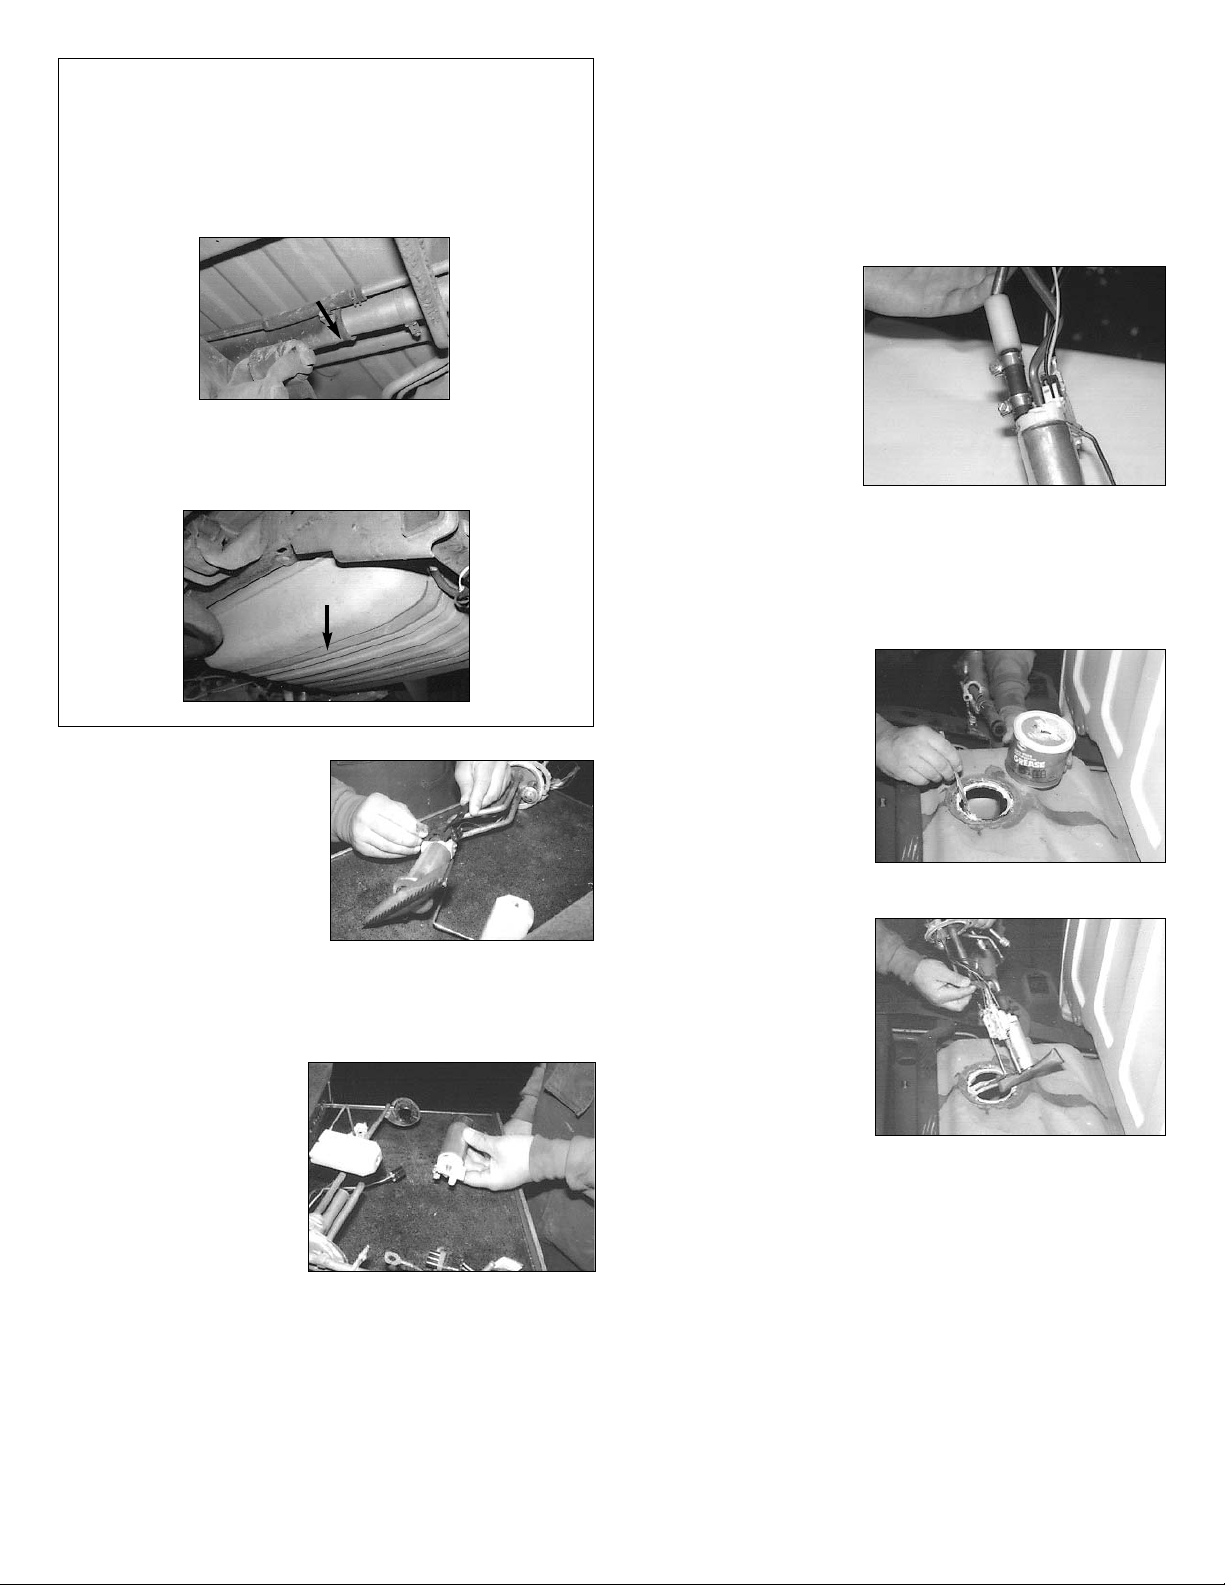
2. FUEL PUMP ASSEMBLY:
With fuel pump assembly
on bench, loosen and slide
up the lower plastic clamp
on top of fuel pump. Now
disconnect the electrical
connection.
On the bottom of the fuel pump there is a fuel strainer sock. Make
note of the orientation of the fuel strainer sock on the stock fuel
pump so that you can attach the supplied fuel sock in the same
orientation on the new pump. Remove the strainer sock.
Use a small flat blade
screwdriver to gently pry
around strainer and it
will pop off. Carefully
slide the factory fuel
pump out of the
assembly. Install the
new fuel pump supplied
in the kit into this
assembly.
NOTE: There is a kit supplied with the new fuel pump. Install
the 3" length of fuel hose onto the 3/8" steel tubing where the
old fuel pump junction hose was previously. Use the 3/8" hose
clamp to secure hose to steel tubing. The fuel line will be a very
tight fit over the 3/8" tubing. It may be necessary to lube the
tubing with some spray lubricant to ease hose installation. You
must use the supplied 3” length of hose. DO NOT use the stock
rubber fuel hose.
Slip the 5/16" clamp
over the rubber hose,
then insert fuel pump
barb into hose and
secure with 5/16"
clamp. Be sure there
is adequate clearance
between the metal
hose clamp and the
electrical connections
on the pump. Some shortening of the rubber hose may be
necessary for proper alignment of the pump with the pump hanger.
Use the new rubber base gasket for fuel pump. If the big O-ring in
fuel tank is OK, (not torn) you may reuse it. If necessary, replace
with original equipment O-ring from a GM dealer. Make sure to
grease large O-ring with
white grease or
equivalent. Making
sure clamp is tight and
electrical connector is
connected, install the
new strainer sock into
same position as noted
earlier. It will push on
by hand. No tools are
required.
Install the complete
assembly back in the
fuel tank. Make sure
you don’t bend anything
while reinstalling. Lock
assembly back in place
by rotating lock ring
clockwise until it hits its
stops. Now tighten fuel
connections and hose
clamps. Make electronic connection and ground connection. Reinstall fuel tank (Suburbans, etc.). Do not re-install bed on pick-up
trucks at this time.
See Performer Multi-Point Fuel Injection installation
instructions for remainder of system installation.
Alternate Procedure: Lowering the Fuel Tank
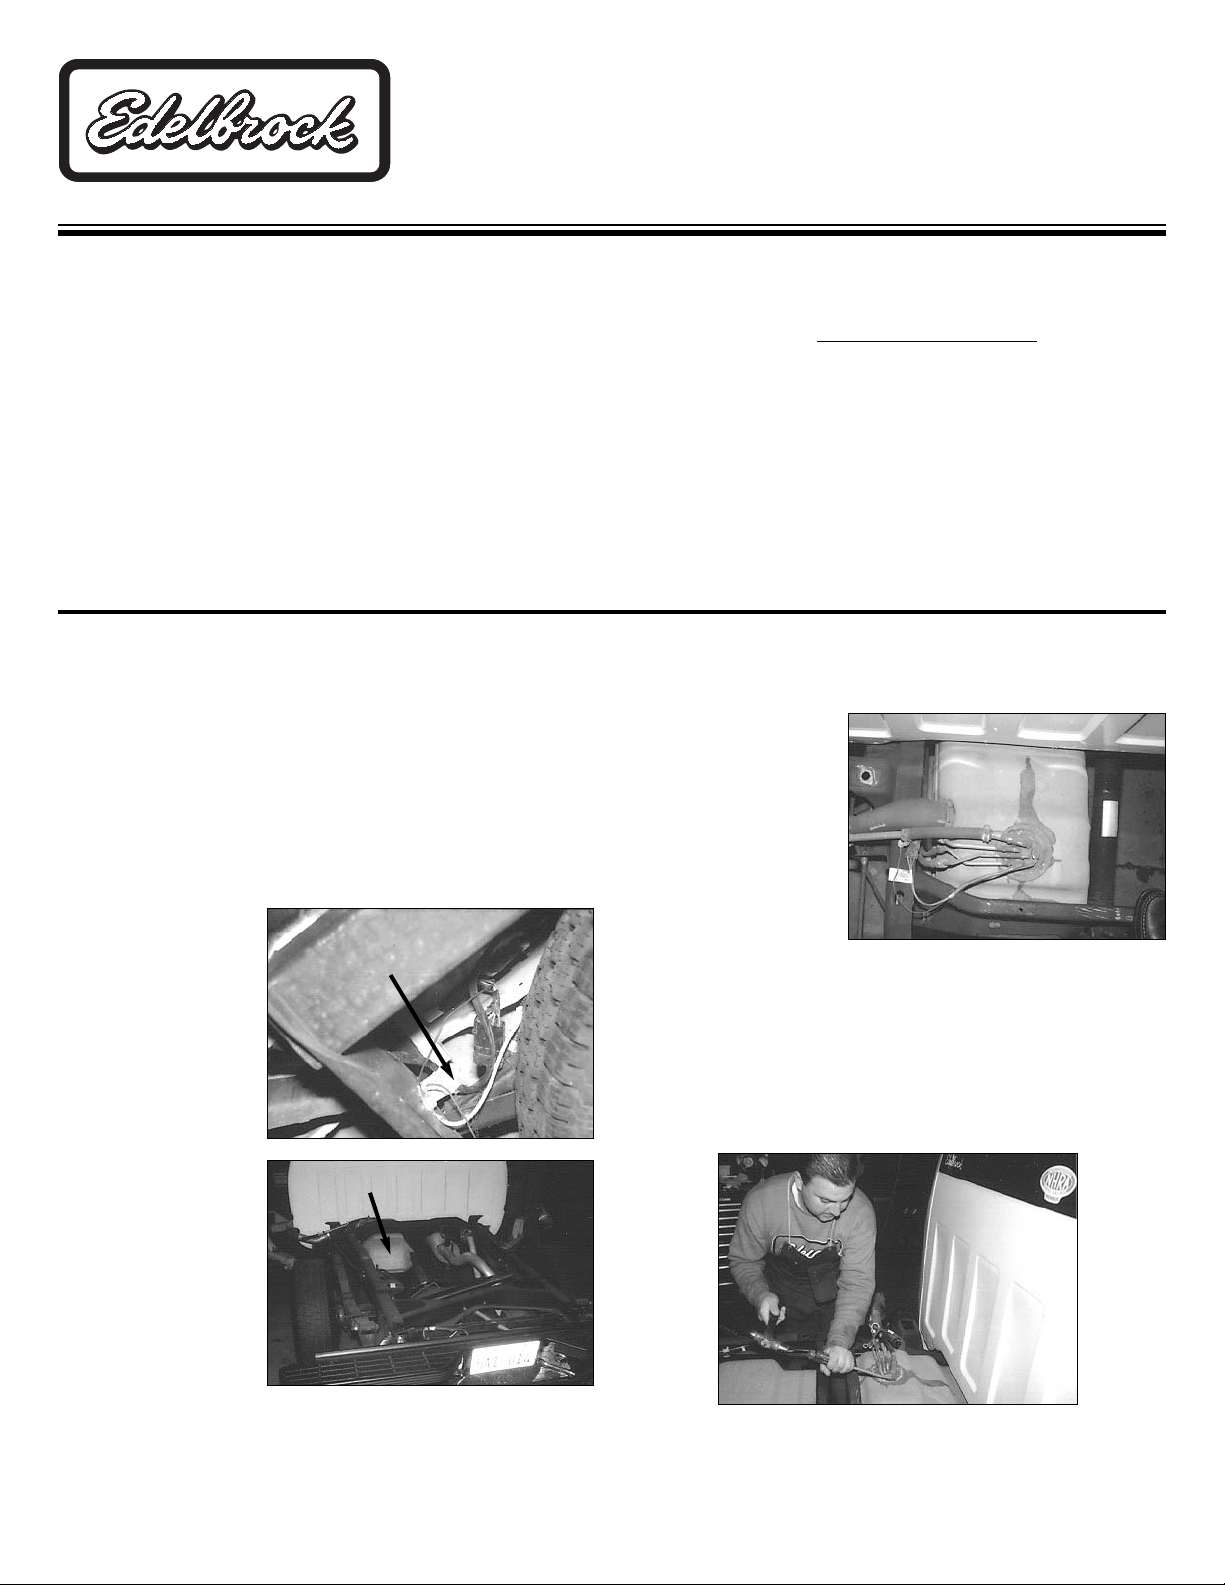
Suburbans (or trucks that you cannot remove the bed), require
removal of the fuel tank(s). The fuel tank must be lowered from
beneath the vehicle. First drain the fuel, then disconnect the
ground wire and the weather pack electrical connector. Then
disconnect gas fill hose and vent hose.
Let the tank drop enough to gain access to the fuel lines, then
disconnect fuel lines and remove tank from vehicle. Most
tanks have two mounting straps which must be removed.
Fill Hose
Connection
Fuel Tank Straps
 Loading...