

Page 1
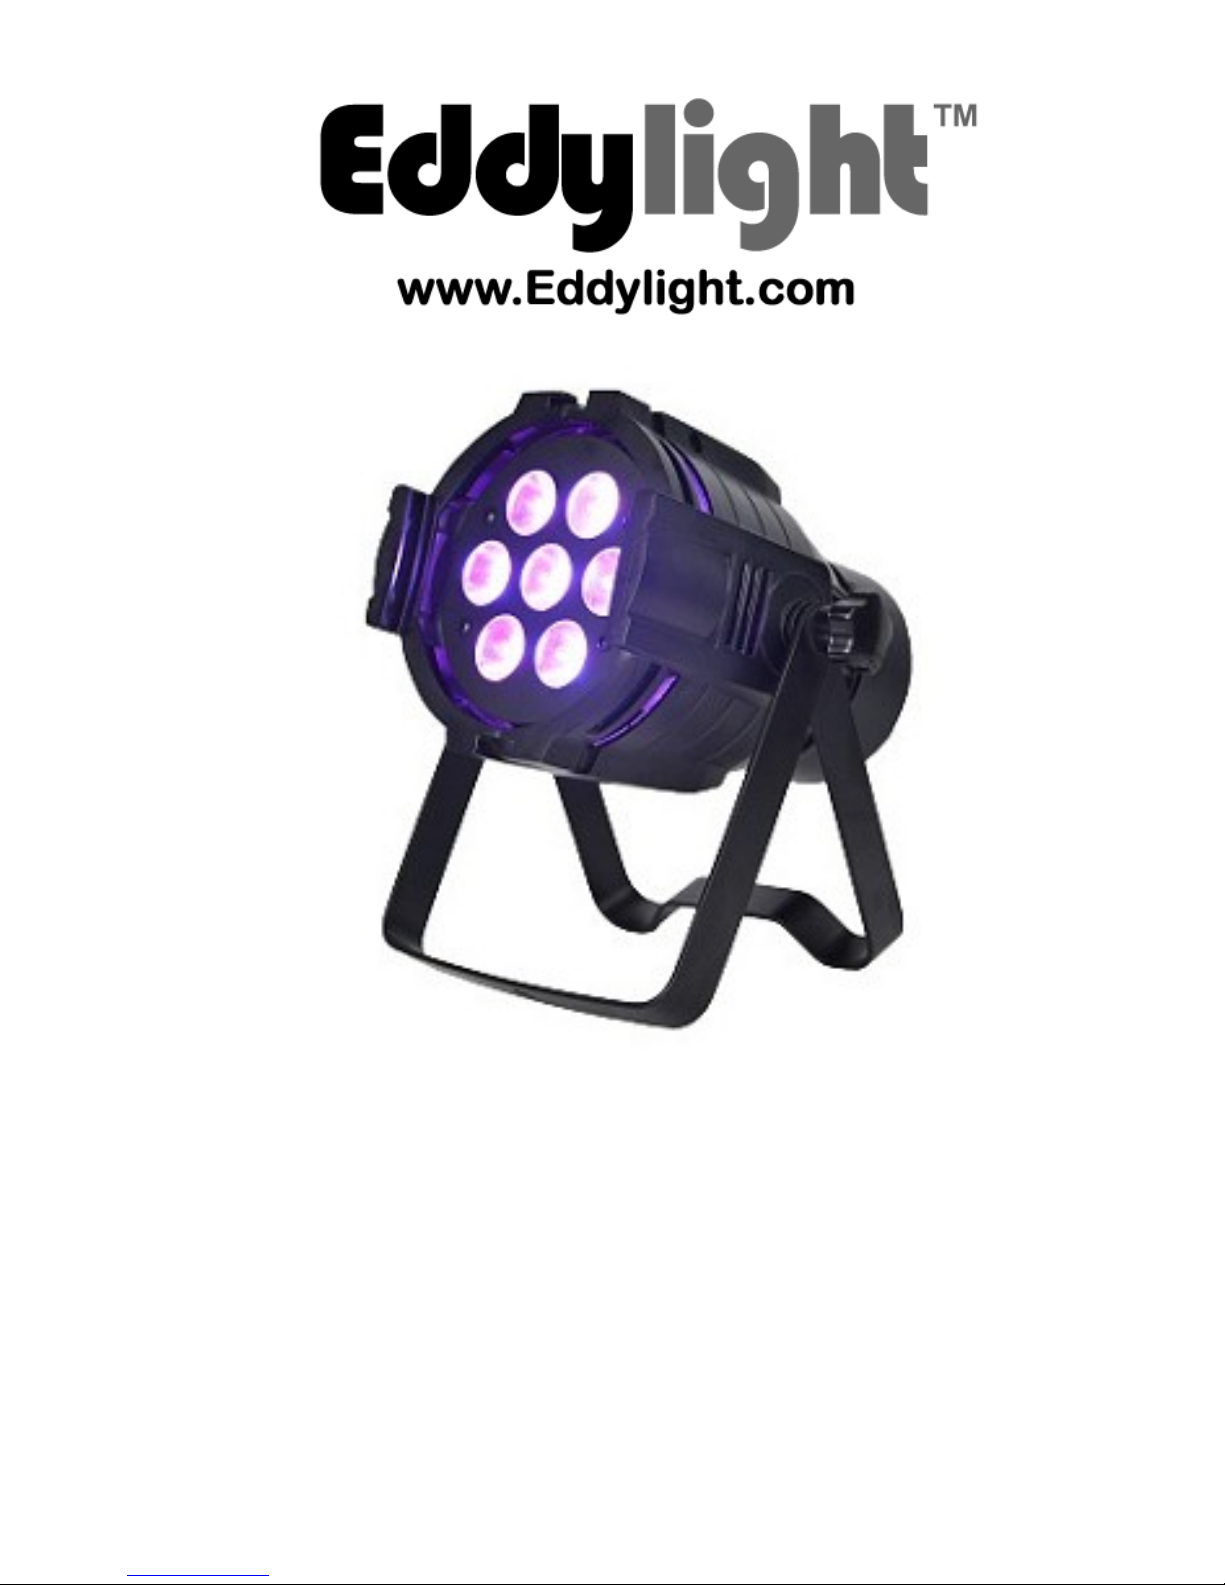
LED SUPER PAR
USER MANUAL
Page 2

1. Introduction
2. Safety Information
3. Dimensions and Specifications
4. Main Function
5. Rear Panel Display and Operation
6. Instructions for Manual
Programming
7. Master/Slave Control
8. Cable Connection
Page 3

1. Introduction
Thank you for purchasing our LED Super Par light. Please read these
instructions carefully before operating to avoid any possible damage and
accidents caused by misuse.
The LED Super Par light has a hydrodynamic aluminum shell. Three
colors of high-brightness LED lights (red, blue, green) are used to create a
wide spectrum of colors. Each color can be independently dimmed, faded
and so on. It draws low power and is low weight. The DMX controls
include dimming, fade, strobe, gradual change and more. The unit is
compatible with the standard DMX 512 signal for external DMX control.
Practical uses of the product include dance halls, stage backgrounds,
hotels, large-scale performances, drapery uplighting and stage lighting.
Packing List
- LED Super Par light
- User manual
- Warranty card
2. Safety Information
- Please consult skilled service technicians for any repairs required
- Always disconnect from the power source before setting up, moving and
servicing
- Avoid direct eye contact to the light when in operation
- Make sure the power supply voltage is compatible with this light
- Before installation, please check the light’s fasteners and mechanical
structure is in good condition and not damaged
- The light is designed for indoor use, below 40 degrees celsius
- The fixture may be mounted in any position provided there is adequate
room for ventilation. Make sure there are no flammable and explosive
items within 0.5 meters.
- Please ensure the ground is always connected
3
www.eddylight.com 1-800-914-3538
Page 4
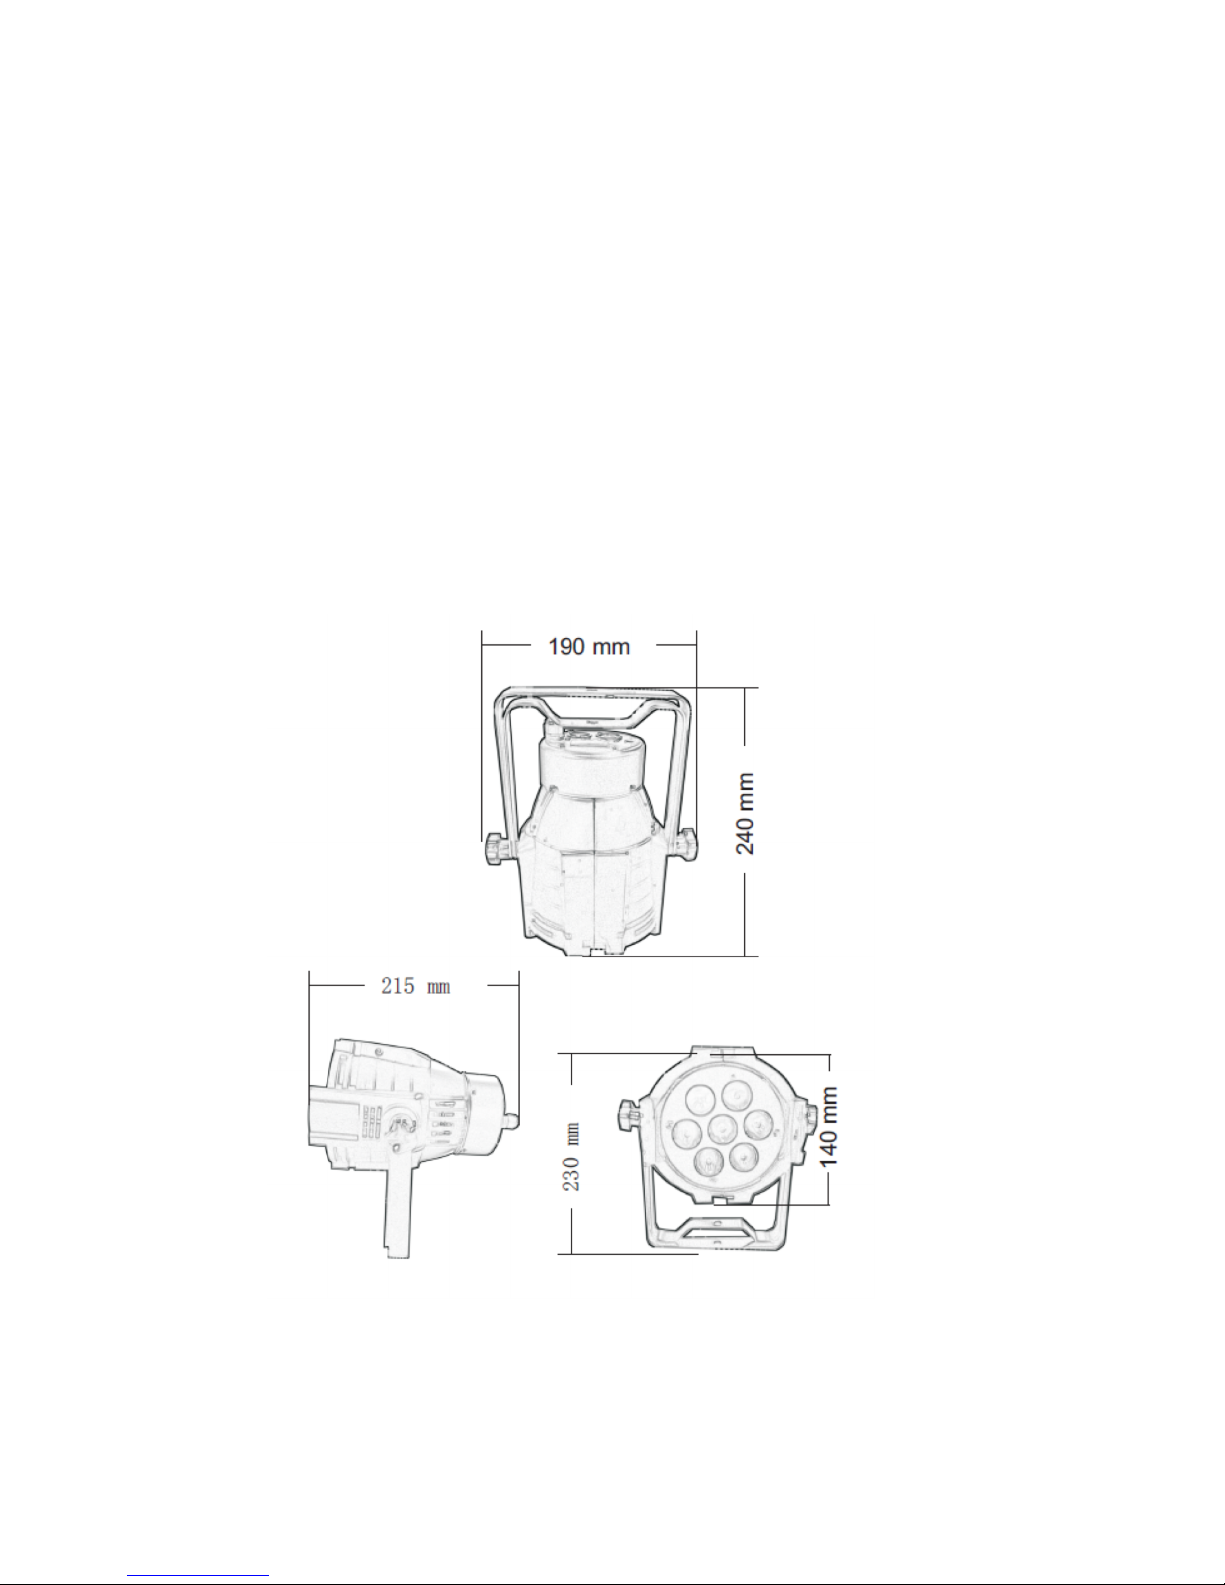
3. Dimensions and Specifications
Voltage: 100-264 VAC ~60Hz
Power: 70W
Size: 140mm deep x 190mm wide x 240mm high
Net Weight: 1.5 Kg
Rated: IP20
Lamp Type: (7) pc of ‘5-in-1’ High Power 10W LED’s
Lamp Life: ~50,000-100,000 hours
Lamp Angle: 25-45 degrees (produces a 5’ dia. spot of light from a 10’
distance, with a 2’ concentrated center of light)
Page 5
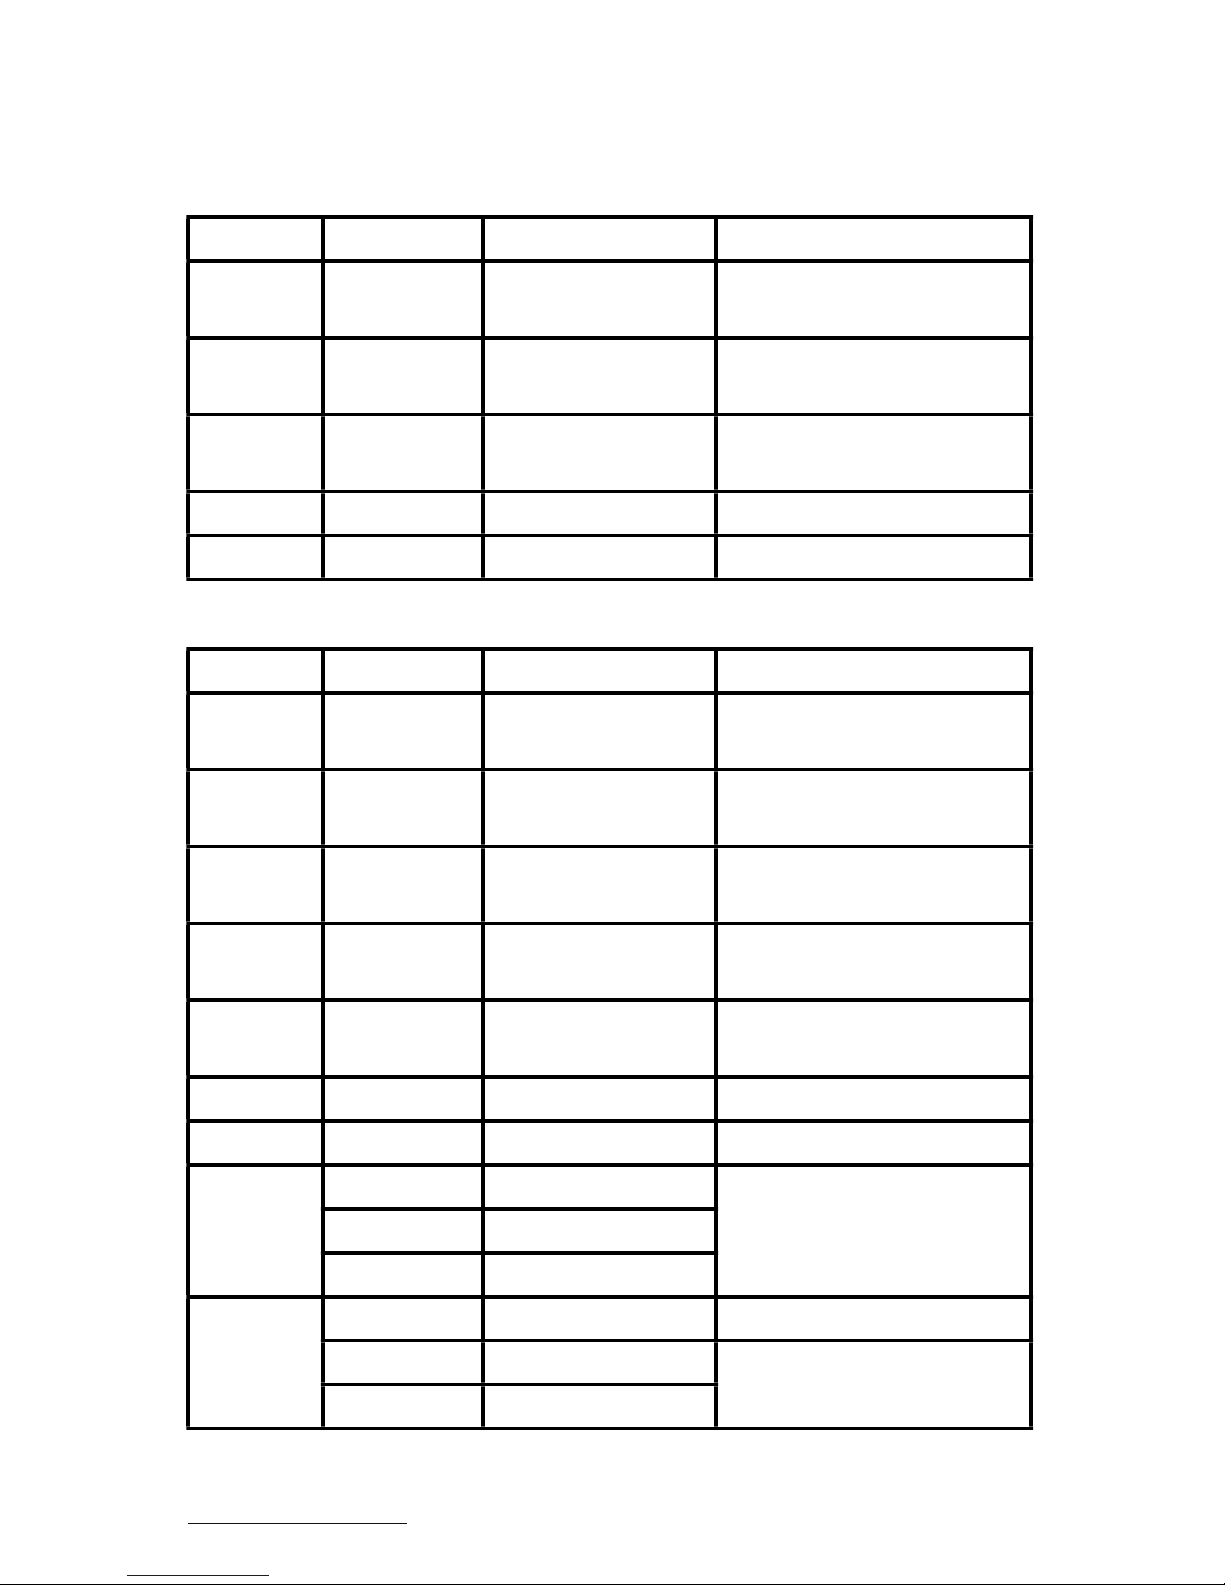
4. Main Function
5 Channel Mode:
Channel
DMX
Function
Notes
1
0-255
Red dimming
0—100%
2
0-255
Green dimming
0—100%
3
0-32
Blue dimming
0—100%
4
0-255
No function
5
0-255
No function
9 Channel Mode:
Channel
DMX
Function
Notes
1
0-255
Red dimming
0—100%
2
0-255
Green dimming
0—100%
3
0-32
Blue dimming
0—100%
4
0-255
Amber dimming
0—100%
5
0-255
White dimming
0—100%
6
0-255
Master dimmer
7
15-255
Strobe speed
72-133
3 color jumping
8
134-195
7 color jumping
Overrides CH1-7
8
196-255
31 color jumping
Overrides CH1-7
28-127
Dimmer mode
(See “nodE” in MENU)
9
128-250
Color fading
9
251-255
Sound activation
Overrides CH1-8
5
www.eddylight.com 1-800-914-3538
Page 6
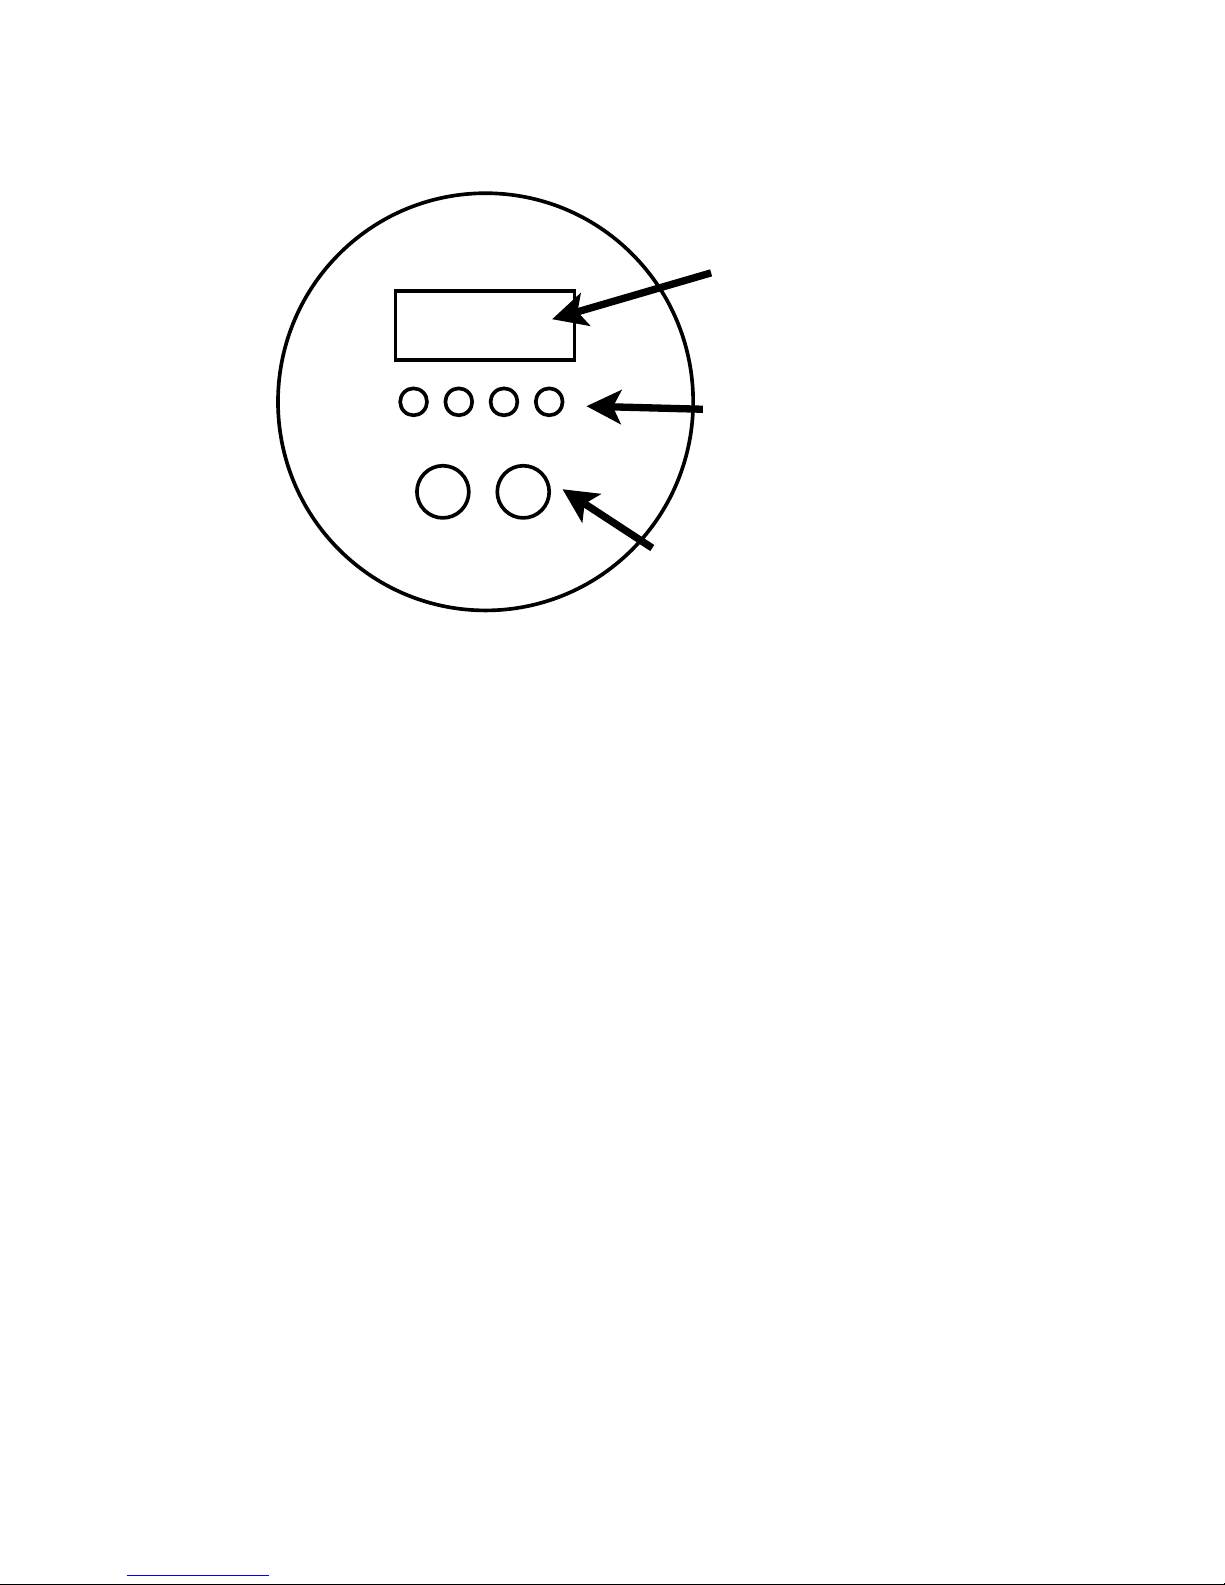
5. Rear Panel Display and Operation
MENU: Access the menu or return to a previous menu option
UP: Menu selection or parameter increments
DOWN: Menu selection or parameter increments
ENTER: Select the current menu option
6. Instructions for Manual Programming
MENU items:
•
!”Addr”: DMX mode (001-512)
•
“Slav”: Slave mode
•
!“Chnd”: DMX channel mode (5CH/9CH)
•
!“SouA”: Sound activated mode
•
!”SP”: Built-in program speed change mode (speed = 0-15)
•
“Pr”: Built-in preset programs (0-11)
•
!”Colo”: Preset colors (0-30)
•
“Strb”: Strobe mode (speed = 0-15)
•
!”rL”: Solid color mode, red setting (0-255)
•
!”gL”: Solid color mode, green setting (0-255)
•
!”bL”: Solid color mode, blue setting (0-255)
•
“aL”: Solid color mode, amber setting (0-255)
•
“wL”: Solid color mode, white setting (0-255)
•
“LED”: Select whether LED display is on or off (on/off)
•
“nodE”: DMX dimmer mode (nod0-nod4) (see DMX chart CH9)
Press ENTER to save your selection, which means you will enter the
menu mode saved previously when you activate the light next time. For
example, if you want to choose DMX mode d017, operate as follows:
DMX OUT DMX IN
Menu Up Down Enter
LED Display
Selection buttons
DMX input/output
Page 7
(See next page)
•
Press MENU repeatedly until “Addr”
•
Press UP / DOWN to select your desired address (ie. “d017”)
•
Press ENTER to choose.
Creating Solid Colors: (r, g, b, a, w)
•
Press MENU until “r”, “g”, “b”, etc is selected.
•
Press UP / DOWN until to change the number (brightness of that color)
•
Press ENTER to choose
•
Repeat the process for each color
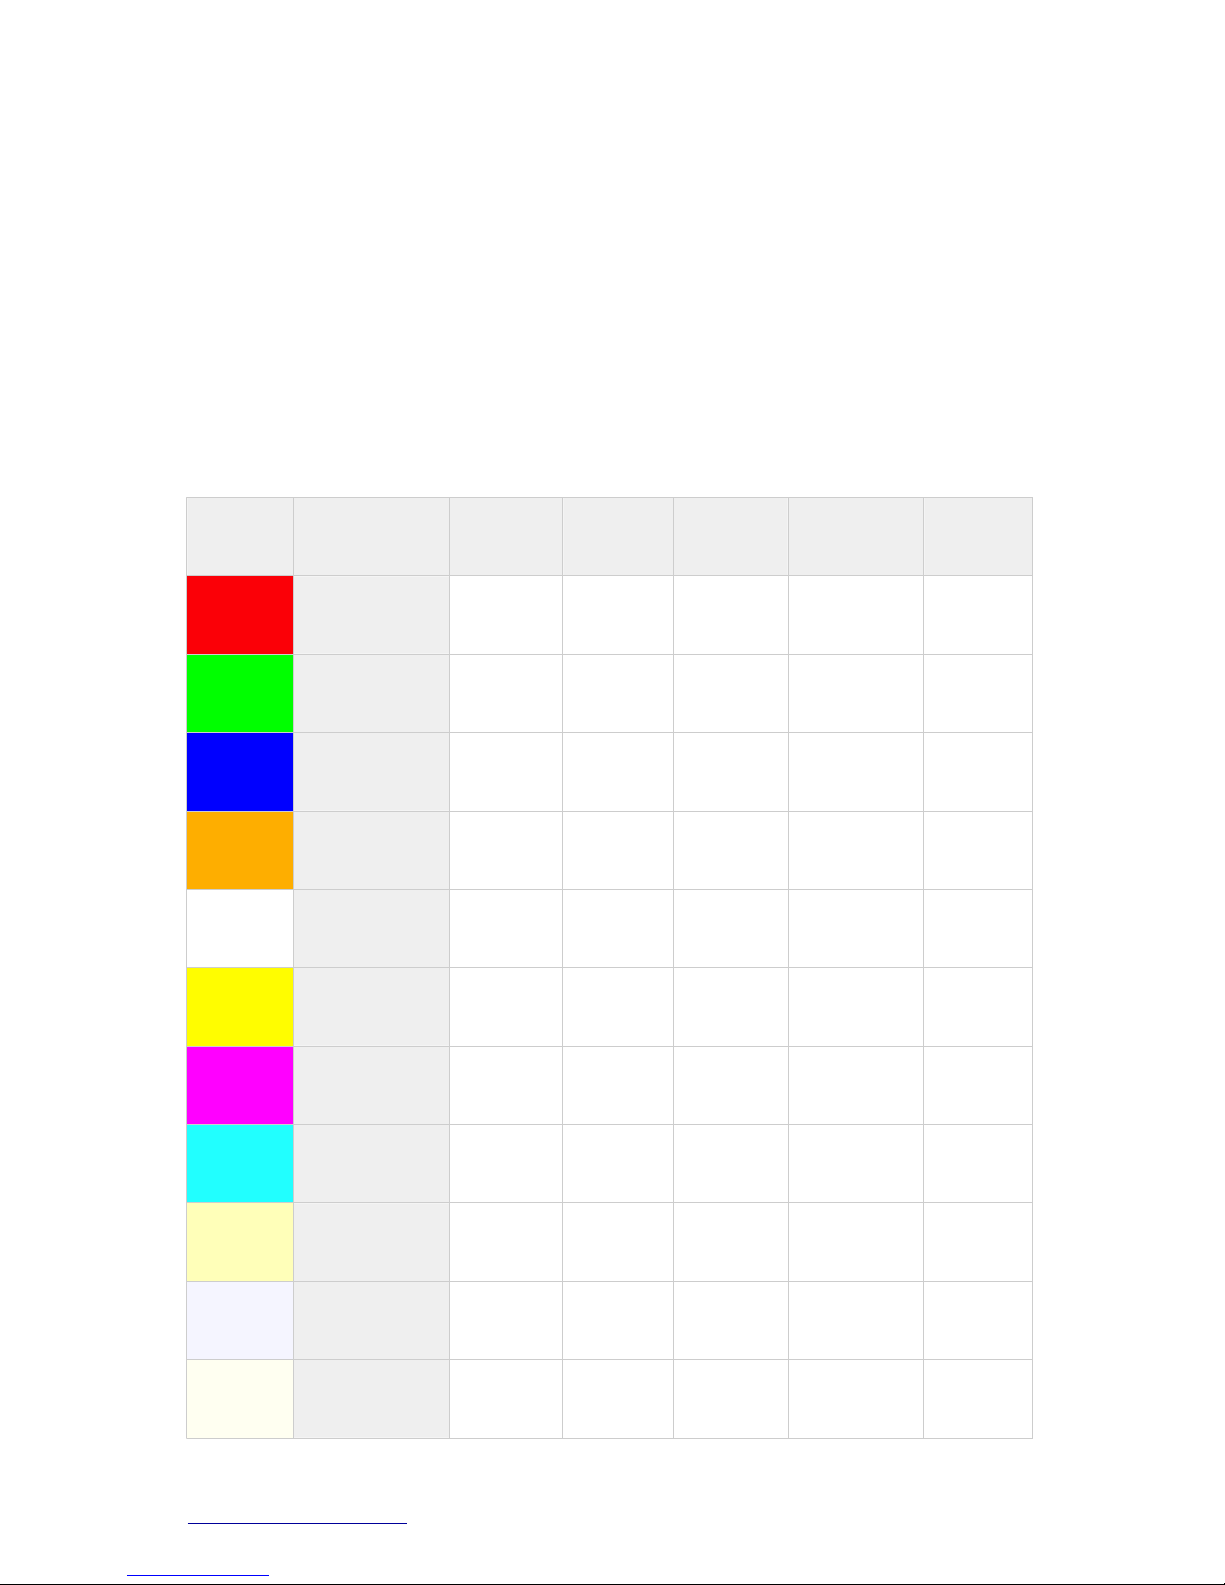
Sample colors: (Visit the website for more color combinations)
Color
Name
Red
Green
Blue
Amber
White
!
Red
2550000
!
Green
0
255000!
Blue
0025500
!
Amber
000
255
0
!
White
0000255!Yel l ow
255
25500
0
!
Magenta
255025500
!
Cyan
0
255
25500
!
Champagne
000
255
255
!
Cold White
255
255
25500
!
Warm White
255
255
255
255
255
7
www.eddylight.com 1-800-914-3538
Page 8
7. Master/Slave Control
The MASTER functions as a master as long as it’s not in DMX mode (and
ideally no cable plugged into the DMX INPUT on the unit). It sends a
signal to the SLAVE through a DMX cable and synchronizes its settings to
it. Do not use more than 20 lamps or 60m of DMX cable.
The SLAVE units should be set to DMX mode and the address code set to
“d001” to receive the MASTER’s signal. Only one light can be set as a
master, but multiple lights can be set as slaves.
8. Cable Connection
A standard XLR connection is used for the DMX 512 protocol:
DMX512 does not include automatic error checking and correction, and so
is not an appropriate control for hazardous applications, such as
pyrotechnics or movement of theatrical rigging. False triggering may be
caused by electromagnetic interference, static electricity discharges,
improper cable termination, excessively long cables, or poor quality
cables.
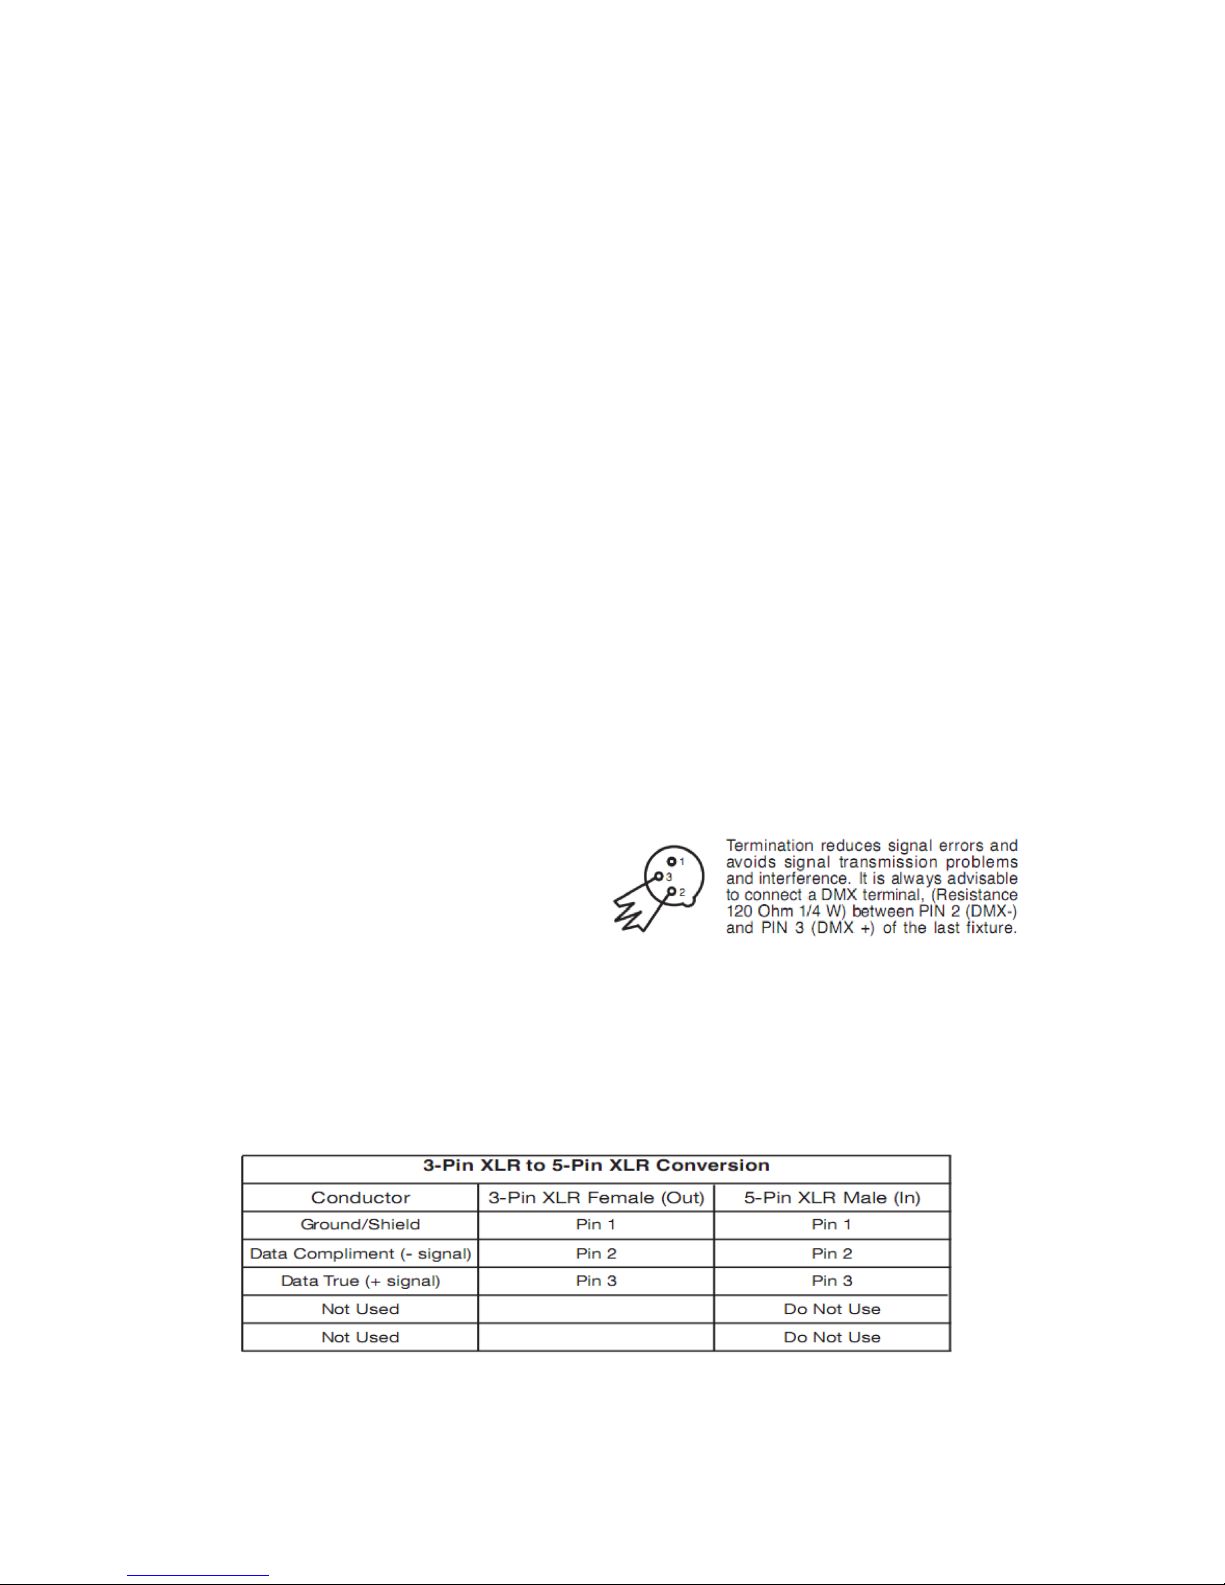
If using 5-pin DMX, please use a 5-pin to 3-pin cable adapter. Details on
configuration below:
Note: In order to avoid failures and
signal interference, it is recommended
to connect a 120Ω resistor (1/4W) at the
end of the DMX connection as shown on
right. If using 5-pin DMX, please use a
5-pin to 3-pin cable adapter. Details on
configuration below:
 Loading...