

Page 1
to continue.
wire ties (2) and TIR lens (2)
You’ll need supplied
>
>
View the video at
www.ecotechmarine.com/tirlens/
®
610 954 8480
800 785 0338 (toll free)
888 500 2907 (fax)
XR695 TIR LENS KIT
WHERE WIRES CROSS (2).
SCREWS FROM HOUSING SIDE
STEP 7: REMOVE HEATSINK
INSTALLATION
TIR LENS
RADION XR30w
View the video at www.ecotechmarine.com/tirlens/
Installation of TIR lenses will increase
the light output from your Radion fixture.
Overlighting your tank may cause damage
OF THE
FOR THE
to inhabitants.
(Repeat this process for second reflector.)
SCREWS (4) AND REMOVE REFLECTOR.
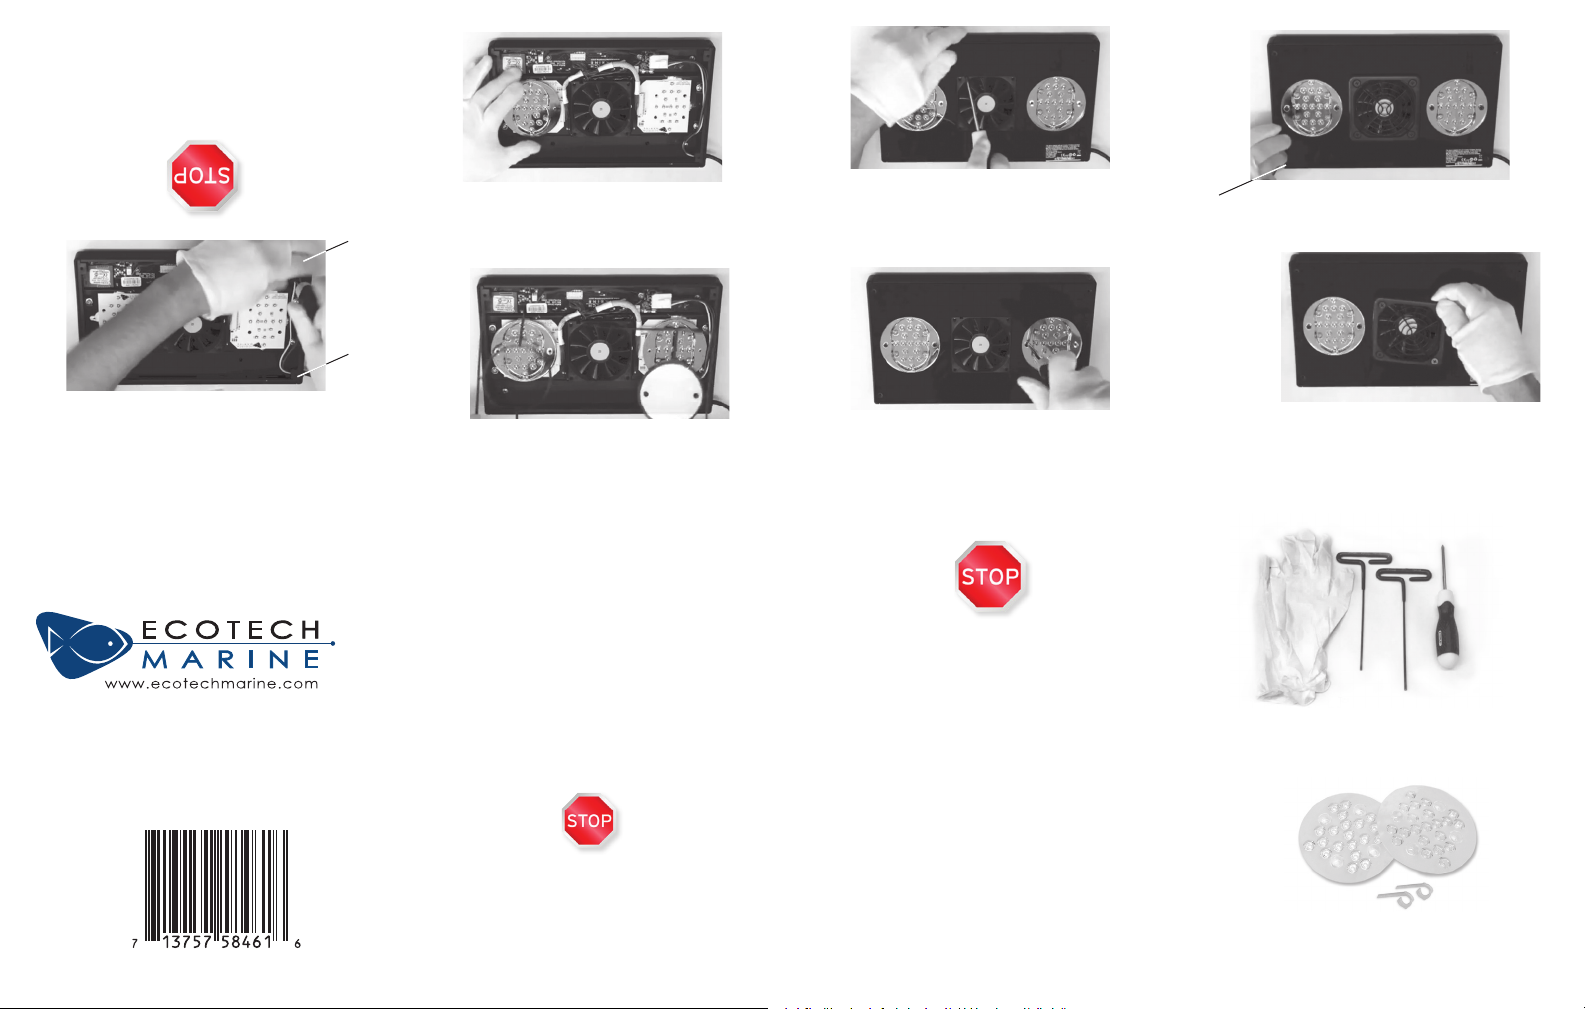
STEP 6: REMOVE 2.5MM REFLECTOR
RUBBER GASKET.
STEP 5: REMOVE
• Before starting this process, ensure that
your Radion XR30w is disconnected from its
power supply.
• Place the Radion on a soft surface to protect
the cover plate from scratches.
• EcoTech Marine recommends the use of gloves
during this process to prevent any fingerprints
from getting on the LED clusters. Fingerprints
could cause a decrease in light output.
• EcoTech Marine is not responsible for any
damage caused to the Radion, your aquarium
and its livestock, or your property as a result
of improper use of the TIR Lens Kit.
• Installation of the TIR Lens Kit will not affect
your existing warranty of the Radion XR30w.
SCREWDRIVER TO FACILITATE.
PLATE USING NOTCH IN FAN AND A
STEP 4: REMOVE BOTTOM
(Discard reflectors. Keep screws.)
AND REMOVE LENSES.
SCREWS (2 FOR EACH LENS)
STEP 3: REMOVE PHILLIPS LENS
>
PLATE SCREWS (4) AT OUTER CORNERS.
STEP 2: REMOVE PHILLIPS BOTTOM
GRILL ASSEMBLY (2 PIECES).
FAN SCREWS (4) AND REMOVE FAN
STEP 1: REMOVE PHILLIPS
TOOLS NEEDED:
Phillips screwdriver, 2.5mm &
3mm Allen keys and gloves
INCLUDED IN TIR LENS KIT:
wire ties (2), TIR lens (2)
Page 2
View the video at
www.ecotechmarine.com/tirlens/
DO NOT
OVERTIGHTEN SCREWS.
IT MAY STRIP SCREWS OR
DAMAGE THE RADION.
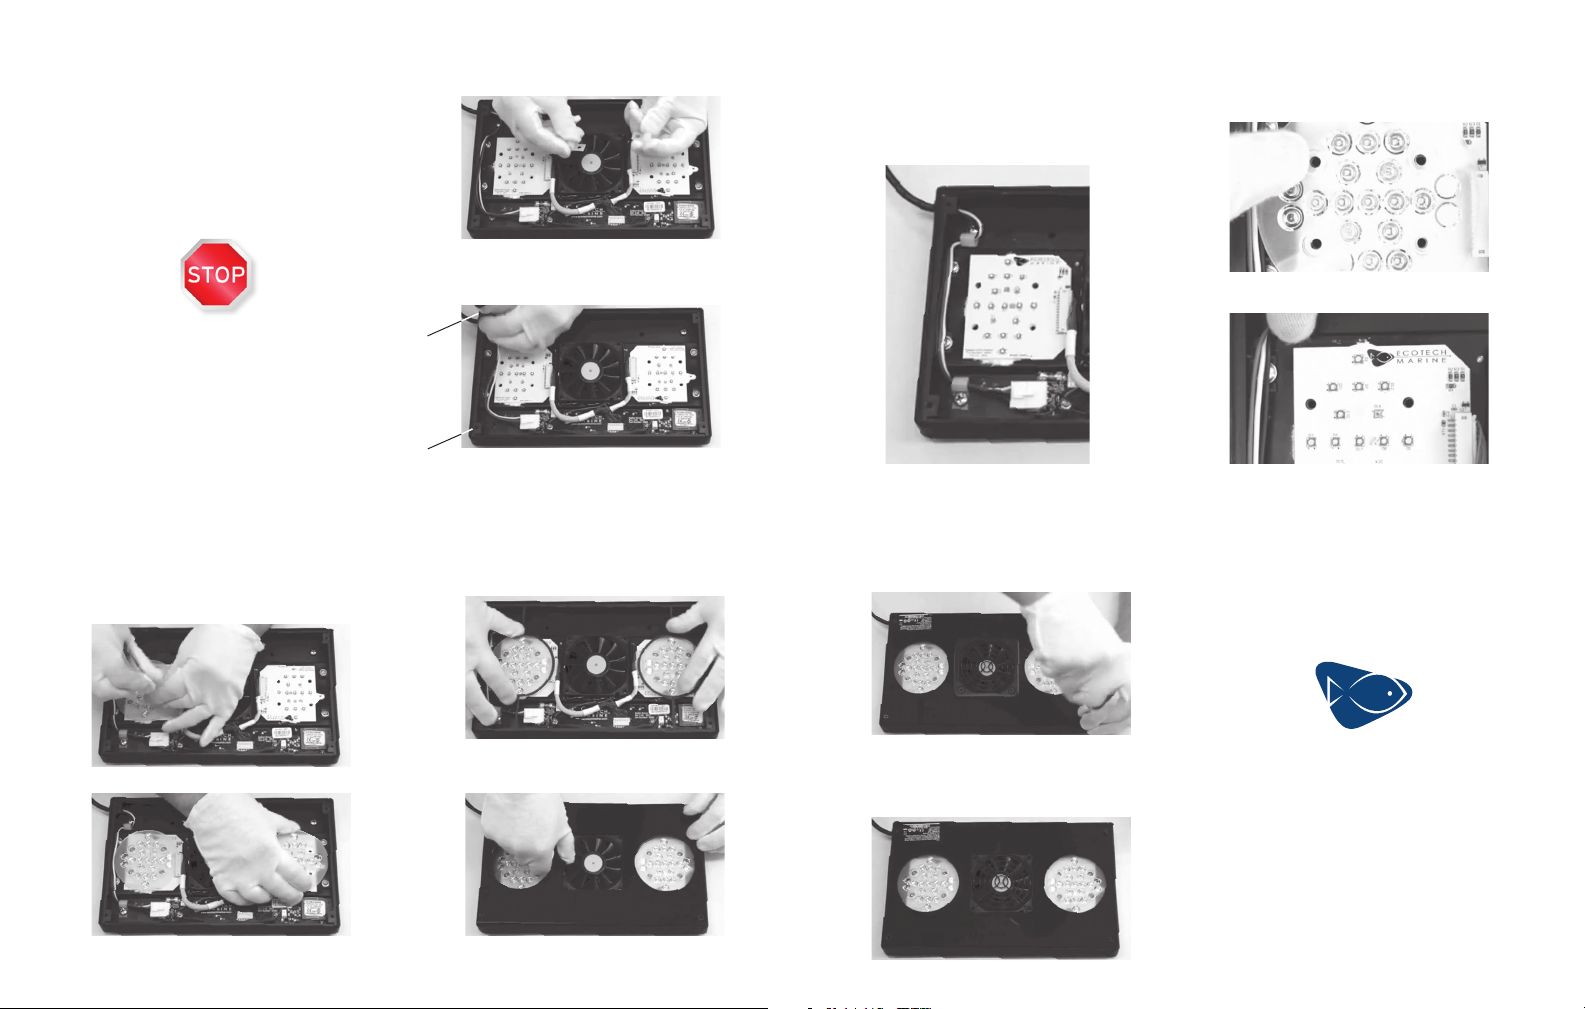
STEP 8: LOCATE SUPPLIED
WIRE TIES (2).
ROUTE WIRES WITH SUPPLIED WIRE TIES
AND SECURE TO FIXTURE WITH PHILLIPS
CORNER SCREWS (2).
>
>
(Wait to tighten screws.)
STEP 9: ROUTE WIRES NEATLY
ALONG INSIDE WALL AND TIGHTEN
SCREWS ONCE PROPERLY SET.
(See image below.)
STEP 10: ENSURE LENS
IS ALIGNED AND PLACE IT OVER
CLUSTER.
(Adjust wiring if necessary.)
STEP 11: AFTER CENTERING
TIR LENS OVER LED CLUSTER, FASTEN
2.5MM SCREWS (4) INTO HOUSING.
(Repeat this process for second lens.)
STEP 12: REPLACE RUBBER GASKET,
ENSURING THAT IT IS FULLY ALIGNED AND
SEATED FLAT ON EACH CORNER.
STEP 13: REPLACE ACRYLIC BOTTOM
PLATE AND ENSURE AN EVEN, SNUG FIT.
(Serial number sticker should be visible.)
STEP 14: FASTEN REMAINING
PHILLIPS SCREWS (4) INTO EACH CORNER.
STEP 15: ALIGN FAN GRILL
ASSEMBLY (2 PIECES) AND FASTEN
PHILLIPS SCREWS (4) INTO FAN HOUSING.
Note: Upon completion of the TIR lens installation,
you will no longer need original clear lens
plates or reflectors. The TIR lenses are thinner than
the original reflector and plate assembly and will be
recessed in the fixture. As with the previous assembly,
the TIR lenses make a water-resistant seal with the
rubber gasket that was reinstalled in Step 12.
YOU HAVE SUCCESSFULLY
UPDATED YOUR
RADION XR30w WITH
TIR
LENSES.
 Loading...