

Page 1
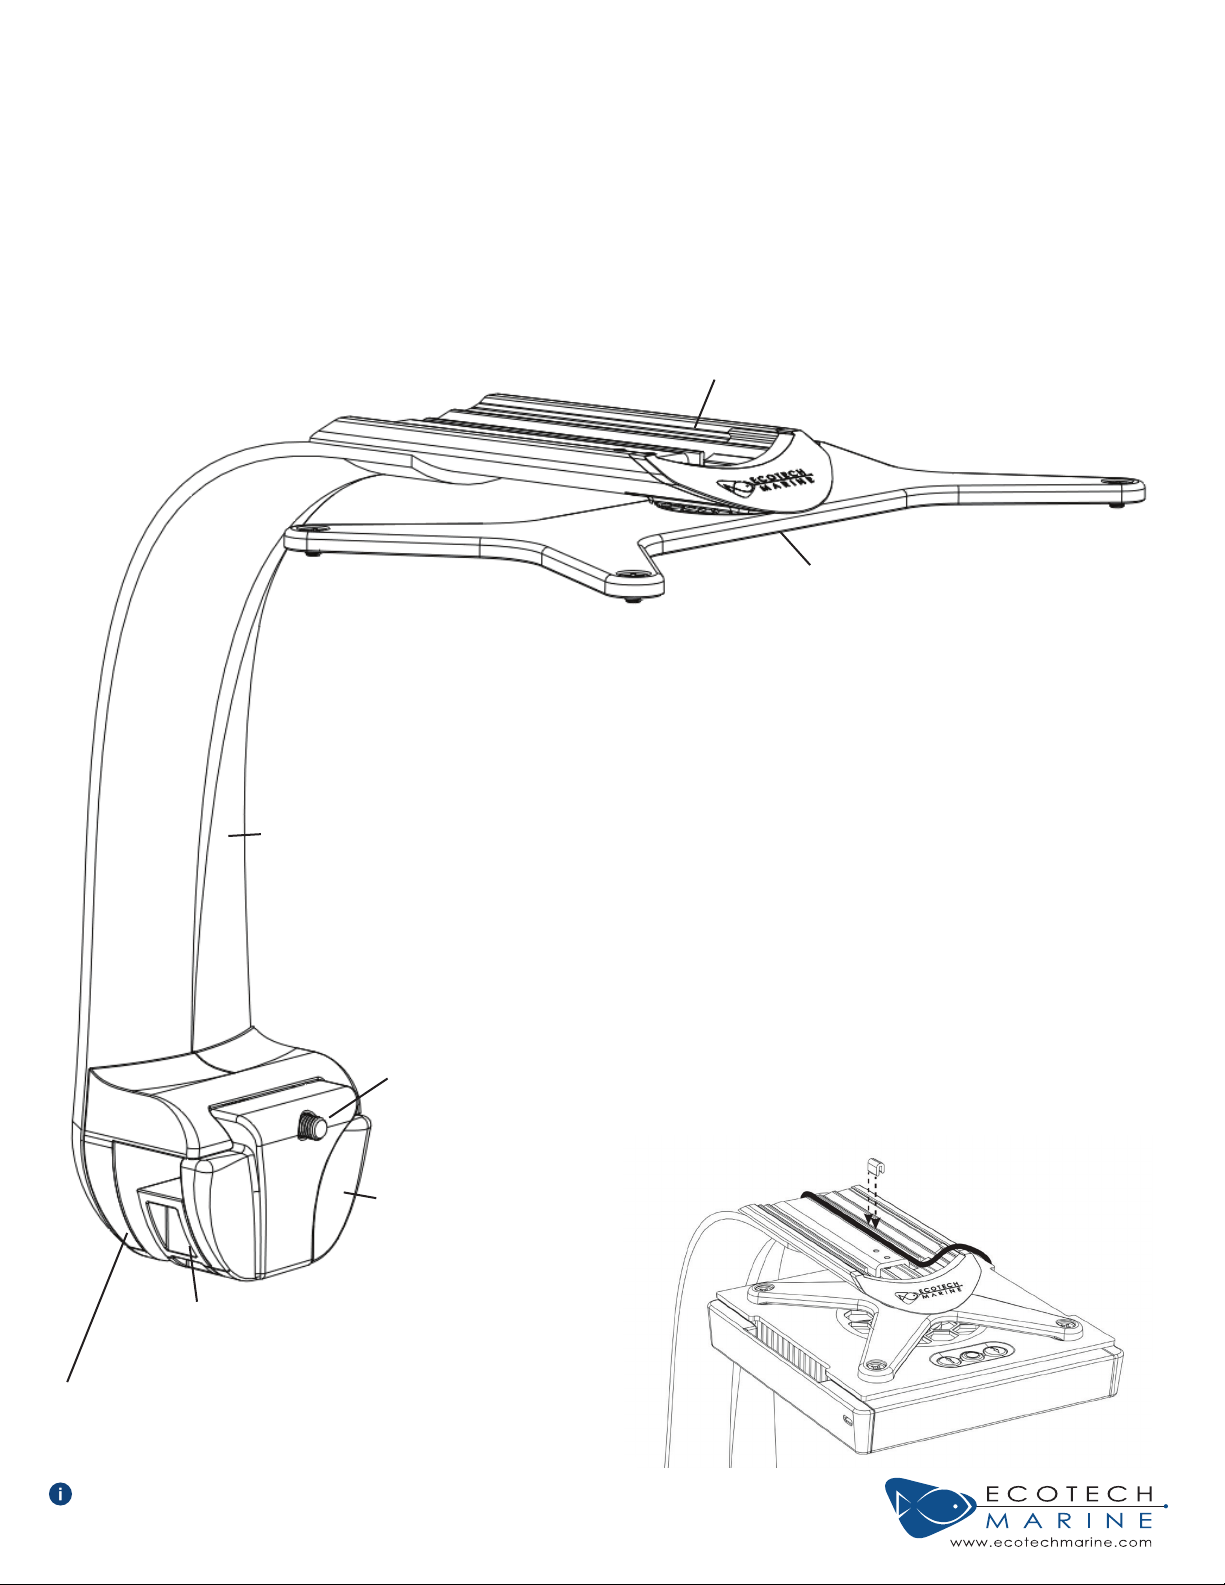
RMS
Tank Mount System
Mounting Instructions for Radion XR30 and XR15 LED Models
1. Sliding Rail
2. X-Bracket
6. Spacer (optional)
7. Edge Clamp
3. Formed Arm
4. Adjustment Screw
5. Clamp Chop
Cable Routing
(XR15 only)
Make sure that all you have all components included in this kit before
beginning. If something is missing contact EcoTech Marine service at
1-800-785-0338 ext.2 with any questions, requests or comments.
Page 2
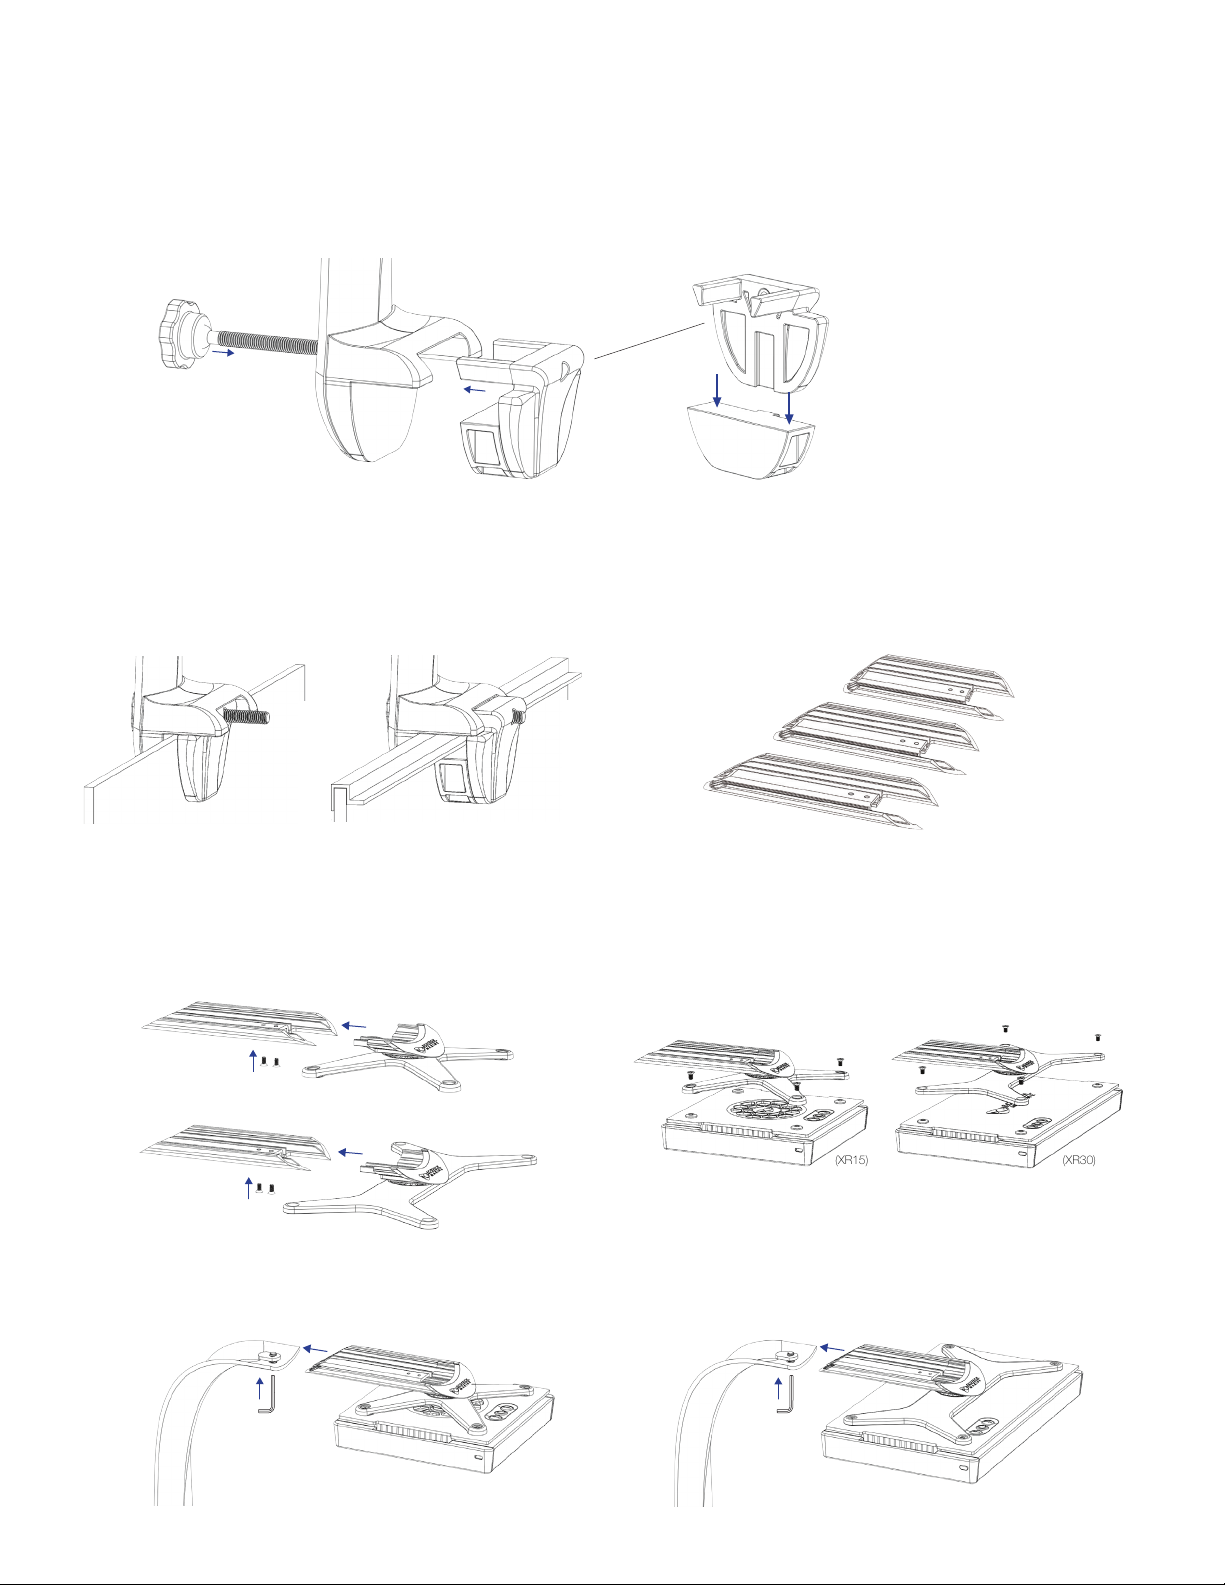
Kit Assembly Instructions
Choose appropriate Spacer configuration
1.
2a. If using the RMS on a rimmed
tank; leave the included spacer
1
Mount RMS assembly to tank
2.
WARNING: Do not over tighten clamp, over-tightening
may result in damage to your tank or RMS assembly.
2b
2a
Choose appropriate Sliding Rail
3.
for desired front to back position
*XR15 Kit only includes two Sliding Rails.
on the clamp chop.
2b. If using the RMS on a rimless
tank; slide the included spacer off
of the clamp chop.
Insert X-Bracket assembly into the
4.
5. Attach Radion to X-Bracket
end of the Sliding Rail and tighten
down screws
1
2
1
2
Guide Sliding Rail onto Formed Arm over the locking nut and tighten
6.
XR15)
(
(XR30)
(XR15) (XR30)
screw in desired position
1
2
(XR15)
2
1
(XR30)
EcoTech Marine, RMS and all slogans are trademarks or registered trademarks of EcoTech Marine LLC. ©2003-2014 by EcoTech Marine LLC All rights reserved.
 Loading...