

Page 1
(XR618-1)
(XR616-1)
(XR618)
(XR616)
www.ecotechmarine.com.
Additional Rail Kit information available at
(Ext. 2) or email us at service@ecotechmarine.com.
(See illustration reference on inside.)
800 785 0338
If something is missing, contact EcoTech Marine service at
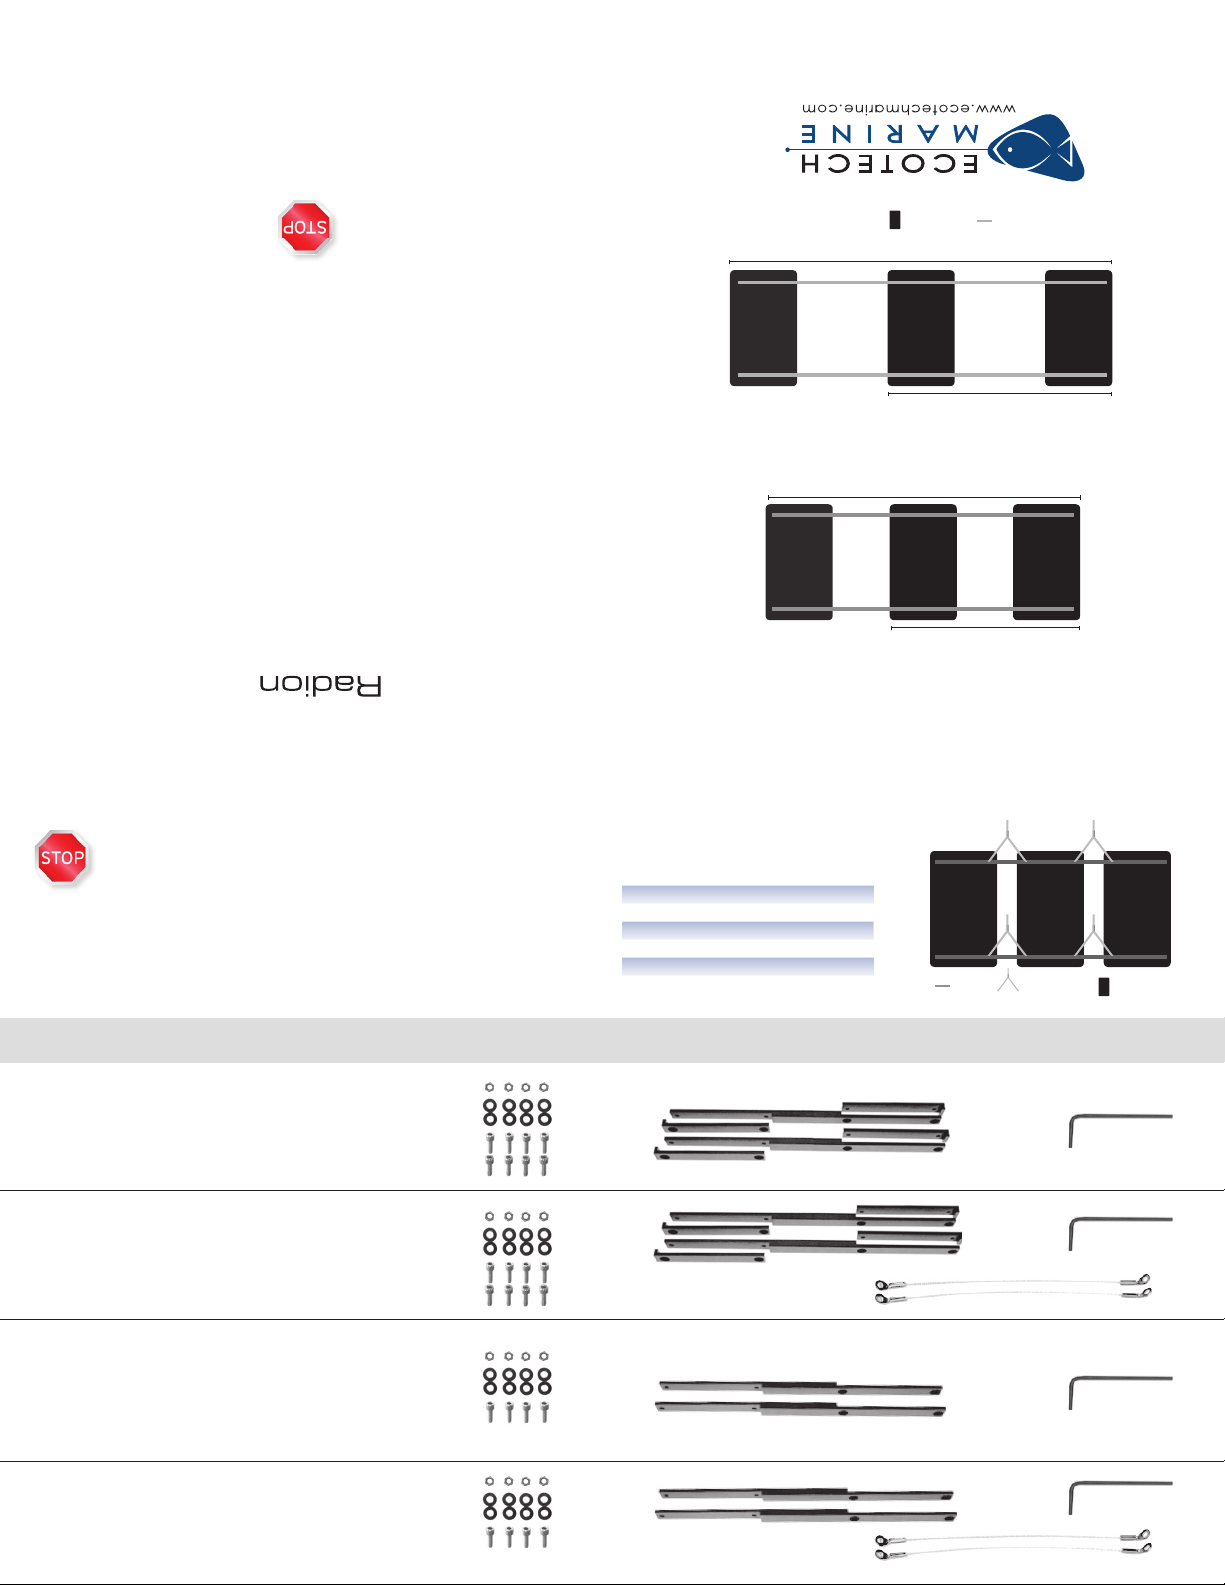
Review the parts included in the kit that you purchased.
+ONE LONG RAIL KIT
+ONE SHORT RAIL KIT
LONG RAIL KIT
SHORT RAIL KIT
610 954 8480 800 785 0338 (toll free) 888 500 2907 (fax)
1349 Lynn Ave., Bethlehem, PA 18015
®
Rails Radions
Approx. 31.875 in (80.96 cm) (3 Radions end to end)
Approx. 19.5 in (49.53 cm) (2 Radions end to end)
AND
+ONE LONG RAIL KIT
LONG RAIL KIT
Instructions are for the following kits:
INSTRUCTIONS
RAIL KIT
TM
If you are using a Rail Kit in conjunction with the
PREMIUM HANGING KIT
hanging kit instructions before beginning. A minimum
of ONE hanging kit per TWO Radions is recommended.
Additionally, make sure that the hanging kit anchors are
capable of supporting multiple Radion fixtures.
, familiarize yourself with the
RAIL KIT PARTS
SIDE-BY-SIDE RADION HANGING GUIDE
Number of
Radions
Hanging
1 1 0 0
2 1 1 0
3 2 1 1
4 3 1 2
5 4 1 3
6 5 1 4
Kit
Rail
+One
Kit
(All kits include hex nuts for connecting multiple kits.)
Kit
Approx. 27.875 in (70.8 cm) (3 Radions end to end)
Approx. 17.5 in (44.45 cm) (2 Radions end to end)
AND
+ONE SHORT RAIL KIT
Multiple Kit Examples
Rails Hangers Radions
SHORT RAIL KIT
SHORT RAIL KIT
16 in (40.64 cm)
LONG RAIL KIT
18 in (45.72 cm)
(XR616)
(XR618)
+ONE SHORT RAIL KIT
16 in (40.64 cm)
+ONE LONG RAIL KIT
18 in (45.72 cm)
(XR616-1)
(XR618-1)
Page 2
TM
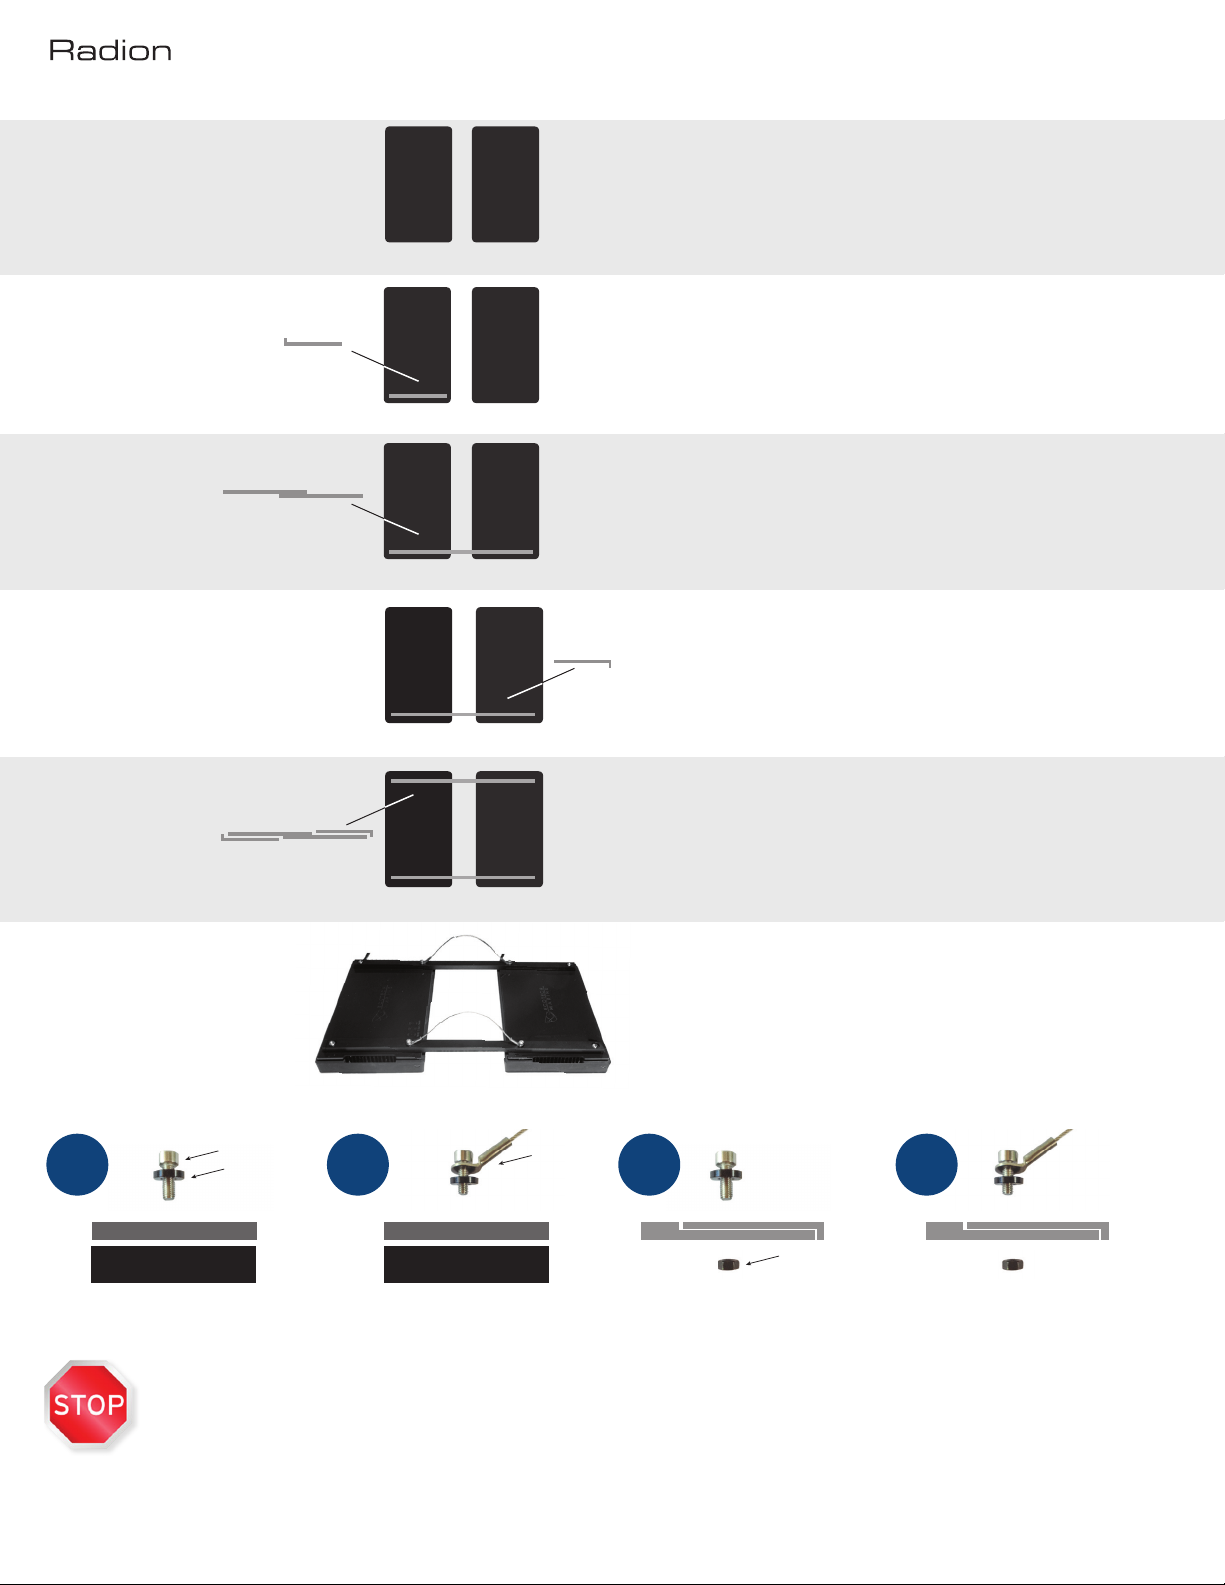
RAIL KIT STEP-BY-STEP INSTRUCTIONS
STEP 1:
PLACE RADIONS SIDE BY SIDE
APPROXIMATE PLACEMENT DISTANCE
5.25 in (13.34 cm) – Long Rail Kit
3.25 in (8.26 cm) – Short Rail Kit
End Cap
Side View
STEP 2:
PLACE AN END CAP NOTCH UP
Rail Side View
STEP 3:
PLACE A RAIL FACE DOWN
STEP 4:
PLACE AN END CAP NOTCH DOWN
TO COMPLETE THE FIRST RAIL
OR ADD A +ONE RAIL
Radion Radion
>
Radion Radion
>
Radion Radion
Radion Radion
>
End Cap
Side View
Place Radions parallel to each other on a flat surface with the
power cables on the same side. If using the Long Rail Kit,
Radions should be spaced 5.25 in (13.34 cm) apart. If using
the Short Rail Kit, Radions should be spaced 3.25 in (8.26 cm) apart.
Place an end cap notch up on one Radion so that the screw
holes align with the mounting holes on the Radion.
Place a rail across both radions so that the end cap and the
rail create a solid bar. Make sure that all screw holes align with
the mounting holes on the Radions.
If you are connecting more than two Radions together, you will
use an additional connector rail as supplied in the appropriate
+One Kit. If you are completing a rail, place a second end cap
notch down to complete a solid bar.
>
STEP 5:
CREATE A
SECOND RAIL
Complete Rail
Side View
Radion Radion
Repeat steps 2 through 4 to complete the second rail.
STEP 6:
DETERMINE WHERE EYELET
CABLES WILL BE MOUNTED
(OPTIONAL). ATTACH RAILS
TO RADIONS.
Screw
1 2 4
RAIL TO RADION RAIL TO RADION WITH EYELET
Bushing
Rail
Radion
Radion Radion
Eyelet
With the rails assembled, determine where the eyelet cables
(optional) will be mounted. Use the images below to identify
rails and/or eyelet cables.
3
Nut
RAIL TO RAIL
(Multiple kits only)
RAIL TO RAIL WITH EYELET
(Multiple kits only)
• Do not install Radions above an aquarium while they are plugged into an electrical outlet. Mount the Radions first and then connect power to the fixtures.
• EcoTech is not responsible for any damage to fixures, your aquarium and its livestock or your property as a result of improper use of the rail kits.
• Never hang pointed or sharp objects at eye level where they may come in contact with persons.
For video tutorials or more information, please visit us at ecotechmarine.com
or visit our community knowledge base at community.ecotechmarine.com.
 Loading...