

Page 1
Multi-Light
B
C
A
B
C
A
B
C
A
RMS
Mounting Instructions for Radion XR30 and XR15 LED Models
RMS Track
RMS Arm
RMS Arm
RMS Track
RMS Slides
RMS Slides
+
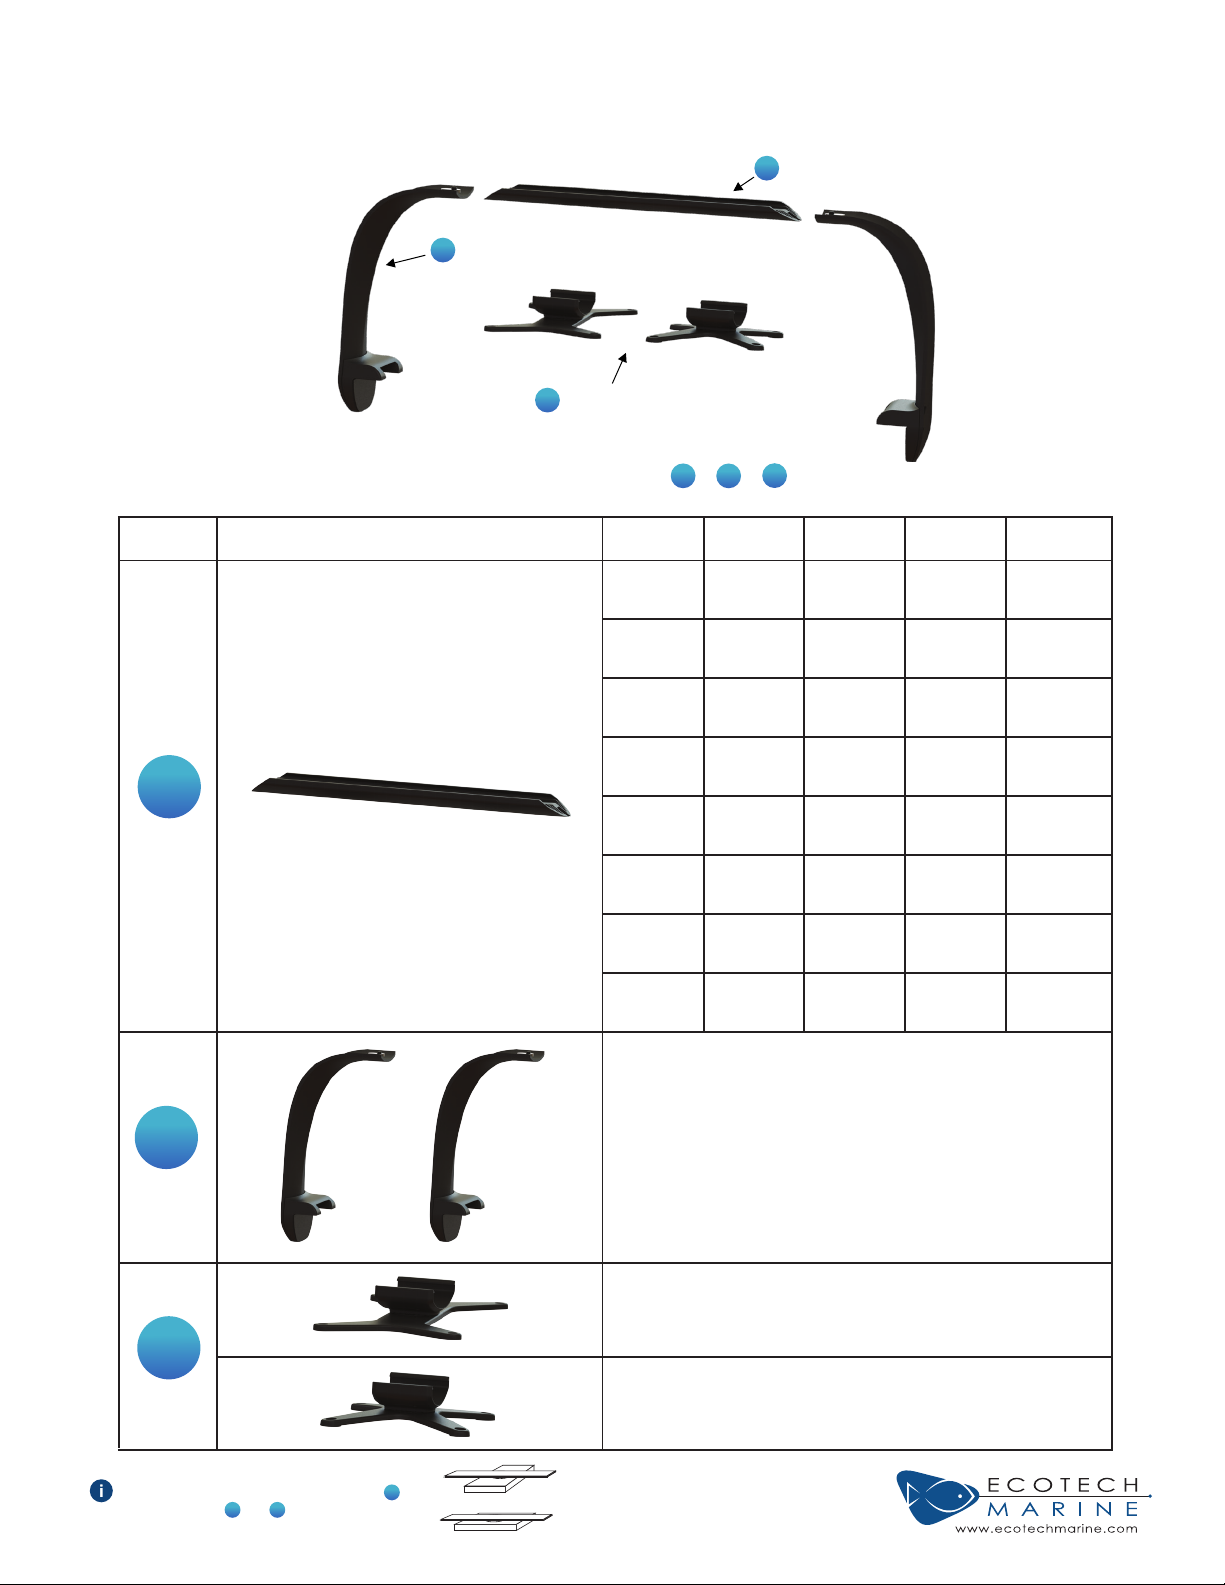
Build your Multi-Light RMS setup by choosing the components that fit your tank
Components
Track
Length
50cm
(20.5in)
75cm
(30.5in)
100cm
(40.5in)
125cm
(50.5in)
+
Max Tank
Length
68cm
(27in)
93cm
(37in)
119cm
(47in)
144cm
(57in)
Max Radions
Standard
XR15/XR30
2 1
2 1
3 2
4 3
Max Radions
Rotated
XR30
Part Number
XR703-0523
XR703-0777
XR703-1031
XR703-1285
A
Track
150cm
(60.5in)
170cm
(67in)
4 3
XR703-1539
B
Arm
C
Slide
175cm
(70.5in)
200cm
(80.5in)*
230cm
(90.5in)*
195cm
(77in)
220cm
(87in)
246cm
(97in)
5 4
6 5
7 5
2 RMS Arms
P/N: XR710
RMS XR30 Slide
P/N: XR707
RMS XR15 Slide
P/N: XR706
XR703-1793
XR703-2047
XR703-2301
*Special order through EcoTech Parts Store only
These instructions are included with group .
Parts from group and are required to
complete this mounting system.
Standard
Rotated
Page 2
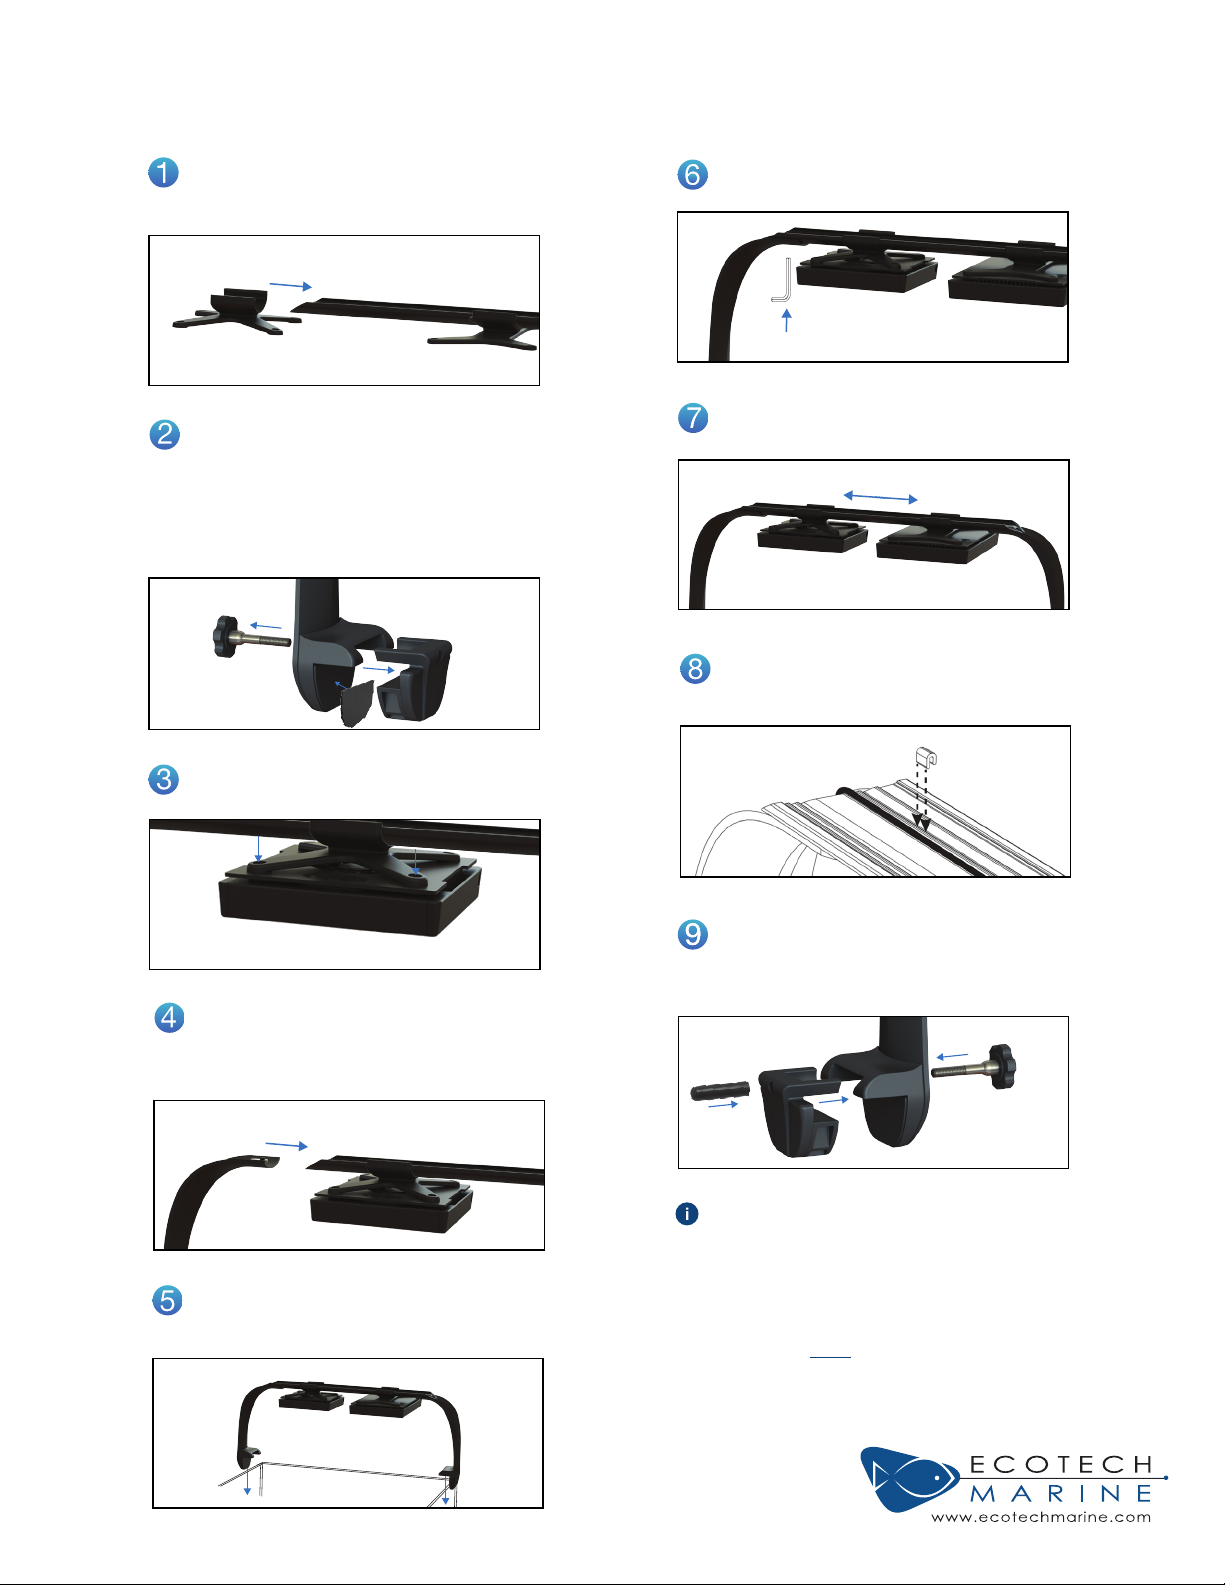
Assembly of the Multi-Light RMS
NOTE: EcoTech Marine recommends two people install this product.
It is recommended that steps 1 through 4 are completed away from your tank.
Guide the slides onto the track, spaced
evenly or in desired positions.
*Track ends may be sharp, use caution when handling.
For ease of installation on rimmed, rimless
and Euro-braced tanks, un-install the
clamp chop/spacer/adjustment screw
from the arm. This can be re-installed after
the RMS is positioned on top of the tank
for additional support and stability. Attach
protective gasket to edge clamp.
Tighten locking nuts with supplied allen
key to secure the track to the arm.
Adjust slides to the desired positions if
necessary.
Route the power cables down the channel
in the upper track. Slide cable clips on
channel edge to secure cable in channel.
Attach the Radion to the slide using the
four provided corner screws. Do not over tighten!
Align the locknut and slide the arms onto
each end of the track, keeping the distance between the edge clamps equal to
the length of your tank.
Lift the RMS assembly onto the tank by
resting the edge clamps on the edge of
the tank.
The clamp chop is optional for non-Euro
braced tanks but it can be used to provide
additional stability and support.
NOTE: The optional screw cover can be trimmed down to fit the
length of the exposed screw after installing on the tank.
Make sure that all you have the correct components from group A, B and C
before beginning. Contact EcoTech Marine service at 1-800-785-0338 ext.2
with any questions, or comments.
EcoTech Marine, LLC. (ECOTECH) shall warrant the mounting system and
parts for 30 days from the date of purchase against manufacturing defects
and workmanship only. This warranty is non-transferable and valid for
the original purchaser only. Use of materials not supplied or approved by
ECOTECH will void your warranty. Use of the mounting system in a manor
other then described in the instruction manual will void your warranty. Use
this product at your own risk. ECOTECH shall not be liable and shall not
reimburse any party for any damage occurring from the intended or un-intended use of this product, said damage includes but is not limited to; death
of livestock, damage to aquarium glass, damage to equipment, damage to
aquarium stands, personal injury of persons using or around the equipment.
EcoTech Marine, RMS and all slogans are trademarks or registered trademarks of EcoTech Marine LLC. ©2003-2014 by EcoTech Marine LLC All rights reserved.
 Loading...