

Ecor Pro EPD50 User Manual
DEHUMIDIFIER • DÉSHUMIDIFICATEUR • DESHUMIDIFICADOR
USER MANUAL
MANUEL
MANUEL DE USARIO
WHITE / BLANC
BLANCO
STAINLESS STEEL
EPD30 white / blanc / blanco
EPD50 white / blanc / blanco
EPD30 PRO stainless steel / INOX
EPD50 PRO stainless steel / INOX
Great British
Design
DRYFAN® TECHNOLOGY
Powered by
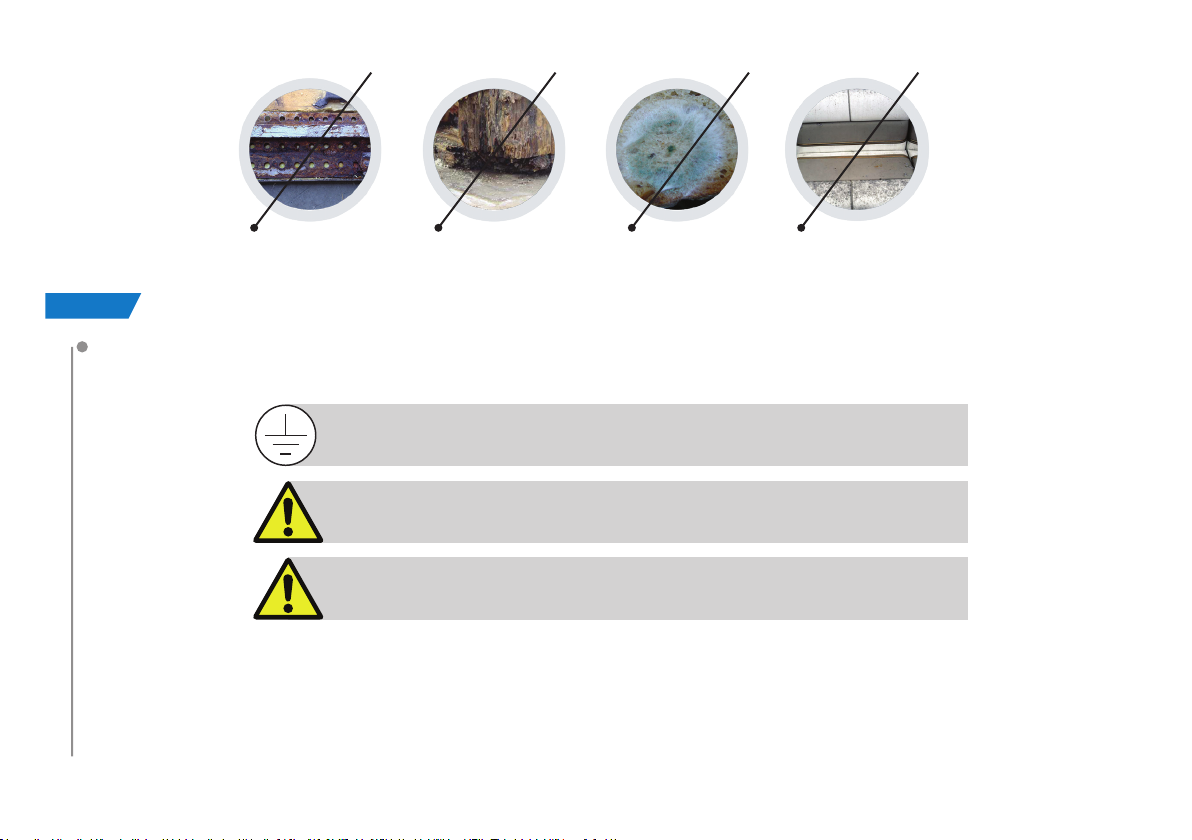
Your dehumidier ghts against rust, wood rot, bacteria, fungi en prevents damage from moisture.
SAFETY |
For safety reasons, read this information carefully before operating.
Persons who are not familiar with this type of product must not use it.
This appliance must be earthed and should only be connected
to an earthed 120 V – 60 Hz mains supply.
The installation must be in accordance with the regulations
of the country where the unit is used.
The unit is designated for indoor operation.
The dehumidier is safe, however, as with other electrical appliance, use it with care.
• This appliance is not intended for use by persons (including children) with reduced physical, sensory or
mental capabilities, or lack of experience and knowledge, unless they have been given supervision or
instruction concerning the use of the appliance by a person responsible for their safety.
• Children should be supervised to ensure that they do not play with the appliance.
+
2

SAFETY (2) |
• Do not clean the dehumidier by spraying it or immersing it in water.
• Do not insert any object into the opening of the dehumidier.
• Disconnect from the mains before cleaning the unit or any of its components.
• Never connect to an electrical outlet using an extension cord. If an outlet is not available, one should be
installed by a licensed electrician.
• Place the dehumidier in location appropriate to the appliance IP-rating (see technical data).
• Any service other than regular cleaning, setting fan mode or lter replacement should be performed by an
authorized service representative. Failure to do so could result in a loss of warranty. Your dehumidier is
supplied with an electrical cable (15 ft) and an earthed plug. Should it be necessary to replace this plug at
any time, you must use an earthed electrical plug.
Warning! Never operate this appliance if it has a damaged cord or plug.
If the supply cord is damaged an approved service representative or a similar qualied person
must replace it in order to avoid any hazards.
There should be direct access to the electrical plug after connecting the power!
Do not use your dehumidier under the following conditions:
• If the power cable is damaged
• Where the power cable may be easily damaged
• Close to heat source
• Where small children may be left unattended
• Where there is a risk of liquids falling on the unit
• Where it may be damaged by chemicals
US
This product is not made for DIY repair.
3
THANKYOU! |
Thank you for choosing this exciting innovation in drying using DryFan® technology.
A unique product and a revolution to the way we keep living spaces, lofts, basements, boats, holiday homes,
garages and storage areas dry all day and every day.
This dehumidier is a tough and can even be used for industrial processes and applications.
Designed to be used almost anywhere, in any orientation and will even work upside down.
These units will perform similar to compressor dehumidiers rated at double the capacity at normal room
conditions.
Using DryFan
®
technology these dehumidiers will out-perform compressor
40% RH - 60% RH
dehumidiers by 3–4 times below 50 ºF. Where compressor dehumidiers stop
working at 41 ºF these units using DryFan® technology will continue to dry spaces
even continuing to work to -4 ºF making them ideal for unheated rooms and
out-buildings.
We feel comfortable
within these settings.
It is important that you read these
instructions carefully before installing and
using your new dehumidier.
Please keep them in a safe place for future
reference.
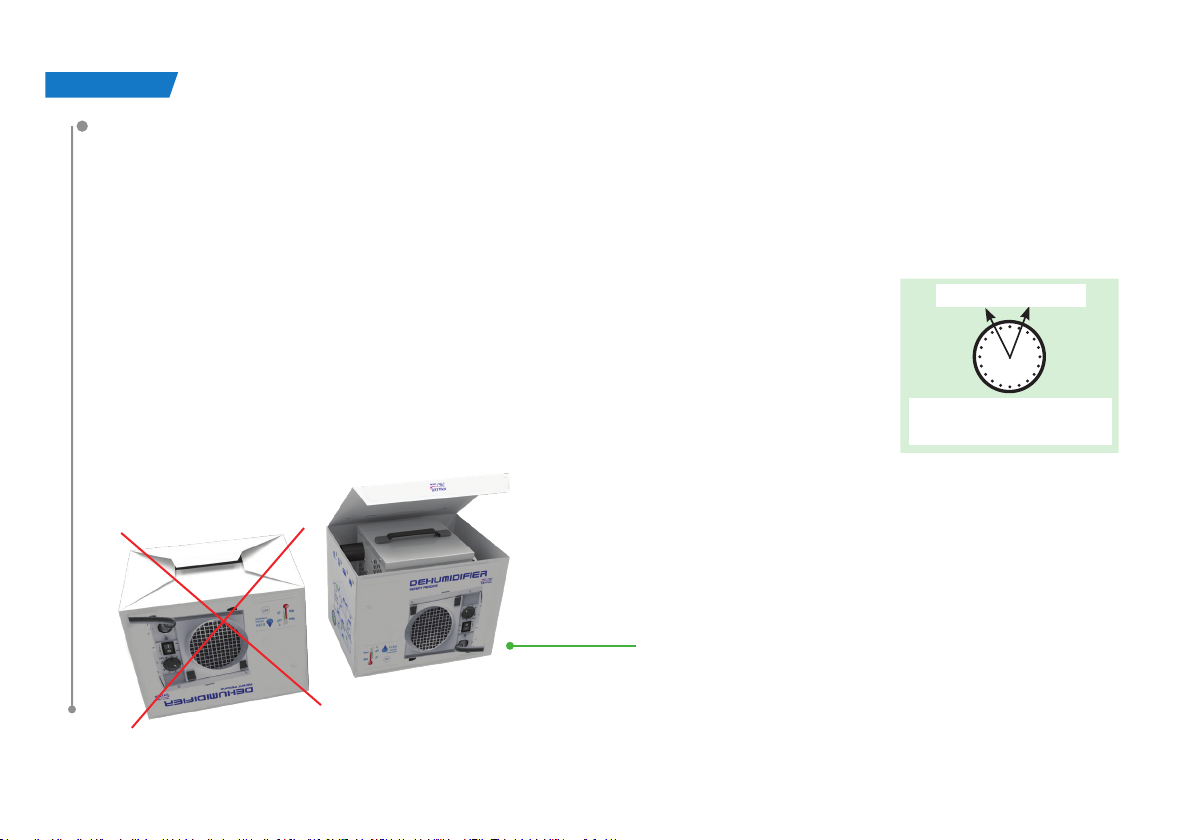
You can take out your unit easily if
you open the box from the top side.
4

HOW OUR UNIQUE TECHNOLOGY WORKS |
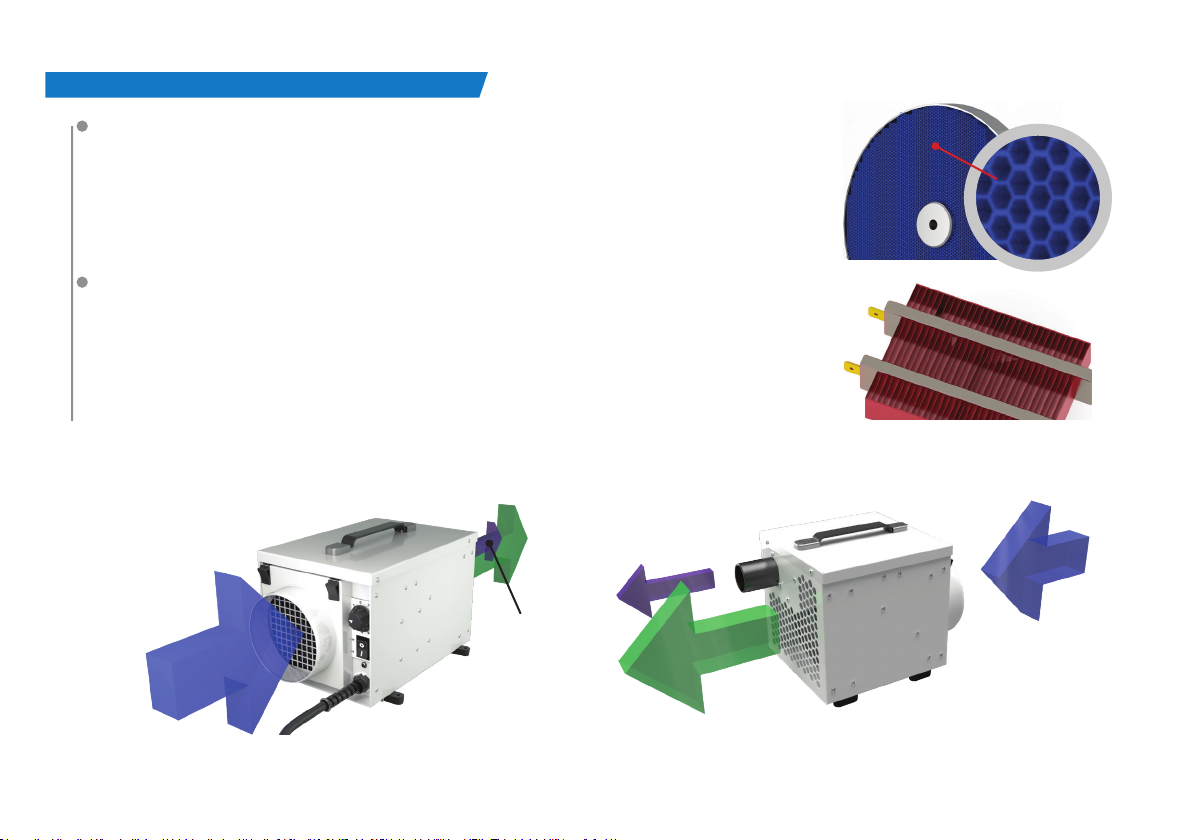
Your dehumidier uses DryFan® technology and
uses a continuously rotating moisture absorbing
patented wheel termed a “Rotor”.
A highly ecient yet low noise fan draws air into the
unit (Process Air) and forces it through a section of
• dry filtered
air out
•wet air exhaust
• patented
regen heater
the rotor. As the air passes through the rotor, the
honeycomb, of hygroscopic membranes absorbs
almost all of the moisture creating an extremely
dry air-stream.
Most of this air-stream (approx 85%) is discharged
directly through the ‘Dry Air Outlet’.
However, a portion (approx 15%) of this air (Regen
• patented dessicant rotor
Air) is separated and directed through a special
heater bank (Regen Heater) where the air’s
temperature is raised.
This heated air is then channeled back through a section of the Rotor.
As this hot air passes through the membranes, its higher temperature drives-out the previously
absorbed moisture and discharges it as warm wet air through the ‘Wet Air Out’ duct.
As the wheel rotates, this process of collecting and discharging moisture is continuous.
The wet air outlet is 1.5 inch in diameter making it easy to vent the moisture away using standard push t waste
water connectors.
Water is not drained away as a liquid, it is vented away similar to a tumble dryer.
+
US
• damp air in
5
HOW OUR UNIQUE TECHNOLOGY WORKS (2) |
PATENTED DESICCANT ROTOR
The Desiccant Rotor is the heart of the DryFan® system. It is an array of
especially absorbent membranes – patent protected – arranged as a series
of corrugations (as shown in the cut-away image) to give a vast surface
area that was developed over many years, making it an extremely ecient
moisture collector.
PATENTED REGEN HEATER
A patented ceramic PTC Regen Heater. (PTC Positive Temperature
Coecient) is self regulating so never to overheat. However, as triple safety
we include a separate overheat smart sensor in the dehumidier.
The patented technology is both safe and energy ecient and can never
overheat to hazardous temperatures, even if vents become accidentally
blocked.
+
• dry filtered air out
• wet air
exhaust
6
• damp air in
• wet air
exhaust
• damp air in
• dry filtered air out
HOW OUR UNIQUE TECHNOLOGY WORKS (3) |
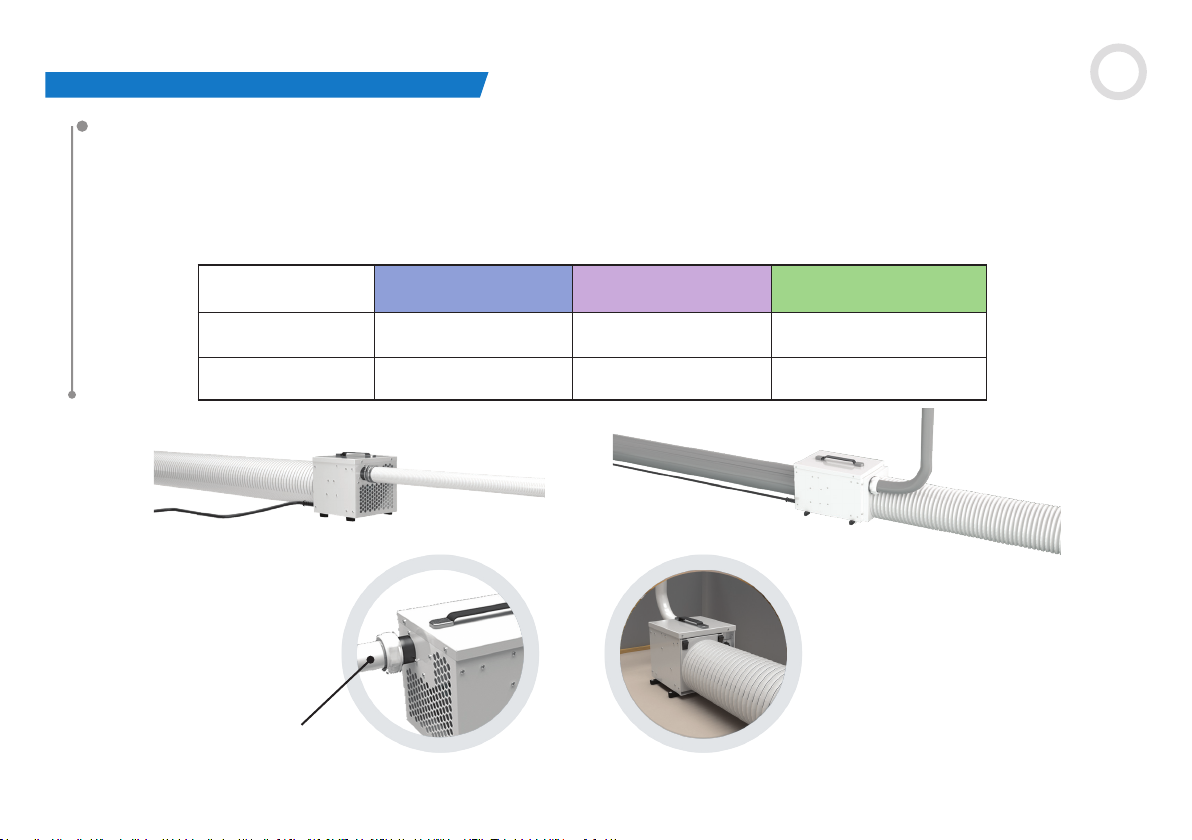
FAN SYSTEM
All models use specialized fan technology to give quiet performance but type of fan will dier by model capacity.
Note: External ductwork will reduce restrict airow and therefore the amount of water the dehumidiers will
extract. To maximize airow and water extraction always keep any ducting to minimum.
Maximum lengths in feet of any ducts are outlined in the table.
US
Model Maximum damp air in
EPD30 &
EPD30 PRO
EPD50 &
EPD50 PRO
• max. 3.3 feet
• supply cord 15 ft
• push fit wasted water pipe
EPD30/EPD30 PRO
duct length
Maximum wet air out
duct length
Maximum dry filtered air
2 3.3
3.3 10 10
• max. 2 feet
• max. 10 feet
• supply cord 15 ft
EPD50/EPD50 PRO
• solid or flexible pipe
out duct length
No duct flange /
not applicable
• max. 3.3 feet
• max. 10˜feet
7
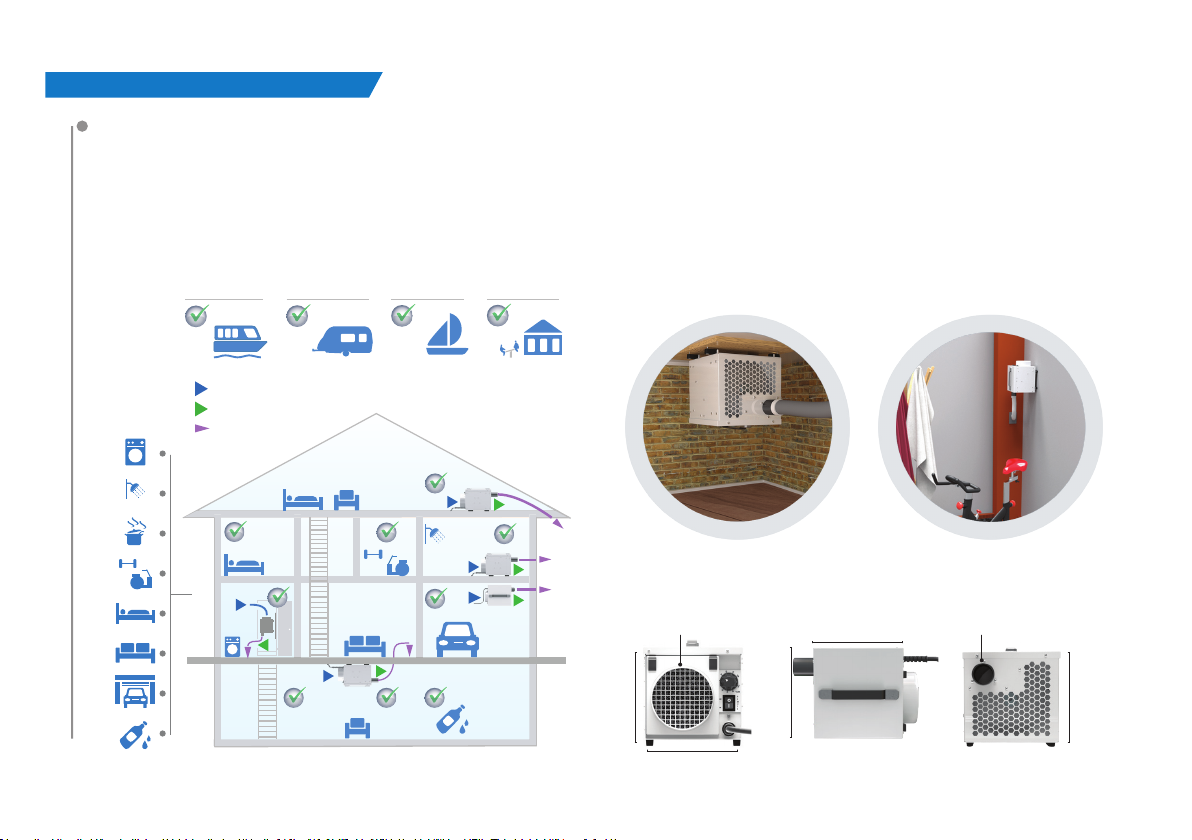
POSITIONING EPD30/EPD30 PRO |
POSITIONING
The models have been designed for indoor use however, they can be placed inside or outside the room to be dried.
Internal Positioning:
When positioning the unit inside the room, place it centrally, ensuring inlet and outlet ducts are clear of
obstruction. If required, ducts can be connected to the outlet and/or inlet (where tted) to direct the drying
to specic areas. The ‘Wet Air Out’ MUST be ducted outside the room.
damp air in
dry filtered air out
wet air exhaust drain
• in the basement • in the gym
Ø 1.5"7.9 inchØ 5"
7.9 inch
7.9 inch
7.9 inch
+
8
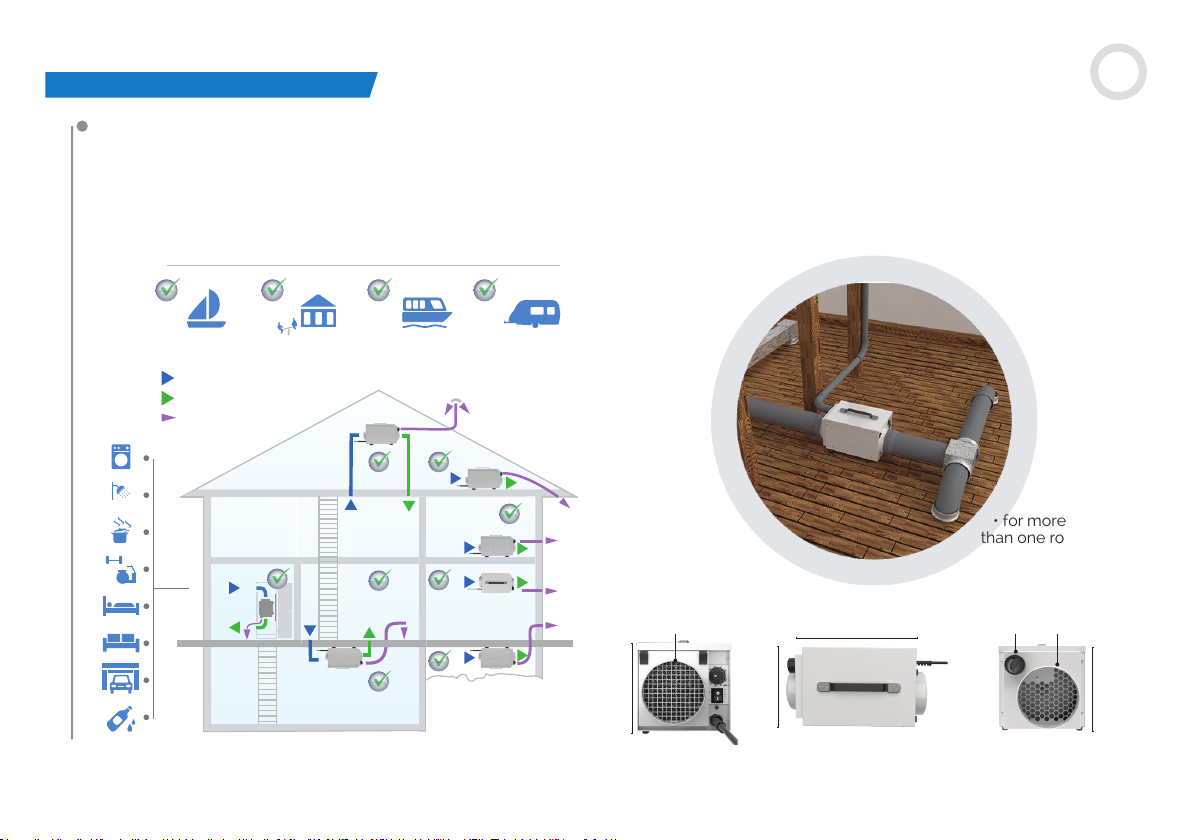
POSITIONING EPD50/EPD50 PRO |
External Positioning (Models where Outlet Duct Fitted Only):
When positioning the unit outside the room, connect ducting to the outlet to direct the dry air-stream into the
room to be dried. Optionally, the inlet may also be ducted to the room to give a re-circulation eect. In this
case however, because the unit uses a portion for the inlet air for regeneration. Provision must be made in the
inlet duct to draw air also from outside the room.
damp air in
dry filtered air out
wet air exhaust drain
• for more
than one room
US
Ø 5"Ø 1.5"Ø 5"
7.9 inch
7.9 inch
11.8 inch
7.9 inch
+
9
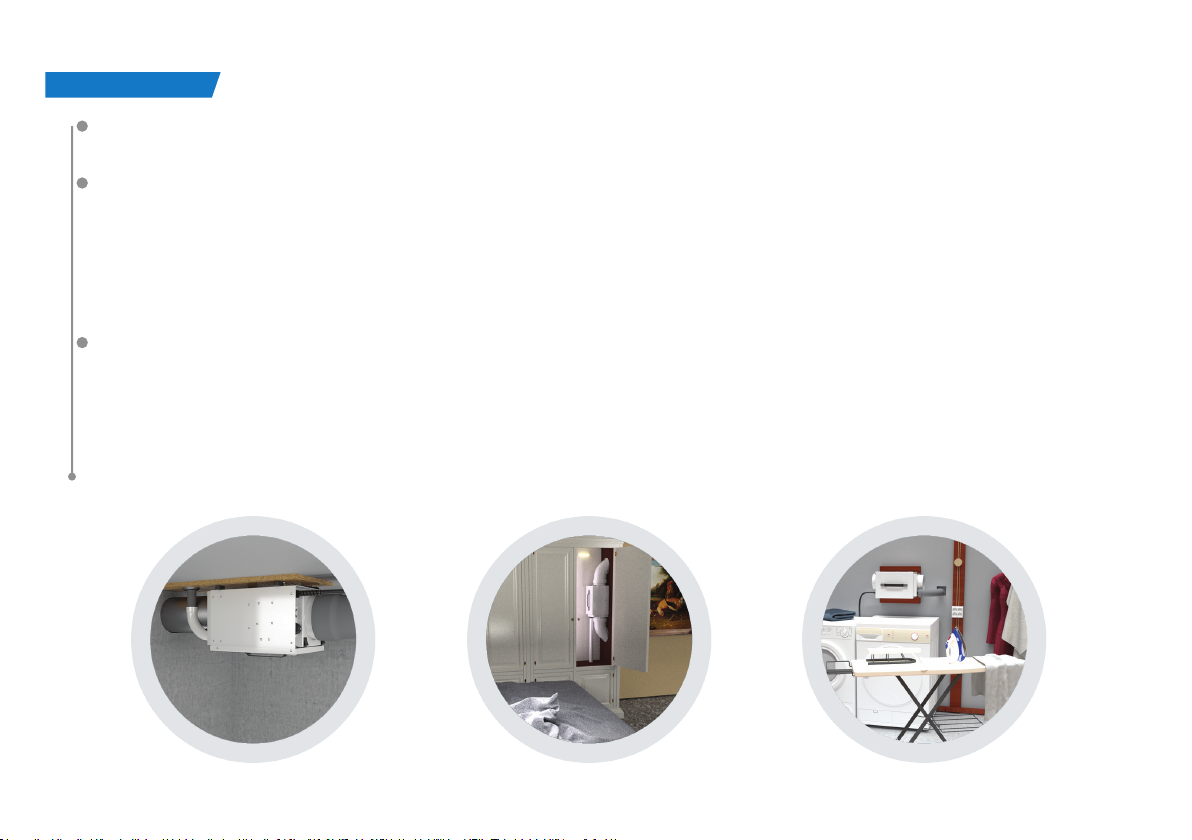
POSITIONING (3) |
NOTE: As the Wet-Air-Out discharge is warm and very humid ensure it is directed where it will have no
adverse eect on the immediate environment.
NOTE: Wet-air-out should be declined from the dehumidier where possible if there is a risk of any
condensation build up in the exhaust duct running back into the dehumidier.
This can be avoided either with short wet-air-out duct lengths or adequately insulating the wet-air-duct
to prevent condensation. Should water be seen dripping from the dehumidier switch o the appliance
immediately at the wall socket. Allow water in the unit to dry completely.
Correct the defect in the wet-air-out ducting and reconnect to the power to start operating again.
Do not operate If there is a concern the unit is not thoroughly dry inside.
NOTE: The wet-air-out ange outlet is 1.5 inch. This is the standard size of push t wasted water pipe
connectors and pipes ideal for exhaust ducting. Decreasing the exhaust pipe diameter will decrease
performance. Flexible ducting may be used on all inlets and outlets.
All ducting lengths should be kept to a minimum. Longer lengths will reduce performance. For the longest
lengths see Fan System Table (page 7). Ducting may be also supplied by your dehumidier supplier.
10
• to the ceiling • in a closet
• in a laundry
room
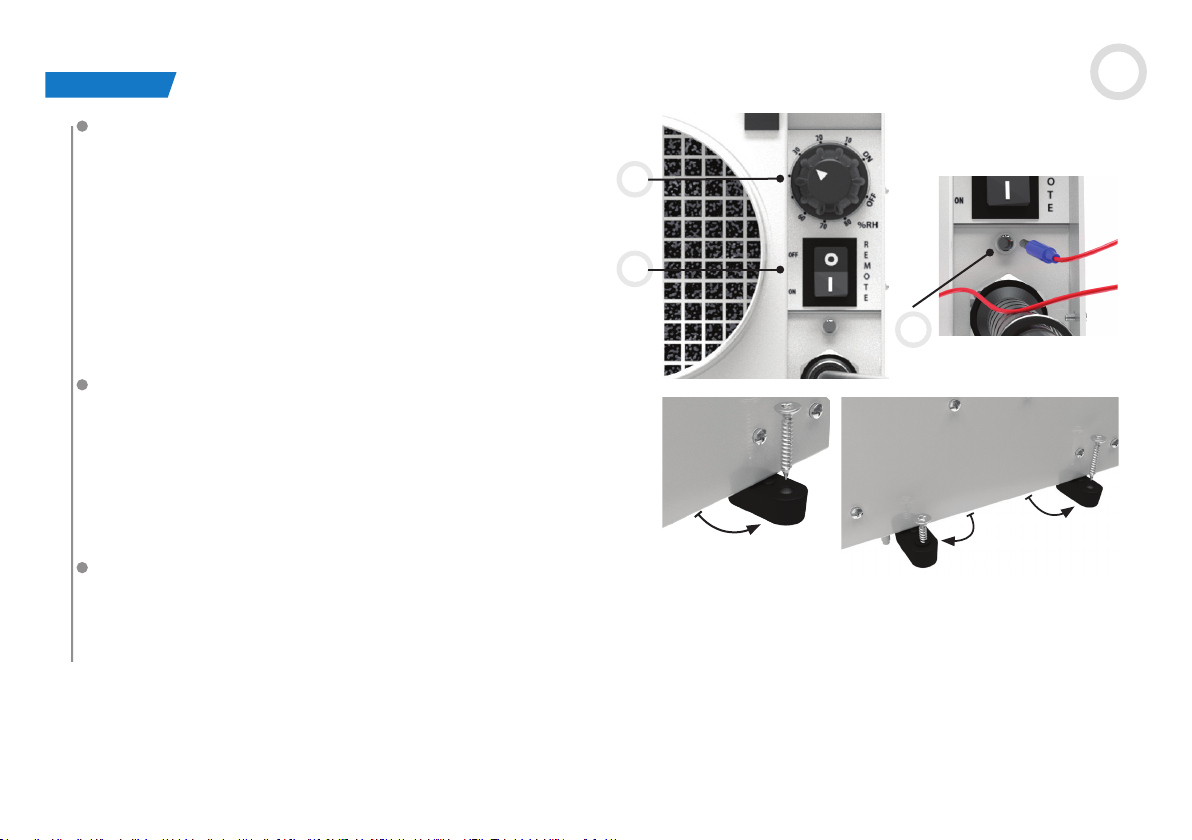
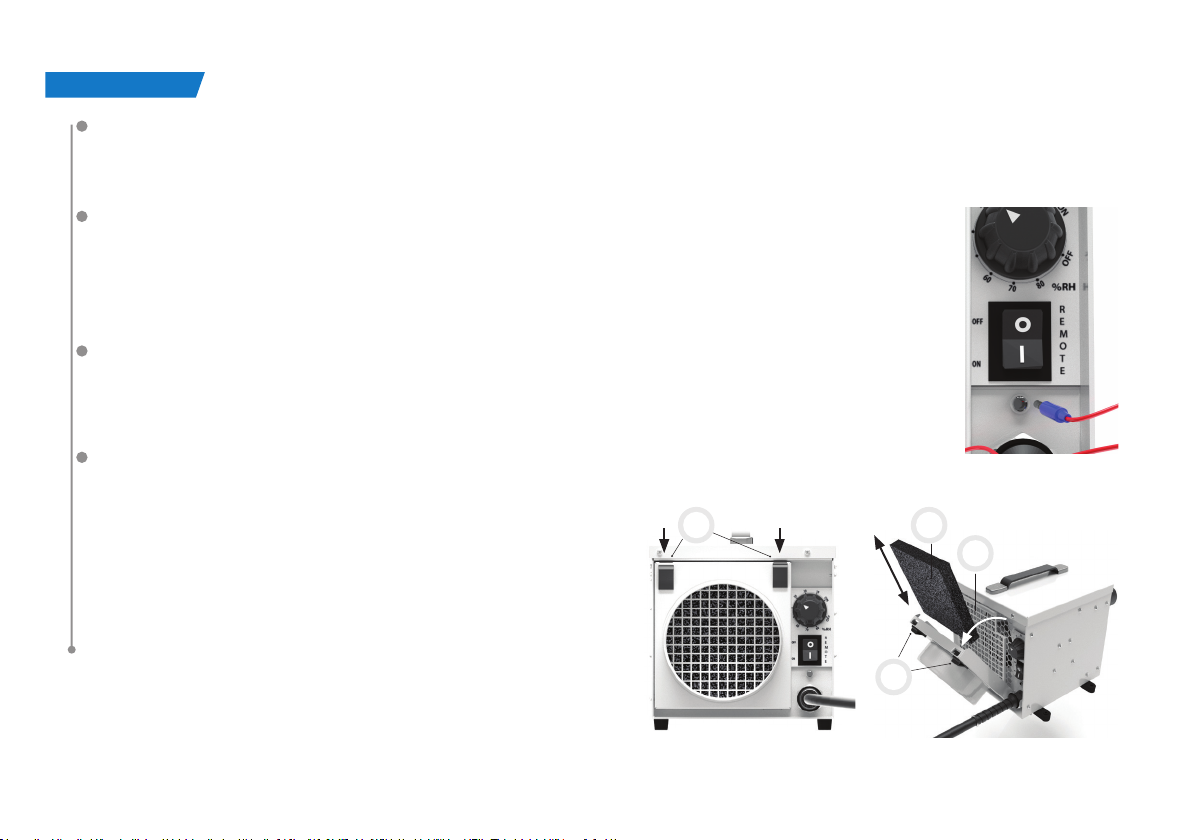
OPERATION |
CONTROLS
The controls are positioned on the front of the unit
next to the damp air inlet duct, they are:
1
1. Humidistat
2. Remote Humidistat Switch
3. Remote Humidistat Jack Plug Socket
Auto reset. If there is a power out, the dehumidier
2
will automatically restart when the mains power is
reconnected.
3
MOUNTING
The dehumidier can be mounted in any direction
even up-side-down.
Turn the feet out to see the anchoring points. Secure
all four feet with suitable xings (not provided) to
oor, wall or ceiling.
STAND-ALONE OPERATION
Connect the unit to suitable mains supply and connect ducting,
Ensure the ‘Remote Humidistat’ switch is set to the ‘OFF’ position (O).
Turn humidistat to lowest humidity level continuation or set the switch to the ‘ON’ position (I). The fan will start.
Set the humidity level right for the room to be dried.
+
US
11
OPERATION (2) |
NOTE: A low setting of say 10% means the room is regulated to a very dry level while a setting of say 90%
the room will be maintained at a relatively humid level. The right level for the room may vary with weather,
temperature and occupation conditions over time.
REMOTE OPERATION
For remote operation it is necessary to connect a 24V external humidistat (not provided)
via the jack plug connector. The external humidistat may be obtained from your appliance
supplier. Ensure the “Remote Humidistat” switch is set to I (ON). The dehumidier will now
be controlled by the remote humidistat that is using low power and only 24V.
CLEANING
Disconnect from the mains before cleaning or servicing the unit or any of its components.
Wipe regularly clean with a moist cloth (a soft, damp cloth) and a mild household
detergent, Never use chemicals, petrol, aggressive detergents or other cleansing solutions
.
AIR FILTER
The dehumidier has an inlet air lter. This should be
checked periodically and if necessary cleaned.
It can be cleaned with a vacuum cleaner or hand
1
3
washed in mild detergent only.
Replacement lters are available from your supplier.
ATTENTION: Do not run the unit without a lter tted
as dust will impair the performance of the Rotor.
1
2
12
 Loading...