

Page 1
OWNER'S MANUAL
AVN2210p
In-Dash Portable Navigation with
CD/USB Multi-Source Receiver
We appreciate your purchase of this receiver.
Please read through this manual for correct operation.
We suggest that after reading it you keep this manual
in a safe place for future reference.
Page 2
For your safety in using the AVN2210p
Warnings and caution signs, illustrated below, are posted throughout this manual as well as on the
AVN2210p. They show safe and correct ways to handle the product so as to prevent personal injury to
you, others and to avoid property damage.
Please read through the "Warning" and "Caution" notes before reading the owner's manual for
operational features and functions.
This sign indicates a situation in which incorrect handling or
Warning
Caution
Please read all materials such as manuals and warranties that have come with the product.
Eclipse will not be held liable for unsatisfactory product performance due to failure to follow these
instructions.
WARNING
● Do not modify this system for use other than that specified herein. Also, do not deviate
from the installation procedures described herein; Eclipse will not be held liable for
damages including, but not limited to serious injury, death or property damage resulting
from installations that enable unintended operation.
● This main unit requires 12V DC and should only be installed in a vehicle with a 12V negative
ground electrical system. Any other installation use other than its intended use may cause
severe damage to the main unit as well as shock or personal injury.
● Never install this main unit where it will interfere with safe operation of the vehicle. Never
block the drivers' view. Do not install main unit where it may interfere with operation of the
brakes, the steering or any safety systems, including seat belts and air bags.
● Before drilling holes in a vehicle for installation, you must confirm the locations of pipes,
tanks, electrical wiring, and other vehicle systems and components to ensure that there will
be no interference or contact. In addition, you must also apply rust prevention and leak
prevention measures at the drilling area. Otherwise, fire or electric shock could occur.
● When installing main unit do not remove or alter existing vehicle fasteners, including nuts,
bolts, screws, clips, and fittings. Never detach, move or alter existing vehicle wiring,
including electrical grounds and straps. Alteration of existing vehicle components may
make vehicle unsafe to operate.
● Before installation, remove the negative (-) battery terminal to prevent shocks, electrical
arcing, fires, and damage to vehicle wiring and the main unit you are installing.
● Secure wiring with non conductive tape or plastic ties so that wires do not interfere with
vehicle operation, including brake pedal, gear shifter and steering. Position wires so that
they will not be rubbed, abraded, or damaged by moving vehicle components, including
power seats.
● To avoid main unit and vehicle damage, including fire, never supply power to installed main
unit in a way which will overload the capacity of an existing vehicle circuit. Never leave a
power supply wire or connection uninsulated. Always install supplied fuses, circuit
breakers, and relays.
disregard of this sign may result in death or serious personal
injury.
This sign indicates a situation in which incorrect handling or
disregard of this sign may result in personal injury or may
result solely in damage to property.
Page 3

WARNING
● Air bags are a vital part of an safety system. Never install main unit in a way which will alter
air bag wiring or interfere with air bag deployment. Air bags must function properly in the
event of an accident.
● When installation is complete, test all vehicle electrical systems for proper operation,
including lights, horn, brake lights, and emergency flashers.
● For your protection, never use a power drill without safety glasses or goggles. Debris or
broken drill bits may cause severe eye injuries, including blindness.
● Use electrical tape to insulate the ends of all wires, even if not used. Proper insulation
prevents arcs, shocks and fires.
● Some devices require the use of batteries. Never install main unit where young children can
get access to batteries. If a battery is swallowed, seek immediate medical attention.
● When the vehicle is in motion, never take your eyes off the road to make adjustments to the
main unit. You must pay attention to the road to avoid accidents, do not let the operation or
adjustment of the main unit distract you from proper vehicle operation.
● The driver should not look at the screen while driving. Accidents may occur as a result of
not paying attention to your driving.
● Do not place foreign objects in the disc insertion slot or USB input terminal. Fires or
shocks may result.
● Do not disassemble or alter this main unit. Accidents, fires or shocks may result.
● Do not let water or foreign objects enter the internal parts of this main unit. Smoke, fires or
shocks may result.
● Do not use when main unit is malfunctioning (the screen is not lit or no sound comes out).
Accidents, fires or shocks may result.
● Always replace fuses with fuses of identical capacity and characteristics. Never use a
higher capacity fuse than the original. Using the wrong type of fuse may cause a fire or
severe damage.
● If foreign objects or water enters the main unit, smoke comes out, or there is a strange
odor, stop using it immediately, and contact your dealer. Accidents, fires, or shocks may
result if you continue to use it in these conditions.
● The driver should not change the CD or USB memory while driving. Accidents may occur
as a result of not paying attention to your driving, you must first stop or park your car in a
safe location and then proceed to remove or insert the CD and/or USB.
● Plastic bags and wrappings may cause suffocation and death. Keep away from babies and
children. Never place bags or wrappings over anyone's head or mouth.
Page 4

CAUTION
● Wiring and installing this main unit requires expertise and experience. Professional
installation is recommended. Consult with your dealer or a professional installer. Incorrect
wiring may damage the main unit or interfere with safe vehicle operation.
● Use only the accessory parts as specified. Using other parts may cause damage to the main
unit or cause parts to dislodge and fall or fly off the main unit.
● Do not install the main unit in places where it may be exposed to dew condensation on
(around the air conditioning hose, etc.), come in contact with water, or in conditions of high
moisture, dust or oily smoke. If water, moisture, dust or oily smoke enters this main unit,
smoke, fires or malfunctions may result.
● Do not install in places with direct sunlight or where it will be hit directly by hot air from the
heater. This may increase the interior temperature of this main unit, resulting in fires and
malfunctions.
● Do not impede the air flow of the heat sink or vents of this main unit. Impeding the air flow will
cause the interior of the main unit to overheat, and fires may result.
● Connect as specified in the installation manual. If not connected correctly, fires or accidents
may result.
● Install wiring in a manner in which they are not pinched by movable parts such as seat rails,
and screw parts of the vehicle body. Accidents, fires and shocks may result from
disconnection and electrical shorts.
● Install wiring in a manner in which they do not make contact with metal parts. The wiring
maybe be damaged by contact with metal parts, resulting in fire and shocks.
● Avoid any contact with hot surfaces when wiring the main unit. High temperatures may
damage wiring, causing shorts, arcing and fires.
● When changing the installation location for this main unit, please consult the dealer where
you bought it for safety reasons. Expertise is necessary for removal and installation.
● Keep volume to a reasonable level so that you can hear sounds from outside the vehicle,
including warning sounds, voices, and sirens. Failure to do so may cause an accident.
● Be careful that hands and fingers are not pinched when adjusting the tilting angle or closing
display. Injuries may result.
● Do not put your hands or fingers into the disc insertion slot or USB input terminal. Injuries
may result.
● Do not touch heat dissipating parts of the main unit as burns may result.
● Volume should be set at a moderate level to avoid hearing damage when the main unit is
powered on.
● Do not operate when the sound is not being emitted properly such as distortion.
● This main unit uses invisible laser light. Do not disassemble or alter this main unit. If trouble
occurs, contact the dealer where you bought the main unit.
Altering this main unit may cause exposure to laser emissions (worsening eyesight), or
result in accidents, fires or shocks.
● If the main unit is dropped or the cosmetics appear broken, turn off the power to the main
unit and contact your dealer. If used in this condition, fires or shocks may result.
● Using the vehicle speed pulse signal, you can use the route guidance function even in the
locations where usually no guidance is given (example: in a tunnel). However, the accuracy
of the guidance is not guaranteed since the guidance is performed using the information
about road surface condition and vehicle speed.
● Precautions for PND Operation
Do not remove the SD card while operating the PND.
Turn off the power to the PND, and wait at least 3 seconds after the display goes off, before
removing the SD card. Failure to do so may cause data in the SD card to be lost or damaged.
Page 5
Operating Precautions
<Your AVN2210p will perform well over a long period of time when giving correct handling and care.>
Notes on Operation
• For your safety, play only at moderate volumes so that you can still hear exterior sounds.
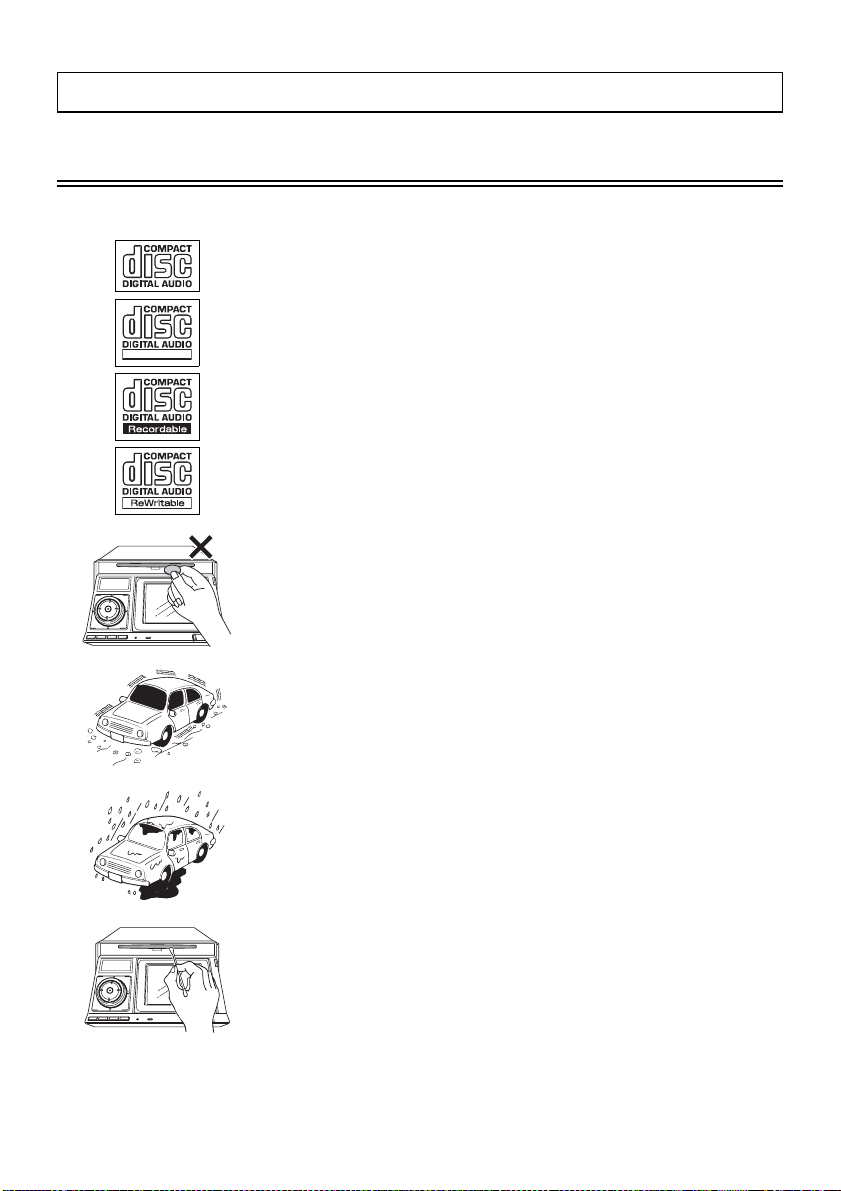
• Discs with the logo shown to the left can be played.
• You can play music CDs (CD-R/CD-RW) on this player. Be sure to
use discs that have been properly processed.
Depending on the editing format and software used, some discs may
not play properly.
TEXT
• Do not insert anything other than a CD into the main unit.
Do not insert any foreign objects, such as coins or credit cards, into
the disc slot.
• Avoid severe mechanical shock.
When the player is subjected to severe vibration while traveling over a
rough surface, playback may be intermittent. When a situation like
this occurs, resume playback after returning to a smoother road.
• About dew condensation.
In cold or rainy weather, just as the interior glass surface gets fogged,
dew (water condensation) may also settle on the main unit. When
this happens, disc playback may become intermittent or impossible.
Dehumidify the air in the vehicle for a while before resuming
playback.
• Cleaning the disc slot.
The disc slot tends to get dusty. Clean it occasionally to prevent
accumulated dust from scratching the discs.
Page 6

Basic Operation
Adjusting the Sound
Muting the Volume
Press the [MUTE] button.
1
To cancel muting, either press the [MUTE] button again or turn the [VOL] rotary knob to
the right.
While the audio system is muted, navigation voice guidance continues unmuted.
Setting Guide Tone
Press the [FUNC] button to establish the FUNCTION mode.
1
Press the [FUNC] button until the indication on the sub display switches to
2
BEEP.
Press the [SELECT (Right/Left)] button to switch between ON and OFF status for
3
BEEP.
Right : ON
Left : OFF
Press the [ENTER] button.
4
Page 7

Switching Audio Control Modes
The modes will switch one step in the order shown below each time the [ENTER]
1
button is pressed.
BASS MID TREB BAL FAD NON-F NF-P LPF LOUD SVC
VOL BASS ...
Turn the [VOL] rotary knob to the right or left in the audio mode while referring to the table below to adjust the
sound.
Mode Function [VOL] rotary knob/Function
BASS Adjusts bass level.
MID (MIDDLE) Adjusts middle level.
TREB (TREBLE) Adjusts treble level.
BAL (BALANCE)
FAD (FADER)
NON-F (NON-FADER
LEVEL)
NF-P (NON-FADER
PHASE)
Adjusts left/right
speaker balance
(BALANCE).
Adjusts front/rear
speaker balance
(FADER).
Adjusts non-fader
level (for connected
sub-woofer).
The merger of sound
between the front and
rear speakers and the
woofer can be
improved by selecting
the phase. Switch the
phase which lets the
speakers combine
without any
disharmony.
Turn to the right Emphasises low sounds.
Turn to the left Softens low sounds.
Turn to the right
Turn to the left
Turn to the right
Turn to the left Softens high sounds.
Turn to the right
Turn to the left
Turn to the right
Turn to the left
Turn to the right
Turn to the left
Turn to the right
Turn to the left
Emphasises mid range
sounds.
Softens mid range
sounds.
Emphasises high
sounds.
Emphasises right
speakers.
Emphasises left
speakers.
Emphasises front
speakers.
Emphasises rear
speakers.
Increases the sub-woofer
level.
Decreases the sub-
woofer level.
NORMAL
(Makes the output timing
of the front/rear speakers
and the woofer the
same.)
REVERSE
(Changes the phase of
the output timing of the
front/rear speakers and
the woofer.)
Page 8

Mode Function [VOL] rotary knob/Function
Turn to the right
LPF
(Low Pass Filter for
Sub-Woofer output)
LOUD (LOUDNESS)
SVC
(Source Volume
Control)
Adjusts frequency
filtering settings.
Accentuates low and
high frequencies
when the volume is
low.
When loudness is ON,
the apparent
deficiency in the high
sounds is
compensated for.
In this mode you can
set the volume level
for each audio source,
taking the FM radio
volume level as the
reference level.
(The volume level of
the audio source you
are currently listening
to is adjusted.)
Turn to the left
Turn to the right ON
Turn to the left OFF
Turn to the right
Turn to the left
LPF ON :
Only allows lower
frequencies (low range)
through.
LPF OFF :
Allows all frequencies
through regardless if the
frequencies are low or
high.
Increases the SVC
setting level.
Decreases the SVC
setting level.
Page 9
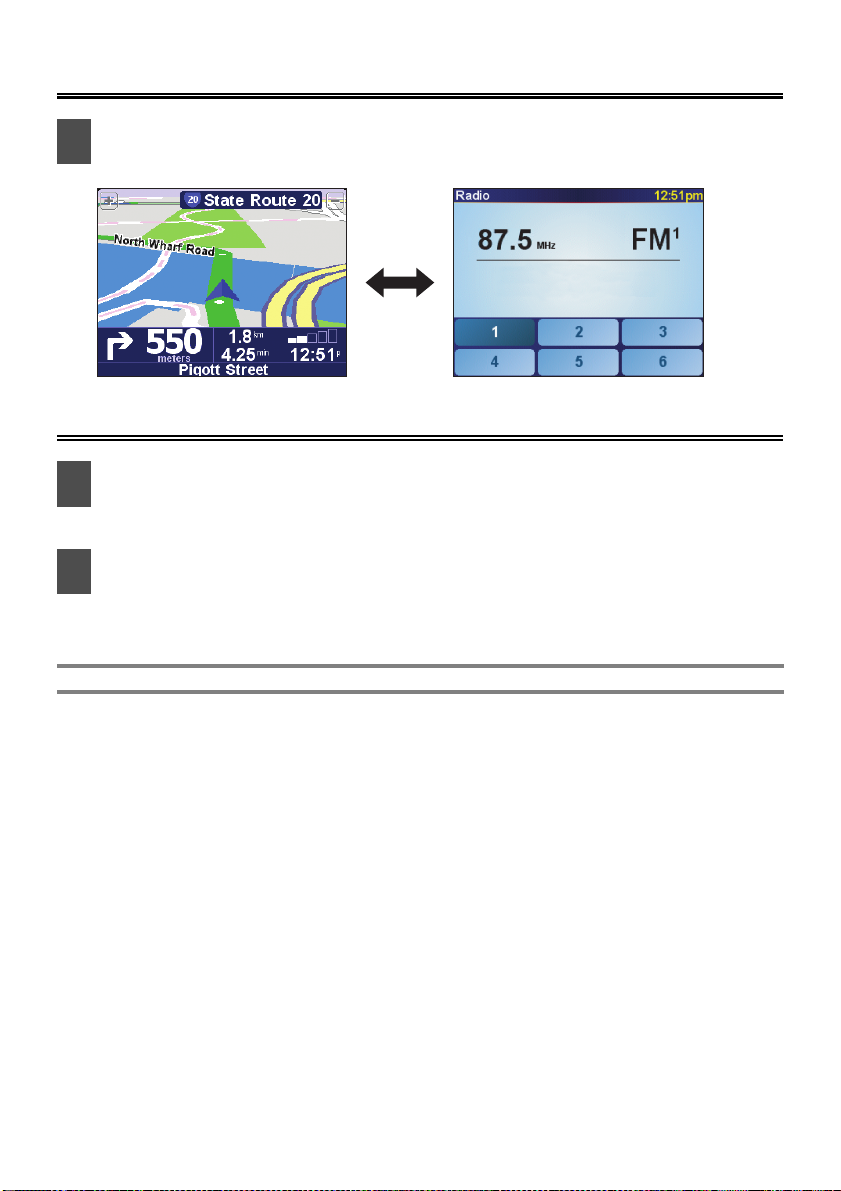
Switching Between the Audio and Navigation Screen
Each time you press the [SCREEN] button the display switches between the
1
audio screen and the navigation screen.
Turning the PND Display ON and OFF
While the PND display is OFF, press the [SCREEN] button.
1
The PND display will come ON.
Press the [SCREEN] button for longer than one second while the PND display is
2
ON.
The PND display will go OFF.
● Note ●
For details on using the PND, refer to the operation manual of the PND.
Page 10

Switching Between Left and Right Speaker Output for the Navigation Voice
Voice guidance speaker output can be switched between the right and left speakers.
Press the [SOURCE/PWR] button for more than one second to turn the audio
1
mode OFF ("GOOD BYE" will momentarily be displayed).
You can switch between right and left speakers by pressing the [FUNC] button
2
and the [SCREEN] button simultaneously for more than 3 seconds.
RIGHT LEFT
RIGHT: Output from the right front speaker
LEFT: Output from the left front speaker
Selecting the Dimmer Setting
In order to make the screen easier to view, the screen brightness will change when the vehicle lights
(side lights, tail lights, license plate lamp) are lit.
Press the [SOURCE/PWR] button for more than one second to turn the audio
1
mode OFF ("GOOD BYE" will momentarily be displayed).
You can switch the dimmer setting on or off by pressing the [MUTE] button and
2
the [FUNC] button simultaneously for more than 3 seconds.
DIMM ON DIMM OFF
ON: Dimmed
OFF: Not dimmed
● Note ●
The brightness and day/night view of the PND display can be changed in conjunction with the
dimmer setting. They can also be changed manually from PND.
See the manual for the PND for information about "Docking Preferences".
Page 11
Using the Audio Cover
Using the Audio Cover
After removing the PND from the main unit, it is recommended to use the optional Audio
Cover which comes with TRK-107p*.
* TRK-107p: Sold separately
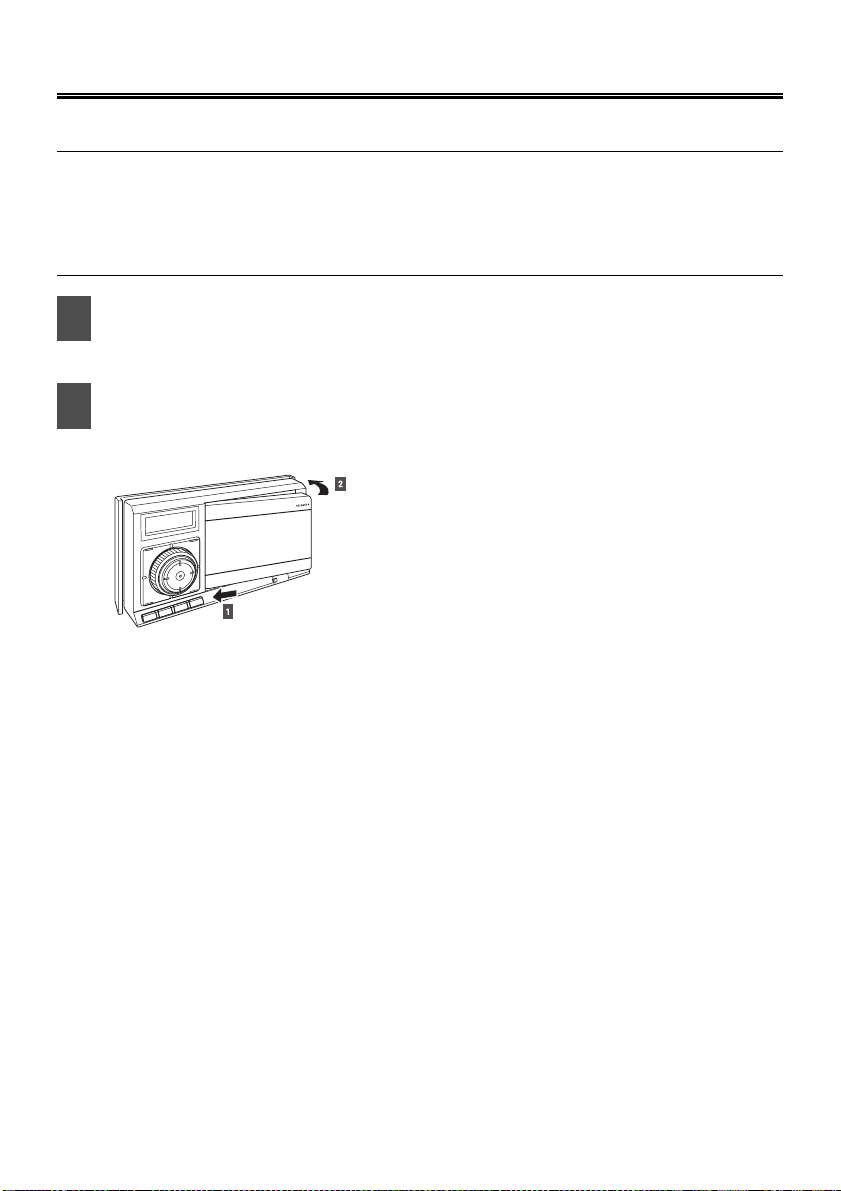
How to Insert the Audio Cover
Insert the left end of the Audio Cover into the main unit.
1
Engage the catch at the left end of the Audio Cover with the lock on the main unit.
Insert the Audio Cover.
2
Press the right end of the Audio Cover until it clicks into place.
Page 12
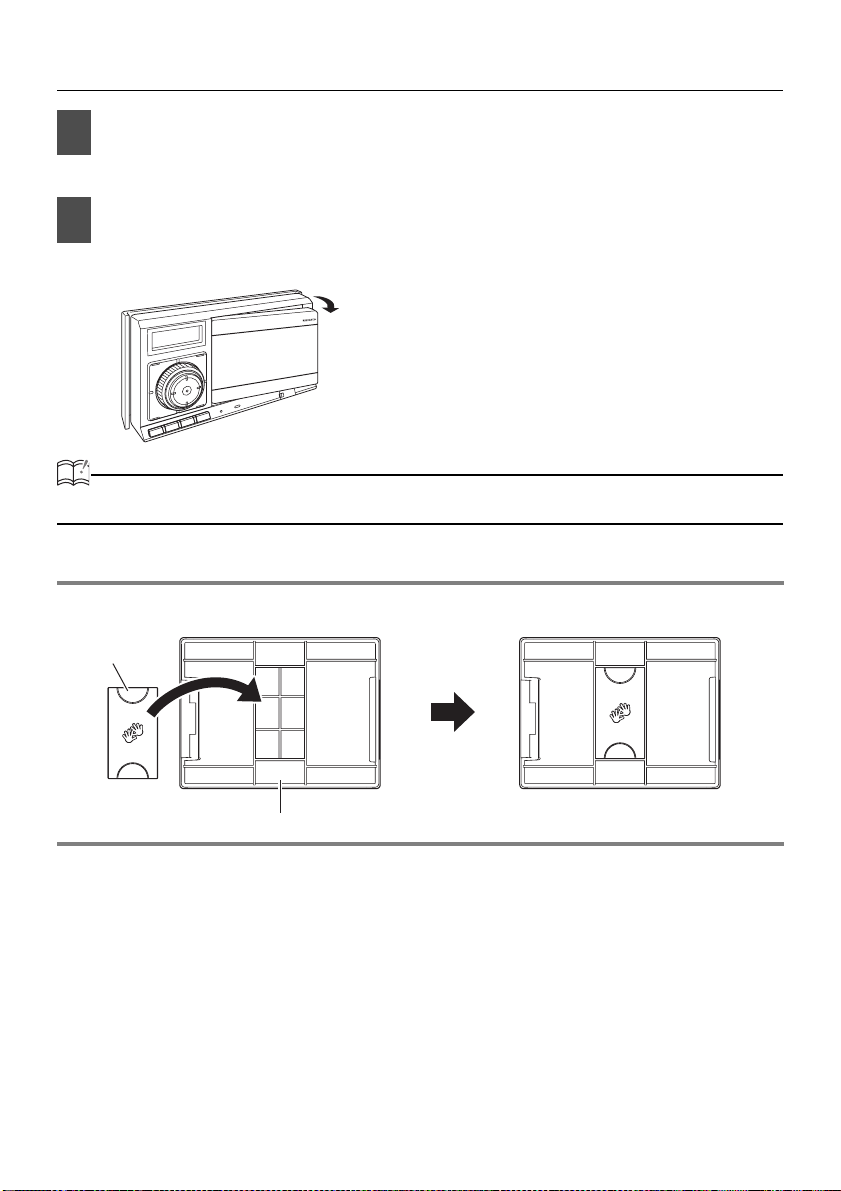
How to Detach the Audio Cover from the Main Unit
Press the [Release] button.
1
The right end of the Audio Cover detaches from the body of the main unit.
Remove the Audio Cover.
2
Hold the Audio Cover on the right side, lift up and pull it toward you to remove it.
ATTENTION
If the Audio Cover gets wet, do not attach it to the main unit.
● Note ●
After detaching the PND, you can fit the connector cover onto the back of the Audio Cover as
shown below.
Connector cover
Audio Cover
Page 13

How to Operate the Tuner
Calling up Preset Channels
Press the [MODE] button to select the preset channel mode.
1
Turn the [VOL] rotary knob to call up the station registered for a preset channel
2
between P1 and P6.
Press the [ENTER] button.
3
The registered preset channel will be selected and the corresponding station will be
received.
Six stations can be memorised for each of FM 1, 2 and 3, and six stations can be
memorised for AM, making a total of 24 stations.
Calling up a Preset Channel from the PND Display
Touch the relevant preset switch to call up the station on the audio screen.
1
Preset switches
Page 14

Memorising Stations
Memorising Stations Manually
Tune into the station to be memorised for the preset channel.
1
Press the [MODE] button to select the rotary select mode.
2
Turn the [VOL] rotary knob to select one of the preset channels P1 to P6.
3
Press the [ENTER] button until "PMEMORY" appears on the sub display.
4
The selected station is memorised and the preset registration number and frequency
are indicated on the display.
To manually set additional selected stations for the remaining preset channels, repeat
this procedure for each channel.
If the stations have been stored in memory, selecting the preset channel with the
[MODE] button and the [VOL] rotary knob or pressing a switch between [1] and [6] on
the PND display will allow you to tune to that preset station.
Memorising Stations Manually on the PND Display
Tune into the station to be memorised.
1
Press the [SCREEN] button and switch the display to the audio screen.
2
Touch and hold the preset switch where you want to memorise the station until
3
MEMORY" appears on the sub display.
"P
The selected station will be memorised.
To manually set additional selected stations at the remaining preset channels, repeat
this procedure for each channel.
Subsequently, when you listen to the radio you will be able to select stations by
touching the preset switches.
Page 15

Memorising Stations Automatically
Press the [FUNC] button to establish the FUNCTION mode.
1
Press the [FUNC] button until the sub display switches to ASM.
2
Press the [ENTER] button.
3
After "ASM ON" is displayed, automatic station selection will start. A search will be
conducted from the lowest frequency through progressively higher frequencies and
stations with strong reception will be memorised for preset registration numbers [1] to
[6].
When the operation has ended the "ASM ON" indication will be cleared and the station
memorised last (i.e. the one memorised for P6) will continue to be received.
Subsequently, when you listen to the radio you will be able to select stations by calling
up preset numbers.
ATTENTION
• Pressing the preset switches ([1] to [6]) allows you to make one-touch station selections. The
frequency of the selected station is displayed on the preset switch.
• When a new station is set in memory, the station previously set in memory will be deleted.
• If there are fewer than six receivable stations, the stations set in the remaining switches will
remain unchanged.
CAUTION
If the vehicle's battery is disconnected (for repairs to the vehicle or for removal of the main unit), all
stations in memory will be lost. In this a case, set the stations in memory again.
Preset Station Scan
This function enables reception of all the stations in the preset switches to be played for five seconds
each.
Press the [FUNC] button to establish the FUNCTION mode.
1
Press the [FUNC] button until the sub display switches to P SCAN.
2
Press the [ENTER] button.
3
"P SCAN" will be displayed and the stations memorised for preset channels P1 to P6
will be called up in order and received for five seconds each.
To cancel the preset scan, press the [FUNC] button.
Page 16

How to Operate the CD/MP3/WMA Player
About Compact Discs
• The signal recorded on a compact disc is read by a laser beam, so nothing touches the disc surface.
A scratch on the recorded surface or a badly warped disc may cause impaired sound quality or
intermittent playback. Observe the following precautions to ensure high quality sound performance:
• Do not leave an ejected disc in the disc slot for very long; the disc may
warp. Discs should be stored in their cases and kept away from high
temperature and humidity.
• Do not stick pieces of paper or tape on disc. Do not write on or
scratch either side of a disc.
• Discs spin at a high speed inside the main unit. Keep cracked and
warped discs out of the player to avoid damage to the main unit.
• Avoid touching the recorded surface when handling a disc; handle
discs by their edges.
Rough Edges
Ballpoint pen
Rough Edges
Flakes
Recorded surface
• You may notice that some brand new discs are rough around the
center hole or outside edge. Remove the rough edges with the side of
a ballpoint pen, etc. Rough edges may prevent proper loading in the
main unit. Flakes from the rough edges may also stick to the recorded
surface and interfere with playback.
Page 17

• Do not use accessories (stabilizers, protective seals, laser lens
cleaners, etc.) sold for "improving sound performance" or "protecting
CDs." The changes in CD thickness or outside dimensions made by
these accessories may cause problems in the player.
• Please be sure NOT to attach any ring-shape protector (or other
accessory) to your discs. Those protectors are commercially available
and said to protect disc and to improve sound quality (and antivibration
effect), but they can do more harm than good in regular use. The most
common problems are disc insertion, disc ejections, and won't play
problems due to the protector ring coming off in the disc mechanism.
• Do not use a CD with glue or remnants of adhesive tape or labels adhering to it. They may cause
the CD to get stuck inside or damage the main unit.
• When removing the ejected disc, pull it straight out along the slot.
Pressing downward in the process may scratch the recorded surface
of the disc.
NO
GO
O
D
OKAY
• Specially-shaped CDs, like heart-shaped or octagonal CDs, cannot be
played. Do not attempt to play them, even with an adapter, since they
may damage the player.
About Cleaning a CD
XXXX
XXXX
XXXX
• Use a commercially available compact disc cleaner to clean a CD,
wiping gently from the center to the edge.
• Do not use benzene, thinner, LP record spray or other cleaners on
CDs. They may damage a CD’s finish.
Page 18

About MP3/WMA
ATTENTION
The making of MP3/WMA files by recording from sources such as broadcasts, records, recordings, videos and
live performances without permission from the copyright holder for uses other than personal enjoyment is
prohibited.
What is MP3/WMA?
MP3 (MPEG Audio Layer III) is a standard format for audio compression technology. By using MP3
a file can be compressed to one-tenth the size of the original.
WMA (Windows Media
compressed to a size smaller than MP3 files.
This main unit has limitations on the MP3/WMA file standards and recorded media and formats that
can be used.
Playable MP3 File Standards
• Supported standards:MPEG-1 Audio Layer III
• Supported sampling frequencies: 44.1, 48 (kHz)
• Supported bit rate: 64, 80, 96, 112, 128, 160, 192, 224, 256, 288, 320 (kbps)
• Supported channel modes: monaural, stereo, joint, dual
TM
Audio) is format for audio compression technology. WMA files can be
* Supports VBR (64~320kbps).
* Does not support free format.
Playable WMA File Standards
• Supported standards: WMA Ver. 7
• Supported sampling frequencies: 32, 44.1, 48 (kHz)
• Supported bit rate: 48, 64, 80, 96, 128, 160, 192, 256, 320 (kbps)
WMA Ver. 8
WMA Ver. 9
* Supports VBR (48~192 kbps).
* Does not support lossless compression.
* Does not support WMA files recorded at a frequency of 48kHz with a bit rate
of 96kbps.
ID3/WMA Tag
MP3/WMA files have an "ID3/WMA Tag" that allows input of information so that data such as song
title and artist can be saved.
This main unit supports ID3v. 1.0, 1.1 and WMA tags.
Page 19

Media
The media capable of playing MP3/WMA include CD-R and CD-RW discs. Compared to the CDROM media commonly used for music discs, CD-R and CD-RW discs are fragile in high
temperature/high humidity environments and one section of the CD-R and CD-RW may become
incapable of playback. Fingerprints or scratches on the disc may prevent playback or cause skipping
during playback. Sections of a CD-R or CD-RW may deteriorate if left inside a vehicle for long
periods of time. It is also advisable that CD-R and CD-RW discs be kept in a light-blocking case
because the discs are vulnerable to ultra-violet light.
Format of Discs
The format of discs to be used must be ISO9660 Level 1 or Level 2.
The control items for this standard are as follows:
• Maximum directory layers: 8 layers
• Maximum characters for folder names/file names: 32 (including "." and 3 letter file extension)
•
Allowable characters for folder names/file names:
•
Maximum number of files on a single disc: 256
[Configuration example for CD supporting MP3/WMA]
Root directory (F1)
F2
Folder 2
001.mp3
002.mp3
003.mp3
004.txt
005.mp3
Number of files possible on a single disc is 256.
F158
F159
Folder 158
Folder 159
001.mp3
002.mp3
Files aside from MP3/WMA files (Example: 004.txt) also count as single files.
A~Z, 0~9, _ (underscore)
Folder 192
F192
• Maximum folders this main unit can recognise: 192*
*: A root directory is counted as one folder.
File Names
Only files with the MP3/WMA file extension ".mp3" / ".wma" can be recognised as MP3/WMA and played.
Be sure to save MP3 files with the ".mp3" file extension. Be sure to save WMA files with the ".wma" file
extension. The "MP" letters of the file extension will be recognised whether entered in upper case or
lower case.
CAUTION
If the ".mp3" / ".wma" file extension is attached to a file other than an MP3/WMA file, that file will be
mistakenly recognised by the main unit as an MP3/WMA file and played, resulting in loud noise
output that can damage the speakers. Be sure to avoid attaching the ".mp3", ".wma" file extension
to files that are not MP3/WMA files.
Page 20

Multi-Sessions
Multi-sessions are supported, and CD-R and CD-RW discs with annotated MP3/WMA files can be played.
However, when "Track at once" has been written, close the session or process the warning message. Use the
same format for each session (don’t change the format).
Playing MP3/WMA
When a disc with recorded MP3/WMA files is inserted, the main unit first checks all the files on the disc. No
sound is output while the main unit is checking the files on the disc. It is recommended that the disc be recorded
without files other than MP3/WMA files and without unnecessary folders in order to speed up the checking of
disc files by the main unit.
MP3/WMA Playing Time Display
It is possible that the playing time will not be correct, depending on the writing condition of the MP3/
WMA file.
*It is possible that the playing time will not be correct when VBR Fast Up/Down is used.
Display Order of MP3/WMA File/Folder Names
The names of MP3/WMA folders and files within the same level are displayed in the following order.
1.MP3/WMA folders are displayed first, in ascending order of numbers, letters.
2.Files are displayed next, in ascending order of numbers, letters.
Making and Playing MP3/WMA Files
MP3/WMA files created by recording broadcasts, records, audio recordings, video recordings or live
performances cannot be used for purposes other than personal entertainment without the permission of
the copyright holder as set forth in copyright law.
Downloading From Internet MP3/WMA Music Sites
There are many kinds of sites that distribute MP3/WMA files on the Internet, such as "pay per
download" online shopping sites, "try before you buy" listening sites and free download sites. Follow
the rules of each site (such as paying fees) and download according to the site instructions.
Converting CD Music to MP3/WMA Files
Prepare a computer with commercially available MP3/WMA encoding software (conversion
software). Some encoding programs available on the Internet do not require payment. Music data
files in the MP3/WMA format can be made by inserting the music CD into the CD-ROM drive of the
computer and following the procedures of the MP3/WMA encoding software to compress the songs
of the music CD. A 12 cm music CD (having a maximum of 74 minutes of recording/650 MB of data)
can normally be compressed to approx. 65 MB (about 1/10 of the original size).
Page 21

Writing to a CD-R/CD-RW
MP3/WMA files can be recorded on CD-R/RW by using a CD-R/RW drive connected to a computer.
Record by setting the recording format of the recording software to ISO9660 level 1 or level 2 (not
including the extension format).
Select CD-ROM ( mode1 ) or CD-ROM XA ( mode2 ) for the disc format.
Playing Back a CD-R/RW
Insert a CD-R/RW disc with MP3/WMA files recorded on it. The system will automatically determine
whether the disc is a music CD or a CD-R/RW with MP3/WMA files and begin playing the disc. A
music CD recorded onto a CD-R/RW can also be played. However, depending on the type, some
discs may not play.
ATTENTION
• A fixed bit rate of 128kbps and sampling frequency of 44.1kHz is recommended for obtaining
stable audio quality at playback.
• Depending on the characteristics of the disc, CD-R and CD-RW may not be playable.
• Because there are many types of MP3/WMA encoding software available, including
commercial and freeware programs, the audio quality may deteriorate, noise may be
generated when playing starts and some recordings may not play, depending on the condition
of the encoder and the file format.
• When files other than MP3/WMA files are recorded on a disc, the system may take some time
to recognise the disc and it may not play it.
Page 22

Skipping to the Next Track (File)/Returning to the Beginning of a Track (File)
Press the [SELECT(Right/Left)] button.
1
Right: Advances to the next track (file).
Left (pressing once): Returns to the beginning of the track (file) being played.
Left (pressing more than two times): Returns to the previous track (file).
FAST FORWARD/REWIND
Press the [SELECT(Right/Left)] button for more than one second.
1
Right: Fast forward.
Left: Rewind.
Random Track Order
Press the [FUNC] button while a CD track is being played to switch to RAND on
1
the sub display.
Press the [SELECT (Right/Left)] button to select whether TRACK RANDOM is ON
2
or OFF.
Right: ON
Left: OFF
Press the [ENTER] button.
3
Tracks will be played in a random order.
Random File/Folder Order
Press the [FUNC] button while an MP3/WMA file is being played to switch to
1
RAND on the sub display.
Press the [SELECT (Right/Left)] button to select the random play setting.
2
Press the [SELECT(Right/Left)] button to switch the mode in the following sequence:
RAND OFF
Press the [ENTER] button.
3
RAND ONE... Play the files in the folder being played in a random order.
RAND ALL... Play the files in all folders in a random order.
RAND ONE RAND ALL
Page 23

Repeat Track
Press the [FUNC] button while a CD track is being played to switch to RPT on
1
the sub display.
Press the [SELECT (Right/Left)] button to select RPT ON or OFF.
2
Right: ON
Left: OFF
Press the [ENTER] button.
3
The track being played is played again.
Repeat File/Folder
Press the [FUNC] button while an MP3/WMA file is being played to switch to RPT
1
on the sub display.
Press the [SELECT (Right/Left)] button to select repeat play.
2
Press the [SELECT(Right/Left)] button to switch the mode in the following sequence:
RPT OFF RPT ONE RPT ALL
Press the [ENTER] button.
3
RPT ONE... Repeat playing of the file being played.
RPT ALL... Repeat playing of all files in the folder.
Scan Tracks
Press the [FUNC] button while a CD track is being played to switch to SCAN on
1
the sub display.
Press the [ENTER] button.
2
The main unit will play the first 10 seconds of each track.
Page 24

Scan Files/Folders
Press the [FUNC] button while an MP3/WMA file is playing to switch to SCAN on
1
the sub display.
Press the [SELECT (Right/Left)] button to select the scan setting.
2
Press the [SELECT(Right/Left)] button to switch the mode in the following sequence:
Right: SCAN ALL
Left: SCAN ONE
Press the [ENTER] button.
3
SCAN ALL... Play the first ten seconds of the first file in each folder.
SCAN ONE... Sequentially play the first ten seconds of all files in the folder being
played and all files beneath it in the hierarchy.
ATTENTION
• To continue playing a desired track/file, turn the scan function OFF.
• After the entire disc is scanned once, ordinary playback starts from the point where scanning
started.
• During random playback, select REPEAT to repeat the track/file being played. To cancel
repeat play (go back to random play), turn the REPEAT function OFF.
• Occasionally the same track/file will be played two or more times in a row ; this is normal
operation and is not a sign of a problem.
• When any of the functions - "Playing the Start of Tracks/Files", "Repeated Playing" and
"Playing the Tracks/Files in Random Order" - is selected, a message such as "SCAN", "ALL
SCAN", "REPEAT", "ALL RPT", "RANDOM" or "ALL RAND" appears on the display to verify
the current function.
Returning to the Root Directory
Press the [SELECT (Upper/Lower)] button (lower part) for longer than one
1
second while an MP3/WMA file is playing.
Selecting the Display During Play
When a CD is playing
Press the [TEXT] button to display text information on the sub display (only with
1
a CD TEXT disc).
Press the [TEXT] button to switch the screen's display pattern in the following
sequence:
Disc title/Track title
Track No. + Playing time Disc title/Track title...
Page 25

When an MP3/WMA file is playing
Press the [TEXT] button to switch the display on the sub display.
1
Press the [TEXT] button to switch the screen's display pattern in the following
sequence:
Folder name/File name
name/File name
Artist/Title Folder No. /File No. Playing time Folder
...
ATTENTION
• If the CD came with the logo shown below, it is recorded with a disc title and track titles.
Text information will be displayed during playback.
• CD text, folder names/file names or tags recorded with characters other than alphanumerics
and symbols cannot be displayed.
Switching Between CD-DA and MP3/WMA
When sound data (CD-DA) and MP3/WMA music files are both found on the same disc, the sound data
is played.
To play the MP3/WMA music files, press the [BAND] button.
1
Page 26

How to Operate the USB Music File Player
About Playable USB Memory Standards
• Supported File System: FAT 16/32
• Playable Audio Format: MP3
• Max.Current: 500mA
• Compatibility: USB1.1/2.0 (Maximum transmission speed equivalent to USB 1.1: 12 Mbps)
• Correspondence: USB mass storage class (Playing from an external HDD is not supported)
Playable MP3 File Standards
• Supported standards: MPEG-1
MPEG-2
MPEG-2.5
• Supported sampling frequencies:32,44.1,48(kHz)
• Supported bit rate: 8,16,24,32,40,48,56,64,80,96,112,128,160,192,224,256,288,320(kbps)
* Supports VBR (64~320kbps).
* Does not support free format.
• Supported channel modes: monaural, stereo, joint, dual
ID3 tags
MP3 files have an "ID3 Tag" that allows input of information so that data such as song titles and the
artist can be saved.
This main unit supports ID3v. 1.0, 1.1, 2.2, 2.3 and 2.4.
Format of USB Memory
The format of the USB Memory to be used must be ISO9660 Level 1 or Level 2.
The control items for this standard are as follows:
• Maximum directory layers: 8 layers
• Maximum characters for file names: Up to 256 characters (the maximum number of characters
obtained by adding the folder name and the file name,
including “.” and the 3-letter file extension)
• Allowable characters for file names: A~Z, 0~9, _ (underscore)
• Maximum number of files in a single memory: 3000
Page 27

[Configuration example for USB memory supporting MP3]
001.mp3
002.mp3
003.mp3
004.txt
005.mp3
1498.mp3
1499.mp3
3000.mp3
Number of files possible on a single USB memory is 3000.
Files aside from MP3 files (Example: 004.txt) will be included as one of the
3000 files.
Skipping to the Next File/Returning to the Beginning of the File
Press the [SELECT(Right/Left)] button.
1
Right: Advances to the next file.
Left (pressing once): Returns to the beginning of the file being played.
Left (pressing more than two times): Returns to the previous file.
FAST FORWARD/REWIND
Press the [SELECT(Right/Left)] button for more than one second.
1
Right: Fast forward.
Left: Fast rewind.
Page 28

Random File Order (Shuffle Songs)
Touch "Preferences".
1
Touch "Shuffle songs ".
2
All music files in the USB memory are played in random order.
Repeat Song
Touch "Preferences".
1
Touch "Repeat song ".
2
The music file currently being played is repeated.
Page 29

File Search
Touch "Select".
1
Song title
Artist name
Album name
Touch "Playlist", "Artist", "Album", "Song" or "Genre".
2
Touch the name of the music file to be played.
3
The selected file in the USB memory is played.
If and are displayed, you can change the displayed page of the music file list by
touching them.
You can search for a file name or the name of an artist by touching "Find".
Page 30

You can search for a music file by entering alphanumeric characters.
CAUTION
• Music files in the USB memory can be played only when the PND is attached to the main
unit.
• Do not remove the USB memory without first switching the display to the audio screen and
then touching the switch. Loss of data may result if this procedure is not followed.
• If the USB memory or PND is removed from the main unit when a music file in the USB
memory is being played, the mode is returned to the one previously selected.
• It may take up to 15 seconds to read the files in the USB memory.
• When voice guidance is given in the USB mode, all the speakers are muted and the
guidance is heard through the speaker.
Page 31

How to Operate with an iPod
An iPod can be connected to the main unit using an optional dedicated connection cable, allowing you
to listen to iPod music files and operate some iPod functions from the main unit.
An iPod is for legal or right-holder-authorized copying only. Don't steal music. iPod is a trademark of
Apple Inc., registered in the U.S. and other countries.
®
Going to the Next File/Returning to the Beginning of a File
Press the [SELECT(Right/Left)] button.
1
Right: Advances to the next file.
Left (pressing once): Returns to the beginning of the file being played.
Left (pressing more than two times): Returns to the previous file.
FAST FORWARD/REWIND
Press the [SELECT(Right/Left)] button for more than one second.
1
Right: Fast forward.
Left: Rewind.
Random File Order(Shuffle Songs)
Touch "Preferences".
1
Touch "Shuffle songs ".
2
The files in the iPod are played in a random order.
Page 32

Repeat Song
Touch "Preferences".
1
Touch "Repeat song ".
2
The iPod music file being played will be played again.
File Search
Touch "Select".
1
Song title
Artist name
Album name
Touch "Playlist", "Artist", "Album", "Song" or "Genre".
2
Page 33

Touch the name of the music file to be played.
3
The selected file in the iPod will be played.
If and are displayed, you can change the displayed page of the music file list by
touching them.
You can search for a file name or the name of an artist by touching "Find".
You can search for a music file by entering alphanumeric characters.
CAUTION
• A music file in the iPod can be played only when the PND is attached to the main unit.
• If the iPod or PND is removed from the main unit while a music file in the iPod is being
played, the mode will be returned to the one previously selected.
• It may take up to 15 seconds to read the files in the iPod.
Page 34

How to Operate the Portable Audio Player
Use an optional AUX105 to connect a portable audio player to the main unit.
Switching the AUX Mode ON and OFF
Press the [SOURCE/PWR] button for more than one second to turn the audio
1
mode OFF.
"Audio off" is displayed on the PND display. On the sub display "GOOD BYE" will be
momentarily displayed and then "ALL OFF".
Press the [TEXT] button and [FUNC] button simultaneously for longer than 3
2
seconds.
AUX ON AUX OFF
ATTENTION
When AUX is set to ON ("AUX ON"), the AUX mode is established by pressing the [SOURCE/
PWR] button. When AUX is set to OFF ("AUX OFF"), the AUX mode is not established by pressing
the [SOURCE/PWR] button.
Page 35

Things You should Know
If One of These Messages Appears
If any of the following messages is displayed on the sub display, check the equipment while referring to
the Cause and Corrective action columns.
Messages Cause Corrective action
CD/MP3
INFO 3 DISCS ARE DIRTY OR
DAMAGED
INFO 5 CD PLAYER FAILS
MECHANICALLY
INFO 6 WHEN THE CD PLAYER’S
INTERNAL TEMPERATURE IS
HIGH (TO PROTECT PICKUP
UNIT)
INFO 7 AN INTERNAL POWER
SUPPLY FAILURE HAS
OCCURRED
FILE ERR NO CORRECT FILE IN CD Confirm the file.
USB
FILE ERR NO CORRECT FILE IN USB
MEMORY
USB ERR PROBLEM WITH DATA
TRANSMISSION
iPod
READING ... iPod IS SENDING DATA Wait until the message
NO DATA THERE ARE NO MUSIC FILES
STORED IN iPod
ERROR1 iPod STOPPED SENDING
DATA FOR SOME REASON
ERROR2 iPod SOFTWARE NOT
SUPPORTED
The loaded disc is dirty or upside
down. Check if the orientation is
correct and if it is clean.
The CD player is inoperative for
some reason.
・The temperature in the CD
player is too high for operation.
Wait till it cools down.
・
Resume playing after the "High
temperature sensed and CD
stopped" display disappears. If
the CD still cannot play, have
your dealer repair it.
・Turn the ACC off and back on
to resume the operation.
・If this condition persists,
please contact your dealer.
Confirm the file.
Confirm connection with a USB
memory or USB memory
standards.
disappears before operating.
Check the files in the iPod.
Check the connection with the
iPod.
・Make sure that the software
for your iPod is the latest
version.
・Make sure that your iPod
model name is listed on the iPC107's manual (iPC-107 : Sold
separately).
Page 36

Before Asking for Repairs
Slight differences in operation can sometimes be mistaken for malfunctions, so check the following
table before asking for any repairs.
CAUTION
If a problem occurs, for instance when the main unit does not respond to any button operation, or
the display does not work correctly, press the [Reset] button using a paper clip or anything similar.
Pressing the [Reset] button will delete all the entries from memory. The settings will return to those
made at the factory prior to shipment.
If the following fail to solve the problem, contact the place of purchase.
Problem Possible reason Corrective action
The screen is dark for a brief
period when the power is turned
on at low temperatures.
The display is distorted for a
short while after the power is
turned on.
No sound comes out.
Sound comes out of only one
side (left or right, front or back).
The sound quality does not
change even after making
adjustments.
A CD will not go into the deck. The power is not turned on. Turn the vehicle ignition switch
A CD cannot be played. There is water condensation in
This is a characteristic of LCDs. This is not a malfunction. Wait
This is a characteristic of LCD
backlighting.
The volume is poorly adjusted or
MUTE is on.
The music is muted when the
PND is attached to the main unit
and when:
- voice guidance is given
- talking in hands-free mode*
A speaker wire is disconnected. Check the connections of the
Volume is poorly adjusted. Check the balance and fader
The adjusted audio quality is not
included in the radio broadcast
or disc.
A disc is already inserted and
you are trying to insert a second
disc.
the equipment.
There is a large scratch or warp
in the CD.
The CD is very dirty. Clean the CD.
The CD is upside down. Insert the CD with the proper
A non-supported type of CD has
been inserted.
for a brief period.
This is not a malfunction. The
display will stabilize after a brief
period.
Turn the [VOL] rotary knob and
check the volume. Or cancel
MUTE.
This is not a malfunction. The
music can be heard again when
the voice guidance finishes or
the hands-free mode is turned
off.
speaker wires.
adjustments.
Check by changing the radio
station or disc.
to [ACC] or [ON].
Eject the previously inserted CD
and insert the preferred CD.
Do not use the equipment for a
while and then try using it again.
Insert a different CD.
orientation.
Insert a CD that is supported by
the deck.
Page 37

Problem Possible reason Corrective action
There is a point of light on the
display.
*: Depending on your mobile phone, the mute function may not work correctly. If it doesn't, press the
[MUTE] button on the main unit. Also, refer to the ECLIPSE web site whose address is given below
for details on applicable phone models. (http://www.eclipse-web.com.au)
At least 99.99% of the pixels on
the LCD panel are effective, but
it is possible that 0.01% of the
pixels may not light or may stay
lit.
This is not a defect, so please
use the equipment in this
condition.
Page 38

Specifications
<GENERAL>
Power Supply 13.2V DC (11-16V)
Current Drain 3A
Dimensions (whole unit) (W x H x D) 7" x 4" x 6-1/2" (180 x 100 x 165mm)
Weight (whole unit) 5.5lbs (2.5kg)
Dimensions (PND only) (W x H x D) 4" x 3" x 1" (101 x 76.1 x 23.3mm)
Weight (PND only) 0.4lbs (0.2kg)
Operating temperature range (whole unit)
Operating temperature range (PND only)
Storage temperature range -40°C to +85°C (-20°F to +185°F )
Suitable load impedance 4Ω
<DISPLAY>
DISPLAY 3.5" TFT
Resolution 230,400 pixels (320 x 240 x 3)
<FM TUNER>
Frequency Range 87.5~108.0MHz (100kHz step)
Usable Sensitivity 15dBf
50dB Quieting Sensitivity 24dBf
Stereo Separation 38dB (1kHz)
<AM TUNER>
Frequency Range 522~1710kHz (9kHz step)
Usable Sensitivity 22µV
<CD SECTION>
Frequency Response 20Hz~20kHz ±3dB
Wow & Flutter Below measurable limits
Stereo Separation 80dB
S/N Ratio (A-weighted) 95dB
Dynamic Range 95dB
Total Harmonic Distortion 0.008%
<USB MEMORY SECTION>
USB Interface 1.1
Frequency Response 20Hz~20kHz ±3dB
S/N Ratio (A-weighted) 95dB
Total Harmonic Distortion 0.008 %
<EQUALIZER SECTION>
Bass/Mid/Treble Control ±11dB at 80Hz/±11dB at 700Hz/±11dB at
-4°F to 149°F (-20°C to +65°C )
14°F to 131°F (-10°C to +55°C )
10kHz
Page 39

<AUDIO AMPLIFIER>
Power Output 14W x 4 (20Hz~20kHz, 1% THD, 4Ω,
Output Level/Impedance 5V/55Ω line-out impedance
Loudness +9dB at 100Hz/+6dB at 10kHz
Vcc=14.4V)
Max. 50W x 4
Page 40

How to Contact ECLIPSE
Fujitsu Ten (Australia) Pty Ltd ECLIPSE Australia
89 Cook Street Port Melbourne, Victoria 3207 Australia
Phone: 1800 211 411
 Loading...