

Page 1
INSTALLATION MANUAL: 090003-30800700
JAPANESE
GERMAN FRENCH ITALIAN SPANISHENGLISH
INSTALLATION MANUAL
Thank you for purchasing this product.
Please read this installation manual before assembling and using the product, and be sure to use the product
properly.
An accident or injury can result if the product is incorrectly assembled or unspecified parts are used.
After assembly, keep this manual where it can be consulted when necessary.
ContentsContents
Before
installation
Accessories
For your safety in using this product
Cautions before use
2
3
3
Installation
Installing the speaker
Adjusting the angle of the speaker
Adjusting the spikes
Installing the caps and protective net
Routing the speaker wires
Specifications
4
5
5
5
6
6
Page 2
JAPANESE
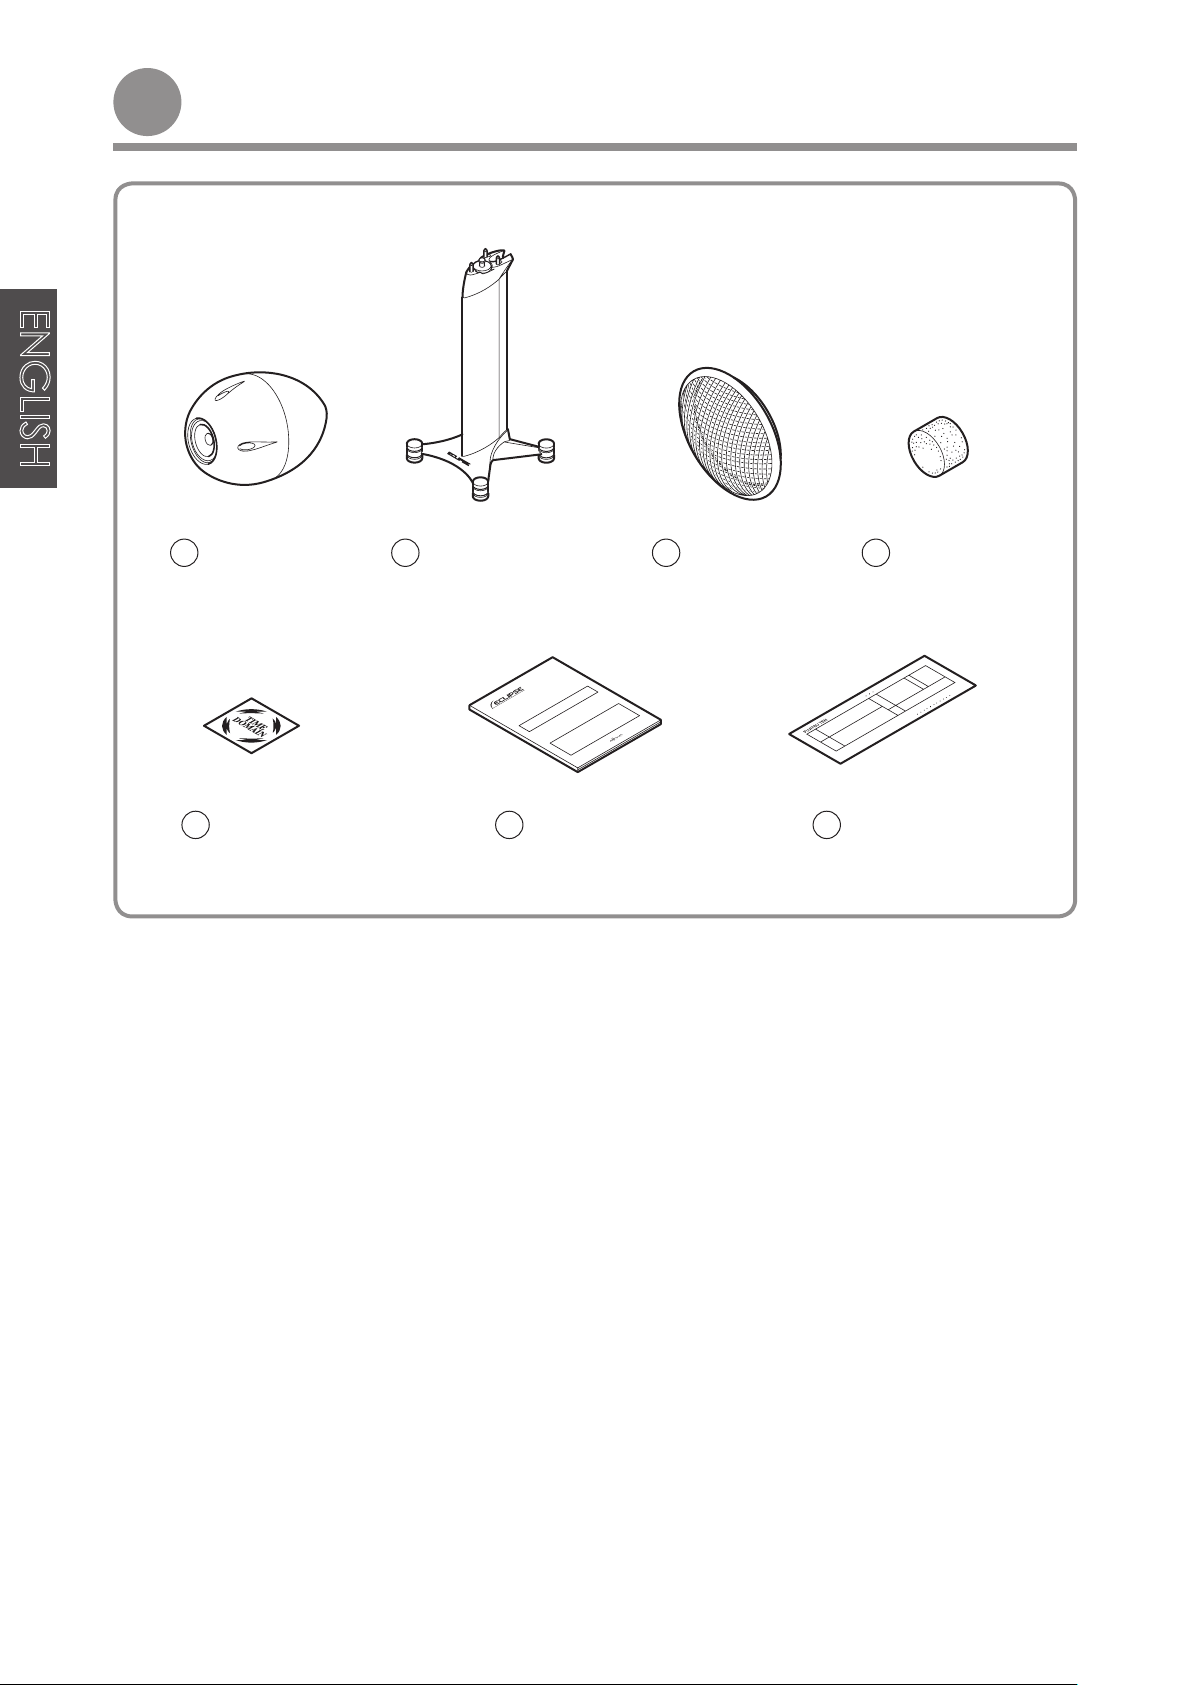
Accessories
Accessories
ENGLISH GERMAN FRENCH ITALIAN SPANISH
1
12cm speaker
φ
×1
Check that all of the following accessories are present before installation
2
Speaker stand
×1
3
Protective net
×1
4
Cap
×5
5
Logo sticker
×1
This product is a speaker which has been designed using Time Domain theory.
*
What is Time Domain theory?
《
Time domain recreates the changes that occur in sound waves over time from the moment of output until their
disappearance. Its purpose is to reproduce those sound waves that are as close to the original recorded sound
as possible. Time domain audio systems allow sound orientation and the nuances that are added by recorded
performers to be faithfully reproduced.
》
6
Installation Manual
×1
7
Warranty
×1
−−
Page 3

For your safety in using this productFor your safety in using this product
The following WARNING and CAUTION signs are used throughout this manual as well as on the product. These signs
alert the installer and users of important safety information to avoid risk of injury and damages to the product.
Make sure that you understand the meaning of each sign first before reading the contents of this manual.
JAPANESE
Warning
Caution
Tip
This "Warning" sign indicates a situation in which incorrect handling may result in death
or serious personal injury.
This "Caution" sign indicates a situation in which incorrect handling may result in
personal injury or may result solely in damage to property.
This section contains information that can help to prevent problems and damage to the
unit, and also contain other useful information.
Warning
・ Do not install this product in high places. It may fall down and cause injury.
・ Do not disassemble this product.
・ Do not use this product in very humid places. Fire or electric shocks may result.
Caution
・ Do not use the stand to support any other item.
・ Assemble the stand on a level surface. Placing the stand
on an uneven surface can lead to overturning and result
in an injury.
・ Do not place the stand where people regularly move past
it. Bumping into the stand can cause an injury.
・ Place the stand on a solid and level floor. Installing the
stand in a location that is unstable can cause it to fall and
result in an injury.
・ Do not drop or drag this unit while assembling or carrying
it. Pushing over or dragging the stand can result in an
injury or cause damage to the floor.
・ Do not climb onto or hang from the stand. Be especially
careful about children trying to do this. It may fall over or
break and cause injury.
・ The stand is heavy, so take care when unpacking or
moving it. Improper lifting can cause a back injury and
dropping the stand can injure feet.
GERMAN FRENCH ITALIAN SPANISHENGLISH
Cautions before useCautions before use
・ Always be sure to minimize the volume before turning on the power and before switching input. Sudden high
volume output can damage the connected speaker system.
・ Even pleasant music can be a disturbance at times. To avoid disturbance in your neighborhood, enjoy your unit at
an appropriate volume. Remember that at night, even low volume carries into surrounding areas. Help to maintain
a pleasant living environment.
・ Always connect speaker systems with the power disconnected.
・ Do not separate the speaker from the stand.
・ Do not place the speaker unit directly on hard surfaces. It may mark the surface.
・ Be careful not to tip over the stand.
・ Clean the unit by wiping it gently with a soft cloth moistened in neutral detergent. Do not use liquid solvents such
as alcohol or thinner to clean this product.
−−
Page 4

JAPANESE
InstallationInstallation
-
Installing the speaker
Place the stand in the desired location.
1
-
ENGLISH GERMAN FRENCH ITALIAN SPANISH
Caution
The assembly of this unit must be done on a flat, hard
surface. If the stand is placed in such a way that it
obstructs free passage, injury may result.
2
3
Caution
If placing the speaker on the floor, lay some protective
material on the floor to prevent any damage to the speaker
and the floor.
Remove the guide screw from the stand.
Install the guide screw to the speaker as shown in the
illustration.
Guide screw
Speaker
stand
Speaker
Guide screw
Caution
・ When placing the speaker, be careful not to touch the
cone paper. Damage to the speaker may result.
・ When placing the speaker on the stand, do not tilt the
speaker by mistake, otherwise the base of the speaker
may become damaged.
・ When placing the speaker on the stand, do not tilt it while
working, otherwise the guide pin may fall down and injury
or damage to the floor may occur.
As shown in the diagram, mount the speaker on the
4
stand, constantly checking the alignment.
Tip
Insert the guide pin into the stand, and align the speaker
with the three pins.
Tighten the guide screw to secure the speaker to the
5
stand.
Guide
pin
Speaker
stand
Speaker
Groove
Pin
Speaker
Tighten
Guide screw
−−
Page 5

-
Adjusting the angle of the speaker
Loosen the guide screw and tilt the speaker to the
1
desired angle.
Once you have determined the angle, tighten the guide
2
screw to secure the speaker.
JAPANESE
-
Upward adjustment
Tip
・ The angle of the speaker is 0° when the stand pins are at
position Ⓐ, and is 12° when the stand pins are at position
Ⓑ.
・ Support the speaker with your hand when tightening the
guide screw.
-
Adjusting the spikes
Turn the spikes to adjust as shown in the illustration.
1
-
Tighten
Guide screw
Base of speaker
Pin positions
Loosen
Speaker
GERMAN FRENCH ITALIAN SPANISHENGLISH
Groove
Tip
・ Turn the four spikes all the way counterclockwise before
placing the stand on the floor.
・ Turn the spikes clockwise one by one. When you feel
the ends of the spikes touching the tray, stop turning the
spike at that point. (Adjustment range is 10 mm.)
-
Installing the caps and protective net
Attach the caps in five places as shown in the
1
illustration.
Install the protective net.
2
-
Tip
・ The protective net may be attached when the speaker is
not in use or at the users discretion.
・ If the protective net comes off the net ring, fit the
protective net back into the groove in the net ring.
Cap
Protective net
Spike
Net ring
−−
Page 6

JAPANESE
-
Routing the speaker wires
Insert the ends of the speaker wires into the holes in
1
the speaker input terminals and tighten the terminals.
-
Caution
When connecting the speaker wires, insert the ends of
ENGLISH GERMAN FRENCH ITALIAN SPANISH
the speaker wires correctly so that they do not touch
neighboring terminals.
Tip
When connecting the speaker wires to the speaker, pass
the speaker wires through the groove in the stand to
improve the appearance. (If less than 7 mm dia.)
SpecificationsSpecifications
Specifications and appearance are subject to change without prior notification.
Speaker input terminals
Speaker wires
●Speaker
Diameter
Degaussing Degaussing design (JEITA)
Type Bass reflecting box
Input resistance
Impedance
Outer dimensions W285×D411×H285(mm)
Weight 11kg
●Stand
Total height 723mm ~ 733mm 335mm ~ 345mm
Weight 14kg 7kg
φ12cm
Rated 35 W / Maximum 70 W
6Ω
TD712zMK2 TD712zMK2-S
−−
 Loading...