

Page 1

OWNER'S MANUAL: 090001-1497A700
OWNER'S MANUAL
JAPANESE
GERMAN FRENCH ITALIAN SPANISHENGLISH
Thank you for purchasing this product.
Please read this owner’s manual before assembling and using the product.
An accident or injury can result if the stand is incorrectly assembled or unspecified parts are used.
After assembly, keep this manual for future reference.
ContentsContents
Before
installation
Parts list 8
Safety guidelines 9
Checklist before use 9
Installation
Removing the speaker 10
Assembling the speaker stand 11
Connecting the speaker cable 11
Adjusting the vertical angle of the speaker
12
Page 2
JAPANESE
ENGLISH GERMAN FRENCH ITALIAN SPANISH
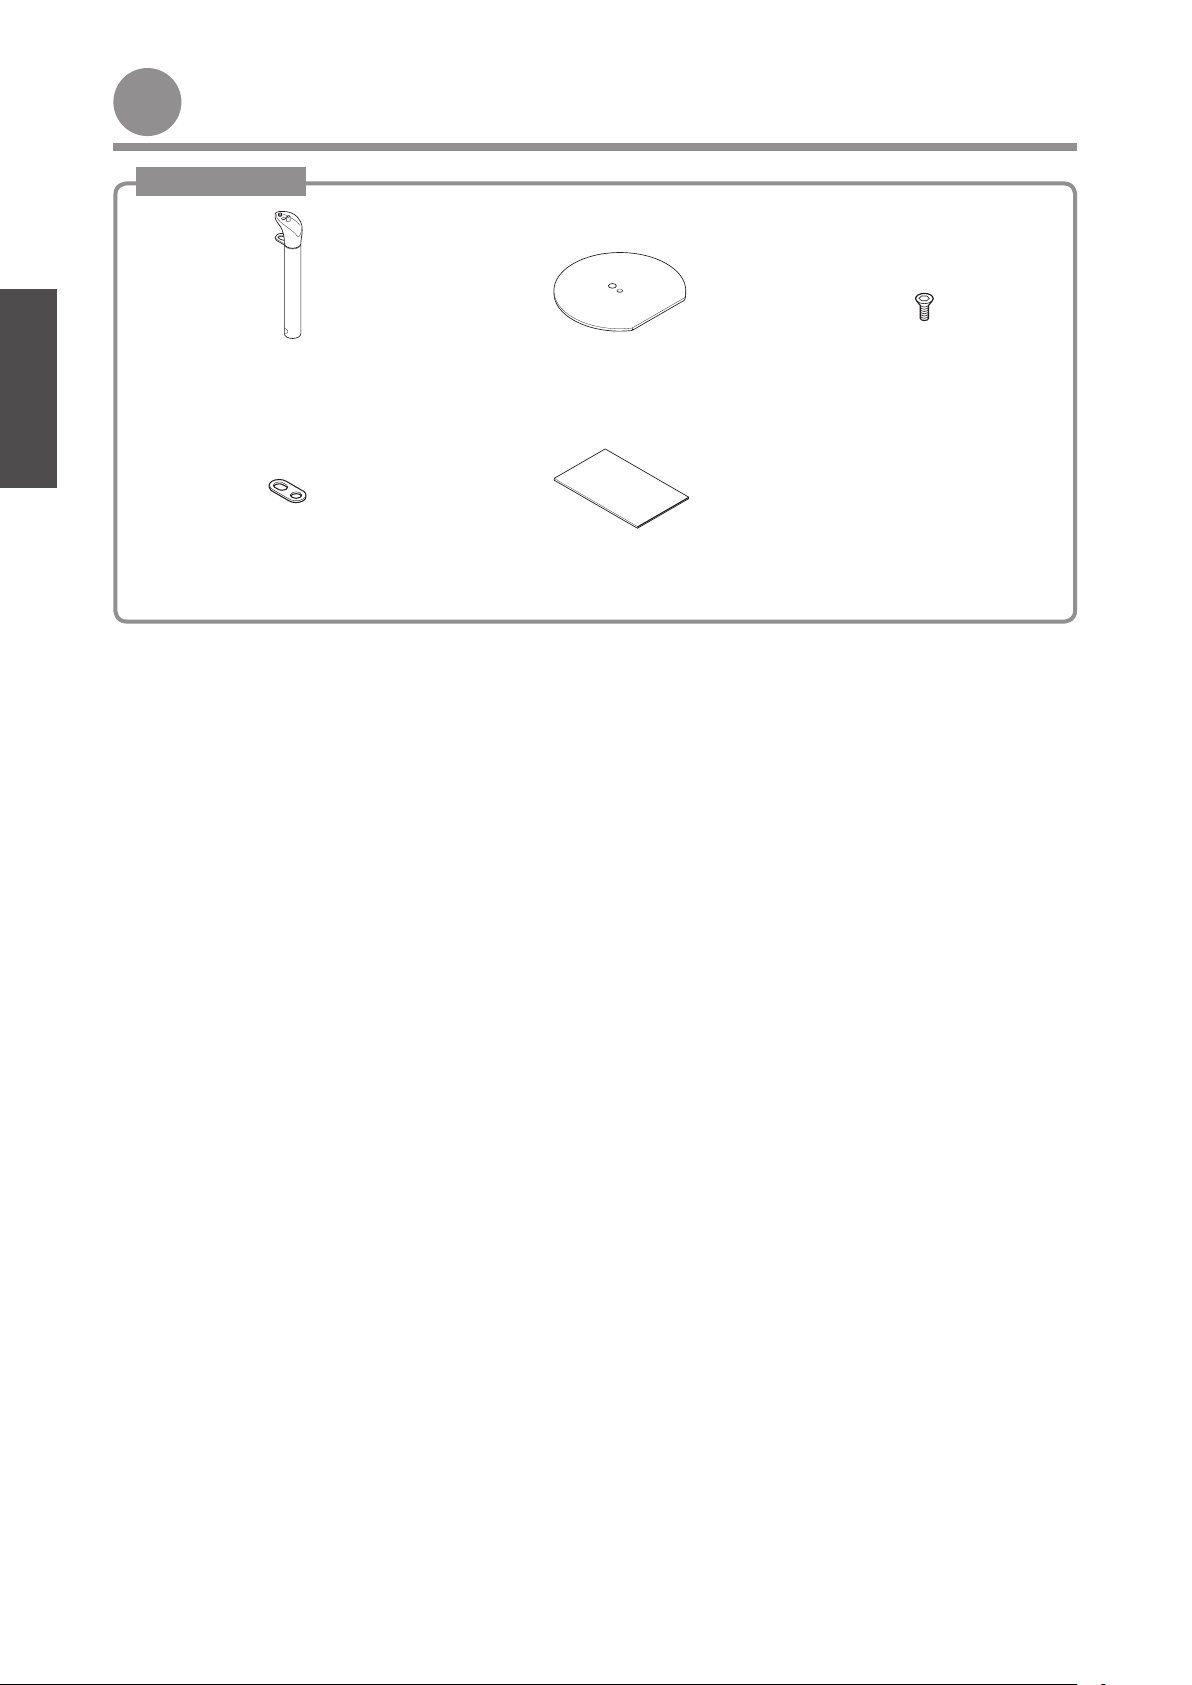
Parts listParts list
For 307DMK2A
❶Column
❹Cable guide
Check that all of the following items are present
❷Base plate
X1
❺Owner's Manual
X1
X1
X1
❸Hexagon socket head bolt
X1
−8−
Page 3

Safety guidelinesSafety guidelines
The following WARNING and CAUTION signs are used throughout this owner's manual as well as on the product.
These signs alert the installer and users of important safety information to avoid risk of injury and damages to the
product. Make sure that you familiarise yourself with these symbols and their meaning.
The information following this sign indicate situations where failure to follow the
Warning
Caution
Tip
instructions may result in death or severe injury.
The instructions which follow this sign indicate situations where failure to follow the
instructions could cause injury when using the product or physical damage to equipment
and surroundings.
This section contains information that can help to prevent problems and damage to the
unit, and other useful information.
Warning
JAPANESE
GERMAN FRENCH ITALIAN SPANISHENGLISH
・ Do not install this product in high places. It may fall down and cause injury.
Caution
・ This stand is meant for use with the TD307MK2A and
TD307 Ⅱ speaker. Do not use the stand for other
purposes.
・ Assemble the stand on a level surface. Placing the stand
on an uneven surface can lead to it falling over and result
in an injury.
・ Do not place the stand where people regularly move past
it. Bumping into the stand can cause an injury.
・ Place the stand on a solid and level floor. Installing the
stand in a location that is unstable can cause it to fall and
result in an injury.
・ Do not drop or drag this unit while assembling or carrying
it. Pushing over or dragging the stand can result in an
injury or cause damage to the floor.
・ Do not climb onto or hang from the stand. Be especially
careful about children trying to do this. It may fall over or
break and cause injury.
・ The stand is heavy, so take care when unpacking or
moving it. Improper lifting can cause a back injury and
dropping the stand can injure feet.
Checklist before useChecklist before use
・ This is a stand for a speaker system. Avoid using the stand for other purposes.
・ The stand is very heavy. Use caution when handling it.
・ Be careful not to tip over the stand.
・ Be careful that the speaker system does not fall from the stand.
・ If the stand becomes dirty, clean it by lightly wiping with a soft cloth, using a neutral detergent if necessary. Do not
use a substance like thinner or benzene.
−9−
Page 4

JAPANESE
-
1
ENGLISH GERMAN FRENCH ITALIAN SPANISH
2
InstallationInstallation
Removing the speaker
Remove the hexagonal nut and washer which secures
the speaker and speaker arm together.
Remove the speaker arm from the speaker.
-
Speaker
Caution
・ The speaker is heavy, so hold it firmly while removing
it from the speaker arm.
・ After removing the speaker, place it on a surface that
will not mark it or allow it to roll around.
Tip
The speaker arm and speaker base are not required
when using the stand.
Give it to the customer for future use if the configuration
is changed.
Washer
Hexagonal nut
Speaker arm
Speaker base
−10−
Page 5

-
Assembling the speaker stand
1
Install the cable guide and column to the base plate with
the hexagonal socket head bolt.
-
JAPANESE
Tip
Align the positioning label on the column with the label
on the base plate.
2
Place the speaker onto the column, and then secure it
with the washer and the hexagonal nut.
Caution
・ Securely tighten the washer and the hexagonal nut.
・ Be careful not to damage the base of the speaker
when placing the speaker onto the stand.
❷Base plate
❶Column
Align the labels
❷Base plate
❸Hexagon socket head bolt
Speaker
❶Column
❹Cable guide
GERMAN FRENCH ITALIAN SPANISHENGLISH
-
Connecting the speaker cable
1
Insert the bare ends of the speaker cable into the holes
in the speaker input terminals and secure them in place.
-
Caution
When connecting the speaker cables, insert the bare
ends of the speaker cables correctly so that they do not
touch neighboring terminals, otherwise it may cause
short-circuits.
Washer
❶Column
Hexagonal nut
Speaker stand
⊖ ⊕
Speaker cables
Tip
If the speaker cables are routed through the cable
guide on the stand when connecting the speaker cables
to the speaker, it will improve the outer appearance of
the speaker. (for diameter of less than 7 mm)
−11−
Speaker cables
❹Cable guide
Page 6

JAPANESE
-
1
ENGLISH GERMAN FRENCH ITALIAN SPANISH
2
Adjusting the vertical angle of the speaker
Loosen the vertical angle adjustment bolt at the bottom
of the speaker.
Adjust the speaker to the desired angle.
-
Angle adjustment bolt
Speaker
Allen key (small)
(included with speaker)
Speaker stand
Caution
・ Be careful not to knock over the speaker stand when
adjusting the angle.
・ The speaker will not move sideways.
Tip
The angle of the speaker can be adjusted within the
range of +20° to -10°.
3
Tighten the vertical angle adjustment bolt.
Caution
Securely tighten the vertical angle adjustment bolt.
+20°
-10°
−12−
 Loading...