

Page 1
− 1 −
ENGLISH
SPEAKER / AMPLIFIER
Owner'sManual
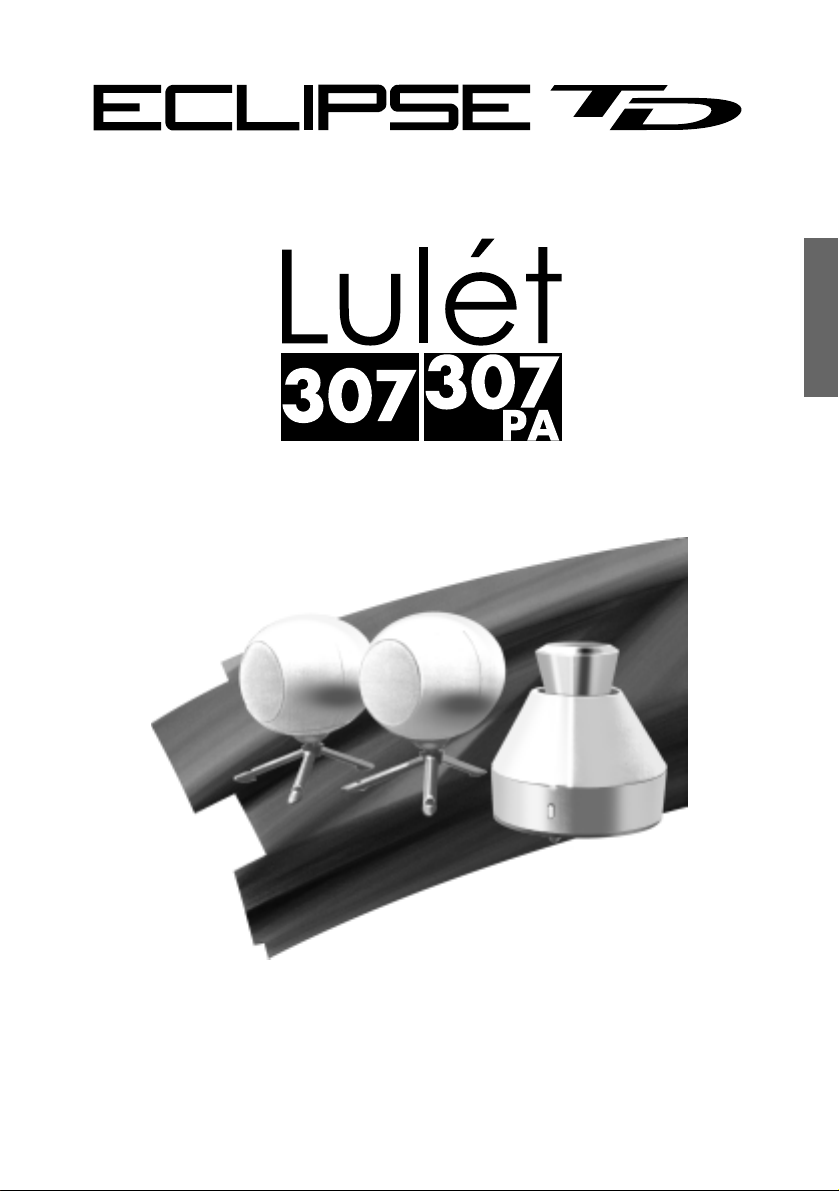
Thank you for purchasing the 307 speaker or the 307 PA speaker/amplifier.
Please read this Owner's Manual before use.
Be particularly sure to read the Safety Instructions section.
Keep this Owner's Manual together with the Warranty in a safe place for later reference.
Page 2

− 2 −
ENGLISH
Foreword
■Contents
Important safety Instructions...........................................................................................3
Notes on Use..................................................................................................................6
Part Names and Functions/Connections.........................................................................7
Installing.........................................................................................................................10
Connection examples ....................................................................................................11
Specifications ................................................................................................................12
■Accessories
※Stereo mini/RCA plug cable(1.5m) is for connecting the amplifier with a playback
equipment which has RCA stereo output terminal such as CD player.
WARNING :
...........
To avoid the danger of suffocation, keep plastic bags out of the reach of
children.
*This product is an amplifier system which has been designed using time domain theory
in order to maximise quality of speaker operation and performance.
《What is time domain theory?》
Time domain recreates the changes that occur in sound waves over time from the
moment of output until their disappearance. Its purpose is to reproduce those sound
waves that are as close as possible to the original recorded sound.
Time domain audio systems allow sound orientation and the nuances that are added by
recorded performers to be faithfully reproduced.
NO
1
2
3
4
5
6
7
8
9
10
11
12
※
1
―
―
―
―
1
1
1
1
―
1
―
2
1
1
1
2
1
1
1
2
2
2
1
65mm [2/16"] dia. Speaker
Amplifier
AC adapter
stereo mini plug cable (1.5m)
Speaker cable 3m parallel-wire ( :gray, :gray/black)
Owner's Manual
Warranty
Hexagonal wrench
Rubber spacer
Cable tie
LOGO Sticker
Stereo mini/RCA plug cable (1.5m)
307
Quantity
307PA
Accessories
Page 3

− 3 −
ENGLISH
Important Safety Instructions
CAUTION
RISK OF ELECTRIC SHOCK
DO NOT OPEN
CAUTION : TO REDUCE THE RISK OF
ELECTRIC SHOCK, DO NOT REMOVE
COVER (OR BACK). NO USER-SERVICEABLE
PARTS INSIDE. REFER SERVICING TO
QUALIFIED SERVICE PERSONNEL.
・Explanation of Graphical Symbols
The lightning flash with arrowhead
symbol, within an equilateral triangle,
is intended to alert you to the
presence of uninsulated "dangerous
voltage" within the product's
enclosure that may be of sufficient
magnitude to constitute a risk of
electric shock to persons.
The exclamation point within an
equilateral triangle is intended to
alert you to the presence of
important operating and
maintenance (servicing) instructions
in the literature accompanying the
appliance.
CAUTION (for customers who concerned)
TO PREVENT ELECTRIC SHOCK, MATCH WIDE
BLADE OF PLUG TO WIDE SLOT FULLY INSERT.
WARNING
TO REDUCE THE RISK OF FIRE OR
ELECTRIC SHOCK, DO NOT EXPOSE THIS
APPLIANCE TO RAIN OR MOISTURE.
1. Read instructions
All safety and operating instructions should
be read before operating unit.
2. Follow instructions
All operating and other instructions should
be followed.
3. Retain instructions
The safety and operating instructions
should be retained for future reference.
4. Warnings
All warnings on the unit and in the
operating instructions should be adhered
to.
5. Power supply
Power supply should be operated only
from the power source indicated on
the marking label. If you are not sure of
the type of power supply to your home,
consult your product dealer or local power
company.
6. General care of unit
Do not open or modify the unit as fire or
electric shock may result. Do not place
flower vases, potted plants, cups,
cosmetics, drugs, containers holding
liquids, or small metal objects on or near
the unit. Do not place any objects on the
unit and do not insert or drop metal,
combustible objects or liquids into the unit
as such actions can cause fire or electric
shock. If liquid or foreign objects enter the
unit, disconnect immediately since
continued use may result in fire or electric
shock. Do not place the unit on tuners,
audio decks or other electric equipment.
Do not use the unit as a step or seat. The
unit may tip over and cause damage or
injury. Consult a company customer
Page 4

− 4 −
ENGLISH
service facility for interior inspection,
adjustment or repair.
7. Where not to use unit
Do not use the unit in bathrooms, areas
exposed to rain or snow, on the shore,
near water or in humid conditions. Do not
place the unit in unstable locations, in
kitchens,near humidifiers, or in any location
with likely exposure to smoke or steam. Do
not place the unit in direct sunlight, near
heating equipment or close to open
flames. Fire, accident or malfunction may
result. Do not place the unit in locations
exposed to cold air or direct draft.
Condensation, leakage current or thermal
damage may result. Do not use the unit in
dusty or dirty locations. Decreased heat
ventilation can cause thermal damage
8. Unit heat
The bottom and sides of the unit can heat
up during use and should not be touched.
Burns may result. Only connect or
disconnect speaker cables after the power
supply has cooled down.
9. Moving the unit
When moving the unit, shut off power to all
connected equipment, and disconnect
power cords, connectoins cables, speaker
cables and other wires. Moving the unit
while cable are connected can cause
damage to cables, fire or electric shock.
The unit is heavy and care should be taken
when unpacking, moving or lifting.
Manufacturing also creates sharp areas on
the unit; use thorough care in handling.
*Because the volume knob can be
separated from the amplifier, never hold
the volume knob when moving the
amplifier.
10. Power cord
Only use the power cord supplied and do
not bend, twist, modify it for repair, or pin it
under the unit. Heavy objects, heat or
tension may also damage the power cord
and cause fire or electric shock. When
disconnecting the power cord from an
outlet, do not pull the cord. Pulling on the
cord can damage it and cause fire or
electric shock. Do not touch the power
cord with wet hands. Do not place the
power cord near heating equipment and
do not use the unit. If the plug fits loosely in
an electric outlet or the plug or cord is hot.
If the cord is damaged replace it as
continued use may result in fire or electric
shock.
11. Unit plug
Insert the plug into an outlet all the may to
its base. Incomplete insertion can cause
heat production, and dust build-up can
cause fire. Contact with the prongs of the
plug can also cause electric shock. Do not
connect the unit to an outlet where the
connection is loose even when the plug is
inserted all the way to its base. Do not use
the unit if the plug is hot. Heat production
can cause fire.
If dust or metal accumulates on or near the
prongs of the plug, wipe the plug with a
dry cloth after disconnection. Continued
use may cause fire or electric shock.
12. Danger signs
If you notice a strange noise, smoke,
unusual odour or other abnormal
condition, shut off the unit, disconnect the
power cord from the outlet and have the
unit inspected. Continued use may result in
fire or electric shock.
13. Electric storms
During electrical storms disconnect the unit
and avoid contact with the antenna and
power cord. Lightning can cause fire,
electric shock and malfunction.
14. Internal temperature rise
To avoid internal temperature rise when
installing the unit, leave space between the
unit and walls or other equipments. When
installed in a rack or similar fixture, leave a
10cm (4") or larger gap on top and at sides
since internal temperature rise can result in
fire. The unit is provided with ventilation
holes to prevent internal temperature rise.
Blockage of these holes decreases
ventilation and can result in fire. Note the
following:
*Do not place the unit in a poorly
ventilated area
*Do not place the unit on carpeting or on
bedding
*Do not obstruct the ventilation holes
*Do not tilt the unit or turn upside down
Page 5

− 5 −
ENGLISH
15. AC Adapter
Only use the AC adapter supplied and
ensure that you use it in a well-ventilated
location free from dampness.
16. Extended non-use
If the unit is likely to be unused for an
extended period, shut off power and
disconnect from power supply.
17. Volume Adjustment
If abnormal noise is produced during play
at high volume, reduce the volume level.
Distorted sound can cause overheating of
speakers and amplifier. Before switching
power supply on, set the amplifier volume
to minimum. Sudden, loud noise can
cause damage to hearing.
18. Connecting TV/other audio equipment
When connecting a TV or other audio
equipment, always shut off power, read
the operating manual for each device and
follow the instructions for connection. Use
only designated cables.
Use of non-designated cables or extension
cables can cause heat production, burns,
and fire.
19. Antenna
An outdoor antenna should be located
away from power lines.
20. Maintenance.
Before undertaking maintenance
disconnect from power supply. Have the
interior of the unit cleaned approximately
once a year by qualified personnel.
Accumulated dust inside and long intervals
without cleaning can cause fire or
malfunction. Before cleaning this product
make sure that the power is turned off and
the power cord is disconnected from the
wall outlet. Clean with a soft cloth. If the
product is particularly dirty, moisten the
cloth and wring out before use. Complete
by wiping with a soft, dry cloth. Do not use
liquid solvents such as alcohol or thinner to
clean this product, as such chemicals can
damage the cabinets.
21. Servicing
The unit should be serviced by qualified
personnel when:
*The power-supply cord or plug has been
damaged, or
*Objects or liquid have entered the unit,
or
*The unit has been exposed to rain; or
*The unit is malfunctioning, or
*The unit has been dropped or the
cabinet has been damaged.
22. Children
Use particular care in households where
children are present.
23. Temporary Fault
If this product receives a strong external
shock (such as from an impact, static
electricity or a power surge due to
lightning), or if this product is used
incorrectly, it may stop working properly.
In such cases, press the power button to
turn the power off and then back on again,
and check if this product is working
normally.
Page 6

− 6 −
ENGLISH
Notes on Use
■Volume Setting
Before switching ON minimise the volume.
Sudden, large output can damage the
speakers.
■Volume Etiquette
To avoid disturbance in your neighbourhood,
enjoy your unit at an appropriate volume.
Remember that at night, even low volume
carries into surrounding areas.
Help to maintain a pleasant living
environment.
■Speaker Cord Connection
Always connect speaker systems with
power OFF.
If a speaker cable is inadvertently shorted,
the protection circuit in the amplifier will
operate, and audio output will stop
temporarily.
In this event, disconnect the power cord
from the outlet, correct the shorted area and
reconnect the power cord to the outlet.
The output of this amplifier is in BTL format;
avoid connecting the negative side to the
negative side of another device by a speaker
selector or the like (the negative side is not
GND voltage).
■Volume knob
Attach the volume knob to the amplifier as
shown in the following figure.
In order to protect internal parts, the volume
knob will separate from the amplifier if
excessive force is applied to the knob.
■Speaker Cable Routing
Bind the speaker cables using the accessory
cable ties.
■Hexagonal Head Screw
If the base of the speaker unit is loose after
you have adjusted the angle, use a
hexagonal wrench to tighten the hexagonal
head screw in the base of the speaker.
Hexagonal
wrench
Hexagonal
Head screw
Cable tie
Speaker cables
AC adapter cable
Caution
Page 7

− 7 −
ENGLISH
Part Names and Functions/Connections
① ②
+−
①, ②Speaker input terminals
When connecting the speakers, insert the
ends of the speaker cables so that they do
not touch neighbouring terminals.
While pressing the terminal with your finger,
insert the speaker cable into the hole. Check
that the speaker cable does not pull out
after the terminal is released.
Speaker cable
Push
*Connect the cable with the black stripe to
the black terminal.
*It is recommended that the accessory
speaker cables are used. (These cables
are designed to provide optimum sound
quality for this system.)
*The 307 is not provided with accessory
cables, so you will need to purchase them
separately. (Make sure that the and
cables are connected correctly.)
Page 8

− 8 −
ENGLISH
①
②
⑤
⑦
④
③
⑥
①Power indicator
Power button "ON" : indicator lights
Power button "OFF"
②Volume control knob.
This knob is used to adjust the volume.
*If the amplifier is connected to a playback
device such as a portble CD player or to
the headphone jack of a computer, adjust
the volume to the appropriate level at the
playback device or computer
③Line-input terminal
Use a stereo mini cable to connect a device
to this terminal.
*If the amplifier is connected to a playback
device such as a portable CD player or to
the headphone jack of a computer, use
the accessory stereo mini cable.
④Line-output terminal
This terminal is used to output signals from
the amplifier to a sub-woofer. For stereo
output, the output signal volume will increase
when the volume control knob is turned
clockwise.
⑤Power button
Turns power ON and OFF.
⑥Power connector
Connect power supply here.
*Do not connect anything other than
the AC
adapter, otherwise it may cause problems
with operation and/or fire.
⑦AC adapter
*Input voltage and the shape of plug vary in
the destination.
IN
OUT
Page 9

− 9 −
ENGLISH
OFF
H.P.F
ON
⑨
⑧
L R
⑧Speaker output terminals
When connecting the speakers, insert the
ends of the speaker cables so that they do
not touch the speaker body or neighbouring
terminals.
While pressing the terminal with your finger,
insert the speaker cable into the hole. Check
that the speaker cable does not pull out after
the terminal is released.
*Connect the cable with the black stripe to
the black terminal.
⑨H.P.F. switch
When a sub-woofer is connected to the
amplifier, set this switch to "ON" to cut out
the bass range of the speaker output signal.
Speaker cable
Push
〔Bottom view of amplifier〕
Page 10

− 10 −
ENGLISH
Installing
■Speaker installation position
The speaker can be suspended from the
ceiling or attached perpendicularly to the wall
as well as being placed on the floor. Insert
screws through the holes in the tripod legs to
secure the speaker to surfaces such as these.
Consult a qualified technician for advice on
installation locations and installation methods. If the speaker is installed in an inappropriate place or by using an inappropriate installation method, it may fall down.
●Installing to a ceiling
●Installing to a wall
■
Attaching the "TIME DOMAIN" logo sticker
Attach the "TIME DOMAIN" logo sticker to
the speaker.
Remove and stick the released paper.
●Attachment example
Logo sticker
Logo sticker
Tripod Screw(M4)
Tripod
Screw
(M4)
■Removing the protective net and
installing the rubber spacer
The speaker's protective net can be removed if
desired. When the protective net is removed,
install the rubber spacer before using the speaker.
(1)Removing the protective net
1.
Insert a flat-tipped screwdriver or similar
tool into the groove of the protective net
and lift it up to raise the protective net.
2. Remove the protective net.
(2)Installing the rubber spacer
1. Push the rubber spacer into the groove
of the speaker starting from the notch in
the speaker.
Do not touch the paper cone of the speaker
with your hands.
2.Use scissors to cut off any unneeded
part of the rubber spacer.
Be careful not to damage the cone of the
speaker with the scissors.
Cut off
Rubber spacer
Rubber spacer
Groove
Rubber spacer
Protective net
Flat-tipped
screwdriver
Groove
Caution
Caution
Caution
Page 11

− 11 −
ENGLISH
Connection examples
■Player+Amplifier+Speakers
■Player+Amplifier+speakers+316SW (sold separately)
AC adapter
Speaker
cables
RCA cable(sold separately)
316SW
(sold separately)
To Line Out terminal of CD player or
Headphone Out terminal of MP3 player
※Varies depending on connected device
(Gray/black)(Gray/black)(Gray)(Gray)
Speaker Speaker
− + − +
φ3.5mm
Cable sold separately
Amplifier
Select switch
(Refer to Page 27)
+ − − +
OFF
H.P.F
ON
To Line Out terminal of CD player or
Headphone Out terminal of MP3 player
※Varies depending on connected device
Cable sold separately
Amplifier
Select switch
(Refer to Page 27)
AC adapter
Speaker cables
(Gray/black)(Gray/black)
φ3.5mm
(Gray)(Gray)
Speaker Speaker
+
− + − +
− −+
OFF
H.P.F
ON
Page 12

− 12 −
ENGLISH
Specifications
■Specifications
Specifications and appearance are subject to change without prior notification.
[Amplifier]
Rated output: 12 W
(at 8Ω load, T.H.D : 1%)
Max. output: 15 W
(at 8Ω load, T.H.D : 10%)
Output type: BTL
Total high harmonic distortion
: 0.05%(at 8 W output, 1kHz)
Frequency characteristics
: 20Hz -- 100kHz (±3dB)
Input sensitivity: 180mVrms (at 12 W output)
Signal-to-noise ratio: 65dB
Separation rate: 50dB
Input impedance: 10kΩ
Applicable load impedance
:8Ω
Dimensions: 144㎜(W)x148㎜(D)x145 ㎜(H)
〔423/32"(W)x65/16"(D)x6
3
/8"(H)〕
Weight: Approx. 1.5kg〔31/4
lbs〕
[AC Adapter]
Input voltage: 230V±10%(50Hz)
Output voltage: +15V DC
Output current: 3A DC
Dimensions: 130㎜(W)x92㎜(D)x67㎜(H)
〔5
1
/8"(W)x35/8"(D)x25/8"(H)〕
Weight: Approx. 1.6kg〔31/2 lbs〕
[Speakers]
Diameter: 6.5cm〔29/16"〕
Type: Bass ref/box
Input resistance: Rated 12 W/Maximum 24 W
(with box)
Impedance: 8Ω
Dimensions: 120㎜(W)x160㎜(D)x162 ㎜(H)
〔423/32"(W)x65/16"(D)x63/8"(H)〕
Weight: Approx. 1.2kg〔25/8 lbs〕
Page 13

− 13 −
ENGLISH
MEMO
 Loading...