

Page 1
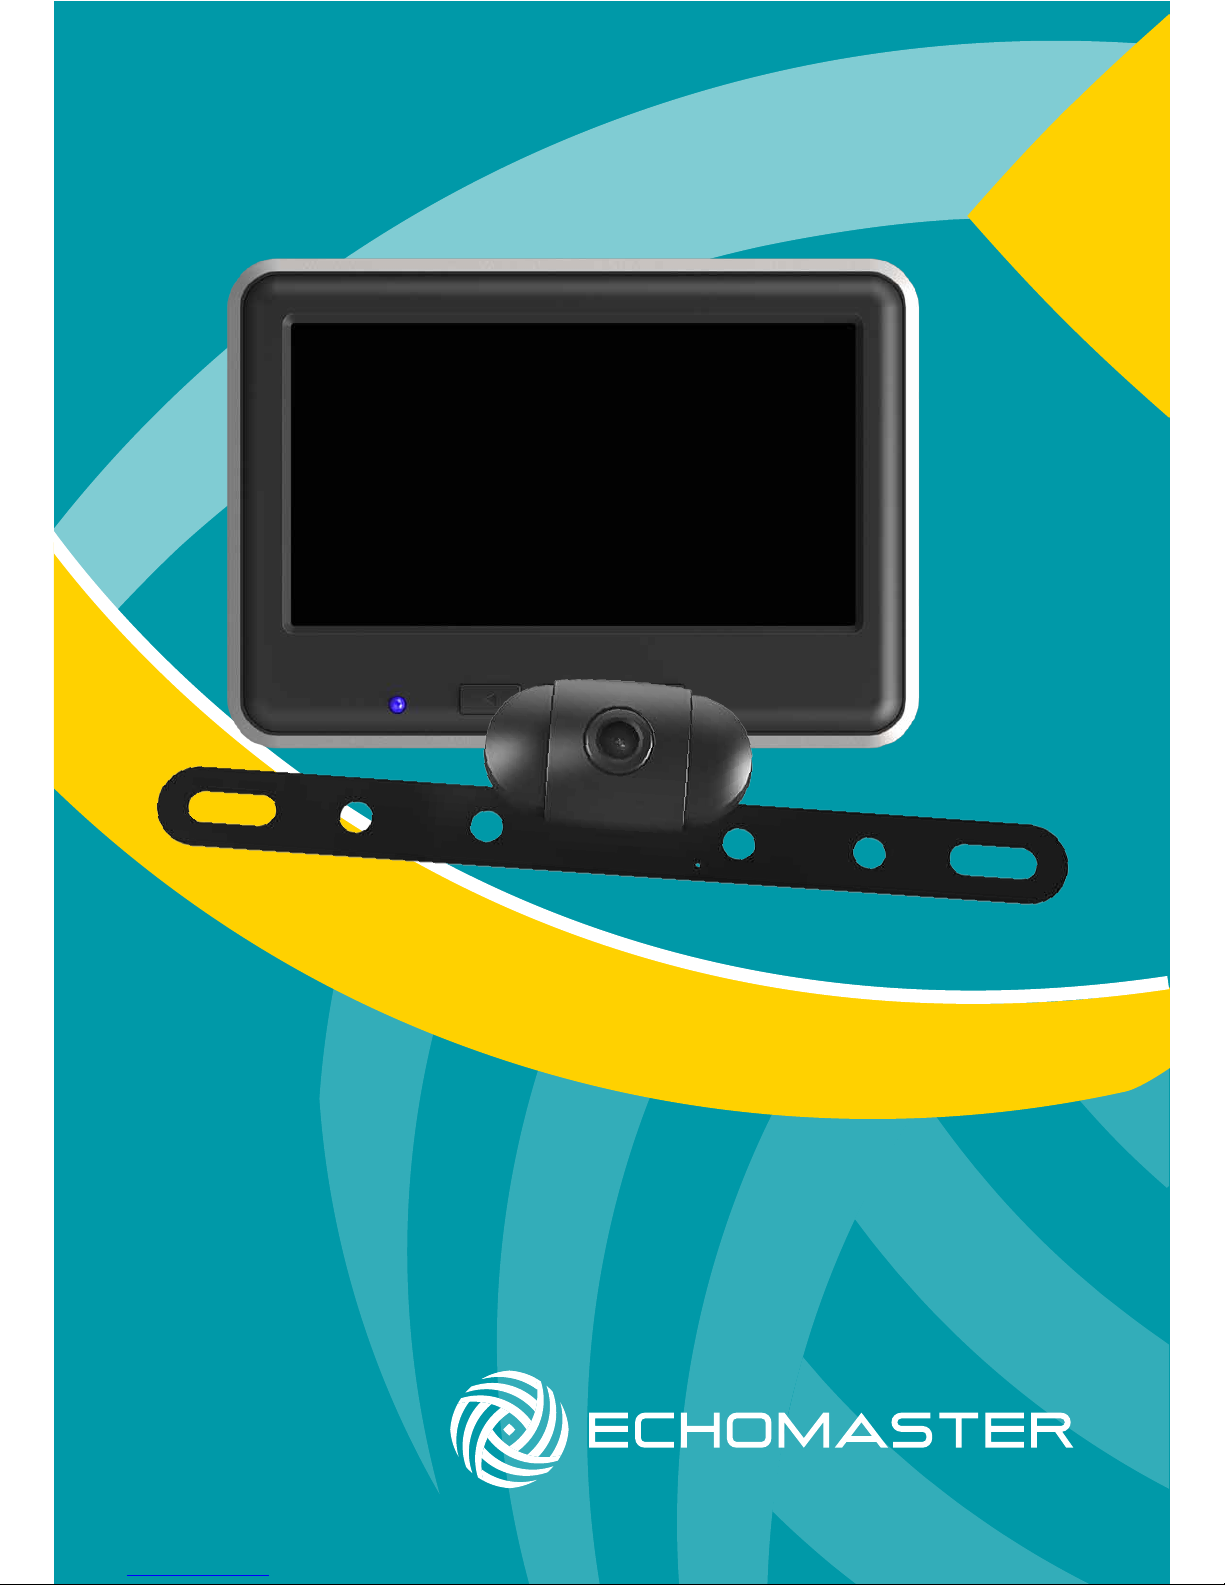
User Manual
Wireless Backup Camera
& Color Monitor Kit
MRC-WLP43
Page 2
Installation Guide
3
email - [email protected]
tel - 800-477-2267
2
Installation Guide
email - [email protected]
tel - 800-477-2267
MRC-WLP43
Wireless Backup Camera
& Color Monitor Kit
Introduction
Box Contents Key Features
u Color monitor that can be mounted
to your dash or windshield
u Adjustable monitor mounting arm
u Camera with 120° viewing angle
u Adjustable vertical camera angle
u System automatically activates
when car is in reverse
u Additional USB port for charging
a device
u Wireless camera
(with built-in transmitter)
u 4.3” Wireless color monitor
(with built-in receiver)
u Mounting bracket arm
u Dual 2.4A USB CLA charger
(provides power to the
monitor, as well as an extra
USB port to charge any
device that is USB chargeable,
up to 2.4A).
u 3.2ft USB to micro-USB cable
to power monitor
u Install accessories
(T-Taps, zip ties)
Thanks for purchasing the EchoMaster Wireless Backup Camera
and Color Monitor Kit.
EchoMaster Camera & Monitor Kits are designed to improve safety by
providing high quality images from camera inputs. This may help to improve
vehicle maneuvering capabilities by displaying blind spots or areas not
normally visible to the driver.
Please ensure you read and understand all aspects of this manual before tting
or using your EchoMaster products.
For installation video, please visit EchoMaster.com
MRC-WLP43
Wireless Backup Camera
& Color Monitor Kit
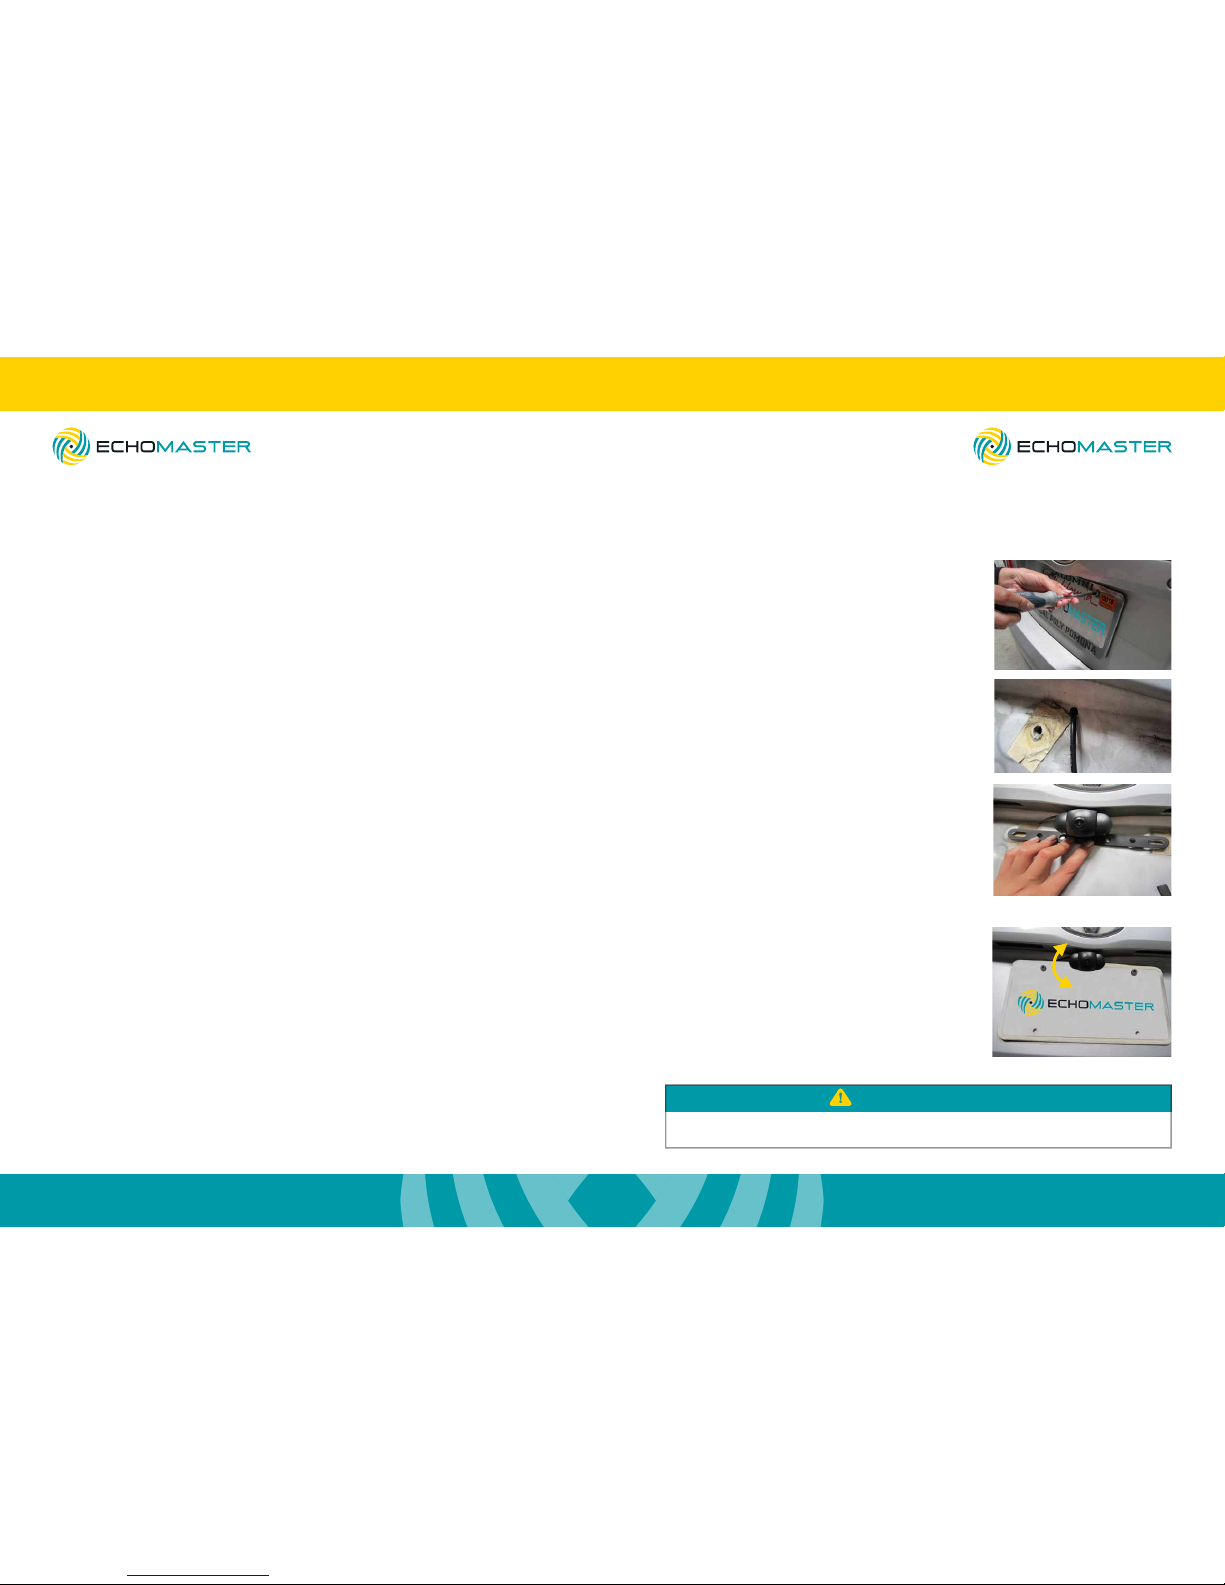
Installing the Camera
Step 1
Remove the screws that hold the
license plate to the vehicle and
remove the license plate.
Step 2
Find an opening (or drill a small hole)
to feed the camera cable into the vehicle.
Step 3
Position the camera mounting bracket
behind the license plate.
Step 4
The camera angle should be adjusted to a
horizontal position relative to the ground to
provide the best view behind the vehicle.
To adjust the camera angle, tilt the camera
up or down to one of the ve positions for
your optimal viewing.
These instructions are only a general guide. If more assistance is needed, please consult
with a professional installer.
PLEASE NOTE
Insert the screws to hold the camera
and license plate in place.
Step 1
Step 2
Step 3
Step 4
Page 3
Installation Guide
5
email - [email protected]
tel - 800-477-2267
4
Installation Guide
email - [email protected]
tel - 800-477-2267
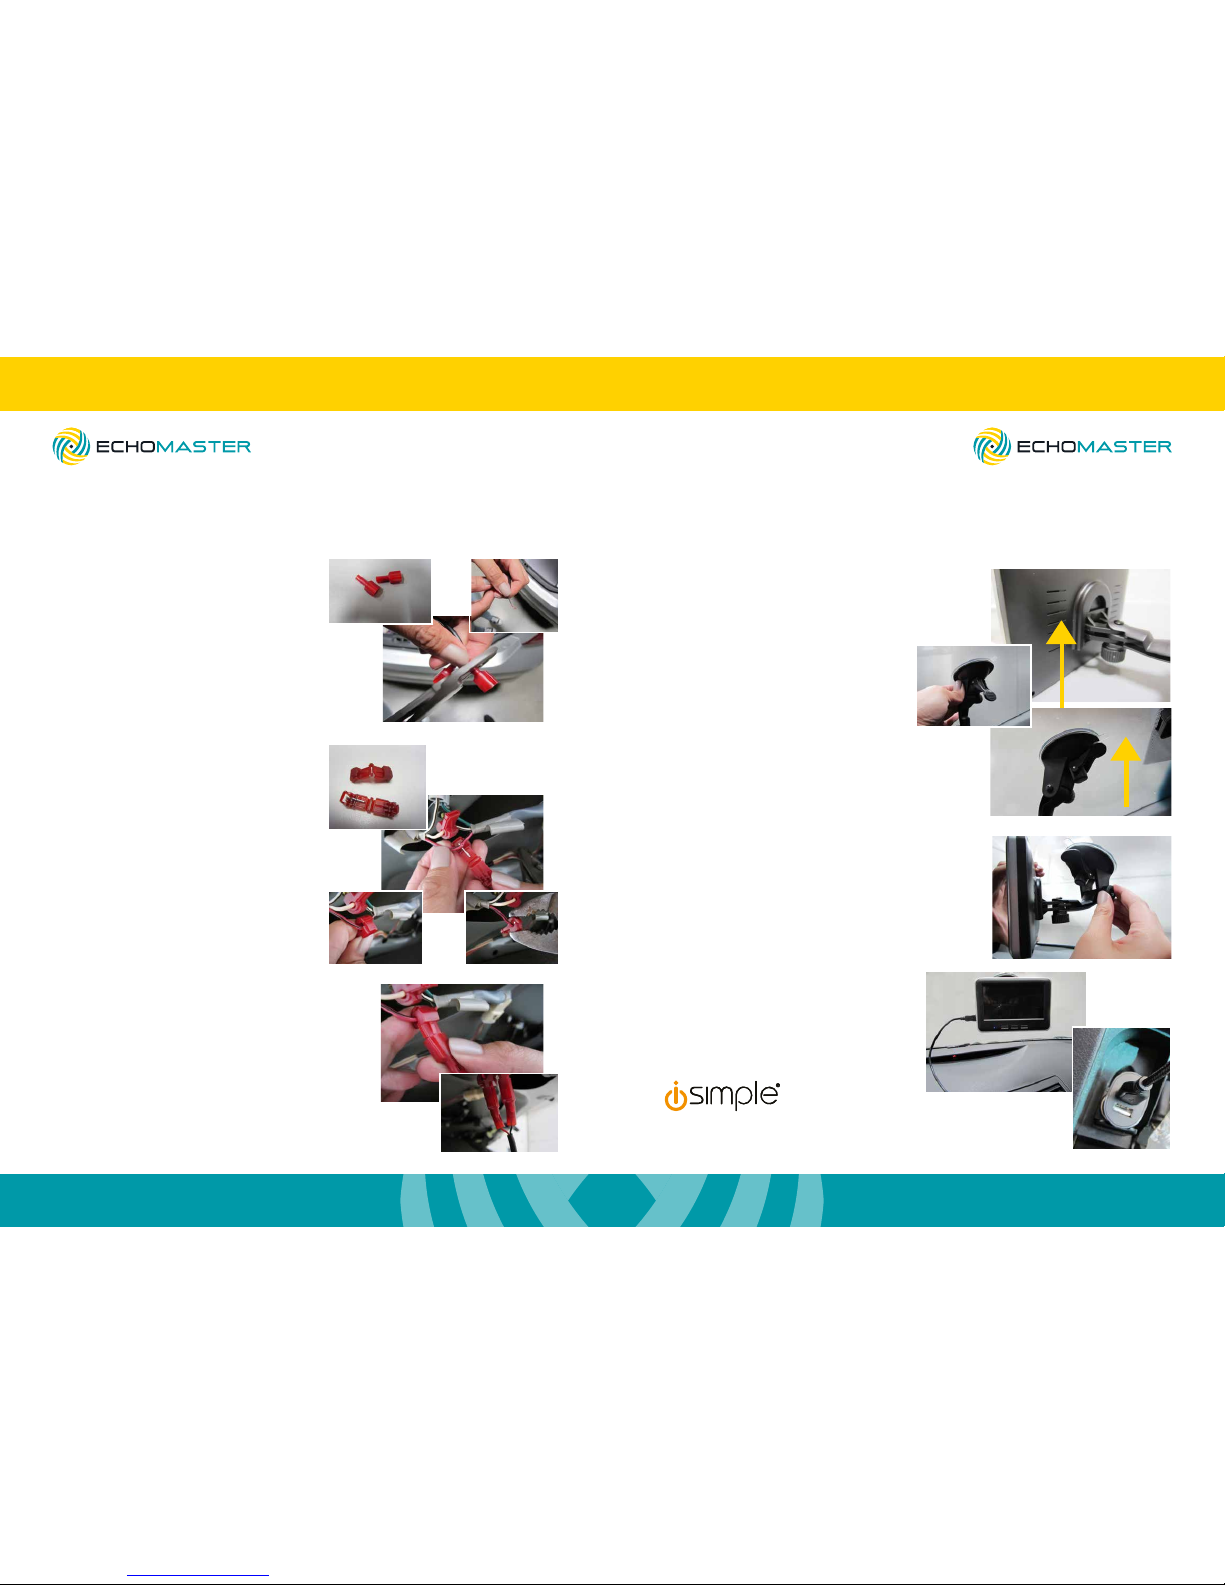
Installing the Camera - continued Setting Up the Monitor
Step 5
Insert each of the wire ends from the
camera cable into the male T-Taps.
Crimp the T-Tap onto the wire to secure
its position.
Red Wire >> 12V / power
(when vehicle is shifted to reverse gear)
Black Wire >> Ground.
Step 1
Slide the arm onto the back of the
monitor. Press on to the dash or
windshield.
Push lever towards the
base to secure in place.
Step 3
Connect the USB cable to the USB
power adapter and insert it into the
vehicle’s lighter / 12v socket.
Step 2
Fine tune the monitor’s position and
make sure to tighten the knobs on
the bracket when nished.
Step 6
Locate your reverse light wires. Position
the female T-Taps onto each wire. Close
the T-Tap onto the wire of the reverse light.
You can use regular pliers for this.
Make sure its connection is secure.
Step 7
A voltmeter may be necessary to
determine polarity, + and -.
Connect the T-Taps together.
MRC-WLP43
Wireless Backup Camera
& Color Monitor Kit
MRC-WLP43
Wireless Backup Camera
& Color Monitor Kit
to order additional car chargers and
power cables, please visit iSimple.com
Step 5
Step 5
male T-Taps
female T-Taps
Step 6
Step 6Step 6
Step 7
Step 7
Step 1
Step 1
Step 1
Step 2
Step 3
USB Power
Adaptor
Page 4
Installation Guide
7
email - [email protected]
tel - 800-477-2267
6
Installation Guide
email - [email protected]
tel - 800-477-2267
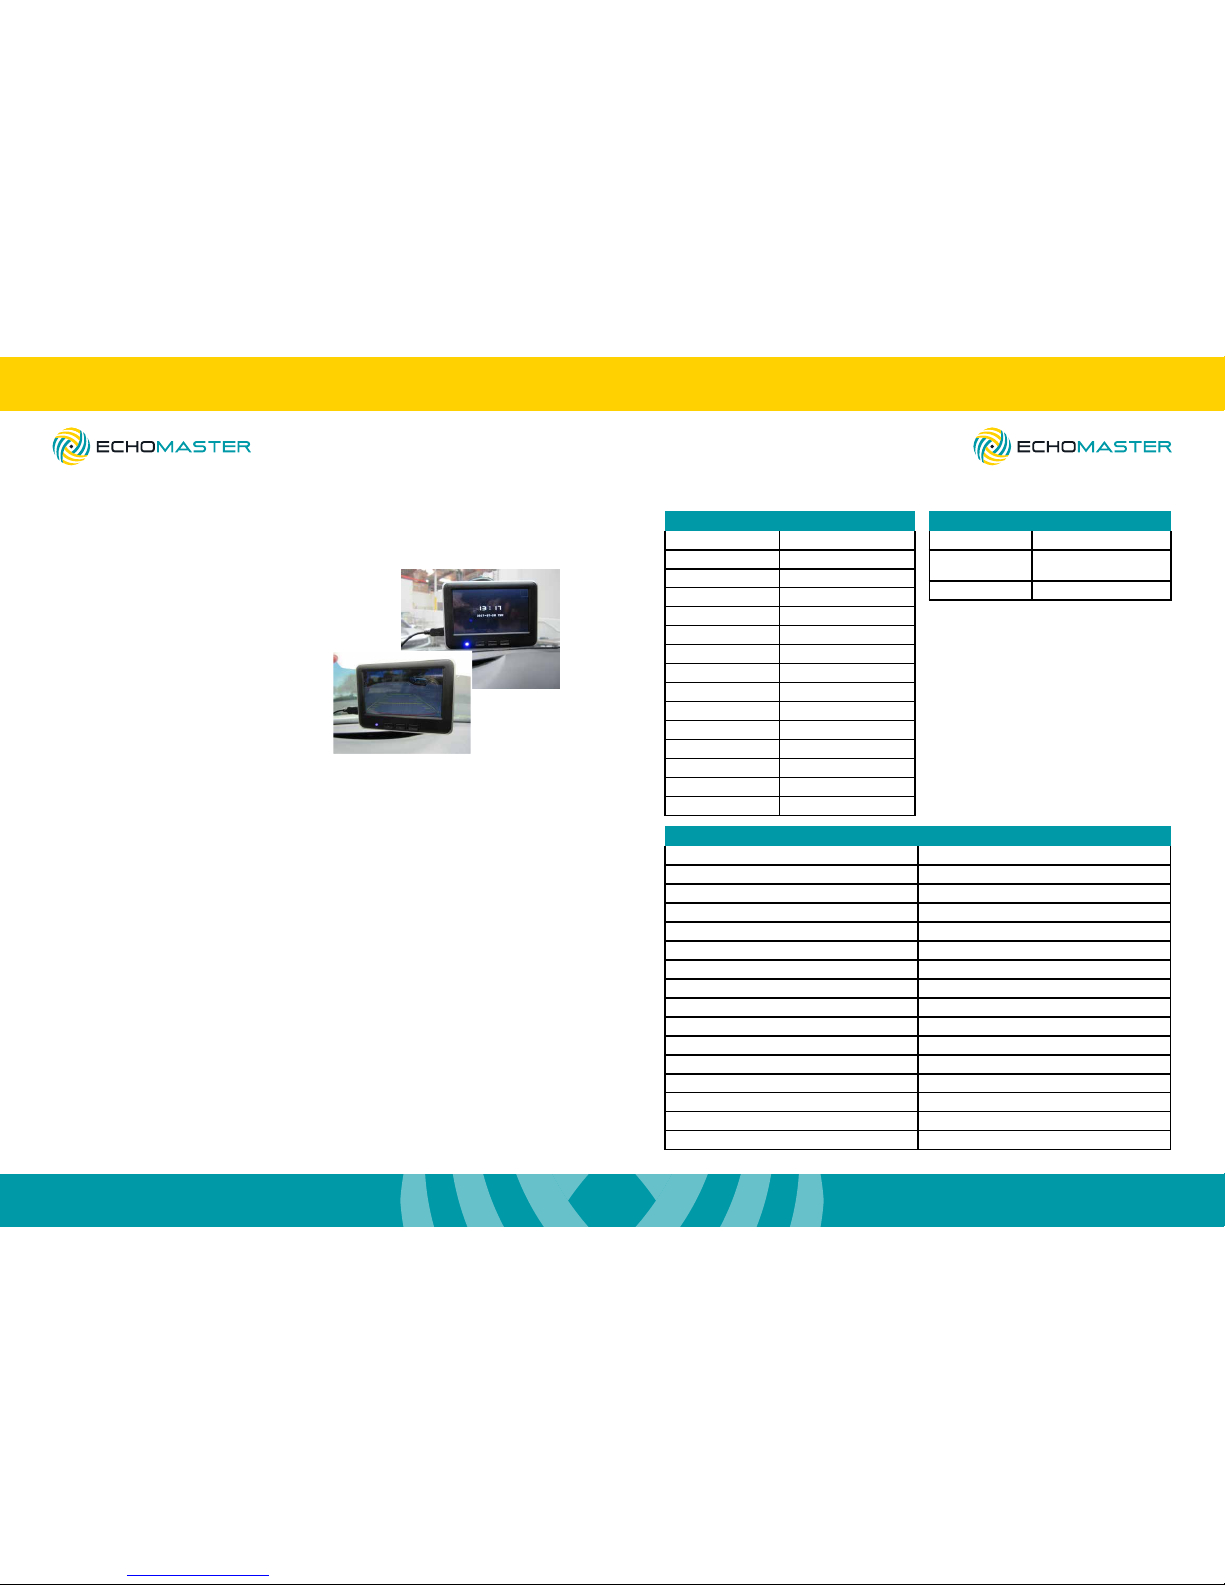
Setting Up the Monitor - continued
Step 4
The blue LED will turn on once powered.
When in reverse, the monitor will display
the camera view instantly.
Adjusting
Monitor Settings
Step 1
Press the menu button to open the settings screen when vehicle is in reverse
gear. When not in reverse gear, pressing the menu button will enter time and
date set-up mode.
Step 2
Press the arrow keys to change settings and press the menu button to scroll
to next setting.
When vehicle is not in reverse gear, the following settings can be changed:
Time and Date
When vehicle is in reverse gear, the following settings can be changed:
Brightness Contrast Color
Language Reset to defaults
Camera
Sensor CMOS
LEDs No
Illumination 1 Lux
Viewing Angle 120°
Mirror Image Yes
Normal Image No
Water/Debris-Proof IP66
Audio No
Power Supply DC12-24V 1A
Current <300 mA
Operating Temp 14°F - 140°F/-10°C - 60°C
Dimensions - mm (in) 66 (2.6) x 36 (1.4) x 38 (1.5)
System NTSC
TV Lines 480
Resolution (HxV) 680 x 480
Monitor
Screen Size 4.3"
Aspect Ratio 16:9
Power Supply DC 5V 1A
Resolution 640x480
Luminance 250 nits
Contrast 400
TV Format NTSC
OSD Languages Yes
Video Inputs 1 input
Audio Inputs 0
Triggers 1
Current 300mA
Operating Temp 14°F - 140°F / -10°C - 60°C
Parking Guidelines Yes
Connection Type Micro-USB
Dimensions - mm (in) 120 (4.72) x 25 (1.0) x 20 (0.78)
Built-in Transmitter
Frequency 2.4G ± 0.3
RF Transmi ssion
Distance
495 ft
Operating Temp 14°F - 140°F / -10°C - 60°C
MRC-WLP43
Wireless Backup Camera
& Color Monitor Kit
MRC-WLP43
Wireless Backup Camera
& Color Monitor Kit
Step 4
Step 4
Page 5

email - [email protected] (US)
tel - 800-477-2267
EchoMaster is a Power Brand of AAMP Global.
EchoMaster.com
REV080117
For installation video, please visit http://echomaster.com/
 Loading...