

Page 1
Instructions
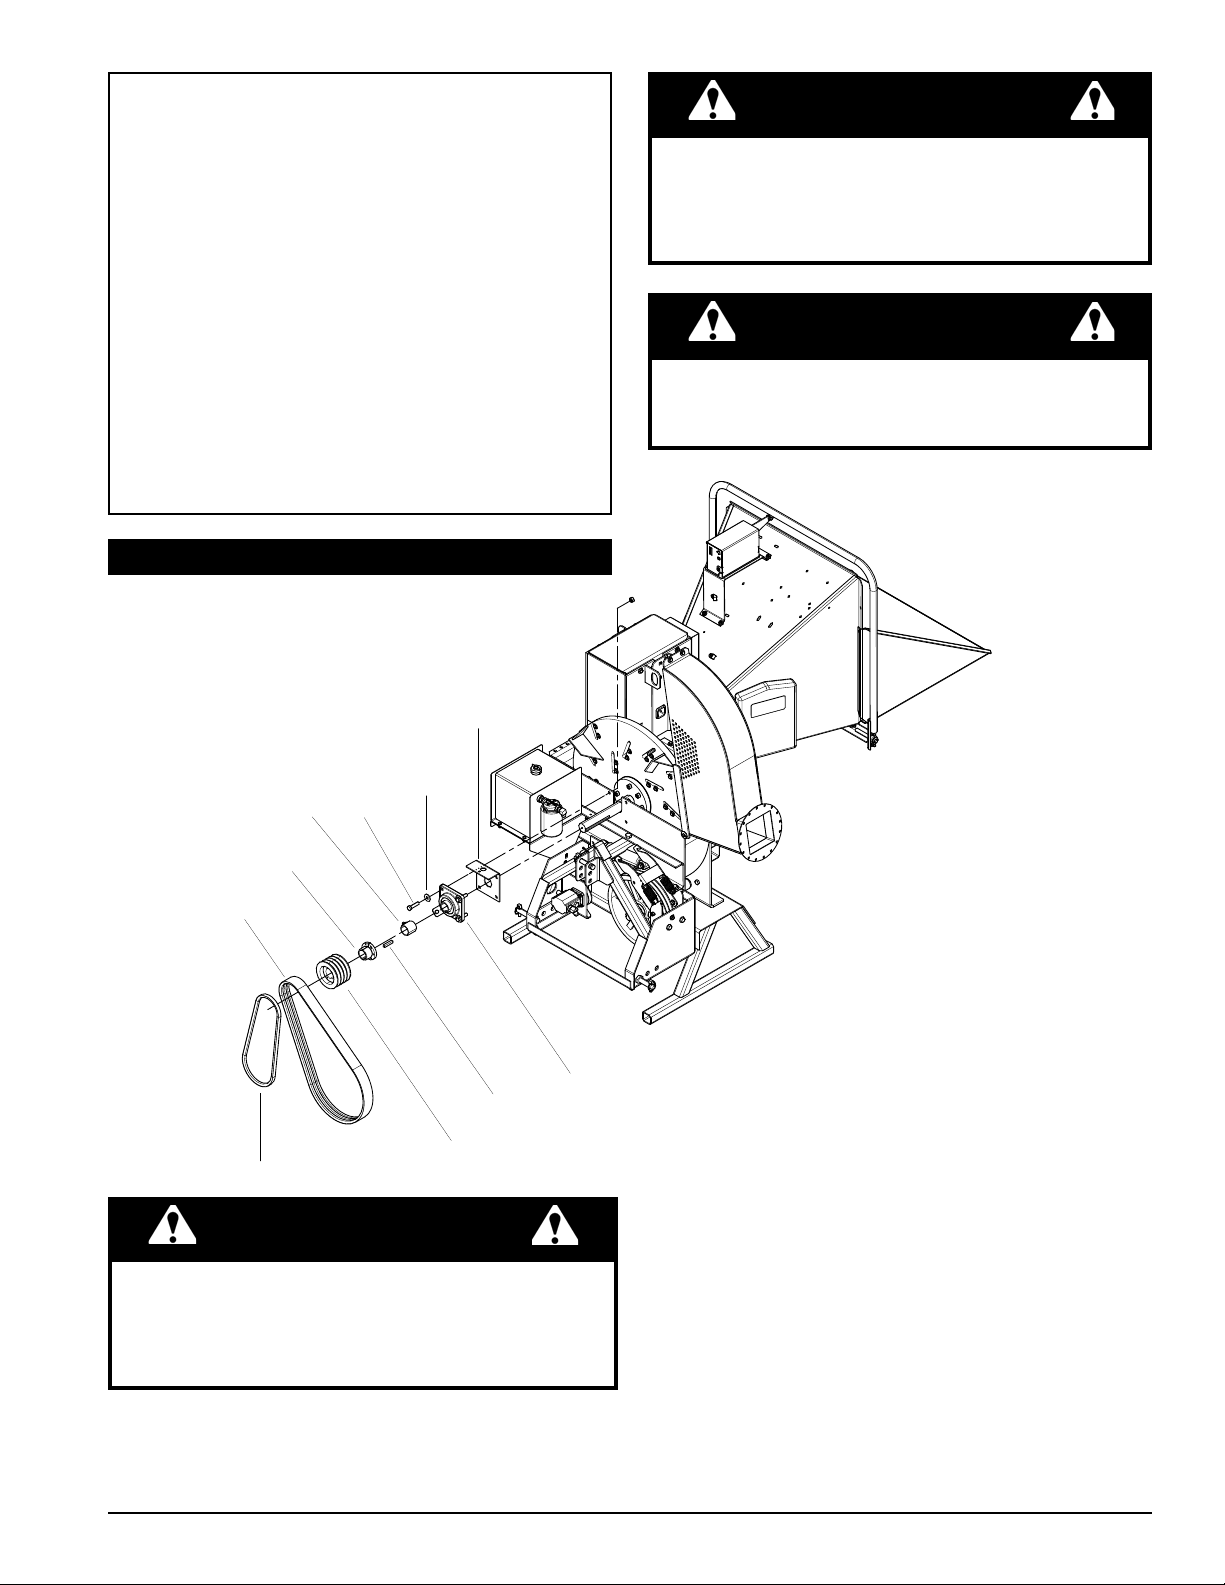
BELT
SHEAVE
BEARING
LEFT BEARING
BRACKET
KEY, 3/8”
SPACER
BUSHING
WASHER
BELT
BOLT, 1/2”
SUBJECT: 76775-00 FINE CHIP
DISK KIT – (
For replacement of
aTTENTION
While the FINE CHIP DISK KIT is designed for use in all
8" and 9" Chipper models, it is purposely designed and
recommended for use on Hydraulic Feed models.
standard and fine chipper disks.)
MODELS: 8" aND 9" CHIPPErS;
CH8670H, CH8993H, CH8540,
CH9540H, CHF9540H, CH911DH,
CH922DH
rEMOVaL OF DISK
WarNING
The chipping blades are sharp! Use care when
working on the machine to avoid injury.
WarNING
Before inspecting or servicing any part of this machine,
shut off power source, remove key, disconnect the
battery cables and make sure all moving parts have
come to a complete stop.
Rotate discharge to the right side of the machine. 1.
Remove the two 3/8" retaining bolts holding the access
cover to the main frame assembly. Tilt the access cover
open to allow access to the rotor.
Instruction Sheet
Remove upper and lower belt guards.2.
Loosen the bolts holding the hydraulic pump bracket to 3.
the 3-point, slide the bracket up and remove hydraulic
pump belt.
Remove the idler tensioning springs, and remove the 4.
1/2" bolt holding the idler pulley in place.
Remove the drive belt.5.
Taking the bolts out of the bushing and reinserting 6.
them into the empty holes, slowly tighten each bolt in
a rotating clockwise direction to remove the bushing
and sheave from the rotor shaft.
Loosen the set screw holding the spacer in place and 7.
remove. If rear bearing does not need to be removed
go to step 11.
Lift up the feed roller and insert the retaining pin to 8.
hold in place.
PN 76772-00
Rev. 080510
Page 2
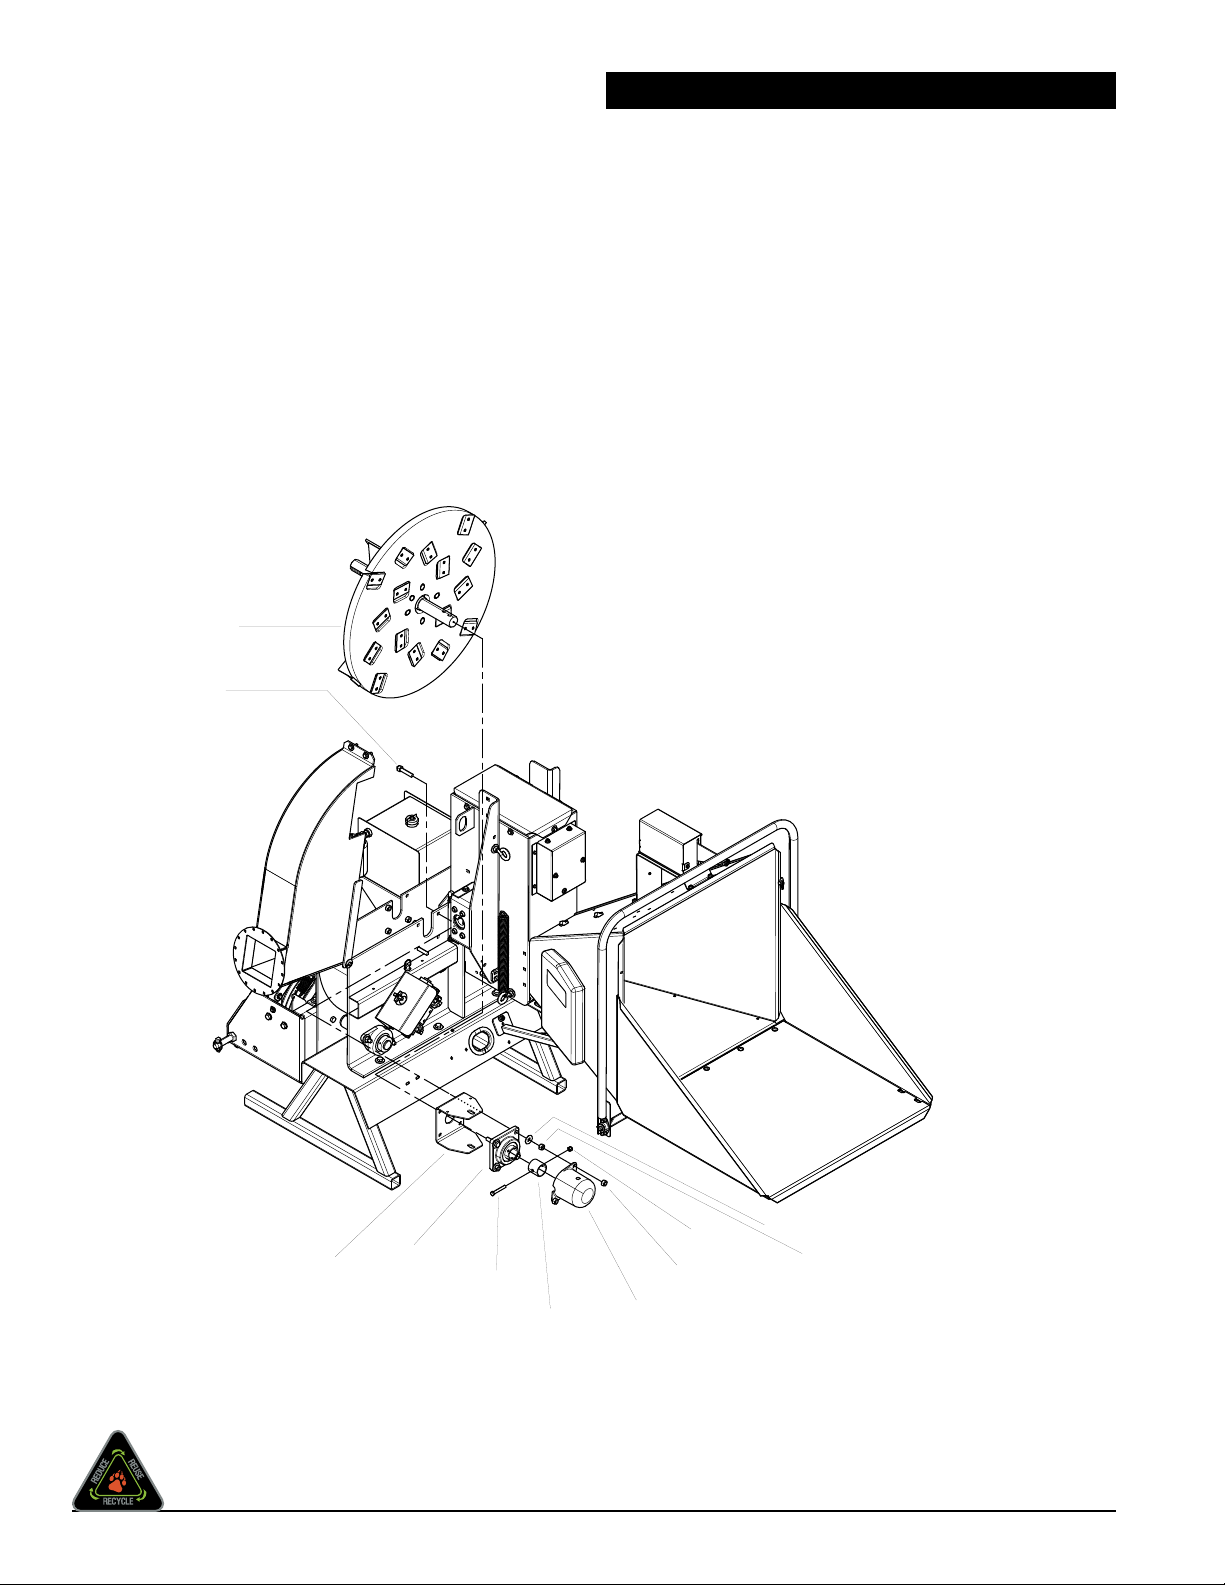
Remove the protective cap.9.
FINE CHIP DISK
BOLT,1/2”
WASHER
NUT, 1/2”
SHAFT CAP
LOCK NUT, 1/2”
NUT, 3/8”
BOLT 3/8”
COLLAR
BRACKET,
DISC LOCK
BEARING
Remove the 3/8" bolt holding the retaining spacer and 10.
remove the spacer.
Remove the four 1/2" bolts on each rotor bearing and 11.
loosen the two set screws on each bearing. (Note: You
may have to clean the shaft with emery cloth.)
Remove old disk and replace with Fine Chip Disk. 12.
NOTE: Approximate weight of disk is 260 lbs (118
kg).
Put the bolts back in the bearings and slide into place. 13.
Tighten bolts to 75 ft-lbs (102 Nm). Slide rear collar
back into place (noting that the offset bolt hole should
be toward the bearing) insert and fasten 3/8" bolt.
INSTaLL OF FINE CHIP DISK
Taking a rubber mallet, tap the rotor shaft until the rear 14.
collar is tight against the rear bearing. Tighten the bolt
and lock the set screws on both bearings. Torque to
160 inch-lbs (20 Nm). Reinstall front collar and tighten
the cap screw. Make sure the speed sensor is aligned
and gapped properly. Reinstall the rear rotor protective
cap.
Slide the bushing on and tighten set screw, then slide 15.
the sheave on. Insert bolts into the sheave and tighten in
a clockwise direction. Torque to 108 inch-lbs (12 Nm).
Check the alignment of pulleys with a straight edge and 16.
adjust if needed. If adjustment is needed, adjust the
jackshaft bushing and sheave.
Replace the drive belt.17.
Replace the idler and tighten. Reinstall tensioning 18.
springs.
Bolt the hitch support back in its original position.19.
Close cover and replace bolts.20.
Replace the hydraulic pump belt. Readjust hydraulic 21.
pump belt tension by sliding the hydraulic pump in the
mounting slots. Tighten bolts. The belt tension should
be set to have a deflection of 1/4" with 5.5 lbs of force
applied.
Replace belt guard and resume operation.22.
ECHO BEar CaT
www.bearcatproducts.com
237 NW 12th Street, West Fargo, ND 58078-0849
Phone: 701.282.5520 • Toll Free: 800.247.7335 • Fax: 701.282.9522
E-mail: service@bearcatproducts.com • sales@bearcatproducts.com
Start tractor engine and engage PTO drive clutch (see 23.
tractor owner’s manual). Increase engine speed to
rated PTO RPM position and test unit. If readjustment
of pulleys and belt tension is needed, shut machine off
Instruction Sheet
and adjust as necessary.
 Loading...