

Page 1
1
USER GUIDE
w w w . e b s s w e d e n . c o m
GETTING STARTED
WITH THE
EBS RETRACER
INTRODUCTION: 2
BRIEF OVERVIEW OF EASY MODE: 4
BRIEF OVERVIEW OF EXPERT MODE: 5
GETTING STARTED IN EASY MODE: 6
EASY & EXPERT MODE OPERATIONS: 6
EXTENDED EDITING IN EXPERT MODE: 8
REFERENCE GUIDE FOR THE
SETTINGS MENU & SUB MENUS: 10
HOW TO CONNECT THE RETRACER
WITH OTHER DEVICES: 12
HOW TO SET UP AND USE
THE LOOP MODE: 13
HOW TO USE AND CALIBRATE
AN EXPRESSION PEDAL WITH RETRACER: 14
USER GUIDE
Page 2
GETTING STARTED
WITH THE
EBS RETRACER
2
USER GUIDE
INTRODUCTION
The ReTracer has tons of options to change, create and
organize delay effects. To get you started, let’s begin with
learning about the two main ways to operate the ReTracer,
EASY MODE and EXPERT MODE.
Easy Mode is where you quickly navigate between presets, but with
limited access to editing them. Easy Mode is probably what you will use
when you are on stage.
Expert Mode unlocks more editing features and might be where you
will operate when you build, fine-tune and organize your own presets.
We recommend that you start with Easy Mode. Try some of the factory
presets, turn the knobs and learn what the controls do in general use.
Later, you will discover that each knob can get a new function when you
enter a new editing layer.
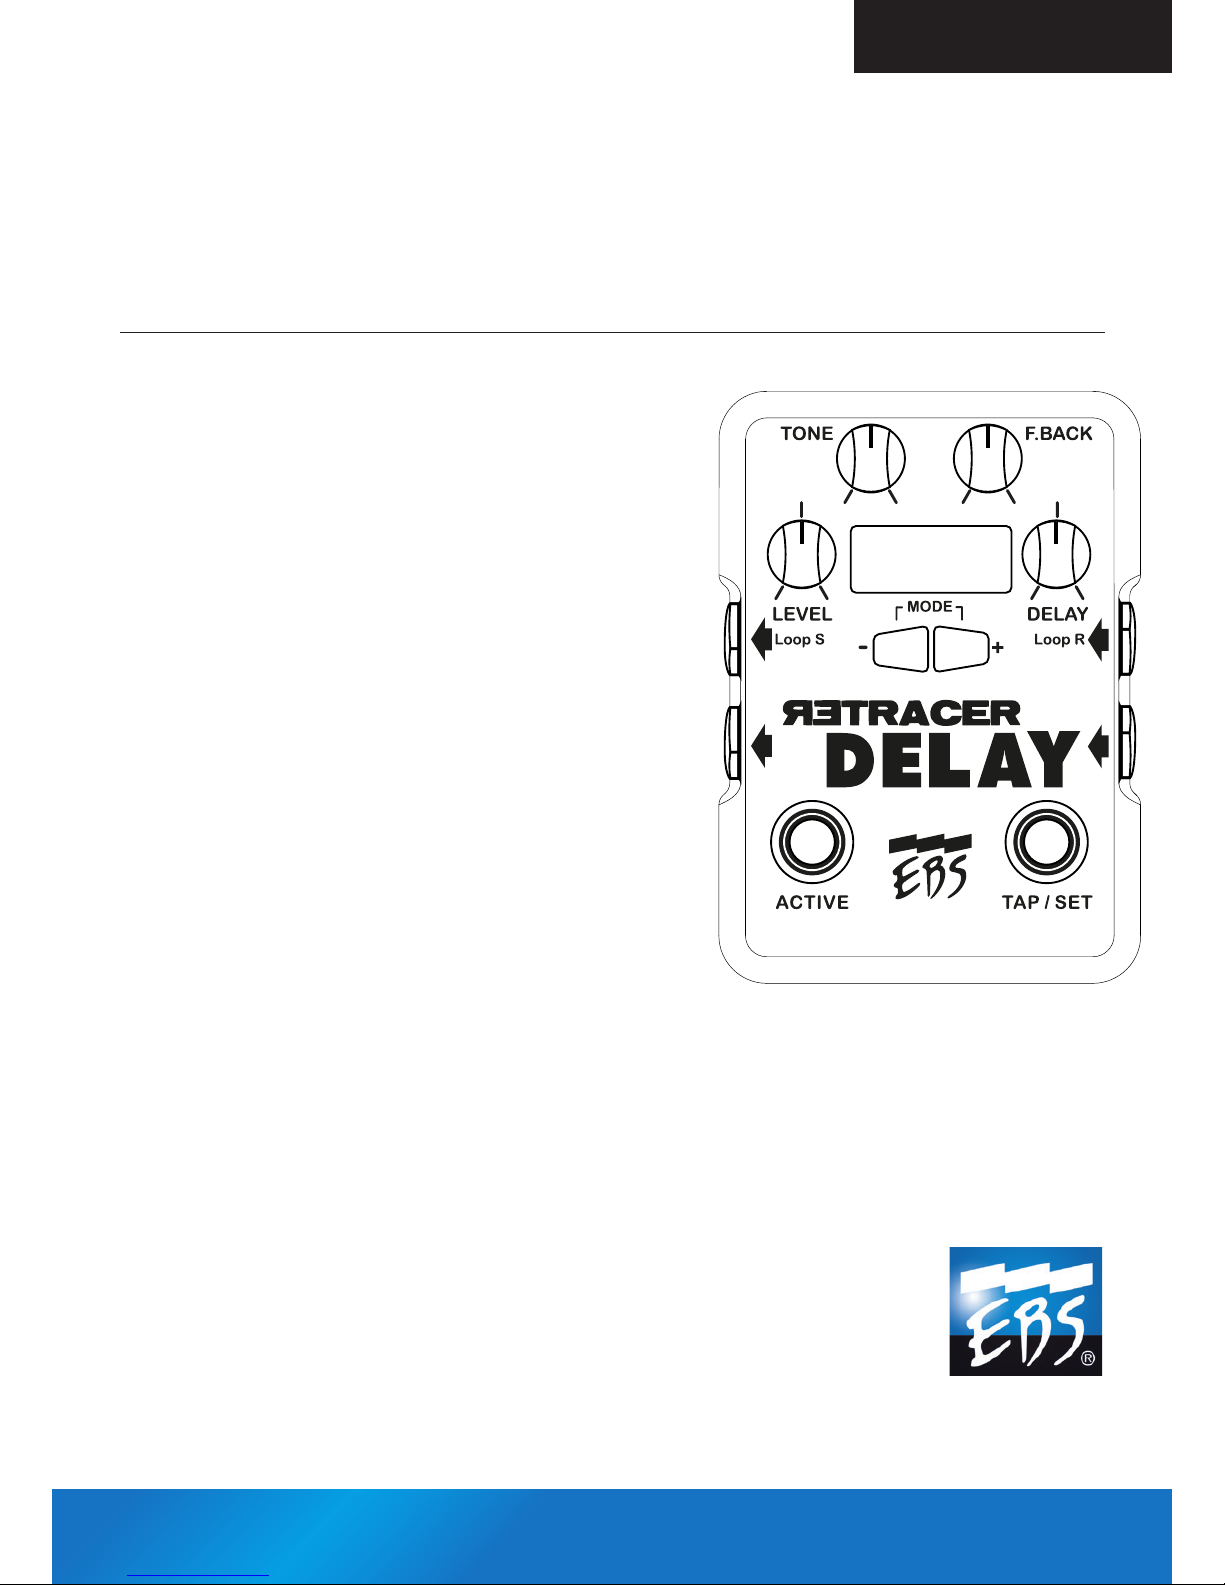
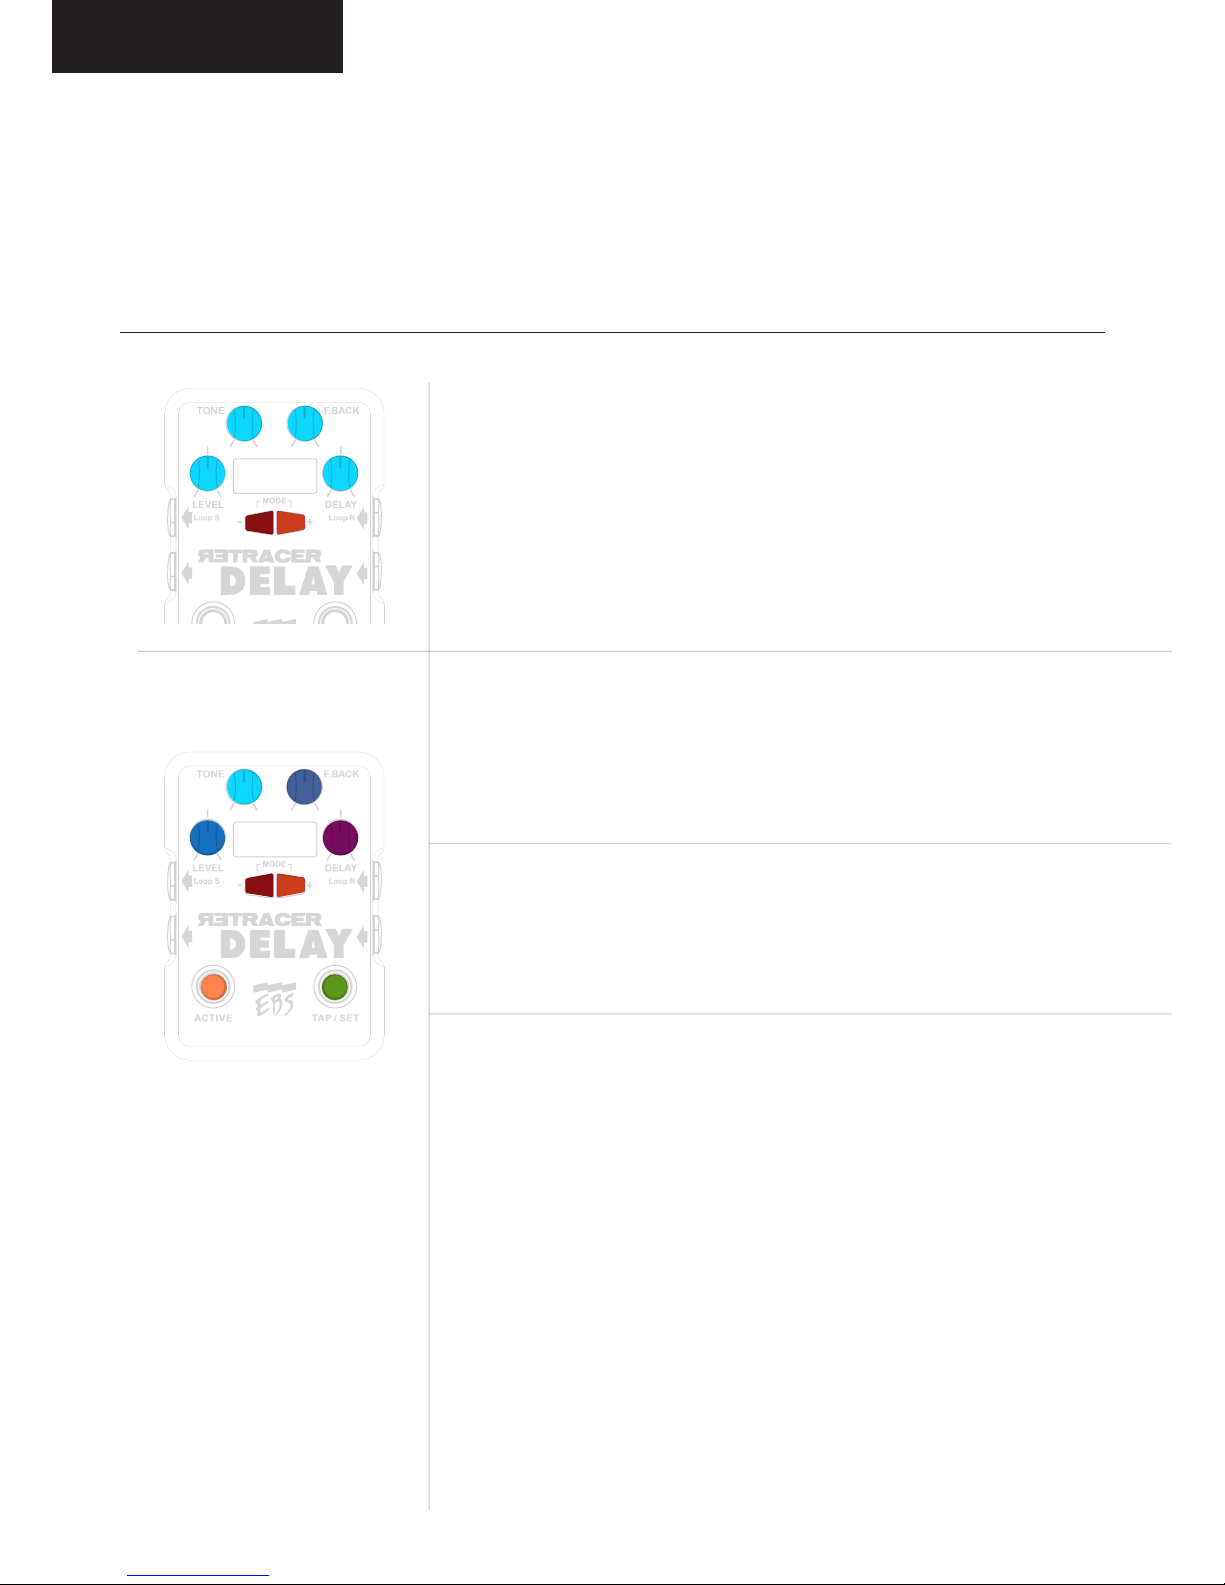
See the illustration on the next page for a reference overview of all the
controls and their possible functions.
Page 3

3
USER GUIDE
Multi-functional control for
- Tone
- Other variables on some presets
(indicated by text on the screens
upper left corner)
- Various Engine parameters in
Expert Mode only (indicated on
the screen, depending on which
engine and parameter layer selected)
Multi-functional control for
- Effects Mix Level
- Use to scroll through lists
whenever a scroll menu
appear on screen.
- Name settings.
- Various Engine parameters in
Expert Mode only (indicated
on the screen, depending on
which engine and parameter
layer selected)
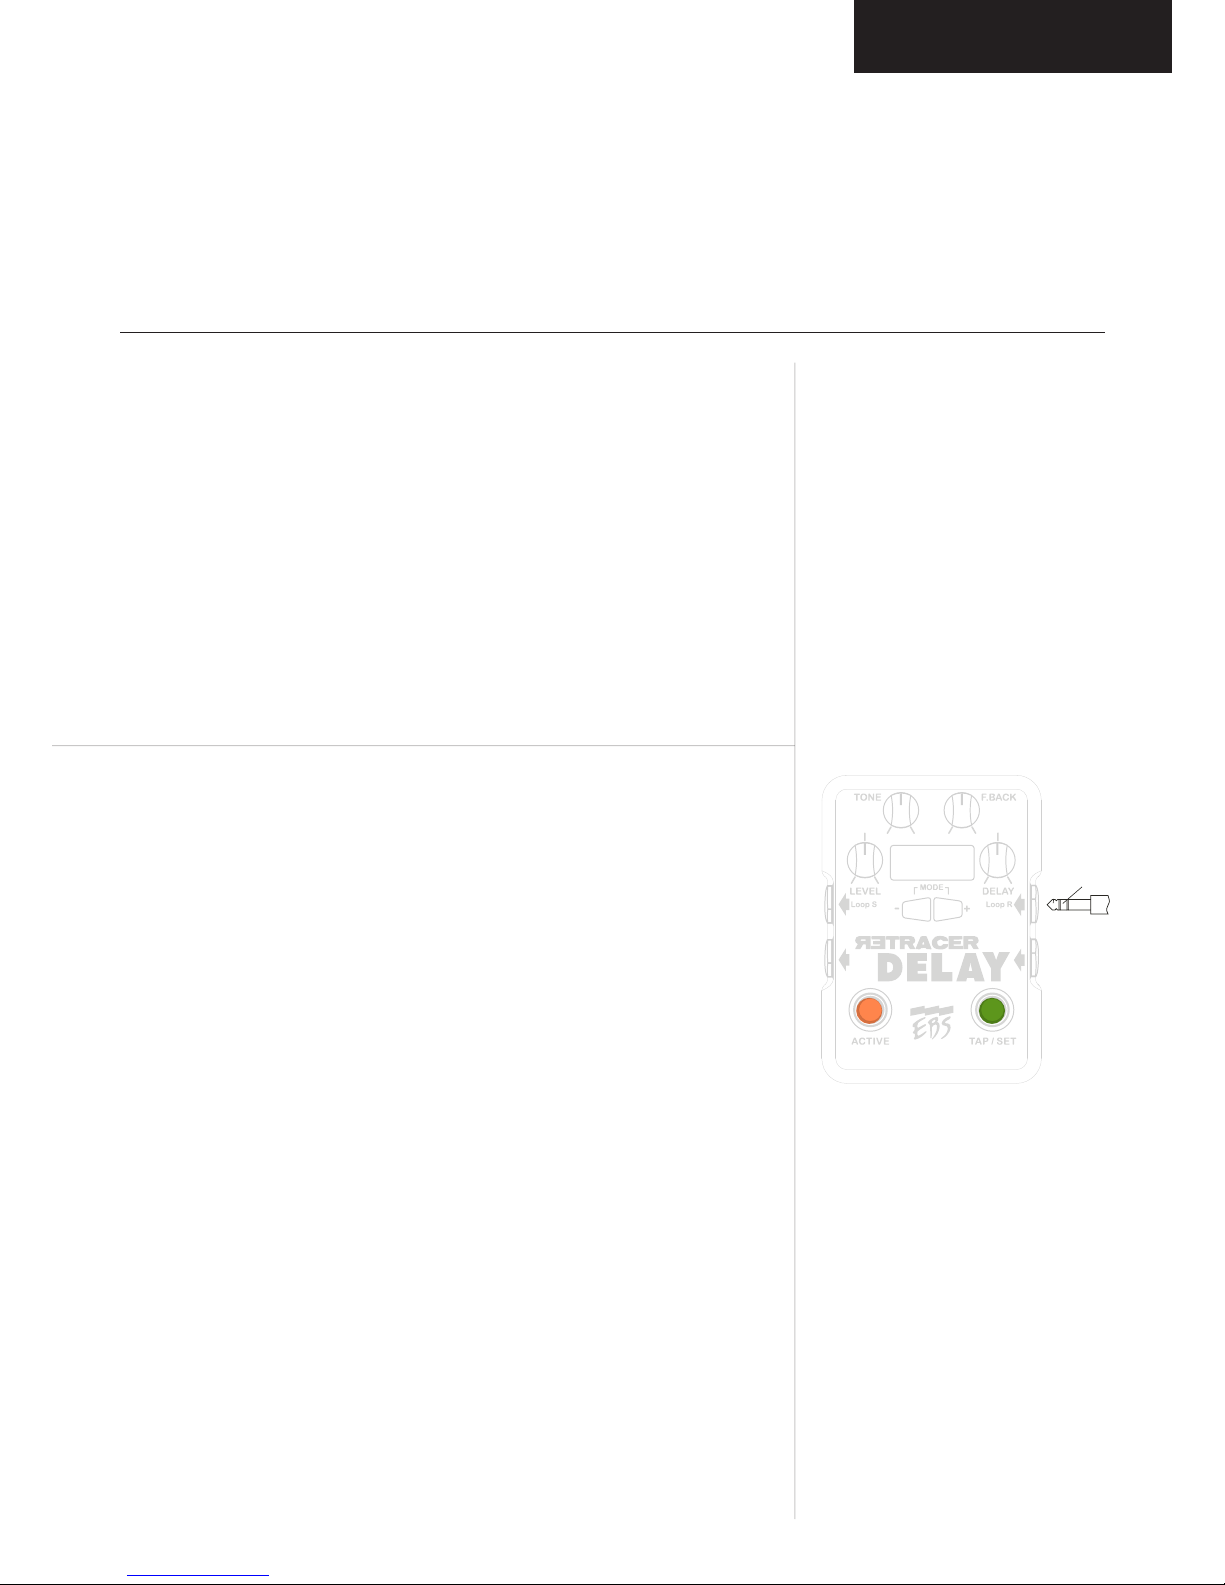
Multi-functional button for
- Navigation between presets
in Easy Mode.
- Enter Load/Edit menu if
pressed and hold.
- Navigate between Engine Settings
layers in Expert Mode.
Multi-functional button for
- Navigation between presets
in Easy Mode.
- Enter Quick Save if
pressed and hold.
- Navigate through Engine
Settings layer in Expert Mode.
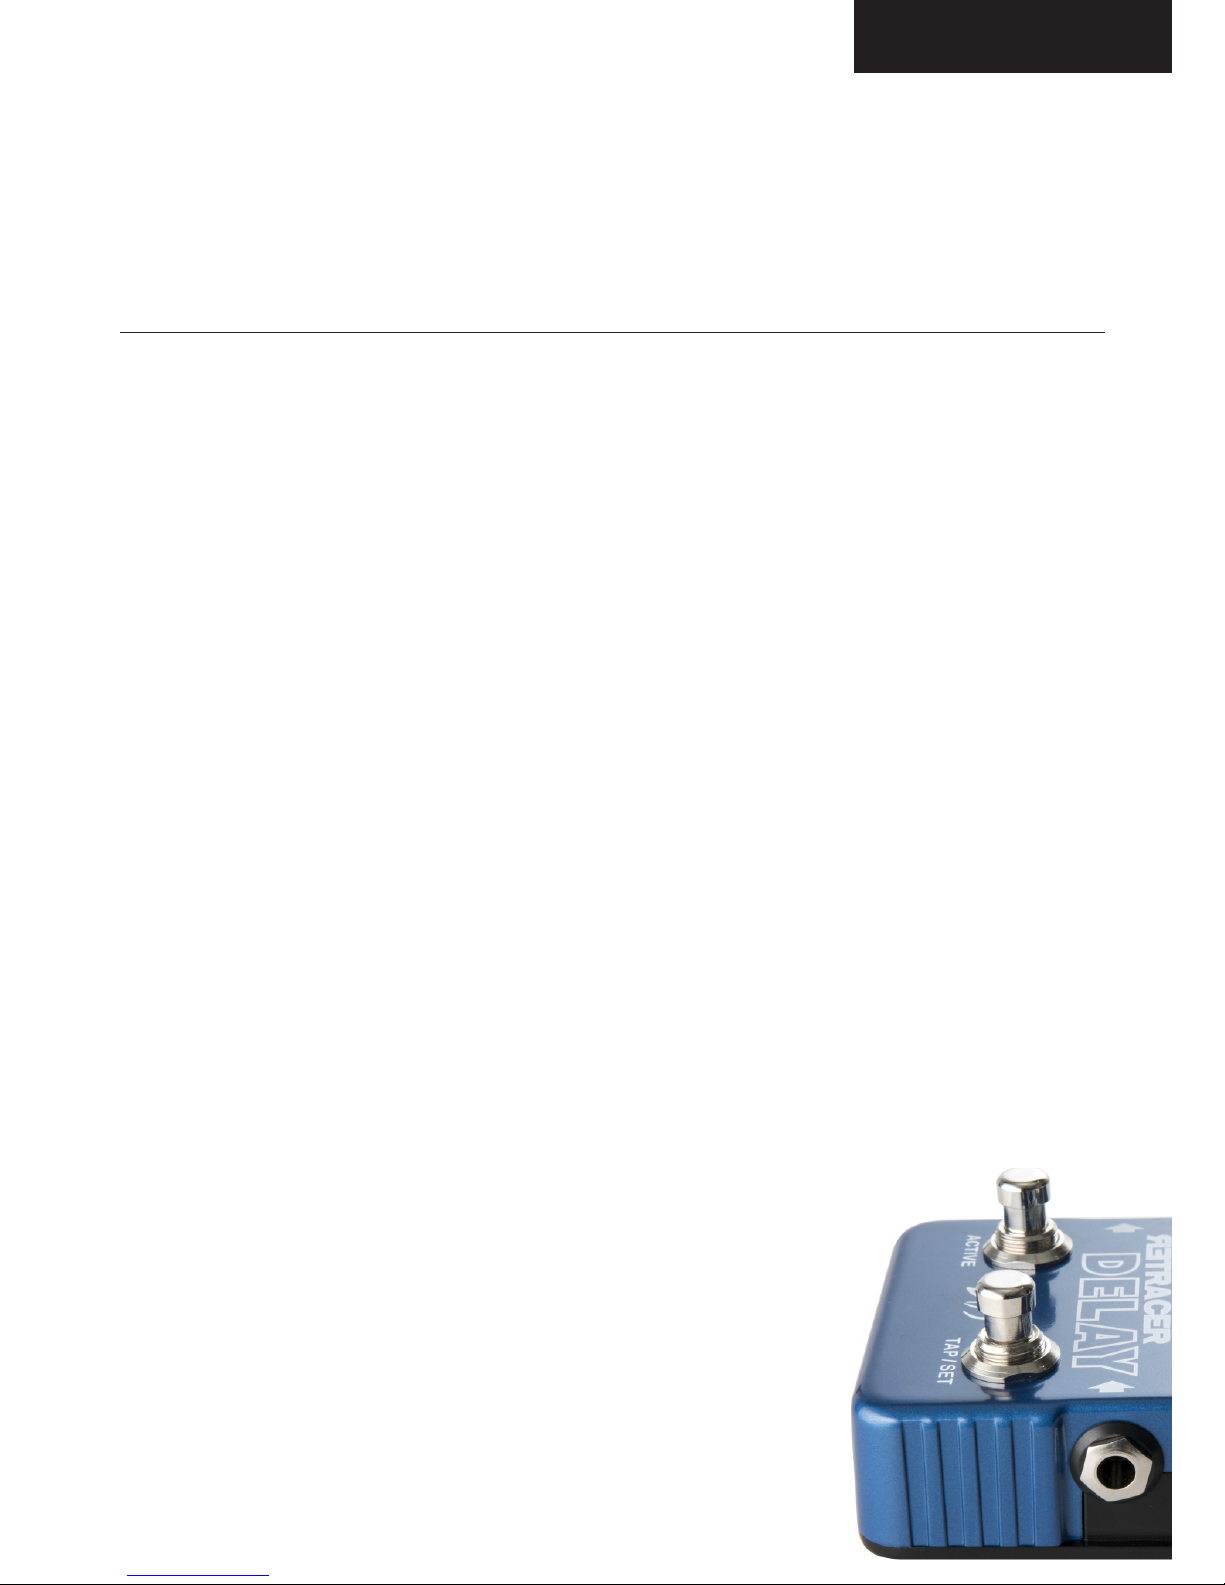
Multi-functional switch for
- On/off
- Escape to previous menu
- Panic reset (if hold until ”PANIC”
appears on screen).
- Hold down to de-activate
Footswitch Navigation if
Footswitch Navigation is active.
- Go to ”Previous” preset in the bank
(when footswitch navigation
function is active).
Multi-functional switch for
- Tap tempo.
- Set/save changes.
- Hold delay (in/out).
- Hold down to
activate Footswitch Navigation
- Go to ”Next” preset in the bank
(when footswitch navigation
function is active).
Combination function
- Hold Tap and press - or +
to change Tap tempo
subdivision.
Combination function
- Press and hold - then press +
to enter Engine Selection menu.
- Press and hold + then press to enter the pedals Setting Menu.
Multi-functional control for
- Feedback
- Various Engine parameters in
Expert Mode only (indicated on
the screen, depending on which
engine and parameter layer)
Multi-functional control for
- Delay time
- Various Engine parameters in
Expert Mode only (indicated on
the screen, depending on which
engine and parameter layer)
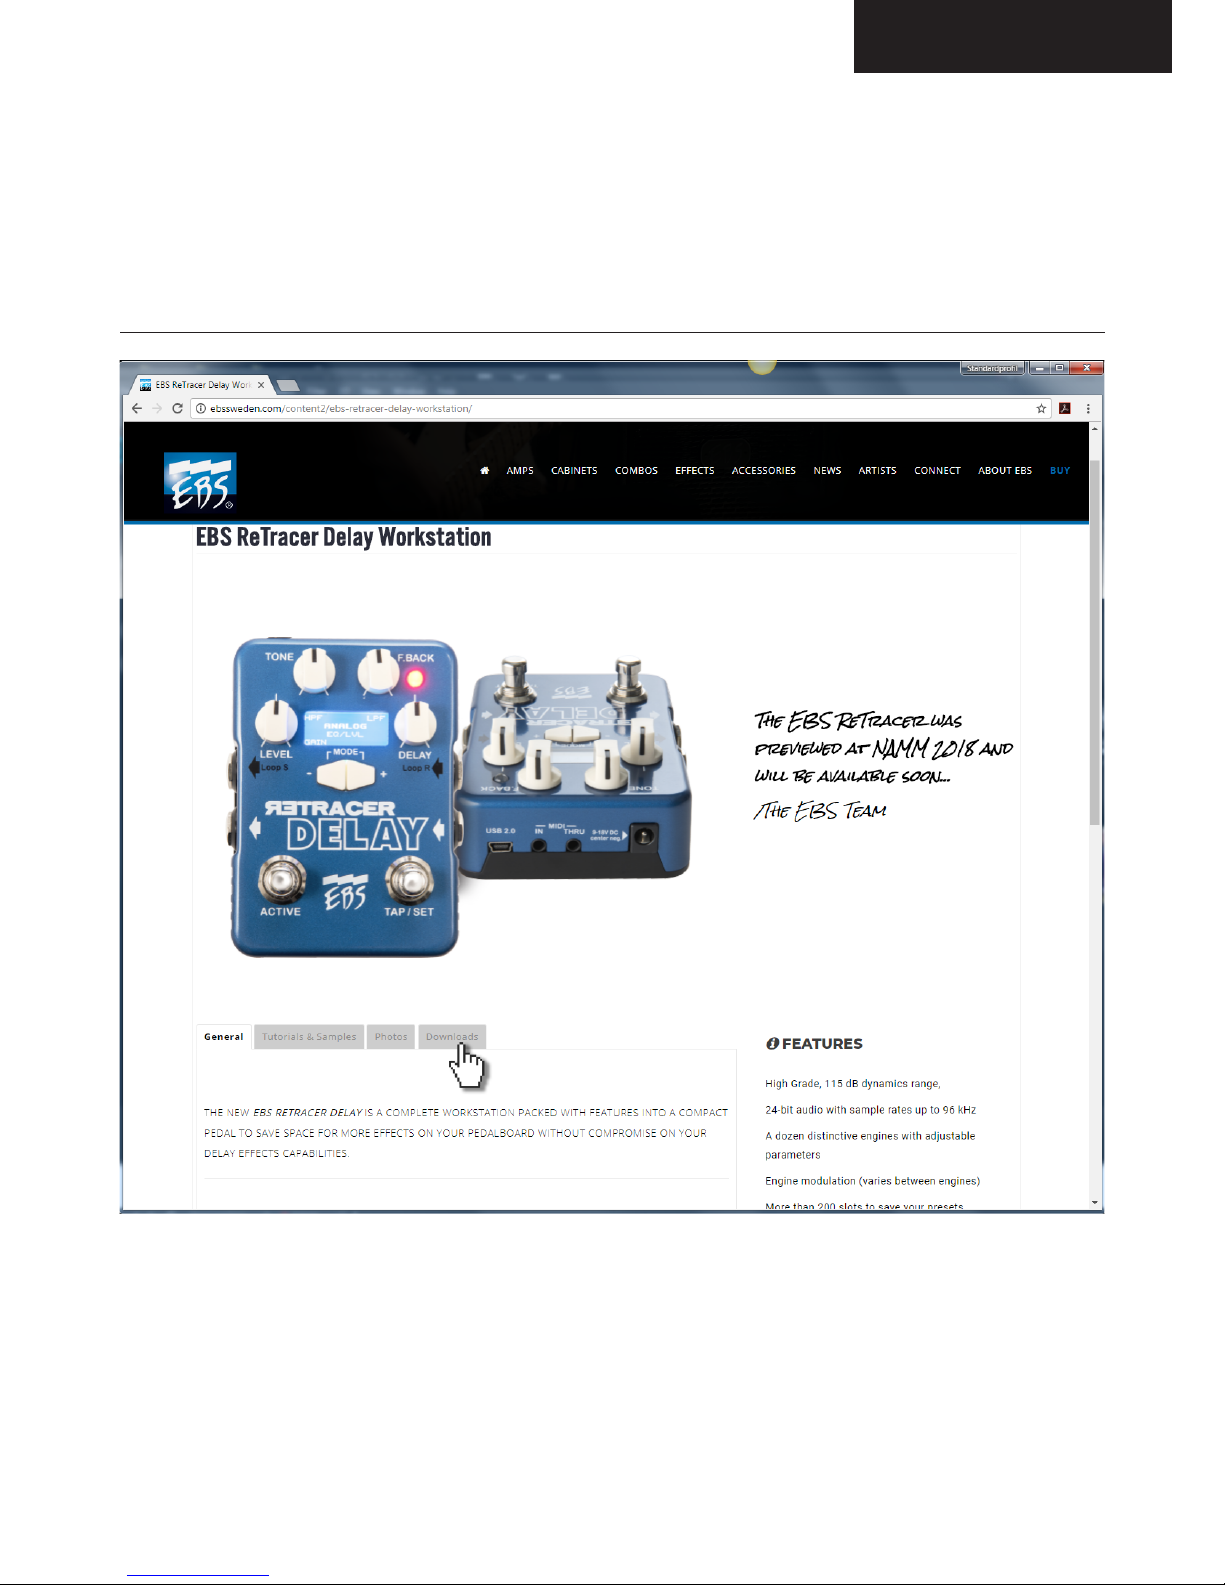
IMPORTANT!
Visit www.ebssweden.com/content2/ebs-retracer-delay-workstation and click on the “Register for updates”
tab to register for the Retracer email list to get instant news about firmware and software updates, tutorials
and other useful info related to your pedal. Make sure to have the latest firmware installed.
Page 4
GETTING STARTED
WITH THE
EBS RETRACER
4
USER GUIDE
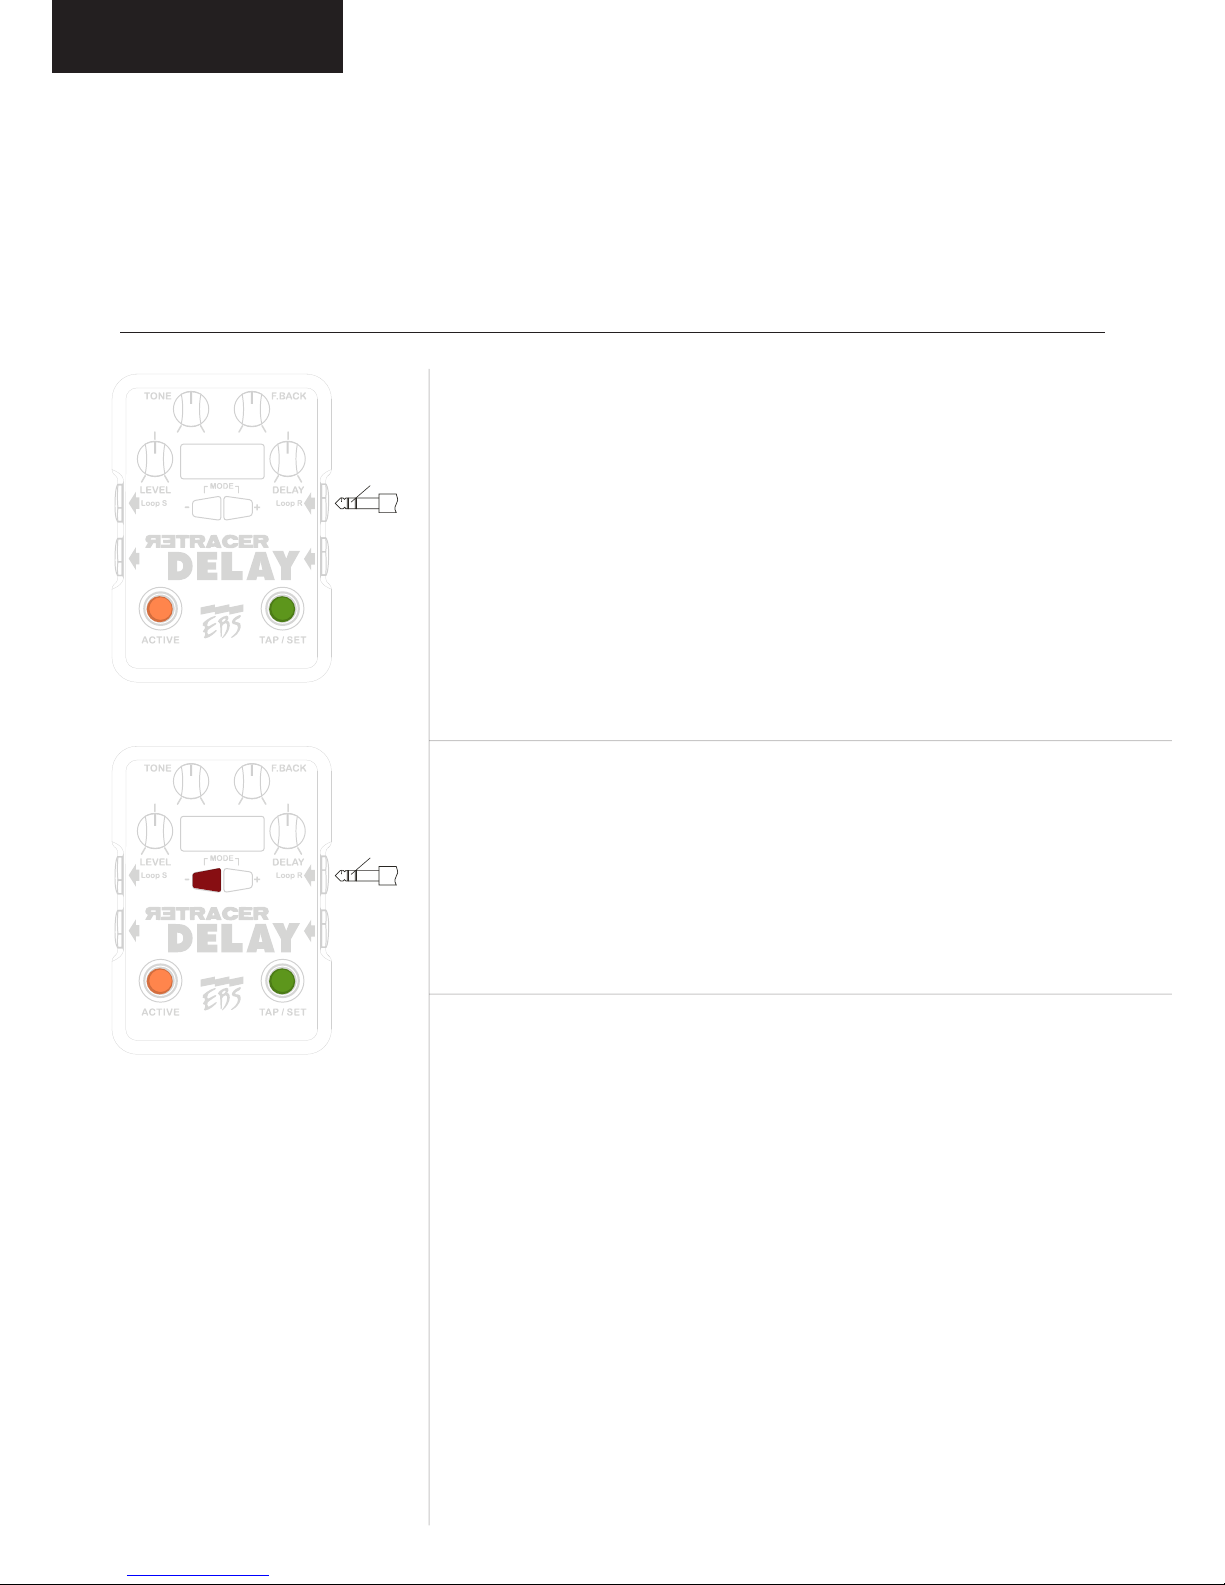
BRIEF Overview of EASY MODE:
Easy Mode is the default mode when you turn on the pedal for
the first time.
. In “EASY MODE” Use
A
or B to choose next or
previous preset.*
. Use LEVEL, TONE, F.BACK and DELAY to modify the sound.
. To SAVE changes to the preset, press and hold
B
until Save pops
up on screen, then press “TAP/SET” to save and exit the menu.
NOTE: Default presets need to be saved as a new preset if you
want to keep any changes you have made.
. To change any of the global settings for the pedal:
1. Press and hold B and press A to access the Settings Menu
2. Use the “LEVEL” control to scroll through the menu, press
B to open up a labels sub-menu, and use the “DELAY”
knob to change the parameter values that show up in the
right column.
3. Then press “TAP/SET” to save the changes or “ACTIVE” to
escape.
Changes in global settings will be the default settings when creating
a new preset from scratch. You can change the corresponding
values to follow a specific preset in Expert Mode (see next page, as
well as bullet 10-12 in the following guide).
* To fast-scroll to a preset further down the list or in a different
bank, press and hold A to access the LOAD menu, then select
bank using “Tone” and preset using the “F.Back” knob. Press “TAP/
SET” to load selected preset and “ACTIVE” to escape the menu.
Page 5
5
USER GUIDE
BRIEF OVERVIEW OF EXPERT MODE:
To activate Expert Mode, go to the global Settings Menu, scroll to
GENERAL using the LEVEL knob, press B and then scroll to EXPERT.
Change the value in the right column to “ON” by turning the DELAY
knob. Press Tap/Set to save and exit. The pedal is now operating in
Expert Mode.
. To navigate between presets in Expert Mode you need to press and
hold A until “Load” appears on screen. Then select bank and
preset using the “Tone” and “F.Back” knobs. Press “TAP/SET” to
load a selected preset and bank, or “ACTIVE” to escape.
. “Expert Mode” unlocks engine-specific parameters that you can
change and save with your preset. To enter the first layer of engine
parameters, simply press B or A . You will now see the name of
the engine that your preset is based on. Indicators in the corners
of the screen shows what kind of parameters you can change with
each knob.
NOTE: Most engines have more than one layer of engine
parameters, if so, the corner indicators will change when you press
B
or A from the first engine parameter settings layer.
. Once you have changed parameters you want and decided to save
them, press and hold B to enter SAVE and press TAP/SET to save
and exit to your preset.
The following pages features step-by-step instructions to some of the
most common operations, as well as more details about the various
settings options.
Page 6
GETTING STARTED
WITH THE
EBS RETRACER
6
USER GUIDE
GETTING STARTED in Easy Mode:
1. SELECT A PRESET
Press B or A to select a factory preset (indexed from Z00 to
Z31). You can change basic parameters to a preset on the fly with
the FOUR CONTROL KNOBS.
NOTE: changes will be lost when you move on to the next
preset. You can make changes and save to a preset following the
instructions in bullet 4.
EASY & EXPERT MODE Oper ations:
2. SET DELAY TIME
TAP the tempo for desired delay time or use the DELAY knob to
dial in a time from 50ms to 1.5s.
3. SET TEMPO SUBDIVISION
You can change the tempo subdivisions from, for example, quarter
notes to 8th note triplets. To do that, hold down TAP and press B
or A repeatedly until you find the desired subdivision. Use Quick
Save as described below to save the changes to your preset.
4. PROGRAM (PRESET) QUICK SAVE
Use the Quick Save function to save changes to a preset. Press and
hold B to enter the program save menu. Then push TAP/SET to save.
If you started from a factory preset you need to save it with changes
as a new preset. The Retracer will suggest the first available slot
to save your new preset on. Use TONE to select bank (from A to
G) and F.BACK to select entry (from 0 to 31). When done, press
TAP/SET to save and continue. You will now be prompted to Label
your new preset. Turn the LEVEL knob to select a character, use B to
move to the next character position and A to go back to the previous
character. Push TAP/SET when done to save and exit (or ACTIVE to exit
without saving).
Quick Save works in both Easy and Expert Mode.
1.
2A4.
Page 7

7
USER GUIDE
5.
6.
5. SETTINGS MENU
To access and change the global default settings for the Retracer,
press and hold down B and press A to enter the [SETTINGS]
Menu.
Scroll to desired subject in the menu with the LEVEL control, then
press B to enter its sub menu.
In the same way, scroll through the sub menu using the LEVEL
control, and use the DELAY knob to change value.
Press SET to save changes and then ACTIVE to exit the SETTINGS
MENU.
NOTE: Many of the settings in this menu can have individual values
attached to a specific preset. See bullet 10-12 for details on how to
attach individual values to a preset.
6. PROGRAM (PRESET) LOAD/EDIT MENU
Press and hold down A to enter the program load/edit menu.
Use the two upper controls (TONE and F.BACK) to select Bank and
Program entry. Then use A or B for desired operation (Load,
Save, Erase, Copy, Move, Swap, or Label). Execute or unfold selected
operation by pressing TAP/SE T.
When Label operation is selected and unfolded:
a) Turn the LEVEL control to choose character.
b) Use B to move to the next character position.
c) If you want to rename the preset, erase the entire label by
holding ACTIVE for approx. 2s and write a new label.
d) Confirm the label and exit the menu by pressing TAP/SET.
When ready with your changes, press ACTIVE to exit the PROGRAM
LOAD/EDIT MENU.
NOTE: All factory presets are marked with a lock symbol and can
only be saved with changes as a new preset. You can lock/unlock any
of your own presets by turning the DELAY knob until a lock appear/
disappear on screen when in PROGRAM LOAD/EDIT MENU.
IMPORTANT!
Visit www.ebssweden.com/content2/ebs-retracer-delay-workstation and click on the “Register for updates”
tab to register for the Retracer email list to get instant news about firmware and software updates, tutorials
and other useful info related to your pedal. Make sure to have the latest firmware installed.
Page 8

GETTING STARTED
WITH THE
EBS RETRACER
8
USER GUIDE
7. SELECT ENGINE
Hold down A and press B . You will now enter SELECT ENGINE
menu. Use the B and A switches to change engine and TAP/SET to
load selected engine or escape the SELECT ENGINE menu with ACTIVE.
NOTE: When a new engine is loaded, it will always start with the setting
parameters that you have made in the [DEFAULTS] menu under the
global SETTINGS MENU (see bullet 5).
8. HOLD DELAY MODE
Press and hold TAP/SET to activate Hold Delay (H) mode:
a) TAP/SET foot switch now holds the delay effect until you release
your foot from it (in default setting, you can change to toggle
deactivation in settings, if prefered).
b) Push ACTIVE once to cancel Hold Delay mode.
9. “PANIC KILL” OF EFFECTS
Press and hold down ACTIVE until PANIC appears on screen in
order to “panic kill” the Retracer effects. This is useful if an engine
goes into stall because of excessive feedback.
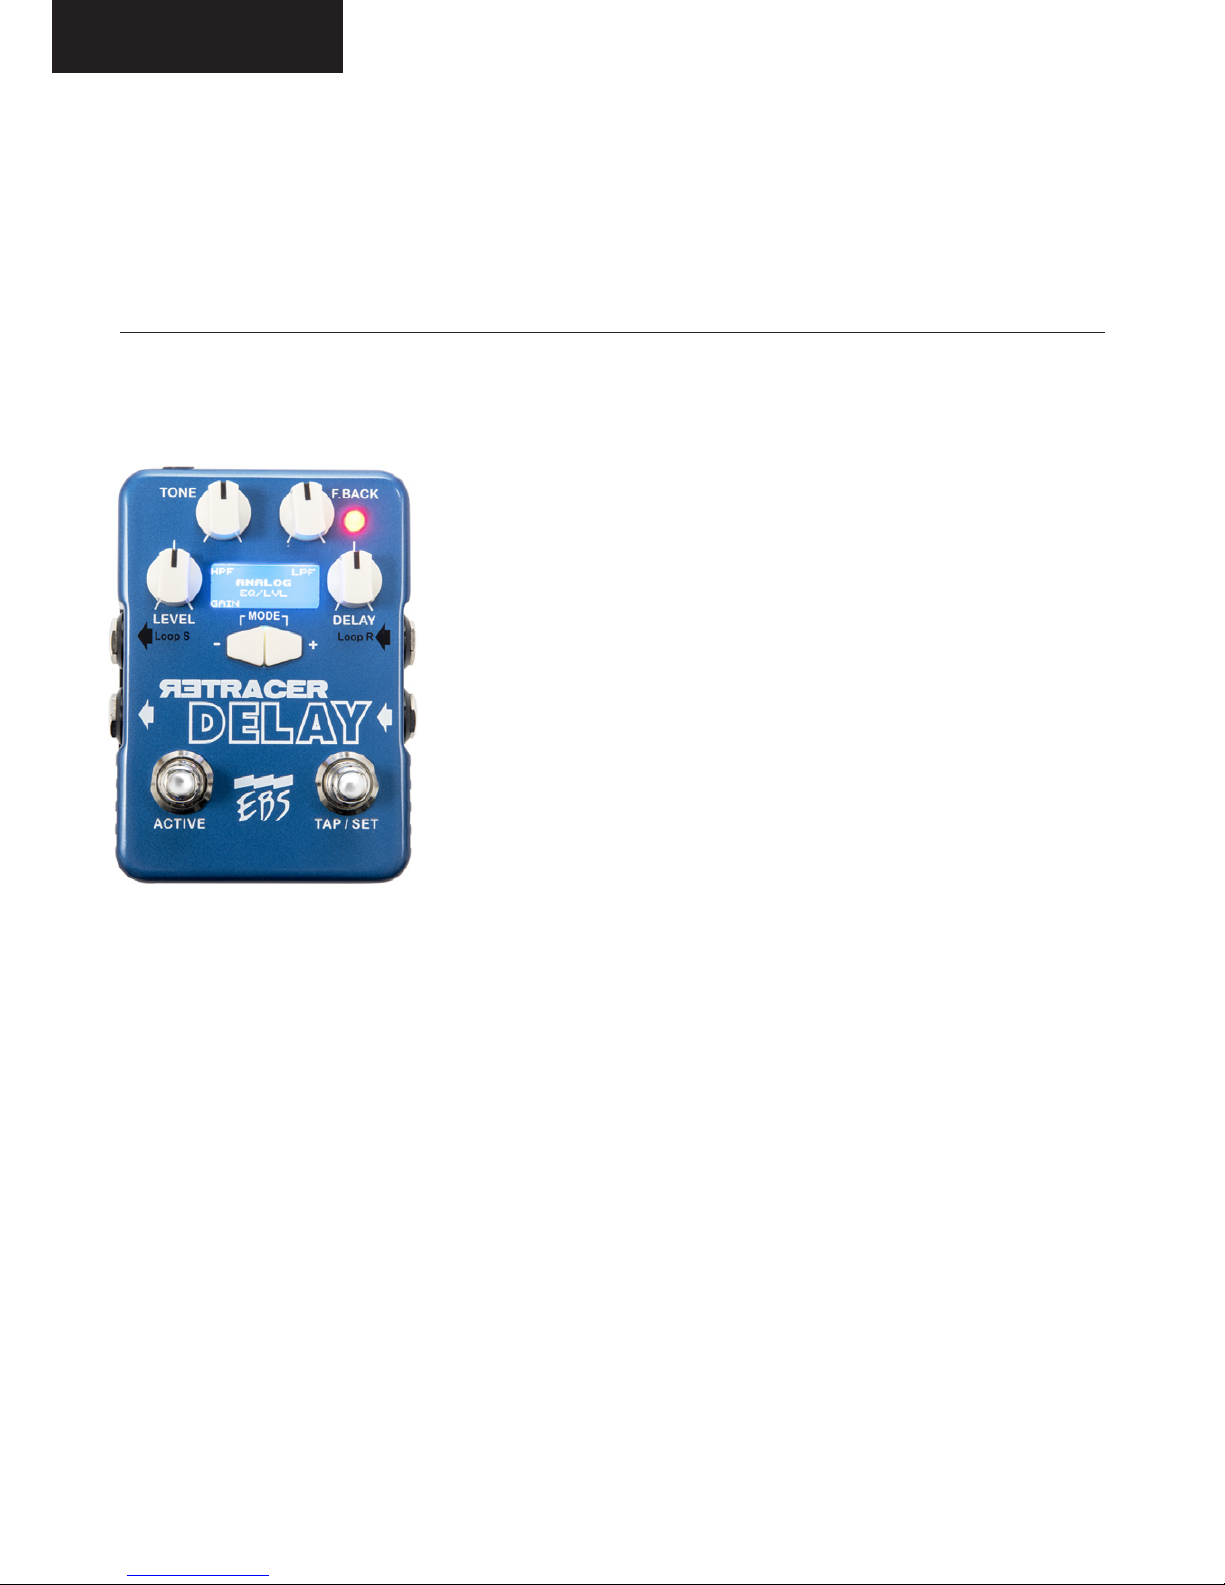
EXTENDED EDITING IN EXPERT MODE:
10. CHANGE TO EXPERT MODE
The Expert mode unlocks all features available in the Retracer.
Enter the [SETTINGS] menu (as described above under bullet 5)
Select GENERAL menu, locate EXPERT and change the value OFF
to ON. Press TA P/ S ET to save and exit. The pedal now operates in
EXPERT MODE.
IMPORTANT! In Expert Mode B and A gives access to the
parameter layers connected to each individual engine instead
of offering navigation between presets. Values can be changed
with the four knobs. Indicators on the screen show what value is
attached to each knob in the layer.
11. ACCESS PROGRAM SETTINGS MENU
After the last parameter layer for an engine, repeat pressing B to
access the PROGRAM SETTINGS attached to your current preset
(se reference on next page). When the name of the engine appears
within a pair of clamps you can use LEVEL to scroll down the list and
DELAY to change the values in the right column.
7A9.
10A12.
[
GENERAL
]
EXPERT ON
TIME MS/S
TAP PROG
Page 9

9
USER GUIDE
12. SAVE CHANGES TO A PROGRAM
When done with your changes enter Quick Save by holding down B
until “Save” appear on screen and then press TAP/SET to save.
NOTE: To navigate between presets in Expert Mode, you need to press
and hold A to access Load menu, then select bank and preset using
the “Tone” and “F.Back” knobs. Press “TAP/SET” to load selected preset
and bank, or “ACTIVE” to escape.
Available PROGRAM SETTINGS reference guide (in order of appearance):
----------------------------------------------------------------------------------------------------
TONE: SOFT 6dB/oct
SHARP 12dB/oct
MIX (level): MIX 0-100% FX MIX, fully cw DRY OFF
ADD Wet signal only added to dry
XFADE Cross fade between dry and wet signal
DUCKER: POST Ducker placed post engine
FBCK Ducker placed pre feedback loop and stops
feedback tail when used.
BYPASS: TB True bypass (relay)
TAIL Tail mode, buffered bypass
BUF Buffered bypass, no tail
SMOOTH: OFF Disabled
ON Allows smooth transitions(tails) between
program and engine change when applicable.
G.TAP OFF Disabled
ON Enables GLOBAL TAP in program.
MODE: MONO Mono/Direct out
STEREO Mono engine, stereo mix
DUAL Stereo (dual mono)
LOOP Mono, 2nd channel loop
LOOP: OFF Disable
DELAY Loop inserted in delay Path
F.BACK Loop inserted in feedback loop
CLRBUF: OFF Disabled
ON Clears the audio buffers in bypass, in True Bypass and
Buffered bypass modes.
HOLD: PRESS Delay Hold function active when Tap is pressed (momentarily)
TAP Delay Hold function is toggled active/inactive for every Tap.
NOTE: Some engines have more program settings available than listed
above. If so, they will appear first in the PROGRAM SETTINGS menu,
above a dotted line.
Page 10

GETTING STARTED
WITH THE
EBS RETRACER
10
USER GUIDE
REFERENCE GUIDE FOR THE (Global)
SETTINGS MENU & SUB MENUS
Below you will find a reference guide for the values you can change in
the global Settings Menu and its sub categories. Go back to bullet 5 to
refresh your mind on how to access the settings and perform changes.
[GENERAL] SETTINGS:
-------------------------------------------------------------------------------------------------------
EXPERT: ON/OFF Accesses extended functionality.
TIME: AUTO / MS/S /BPM Shows delay time in bpm or ms/s. Auto
mode displays bpm when tapped and time
when adjusted with knob.
TAP: PRG/GLOBAL Sets Tap mode. If set to Global, global
tap/time info will override program tap.
SW.PRG: ON/OFF Enables program change with foot switches.
When this option is enabled, press and hold
TAP until two arrows appear. Escape from this
mode while HOLDING Active.
PRGSTEP: ALL/BANK Sets program step within bank rather than
within all entries.
[DEFAULTS] SETTINGS (these will be the default value for all engines when creating a
new program/preset or when you switch the engine in an existing program/preset):
-------------------------------------------------------------------------------------------------------
TONE: SOFT 6dB/oct
SHARP 12dB/oct
MIX (level): MIX 0-100% FX MIX, fully cw DRY OFF
ADD Wet signal only added to dry
XFADE Cross fade between dry and wet signal
BYPASS: TB True bypass (relay)
TAIL Tail mode, buffered bypass
BUF Buffered bypass, no tail
MODE : MONO Mono/Direct out
STEREO Mono engine, stereo mix
DUAL Stereo (dual mono)
LOOP Mono, 2nd channel loop
LOOP: OFF Disable
DELAY Loop inserted in delay Path
F.BACK Loop inserted in feedback loop
[SETTINGS]
GENERAL
DEFAULTS
MIDI
DISPLAY
INPUTS
SYSTEM
HELP
[SETTINGS]
GENERAL
DEFAULTS
MIDI
DISPLAY
INPUTS
SYSTEM
HELP
NOTE: When you are in
the Settings Menu, scroll
down with LEVEL and press
B
to access the chosen
chategories submenu.
Page 11

11
USER GUIDE
[MIDI] SETTINGS:
-------------------------------------------------------------------------------------------------------
CHAN: 1A16, OMNI MIDI in channel select
BANK: CC0, CC32, CC0/32 Bank control command
REMAP: ON/OFF Remaps program change command
CLOCK: ON/OFF Enables or disables MIDI clock
[SETTINGS]
GENERAL
DEFAULTS
MIDI
DISPLAY
INPUTS
SYSTEM
[SETTINGS]
GENERAL
DEFAULTS
MIDI
DISPLAY
INPUTS
[SETTINGS]
GENERAL
DEFAULTS
MIDI
DISPLAY
INPUTS
SYSTEM
[SETTINGS]
GENERAL
DEFAULTS
MIDI
DISPLAY
INPUTS
SYSTEM
IMPORTANT!
Visit www.ebssweden.com/content2/ebs-retracer-delay-workstation and click on the “Register for updates”
tab to register for the Retracer email list to get instant news about firmware and software updates, tutorials
and other useful info related to your pedal. Make sure to have the latest firmware installed.
MIDI Options Retracer
BANK: CC0 Listens to Control Change 0 only MIDI: Bank Select (MSB)
CC32 Listens to Control Change 32 only MIDI: Bank Select (LSB)
CC0/32 Listens to Control Change 0 and 32 MIDI: Bank Select (MSB/LSB)
REMAP: OFF: No remapping, internal banks follow incoming MIDI bank info.
MIDI Options Retracer
CC32 Listens to Control Change 32 only MIDI: Bank Select (LSB)
CC0/32 Listens to Control Change 0 and 32 MIDI: Bank Select (MSB/LSB)
OFF: No remapping, internal banks follow incoming MIDI bank info.
ABCDEFGZ
0 0:0 1:0 2:0 3:0 4:0 5:0 6:0 7:0 (Midi Bank: Program Change)
---------
31 0:31 1:31 2:31 3:31 4:31 5:31 6:31 7:31
ON: Remaps internal banks to fit into first two MIDI banks
ABCDEFGZ
0 0:0 0:32 0:64 0:96 1:0 1:32 1:64 1:96 (Midi Bank: Program Change)
---------
31 0:31 0:63 0:95 0:127 1:31 1:63 1:95 1:127
[DISPLAY] SETTINGS:
-------------------------------------------------------------------------------------------------------
BRIGHT: Sets display intensity.
STANDBY: Sets display intensity in bypass mode.
CTRAST: Sets display contrast.
[INPUTS] SETTINGS:
-------------------------------------------------------------------------------------------------------
EXP: Configures and enables Expression and CV pedals in program level.
AUTOCAL EXP: Automatic Expression calibration
MANCAL EXP: Manual Expression calibration
SET EXP MID: Set Expression midpoint calibration
[SYSTEM] SETTINGS:
-------------------------------------------------------------------------------------------------------
RESET: Factory Reset
PRG RESET Clears all user programs
PRG SCAN Scans memory for programs
Page 12

GETTING STARTED
WITH THE
EBS RETRACER
12
USER GUIDE
MIDI
3.5MM
MINI-TELE
IN
THRU
1
425
3
Source
Gnd
Sink
AUX IN or
LOOP RETURN
EXPRESSION or
CV PEDAL INPUT
AUX OUT or
LOOP SEND
STEREO OUT
(in Stereo & Dual mode)
EXTERNAL TAP
FOOTSWITCH
(momentary)
MASTER
CHANNEL IN
(mono)
MASTER
CHANNEL OUT
(mono)
IMPORTANT!
USE ONLY MONO
PLUG FOR THIS INPUT
For future use.
STEREO INPUT
(in Stereo & Dual mode)
how to connect the Retr acer with other devices
See the illustration below on all the connection options you have with the EBS Retracer.
Page 13

13
USER GUIDE
EXTERNAL EFFECT
MAIN INPUT
(MONO)
MAIN OUTPUT
(MONO)
LOOP
SEND
LOOP
RETURN
IN OUT
LOOP DELAY
ANALOG
How to setup LOOP MODE for a preset (in Expert Mode only)
1. Choose the preset that you would like to use in LOOP MODE.
2. Then press
A
to go directly to the menu for the specific Program settings.
The menu appears as the name of the current engine within a pair of clamps
(for example [ANALOG]), followed by a list of menu items.
You can also reach the menu by pressing
B
repeatadely until you reach the menu.
The difference is you will then walk through all the available parameter settings layer
for the selected engine before you reach the desired menu.
3. Turn Level* to scroll down to MODE and then turn the Delay knob
until LOOP appear in the right column.
4. Then scroll to menu label LOOP and choose DELAY or F.BACK,
depending on where you want the loop inserted. You can also set
LOOP to ”off”.
* TIPS: start by turning the Level knob counter-clockwise as far as possible,
and then turn clockwise to be able to scroll to the end of the submenu.
EXTERNAL EFFECT
MAIN INPUT
(MONO)
LOOP
RETURN
IN OUT
LOOP DELAY
ANALOG
how to SET UP AND USE THE LOOP MODE
Page 14

GETTING STARTED
WITH THE
EBS RETRACER
14
USER GUIDE
HOW TO USE AND CALIBR ATE
AN EXPRESSION PEDAL WITH RETR ACER
A. ACTIVATE/DEACTIVATE EXP
Press and hold down B and press A to enter Settings Menu.
Scroll to sub menu ”Inputs” with the LEVEL control knob.
Press B to enter sub menu and use LEVEL to scroll to ”EXP”.
Then use DELAY to change value.
If your expression pedal is using external power, choose ”ACTIVE”,
if it is not powered, choose ”PASSIVE”. Now proceed to B.
The ”OFF” option deactivates the expression pedal input feature.
B. CALIBRATE EXP
After you have choosen ACTIVE or PASSIVE, scroll down in the same
sub menu using LEVEL to either ”AUTOCAL EXP”, “MANCAL EXP”
or “SET EXP MID” and use DELAY to activate calibration sequence.
AUTOCAL EXP (auto calibration)
Move the pedal all the way back and fourth until the resolution (“res”)
no longer increases on the screen. The maximum resolution is now
reached.
Press TAP/SET to end calibration sequence.
Press TAP/SET once again to save settings and exit.
MANCAL EXP (manual calibration)
With MANCAL option it is possible to restrain the modulation action
between two points of the expression pedals physical range.
Move the pedal to the desired position where the action should
start, hit TAP/SET.
Move the pedal to the desired position where the action should
end, hit TAP/SET.
Now proceed to SET MID.
A.
B.
AUX IN or
LOOP RETURN
EXPRESSION or
CV PEDAL INPUT
AUX IN or
LOOP RETURN
EXPRESSION or
CV PEDAL INPUT
Page 15
15
USER GUIDE
SET MID
With SET MID option it is possible to tune the modulation amount
over the calibrated range.
If you want a smooth modulation (and your expression pedal is
somewhat linear) somewhere in the middle of the calibrated range
would be a good point to start from. But if you, for example, want
to have more action in the last ten percent of the expression pedals
range, just set “mid” more towards the toes down position.
Move the pedal to the desired mid position and hit TAP/SET
When calibration sequence is finished, press TAP/SET to save and exit.
C. ACTIVTE EXP PARAMETER(S)
Choose a sound on the Retracer to start from with the expression
pedal positioned at heel down.
Hold TAP/SET and press ACTIVE. A blinking ”E” will appear on the
screen to indicate that the delay pedal now is in ”exp record mode”.
Modify the desired parameters to the sound you would like to
modulate to.
Again, Hold TAP and press ACTIVE. This will end ”exp record
mode” and the blinking ”E” will now be fixed to indicate that this
program is using the expression pedal.
You are now ready to get blown away. Put your pedal to the metal
and the parameters will move toward the sound you decided to
modulate to.
IMPORTANT!
Visit www.ebssweden.com/content2/ebs-retracer-delay-workstation and click on the “Register for updates”
tab to register for the Retracer email list to get instant news about firmware and software updates, tutorials
and other useful info related to your pedal. Make sure to have the latest firmware installed.
C.
AUX IN or
LOOP RETURN
EXPRESSION or
CV PEDAL INPUT
Page 16
GETTING STARTED
WITH THE
EBS RETRACER
16
USER GUIDE
D. DEACTIVATE EXP PARAMETER(S)
If your intensions are to remove ALL parameters, proceed to E. If
you want to change SOME parameters, follow the steps below.
1. Put the chosen parameters knob to zero (all way to the left).
2. Hold TAP and press ACTIVE to enter ”exp record mode”.
3. Put the same knob to the middle (12 o´clock) and then back to
zero.
4. Again, Hold TAP and press ACTIVE to escape from “exp record
mode”.
E. RESET EXP
Hold TAP and hold ACTIVE for about 1 second.
A prompt will appear. Use A to select ”YES” option, and press SET
once to confirm and exit prompt.
All the expression parameters are now reset and expression pedal is
deactivated for the active program.
F. TIPS & TRICKS
If you forgot to add a parameter, don’t worry, just enter ”exp
record mode” again and do the add-ons, the already saved exp
parameters wont change (as long as you don’t modify them). Don’t
forget to exit ”exp record mode” when done.
To modify the starting position (heel down) of an expression
parameter, just modify the parameter to the desired value.
When calibrating the expression pedal using AUTOCAL EXP, the mid
position will be set automatically (in the middle).
D.
E.
AUX IN or
LOOP RETURN
EXPRESSION or
CV PEDAL INPUT
AUX IN or
LOOP RETURN
EXPRESSION or
CV PEDAL INPUT
Page 17
17
USER GUIDE
IMPORTANT!
Visit www.ebssweden.com/content2/ebs-retracer-delay-workstation and click on the “Download” tab to
register for the Retracer email list for instant news about firmware and software updates, tutorials and other
useful info related to your pedal. Make sure to have the latest firmware installed.
Page 18

GETTING STARTED
WITH THE
EBS RETRACER
18
USER GUIDE
Technical Specifications EBS Retracer:
Nominal Levels: - 8 dBv
Maxium Input and Output Levels: +12 dBv
Input Impedance: 900 kohms stereo / 450 kohms mono
Output Impedance: < 100 ohms
Bandwidth: +0/-3 dB 20 - 20k Hz
Sampling Frequency: 48 kHz
Dynamic Range: typ 115 dB (A-weighted)
Power Requirements: 9 - 18 V DC Regulated,
Current Consumption: 200 mA max. @ 9V / 100mA max @18V
(DC power in has no other effect on headroom or performance)
Dimensions (with xternals) W x H x D: 3.3” x 4.5” x 1.9” (83 x 115 x 48 mm)
Weight: 414 gr (0.92 lb.)
Subject to change without notice.
w w w . e b s s w e d e n . c o m
FIRMWARE UPDATES & EXTENDED SUPPORT DOCUMENTS
Find and install the FIRMWARE UTILITY software for your computer and download the latest
FIRMWARE EDITION according to instructions at http://ebssweden.com/content2/category/retracerhelp/
The latest support documentation and software will be found there as well.
For quick access on your smartphone or Pad, scan the QR code.
 Loading...