


Ownerts
Manual
tor
EnYirc
This manual
contains
important safety,
performance
and
maintenance
information.
Read
the manual before
taking
your
first ride on
your
new Enviro,
and
keep
the manual
handy
for future reference.
TABLE OF COilTEITTS
I,
ABOIT| I'IIS
MAflAAL
A. Why Should
You Read
This Manual
B.
lmportant Safety
Information
C.
Reporting
Safety
Defects
D.
lnspection and
Maintenance
E. lnspection and
Maintenance
Chart
2. 0PEM110ML
Insfnufifr0ils
A. Right Hand Controls
B.
Left Hand Controls
C.
On-Board
Battery Charging
D. Remote
Battery
Power
Pack
Charging
E. Battery
Maintenance
F. Built-ln Safety
Features
G.
Performance
Specifications
3,
FTf ATJD SAFE|T
A. Fit
B. Safety
Equipment
C.
Mechanical
Safety Check
4, ilDI'TE
SAFELY
AIID
NESPOIISIBLY
A. The
Basics
B. Rules
of
the Road
C.
Wet
Weather
Riding
D. Night
Riding
5.
HoWfil'ltaswonK
A. Removing
and
Installing
Bolt-On
Wheels
B.
Seatpost Quick
Release
C.
Brakes
D. Toeclips
and
Straps
E. Clipless
Pedals
F.
Tires and
Tubes
G.
Bicycle Suspension
6, SEBWCE
A''D
frUTITIEI'AIICE
A.
Service
and
Maintenance
Schedule
B.
Getting
Home
When Something
Breaks
C. Upgrading
Your Bike and
Equipment
D. About
Your
Dealer
t3
13
17
18
t9
19
20
21
22
23
23
25
25
28
28
29
31
3:'
34
36
38
41
0l
01
01
03
03
o4
05
06
07
08
09
10
11
12

I. ABOAT
THIS
MAilAAL
A.
WHY YOA
SHOALD
NEAD
I'IIS
ilAIII'AL
This
manual
was
written
to
help
you
get
the
most
performance,
comfort,
enjoyment
and
safety
when
riding
your
new
E-Bike@.
It's
important
for
you
to
understand
your
new
E-
Bike@, its
features
and
its
operation,
so that,
from
your
first
ride,
you
get
maximum
enjoyment
with
maximum
safety.
By reading
this
manual
before
you
go
out
on
your
first
ride,
you'll
know
how to
get
the
most from
your
new
E-Bike@,
It
is
also important
that
your
first
ride
on a new
E-
Bike@
is taken
in
a
controlled
environment,
away from
cars,
obstacles
and
other
cyclists.
GEilEnAL
WABlllll0:
Bicycling
can
be hazardous
acttyity
eten
undcr
the
best
of clrcumstances,
Prcper
mainhnance
ol
your
E-Bike@
is
your
responsiblllty
as it
helps
rduce
ffie rtsk
ol lnjury,
fhis
Manual
contains
many
nWarningstt
and
"Cautionst,
concmfing
the
consequences
ol tallure
to malntain
or
inspect
your
E-Bffie@,
Many
of
ffie Warnings
and Cautions
say
t'you
may losc
confrol
and
tall,,.
Because
ol
any lall
can
rwult
ln
serioas
inlury
or eyen
dcaflt,
we
do
not
repeat
thc
waming
ol
posstble
lnjury
or
deaflr
wheneyer
tIrc fisk
of
talltng
is menfioned,
B, IMPONTA'T|
SAFEfl IIFOBMANU'
Your
E-Bike@
can
provide
many
years
of
service,
fun
and
fitness
-
if
you
take
responsibility
for
your
own
safety.
Understand
the
features
of
your
bicycle
and
become
aware
of the
challenges
that
you
will
meet
on
the
road.
There
is much
that
you
can do
to
protect
yourself
while
riding.
We
will
offer
many
recommendations
and
safety
tips
throughout
this
manual.
The following
are
those
that we
feel
are most
important
l) Alwap
Wear
A Helnet!
Helmets
significantly
reduce
the number
and
severity
of head
injuries!
Always
wear
a
helmet
which
complies
with
your
state
laws
when
riding
the
E-Bike@.
Check
with
your
local
police
department
for
requirements
in
your
community.
Do not
wear
loose
fitting
clothing
that
can
become
tangled
in
the
moving
parts
of the
E-
Bike@.
We
are sturdy
shoes
and
eye
protection.
Also
check
your
state
laws
concerning
other
protective
gear
that
may
be required
when
riding
the
E-Bike@.

HABiIIIG:
Ilot
wrlng
a hcffi slgnlflcanfly
lncrerlw flp dn w of s/rlr
trffiy u Mt
h a
crash, Be surc flnt
you
war a M//'/re$
eyc
poWt
aN aWWlaE amrdwlrg/r
W
tW,
2) rfiwr
fow
E-0il(@t
Your
new
electric
bicycle incorporates
many features
and
functions
that
have never
been
built
into
a bicycle
before.
Read this manualthoroughly
to understand
how
those
features enhance
your
riding
pleasure
and
safety.
qnDEIrffiwEIn
One of
the most
frequent
bicycle accidents
occurs
when the driver of a
parked
car
opens
his
door
in to
bike
rider's
path.
Another common occurrence
is when
a car
or another cyclist
moves
suddenly
in
your
path.
Always be
aware of other
vehicles
around
you.
Do
not
assume
that the driver or other cyclist
sees
you.
Be
prepared
to take
evasive
action
or
stop suddenly.
4) ffifrcYungl
Easylo W,
Make
yourself
more visible by wearing
bright reflective
clothing.
Keep
you
reflectors clean
and
properly
aligned.
Use
your
head and
tail lights in
reduced lighting
conditions.
Signal
your
intentions so
that drivers
and
other cyclists
can anticipate
your
actions. Use
your
horn when
needed to make
your presence
known.
q
nreVlfiln
Yur
I/rlnIEI
Take it slow until
you
are
familiar with
the riding
conditions
that
you
encounter.
Be especially
careful in
wet
conditions
as
traction can
be
greatly
reduced and
brakes
become
less effective.
Never
ride faster than
conditions
warrant or beyond
your
riding abilities.
Remember
that alcohol, drugs,
fatigue and
inattention
can significantly
reduce
your
ability
to make
good
judgements
and
ride safely.
6)@YurB@lnhtetuf,,fln
Follow our
inspection and
maintenance
guidelines
beginning on
page
16.
Check
critical safety
equipment
before
each and
ever y ride.
7) I(mwlhe
law
Cyclists are
required
to follow
the Rules of
the Road.
Additionally, some
communities
regulate
the use of
motorized
bicycles
regarding
minimum
age
requirements and
necessary
equipment.
Check
with
your
local
police
department
for specific
details.
8) ffirwil
nffirng
Off
road riding
is not recommended
because
the E-Bik@
02

tires
are
for
street use only. Dust and extreme impacts
from
off
road riding
can cause
electrical system
problem.
C,
NEMNNilG SAFETY DEFECIS
lf
you
believe
that
your
vehicle has
a defect
which
could
cause a crash or could cause injury
or death,
you
should immediately inform the National Highway Traffic
Safety
Administration
(NHTSA)
in addition to notifying
EV Global Motors
Company.
lf
NHTSA receives
similar
complaints,
it may
open an
investigation,
and
if it firrds that
a safety defect exists in
a
group
of
vehicles, it
may order a recall
and
remedy
campaign.
However,
NHTSA
cannot become
involved
in individual
problems
between
you, your
dealer or EV
Global
Motors
Company.
To contact NHTSA,
you
may
either call
the Auto
Safety
Hotline toll-free
at
1-800-424-9393
(or
202-366-0123 in
Washington, DC
area) or write to: NHTSA,
U.S.
Department
of Transportation, Washington, DC 20590.
You can
also obtain other
information
about motor
vehicle safety from the Hotline.
D. ',TJSPECN(N AilI' NAMENATCE
For
your
safety and enjoyment, and to insure a long life
for
your
E-Bike@, inspect
and
maintain
your
E-Bike@
regularly.
Use
the table below for
guidance.
lt
is very
important that
you
check certain key systems
before
each and every
ride.
The
proper
condition and function
of these systems
is
critically important for
your
safety.
Your E-Bike@ should be returned to
your
servicing
dealer at
least
once a
year
for
a complete and thorough
inspection and tune up. lf a
problem
arises
that is not
described below, discontinue
riding
the E-Bike@
and
return it to
your
servicing dealer immediately. For
more
information
dbout service and
maintenance,
please
refer
to
page
42.
o3

lefer to
Page
Component
or Condition
lnspect before
every
ride
lnspect
periodically.
Clean
and/or
Lubricate
AdjusVTighten
Repair/Replace
if necessary
26
Brake
pad
adjustment
,--1---.
z{S'
23-24
Wheel
quick
release adjustment
z'{:\
.S]Z
7<:\
29
Tire
pressure
/-f-\
\Slz
Z<:\
-SP-
29
Tire wear/damage
/'1-\,
-s-gz-
,4<,
07
Head/tail/brake
lights
zza:\
L<!Ez-
/--\:.
!:lz
06-07
Controls and
displays
-,zG'
!:!z
35
Brake
pad
wear
/'1--\'
<SP-
Z<:\
!:lz
35
Brake cable
tension/wear
zza:\
-5:s9-
/'1:\
.SP-
,za:\
-SP'
35
Spoke
tension
z4:\
\<!z-
zz{]:\
.:lz
35
Wheeltrue
.-f-.
.:lz
,4:,
18
Hub bearings
/-1-
S\Z
JZ::S-
S]Z
6:>
34
Chain
lubrication
,'-i---\
,,,,,,,\.
.:lz
36
Derailleur adjustment
r--{-:\
<SP-
zr<s\
S\Z
/'-\:.
02
Reflectors
r,'G\
.SP-
,'-i--\.
-SP-
08-1 1
Battery and charger
/-1--.
-S9-
@-
34
Headset
adjustment
z-A:\
.^:\
.:lz
r,:':\\
\<9-
35
Bottom
bracket
adjustment
---:.,
/'-1-
SP-
z{<'
34
\llbolts, nuts, and
mounting hardware
-@-
/'-(-\
SP-
,,z:lG*
-
Every 5
to 1 0 rides depending
on
lengrth
and
conditions of
the ride
o4

2. 0PEnAnoflAL I tISTnACn0ilS
Please rcad
and underctand tltese insfitctions
conplehly
belorc optating
yoar
E-BiRe@
to
prcvent
scrlous
inlury to
yourcell
and oflretro', and b
prcved
damage to tfie bike
IMPOBTAIIT ll0fIGEt
For
Wamnty
purpow,
Ir0 nOT
brcak tlrc Wananty
Seals
trum ffie
Gonholler or Charger Housings
and attempt to
repair or ssyim tfiese
conponenb. ALWAYS
contac't an
authorized
EVG
dealer tor repair
or service of these
componenE.
Sumtnary Chart tor Warning Ber;ps
-
Long BeeP ' Short BeeP
normal, okay to ride
Low
battery,
power
will
shut
off
in
3-5 seconds.
assistance from
the
rider
Beep will
sound on
steep
hills
and during over-heat
conditions.
Over-heat
of
motor
or
controller,
power
will
shut off
in
3-5 seconds.
System refuses to restart
during
over-heat condition.
o5

A. HGHT HAIID COffr]PiOLS
t) rcnmw 0M0FF
.
Turn
knob
clockwise
to the ON
position.
r
The LED lights will
flash in
sequence
3 times and
a
series of beeps,
will sound
to indicate the system and
controls
are ready
for
operation.
2)fHBOfnE
Press
throttle lever with thumb
to
apply
power
to the
motor.
q
FnoilT BnAIG
LEWE
The front brake
is
activated
by squeezing
the right hand
lever.
(lt
is the
opposite
of a traditional bicycle.)
4) BATIEBY CHAnEE LEWL
The 3
LED lights on
the right hand control switch
indicate
the
battery charge
level.
GBEEtI
o
indicates the battery is between
full and 60%
charged.
YELL0W
r
indicates
the
battery
is between 600/o
and
15% charged.
f,ED . indicates
the
battery
is between
15o/o and empty
or
low battery shut-off.
The motor will automatically
shut-off
when the battery
is below a
preset
limit to
help
extend
battery
life. The red
LED light will flash
to
signify
the motor is off and
the battery
must
be
recharged. lt is
recommended
that
you
recharge the battery
within 24
hours to help
maintain the
life
of
the battery.
WABIIIIIG:THE
NrcHT HAND
LEVEN ACTTUATES
f,]E
FNO'Tr
BNAKE OT
f'IE E.BIKE@. Tf
IS THE OPPOSM
OF
ATBADMOilAL
BICYCLE.

B, LEN HAilD COffiNOUS
l) llomal or Eoonuny
Switch
(ll/E)
The Blue N
/E
switch
provides
2
different
power
delivery
characteristics.
ln
the
llormal
or
ll mMe,
your
E-Bike@ will have
maximum hill climbing
capability and acceleration.
Total
range will
be shorter because
power
usage
will
be
greater.
In the Economy
or
E mde,
your
E-Bike@ will have lower
hill
climbing capability and
may
accelerate more slowly.
Total range will be longer because
power
usage
will
be
less.
2) Hon Switch
Press the
Red Horn
button to activate
the
horn.
3) Cruise Confrol Bntton
The
Green Cruise
Control button allows
you
tc
automatically set
a constant throttle
setting
for thumt
free
operation.
lo
set,
hold the thumb throttle
at a desired speed,
press
the
Green Cruise
button
and
release
your
thumb fron
the throttle lever.
To
cancel,
pull
either Brake Lever or
press
the
Greer
Cruise
button or
turn the
knob Off
.
4) Headlight
0rilU|
The Yellow Headlight switch
activates
the headlight
taillight
(running
light)
and
the Yellow LED light.
Press the
Yellow Headlight
switch
to
ON for Headligh'
and
Taillight
operation.
The Yellow LED will
illuminate
to help
provide
Horn
anc
Cruise button
visibility at night.
In the
ON
position, power
consumption
will
increasr
and
total ranqe will decrease .
When the mo-tor is
shut-off due
to a low
battery or over.
heat
condition,
the headlight
and
taillight
will continur
to
operate
until the battery is fully
discharged.
lt ir
recommended that
you
recharge the
battery as soon as
Left Hand
Controls

possible
or within
24 hours to
help maintain the
life
of
the battery.
5)
Bear Bnke
LeYer
The rear brake
is
activated
by squeezing
the
left hand
lever.
(lt
is the
opposite
of a
traditional bicycle.)
WABlllll0tThe lett
hand lever ac'tivates
the rcat
brake
on
tIrc E-BiRe@.If
lSfrlE
OPPOSIIE
0F
A
1NADMOilAL
BICYCLE.
C, OII-BOAND
BANENY CHANGIilG
o
When charging
the
battery,
the
ON/OFF
switch
must
always
be
in the OFF
position.
.
Open
the Battery
Power Pack door
by turning
the
door
closures clockwise.
o
Plug
the female end of
the cord into
the receptacle on
the
right
side
of
the
battery
charger and
the male end of
the cord
into
a standard
U.S.110V/60
cycle
wall
socket
and
turn charger ON
.
The
RED indicator
light and cooling
fan
will
automatically
turn
on
when in
the
charging
mode.
o
The indicator light
willturn
GREEN
when fully charged.

A
only,
WABlllllG:
Keep
Gharger and BatEry Power
Pack
n
WABlllllG: Keep
Charger
and
Battery
Pack
awal
away frum water
to
prevent
electical shock
and
/ ! \
fiom wabr
to
prcvent
elecfrlcat shrck
an shorting
shorting, fhe Charger is
intended tor indoor
use
-
Gharger is inhnded
tor indoor
use only,
71
CAUTl0llt Be
sure the CO0LI}lG FAll
VEllf i:
7\
GAtlfl0ltt lf the
Cooling Fan does not
opente when
/!\
unrestrtcfud
or
lacing
out
when
charging
tht
/!\
in
the charging mode
(Bed
light
on),
immdiatety
rel
battery to
prcvent
tfie
Charger fiun over-heating
-
AilPLUE the charger
fiom tfie wall
socket, Contact
fhe C00lllt0 FAII
should always
be 0ll when tfie
Bed ligh
an authortzed EUG daler for
adyice
is
on
to
prevent
charuer over-heat.
D. NEMOTE
BATTENY POWEN
PACK
CHANGIilG
The Battery
Power Pack
can be removed
for remote
charging .
e
Turn Battery to
the
OFF
position.
.
Open
the
Power Pack
door.
.
Release the
Battery Power Pack
retainer
gate
latch.
.
Remove the Power Pack
using the built-in handle
with
one hand, while
supporting the
bottom
of
the Battery
Power
Pack with
your
other hand.
.
Place
Battery Pack
on it's
side and
follow
directions in
section C.
is
on
to
prevent
charger over-heat.

WARltlltB:fheBatWyPowerPackweighsovs20
of four conditions
occurs;
1) Low
battery,2)
Electrical
punds.
Usc futlt
hands to rcnove
it tront tfie
controller
over-heat,
3) Motor over-heat,
or
4) Brake
bike
trame
levers are
Pulled.
o
Reinstall
the Battery Power Pack by
tilting the bottom
first.
.
Close
the retainer
gate.
.
Close
latch
by
lifting the
latch ring with
your
left hand
and
locating it on
to the frame hook with
your
right
hand.
.
Close
the Battery
Power Pack door and
turn closures
counter
clockwise
to
secure.
E. BATTENY
MAIITTEIIAIICE
Always
recharge the Battery
Pack within 24 hours after
use
to
maximize batter y cycle
life
and
prevent
damage
to the battery.
During long
periods
of storage,
recharge
or
'top
off' the batter y at
least once
per
month to
help
extend
the
batter
y
cycle life.
ldeally, the battery should
be used
at
least
one
per
month otherwise,
that battery
will
have a short lifespan.
t)
BU'IT4fl PnoTEgn0tt SYSTEIilS
Power
to the motor will automatically shut-off
if
any
one
2) Over-Hat
Gonditions
-
Warning
(3)
beeps
- - -
will
sound
to
warn the motor or controller
are
in overheat
condition.
You will
hear
(3)
beeps-
- -
every 5 seconds
until the current
system
temperature drops.
The
system
will shut off
and
the
default
amber
LED
light will
come
on and
flash; flashing
will remain until
the system
is
restarted.
lf the key
is turned off and on,
when
in
over
heat
condition,
in an attempt
to restart
the motor,
(5)
fast warning beeps
.....
(system
refusal)
will sound
indicating
the
system
refuses to start
until the
temperature
falls below
the
present
limit.
Once
the
system
has cooled,
the
(9)OK
beeps
ooooooooo
1ryill
sound and
the throttle can be
used to
power
the motor.
3)
Low Battery Condition
-
Warning
red LED
light will
come
on and begin
to flash until the
motor shuts off due
to low battery
condition.
lf
the key is turned off
and on,
when
in low battery
condition,
in an attempt
to
restart
the motor
(5)
warning beeps
.....
will sound and
red
LED
light will
remain on.
lt is recommended
that
you
recharge
the
battery
as
soon as
possible.
10

4) Pdal Assist
-
Warning
(3)
beeps
_ _ _
(pedal
assist)
will
sound every
5 seconds when
climbing
steep hills
or
during
over-heat
conditions.
System will
shut off
completely, the
red LED
light will
flash
and long
beeps_,_,_
will sound
indefinitely
until system is
restafted.
F, BAILT-III
SAFErY
FEATUNES
l) Automatic
Throtfle
ncsiet - Whenever
the
knob is turned
from
OFF to the
ON
position,
the
throttle
will
automatically
reset to
"0",
regardless
of
its
positioning,
to
prevent
motor
operation
and causing
an unexpected
movement
of the E-Bike@.
Clean using
a bike
polish
and clean rag.
DO NOT
use
i
2)Automatic
Bnke
Shut-Ul - When
either brake lever
is
power
hose
or washer.
Avoid
spraying water
directlr
applied, the
motor is
automatically
shut-off.
onto the
control switches,
motor
and front
hut
bearings. Do not
spray water
inside the
Battery
Powe
3) Sate Start - lf the
throttle is
held in
an
ON
position
Pack
compadment.
Dry the frame
mounted
electrica
while either
brake lever
is applied
and then
released,
the
connector in the
battery
pack
compartment
beforr
power
to
the motor
will
shut-off, then
gradually
increase
reinstalling
the Battery
Power Pack.
Use automotivt
from
"0"
to
prevent
a surge of
power
from the
motor.
wax
to
protect painted
sudaces. Lubricate
the
chair
periodically
to help
prevent
corrosion
and minimizr
4) Motor
Shut-otlWaning
-
As described
above warning
wear.
See the
bicycle sections
of
this
manual
for
mon
information.
11
(3)
beeps
(over
heat
or
pedal
assist) will
soun<
every 5 seconds
before the motor
shuts
off due to
over
heat
or low
battery
condition. You
must
pedal
tr
maintain
your
speed
or momentum
on
a hill or fla
surface when the
motor is
off.
5)
Garc and Cleaning
Remove
the Battery
Power Pack
before
cleaning
you
E-Bike@.
WABlIlllGt
Keep
the Battery Power
Pack
wil
Charger away lrom
water
to
pevent
elecfria
shock and damage
to ffie
charger
or battertes.

O.
PENFONMAilCE
SPECIFICANOilS
Top
S@r
13 mph
Banget
Up
to 20 miles
(up
to 15 miles without
pedaling
on economy
mode,
flat terrain,
no wind, well
conditioned battery).
ilax Gnder 8.5%
(Continuous
operation)
Batbry lile: Approx 250 cycles
Gharge
timet 2S%o - Approx t hr
50%
-
Approx 2 hrs
75% - Approx 3
hrs
95%-Approx4hrs
100%
-
Approx 4.5 hrs
BWcle
S@fic
0pntions and
Mainbnance
hrtmnalion
12

3,
FIf AIID
SAFErT
A, FTf
Make sure the E-Bike@ fits. A
bike that's too big or
too small for the rider is harder to
control and can be
uncomfortable.
WABltlllG:
It
your
E-Blke@
does
not frt
pruprly, you
may lose
aontol and
tall, ll
your
new E-Bike@
doesnrt
fit,
ask
your
dealer fu exchange it betorc
you
ride it.
The first
check for correct
size
is
standovq
height,
Standover height is the
basic element of
E-Bike@ fit.
lt
is
the
distance from the
ground
to the top
of
the
top
tube
at
that
point
where
your
crotch
would
be
if
you
were straddling the E-Bike@
by standing
half
way
between
the
saddle and the handlebar
stem.
To
check
for safe
standover
height,
straddle the E-Bike@ while
wearing the kind of shoes in which
you'll
be
riding,
and
bounce vigorously on
your
heels. lf
your
crotch touches
the frame, the E-Bike@
is too big for
you.
Dontt
even
ride
the
E-Bike@
aruund ffie block. An E-Bike@ which
you
ride
only
on
paved
surfaces and never, ever take
off-road
should
give you
a
minimum
standover height
clearancr
of one
to two inches.
l)
Saddle
posilion:
Correct saddlr
adjustment is
an
important
facto
in
getting
the most
performancr
and comfort from
your
E-Bike@
Your
dealer
will have
positione<
the saddle where
experience telh
him most
people
find
i
comfortable.
lf
you
find
the saddk
position
is
not comfortable, there are
adjustments
yor
can make.
Look at Figures 64, B and
C, and
determine which
onr
illustrates the type of saddle
attachment on
your
E
Bike@.
A saddle can be adjusted in three directions:
a) Up and down adjusfrnent, Your leg length
determiner
the
correct saddle
height. The
saddle
is
at the correc
height for
you
when, while seated on the
saddle ant
with the
crank arms
parallel
to the seat tube,
you
cal
just
reach the
"down"
pedal
with
one
heel. To
check fo
correct saddle height:
fig. 5 Slandwlr Hclght
t3

, \\\
sit on
the saddle;
place
one alignment.
Check
the adjustment
as described
above.
\W$P
heel
on
a
pedal;
llnder
no circumstances
should
ffie seat
post prcied
fiom
rb
6A lf
the tnme
beyond
iE
"Minimum
lnsertion" or
ttffiaximam
-x
rr \r
..\
rotate the crank until
the
pedal
Extension"
nart
Fig'
8),
\\At
with
Your
heel on it
is in the
. --*TJ-
down
position
and
the crank
/\
WADllllt0:llyourseatpostpoiec*trcmtheframe
tig.88 \
I
.. \
arm
is
pararrer
to the seat
tube.
/\
,!i#!,"i;rir#ri#r,Ji';,^;;:
#rff:rr;"!,
$N>
--\Y-f
lf
your
leg is
not
completely
brcak
,
which
could cause
you
to lose confrol
and
tall'
iis 6c \ \
straight and
just
touching
the
*rJ-
ijb
;:ffii;::::Hf, J.:::,'S1o'"
,y,^I:IL#^:1",fJ,:'#'fr,i1LTli""l"li",i.T,i:
Ek WY
"
"addle
back
or forward
on
its rails. Start
with the
saddle
'-/l/\
'ln
To adjust
the saddle
height, clamped
in about
the middle,
then adjust
forward or
*.r^
I
'
no.rJ
\
loosentheseatbinderbolt(Fig.
back until
you
find the
position
which
is most
liS.7
ti9,7B
t
lvvogll
Llls
ovql
vllluel vvrr
\r
rvi vq
standardErind'r QRBinder
7a &b; see also Section
3.
Bon comfortable
for
you.
Then,
retighten
the saddle
Seat
Post
Quick
Releases) and clamping
mechanism
as
tight as
you
can.
move the seat
post
up or down
as
required.
Then, make sure
c) Saddle
tilt adjustment.
Most
people prefer
a
that the saddle
is
parallel
to
the horizontal saddle;
but
some
riders
prefer
to have the
top tube of
the E-Bike@,
and saddle
nose
tilted up
just
a
little, and others
prefer
it to
retighten
the seat binder
bolt be
tilted down
just
a little.
You can
adjust saddle
tilt
by
tight enough
so
that
you
cannot
loosening
the saddle
clamping
mechanism,
tilting the
twist the saddle
out
of saddle
to
the desired
position,
and
retightening
the
mrn
nton
m8*
14

saddle
clamping mechanism tight
enough so that
you
cannot
move
or
jiggle
the
saddle. Very small changes in
saddle
position
can have
a substantial effect on.
performance
and comfort.
Consequently,
whenever
you
make a
change
to
your
saddle
position,
make only
one
directional change at a
time,
and make the changes in
small increments
until
you
have found
the
position
at
which
you
are
most
comfortable.
WABlllllG: Atter
any saddle adjusfrnent,
bc surc to
tighten tfie salddle
adjusting
mechanism
pmperly
Morc riding, A loose
saddle clamp or seat
post
binder
can
caase damage to tfie seat
post,
or
can
cause
you
to
lose
confrol and tall, A conecily tightened
saddle
adiusting muhanism will allow no
saddle
movement
in any
direction. Peridially check to make
sure fltat the saddle
adjusting nuhanism is
ptoprly
tightened.
lf, in
spite of carefully adjusting the
saddle
height, tilt
and
fore-and-aft
position,
your
saddle
is
still
uncomfortable,
you
may need
a different saddle design.
Saddles, like
people,
come in many
different shapes,
sizes
and resilience. Your
dealer can help
you
select
a
saddle
which,
when
correctly adjusted for
your
body
and
riding
style, will be comfortable.
CAllflOll:
Etundd riding with
a sddle which it
inconecfly adjusted or which
does
not
supry
your pelvic
arca coneofly can caase
short-|arm o
long-term iniury
fu
nenes
and blood
yessers,
ll
your
saddlr
Gauses
you pain
or
numbness,
adjust tfie nddle
lulsitiot
and
your
rtding
position.lt
pain
or numbness
percist,talktr
your
dealer afuut
lifting
a diftercnt saddle to
your
E-Bike@
2) Handlebar height and angle: lf
your
E-Bike@ is
equipped with a
stem which clamps
directly on
to
the
outside of
the
steering
tube,
your
dealer may be able to change
bar
height
by
moving height
adjustment spacers
from
below
the stem to above the stem, or vice versa.
Otherwise
you'll
have to
get
a
longer
stem
with
a higher rise
Consult
your
dealer. Do not
attempt
to
do tfiis
yourselt,
at
it requires spial Rnowldge Your wananU
nay Incomr
invalid if tfie ortginal
parts
arc changa
But
on most
bikes
you
can
raise
or
lower
your
handlebars
a bit [r
adjusting stem
height. Loosen the
stem binder
bolt b,
turning it
counterclockwise three or four full turns.
lf thr
bolt
rises
but
the
stem doesn't,
get a piece
of wood o
a soft
mallet
and
give
the
bolt a
good
whack to releasr
15

the
wedge.
Adjust
the stem
position
as
desired,
align
stem
with
tire, and
retighten
the binder
bolt
tight
enough
so
that
you
cannot
twist
the stem
and
handlebars
out of alignment.
Under
no circamslanoes
should
the stem
be retightened
with
its
ntinimum
lnserliontt
or
"Maximum
Extensiontt
mail< visible
Check
to
make sure
that the
handlebars
rotate
freely
in
both
directions
without
the brake
cables
catching
or
binding
on anything.
/l\
CAllflOllt
0n sorne
bicycles,
changing
s|am
height
U+.1\
can alferlt
the
tension oJ
ffie
ttont brake
cable,
locffing
ffie
frcnt brake
or cleating
sullicient
cable
slack
to
make
the
tront brake
inoperable
lt ffie
tront brake
shoes
move
in towards
tfie
wheel rtm or
out away
ftom
tfie
wheel
rtm when
yoa
change
stem
height,
take
your
E
Bike@ to
your
dealer
tor wtwt
bnke
adlushrent
betore
rtding
it.
WABIIING:
The sten's
lllinimum
lnsertion
Mad<
must not be
visible above
the
top of
the
headset
(see
Fig, 9),
lt the
stem
is
extended
beyond
fie
Minimum
Insertion
Ifrart
the stem
may damage
the
loilr's s|aerer
tabe
or
fueak,
which
coatd cause
you
to lose confrol
and
fatl,
You can change
the angle of
the handlebar
or bar
end
extensions
by
loosening
their binder
bolt,
rotating
the
bar or extension
to the desired
angle,
recentering
it and
retightening
the binder
bolt
tight enough
so
that
the
bars or
extensions
can't
move
in
relation
to each other
and
the stem.
//\
WABltllIG:
Failure
to
properly
tigh/r;n
ffie stun
I
\
binder
bolt,
the
handlebar
binder
bolt
or tlrc bar
end
ertension
clamping
bolfs
may compromise
steering
action,
which
could
eause
you
to lose contol
and tall'
PIae
ffie
ttont
wheel
ol
the
E Bike@ between
your
legs and
attempt
to
twist ffie
handlebarlstem
assembly,
lt
you
can
twist
fie stem
in relation
to
the tront
whnl, fum
tfie
handtebarc
in
relation
to the
stem,
or
turn the
bar end
ertensions
in relalion
to
the
handlebar,
tighten
the bolk,,
Control
position
adjustments:
The brake
and
shifting
controls
on
your
E-Bike@
are
positioned
where
they
work best
for most
people.
The angle
of
the controls
and
their
position
on
the handlebars
can
be changed'
Ask
your
dealer
to show
you
how,
or
to make
the
adjustments
for
you.
3)
Brake
reach:
Many bikes
have brake
levers
which can
be
adjusted
for reach.
lf
you
have
small
hands and
find
16

it difficult
to
squeeze
the
brake
levers,
your
dealer can
either
adjust the
reach
or
fit
shorter
reach
brake
levers.
WABllltE: fhe shorbr the bnke lever
reach,
ilte
morc
aitical
itisro. haye
mmcilyadiustd
brakes,
so that
iull
bnking
power
can be applied wftnin available
brake
lever frayel, Bnke leyer tavel insutlicient
to
apply
tull bnffing
Nwq
an rcsuft
in loss
of contol,
which may
rcsult
in serious injury or deatfi.
B, SAFETY
EQUIPMEII|
WABlIlllG: Many slales require specilic satety
deyiw.
lt is
your
rcspnsibility
to lamiliarize
yourcelt
with the
laws
ol
the state where
yoa
ride and to
comply
with all applicable
laws, including
properly
equipping
yrurwlt
and
your
E-BiRe@ as fie law rcquires,
WABllllJE:
Do not ,emove ffie reflectorc or lighfs
fiom
your
E-Bike@. fhey arc an lnfugral
part
of the
E-Bike@'s nW system.
Bemoving ffie rellectorc or lights
may reduce
your
vtsibility to
otfierc using
the roadway,
Being sffrttdt by ofltu
yehicles
otten rcsulb
in
serioas
injury
or death, Bernemfp;n
rfrectorc
arc
not
a substifute
ior
ligh|s,Alwapinsurcyour
E-Bike@ with is
quippd
with
all
state and
locally mandatd liglt&,
l) Pedals:
(See
also Section 5.E and 5.F.) Some
highe
performance
model bicycles come equipped
witl
pedals
that have sharp
and
potentially
dangerour
surfaces.
These
surfaces
are designed
to
add safety b'
increasing
adhesion
between
the rider's
shoe and
thr
E-Bike@
pedal.
lf
your
E-Bike@ has this type
of
high
per-formance pedal you
must take
extra care
to
avoir
serious injury
from the
pedals'
sharp sudaces. Baser
on
your
riding
style
or skill level,
you
may
prefer
a
lesr
aggressive
pedal
design.
Your
dealer can show
you
number of ootions and
make
suitabl,
recommendations.
2) Eye
pruEction:
Any kind
of
riding, but
particularly
off
road riding, involves airborne dirt, dust and bugs, so
it'
a
good
idea always
to ride with
protective
eyewea
tinted
when the
sun
is bright, clear
when it's
not. Mos
E-Bike@ shops carry
protective
fashion eyewear, som
with interchangeable
lens
systems.
17

C,
MECHAITICAL
SAFErY
CHECK
Here
is a simple,
sixty-second
mechanical
safety
check
which
you
should
get
in
the habit
of
making every
time
you're
about
to
get
on a
E-Bike@.
l)
ltuts, bor|s-
& staps:
Lift
the front
wheel
off
the
ground
by
two or
three
inches,
then
let it bounce
on
the
ground.
Anything
sound,
feel or
look
loose?
Do a
quick
visual
and
tactile
inspection
of
the whole
E-Bike@.
Any
loose
parts
or
accessories?
lf so, secure
them.
lf
you're
not
sure,
ask
someone
with experience
to check.
2)
fircs &
Wheels:
Tires correctly
inflated?
Check
by
putting
one
hand on
the saddle,
one
on
the intersection
of
the handlebars
and
stem,
then
bouncing
your
weight
on
the
E-Bike@
while looking
at
tire deflection.
Compare
what
you
see
with
how
it looks
when
you
know
the
tires are
correctly
inflated; and
adjust
if
necessary.
See Section
5.F.1
for details
and
recommended
tire
pressures.
Tires
in
good
shape? Spin
each
wheel slowly
and
look
for cuts
in the
tread and
sidewall.
Replace damaged
tires before
riding
the
E-Bike@.
Wheels
true? Spin
each
wheel
and
check
for brake
clearance
and
side-to-side
wobble.
lf a
wheel
wobbles
side
to side
or
hits the
brake
pads,
take
the
E-Bike@
to
a
qualified
bike
shop
to have
the
wheel
trued.
/N
CNIflDlt:
Wheets
must be
frue
tor tfie
bnkes
to
l-:-\
woil
efteotively,
Wheel
tuing
is a skill
which
rcquires
sryial
tools
and expertence
Do
not attempt
to
true a
wheel
unless
you
have
the
knowledge
and
tools
nffid
to do
the
iob
mneotlY,
3) Bnkest
Squeeze
the brake
levers.
Are
the brake
quick
releases closed?
The straddle
cable
securely
engaged?
Are the
brake
shoes
contacting
the
wheel
rim
within an
inch
of brake
lever
movement?
Can
you
apply
full
braking
force at
the
levers
without
having
them
touch
the handlebar?
lf not,
your
brakes
need
adjustment.
Do
not ride
the E-Bike@
until
the brakes
are
properly
adjusted.
See
Sections
5.C.1
and 5.C.2
for details.
WABtlllJG:
Biding
with
improprly
adiustd
brakes
or
worn bnke
shoes
is dangerous
and
can rcsult
in serious
iniury
or deafi'
18

4)
Quick
Beleases: Are the front wheel, rear wheel
and
seat
post quick
releases
properly
adjusted
and in the
locked
position?
See Section
5.A and 5.8 for details.
WABltlilA: Biding with an improperly adjusted
wheel
quick
rclease can caase the
whrel to wobble
or disengage
lrom
the
E-BiRe@, which
Gan aause damage
to
the E-Bike@ and serious injury or death,
Handlebar and saddle alignment: Are the saddle and
handlebar
stem correctly
parallel
to the bike's top tube
and
tight enough so
that
you
can't
twist them
out of
alignment?
Handlebar ends:
Are the handlebar
grips
secure and
in
good
condition?
lf not, replace them. Are the handlebar
ends and extensions
plugged?
lf not,
plug
them before
you
ride.
WABrllllE : Loose or damagd handlebar
grtps
or
ertensions Gan Gaase
you
to lose
control
and tall.
Unpluggd
handlebarc
or ertensions can act
like a cookie
cutter
on
your
body, and can cause serious
injury in
an
otfieruise
minor
accident,
4,HDIITG
SAFELY
AND NESPOIISIBLY
ll0TE: Like
any
spott, bicycling involves
rtsk
ol
injury
anr
damage,
By choosing fu rtde a E-BiRe@,
yoa
assume ill
rcsponsibility
tor that risk llot the
people
who
sold
you
ill
E-Bike@. llot ffie
people
who made
it.
llot the
people
wh,
disfrihute
it. llot the
people
who
manage
or
maintain
th
roads or trails
you
ride
on.
You.
So
you
need to Rnow
--
an'
to
practice
-
the rules ol safe and responsible riding,
A.fTlE
BASICS
1)Always
do
the Mechanical
Safety
Check
(Section
3.C
before
you
get
on a E-Bike@.
2)Always wear a helmet which complies with
your
stat,
laws when
riding the E-Bike@.
Check
with
your
loce
police
depadment
for requirements
in
your
community
3)
Be
careful
to keep body
parts
and other objects awa
from the sharp
teeth
of chainrings;
the moving
chair
the turning
pedals
and cranks; and
the
spinning
wheel
of
your
E-Bike@.
r9

4) Always
wear shoes
that
will stay on
your
feet and
will
grip
the
pedals.
Never ride barefoot
or
wearing sandals.
5)
Be thoroughly
familiar
with the controls
of
your
E-
Bike@.
6)
Wear bright,
visible clothing
that
is not so
loose
that
it can
catch on
moving
parts
of
the
E-Bike@ or
be
snagged
by objects
at
the side of
the road or
trail.
7) Don't
jump
with
your
E-Bike@.
Jumping
an
E-Bike@
can
be
fun; but
it
puts
incredible
stress
on everything
from
your
spokes
to
your
pedals.
Perhaps
most
vulnerable
to
jumping-related
damage
is
your
front
fork.
Riders
who insist on
jumping
their
E-Bike@s
risk serious
damage,
to their
E-Bike@s as
well as
to themselves.
8)
Think about
your
speed,
and
keep
your
speed
at a
level
which
is consistent
with conditions.
Always
keep
in
mind that
there
is
a direct
relationship
between
speed
and control,
and
between
speed
and component
stress
E NULES OFTHE
BOAD
1)
You are sharing
the
road
with others
--
motorists,
pedestrians
and other
cyclists.
Respect
their
rights,
and
be
tolerant
if they infringe
on
yours.
2)
Ride defensively.
Assume
that
the
people
with
whom
you
are
sharing
the road are
so absorbed
with
what
they a
re doing
and
where
they are
going
that
they are
oblivious
to
you.
3) Look
ahead
of
where
you're
going,
and
be
ready to
avoid:
.
Vehicles slowing
or
turning
in front of
you,
entering
the
road or
your
lane ahead
of
you,
or
coming
up behind
you.
e
Parked
car doors
opening
in front of
you.
.
Pedestrians
stepping
out
in front of
you.
'
Children
playing
near
the road
.
o
Pot
holes, sewer
grating,
railroad
tracks,
expansion
joints,
road
or sidewalk
construction,
debris
and
other
obstructions
that could
cause
you
to swerve
into traffic
,
catch
your
wheel
or otherwise
cause
you
to lose
control
and
have an
accident.
.
The many
other
hazards
and
distractions
which can
occur
on
a
E-Bike@
ride.
20

4)
Use
hand signals
for turning and stopping.
Learn the
local
vehicle
code
for the correct signals.
5)
Never ride with
headphones.
They mask
traffic
sounds
and emergency
vehicle sirens,
distract
you
from
concentrating
on
what's
going
on around
you,
and
their
wires can
tangle in the
moving
parts
of
the E-Bike@,
causing
you
to lose
control.
6)
Never carry a
passenger.
7)
Never
carry
anything
which obstructs
your
vision
or
your
complete control
of
the E-Bike@, or
which could
become
entangled
in the moving
parts
of
the E-Bike@.
8)
Never
hitch a ride by holding on
to another
vehicle.
9) Don't do stunts,
wheelies
or
jumps.
They can cause
you
injury and damage
your
E-Bike@.
10)
Don't weave through
traffic or make any
moves
that
may surprise
people
with whom
you
are
sharing
the
road.
12) Never
ride
your
E-Bike@
while under
the
influence of
alcohol or
drugs.
13) lf
possible,
avoid
riding in bad
weather,
when
visibility
is obscured,
at dusk or
in the dark,
or
when
extremely
tired. Each of
these conditions
increases
the
risk of accident.
C,
WET
WEATHEN
HDIIIE
WABlllllG:
Biding in
wet conditions
is nol
recommended,
Wet
weather impairs
traction'
braking and
visibility,
tuth
tor ffie rider and
tor othet
vehicles
sharing
the road,
fhe risk of accident
is
dnmalically
increased
in wet conditions,
Under
wet conditions,
the
stopping
power
of
your
brakes
(as
well as
the
brakes
of other
vehicles sharing
the
road) is dramatically
reduced
and
your
tires
don't
grip
nearly as
well. This makes
it harder
to
control
speed and
easier
to lose control.
To make sure
that
you
can slow
down and
stop safely
in wet conditions,
ride
more
slowly
and
apply
your
brakes
earlier and
more
gradually
than
you
would under
normal, dry conditions.
See also Section
5.C.
21
11) Observe and
yield
the
right
of
way.

0,
lllGHT HDII]G
reflective device or
light
source
that moves will help
you
get
the
attention
of approaching
motorists,
pedestrians
Even
if
you
have
excellent
night vision, many of
the
and
other traffic'
people
with whom
you're
sharing
the road don't. A rider
is very
difficult
for motorists and
pedestrians
to see at
Make sure
your
clothing or anything
you
may
be
dusk, at
night,
or at other
times of
poor
visibility.
lf
you
carrying on
the E-Bike@
does not obstruct a reflector or
must ride
under
these conditions, check and
-be
sure
light'
you
comply
with all local laws about
night riding; follow
the Rules of
the Road
and of
the irait
evJn
more
While riding at dusk or at
nightt
carefully, and
you
must take the following additional
precautions:
o
Ride slowlY'
Before riding at dusk or at
night, take the following
'
Avoid areas of
heavy traffic, dark areas, and roads
steps
to make
yourself
more visible:
with speed
limits over 35
mph'
Make sure that
your
E-Bike@ is
equipped
with
correctly
'
Avoid road hazards'
positioned
and securely
mounted reflectors
(see
Section 3
B).
.
lf
possible,
ride on routes already
familiar to
you.
Purchase and
install
an adequate
battery or
generator
powered
head and
tail light.
Wear light colored,
reflective
clothing
and
accessories,
such
as a
reflective vest, reflective arm and leg bands,
reflective stripes on
your
helmet, flashing lights ... any
22

5.
HoW THIilnS W0nK
It's
important to
your performance,
enjoyment and
safety
to
understand
how things work on
your
E-Bike@.
Even
if
you're
an experienced bicyclist,
don't assume
that the way things
work
on
your
new E-Bike@ is
the
same
as how they work on older bikes.
Be sure to read
-
and
to understand - this section of
the Manual. lf
you
have
even
the
slightest
doubt as
to whether
you
understand something,
talk to
your
dealer
.
A. NEMOWIIG AIII'
ffISTATIIIIG BOLT-0il WHEEUS
l) Bemoving a Boft-0n FrcntWheel
a) Open up
the
brake shoes
(see
Section
5.C.1,(Figs.
16
a,b,c and d).
b)
With
a
'15mm
box
wrench or a six
inch
adjustable
wrench.
loosen the two
axle
nuts.
c)
lf
your
front
fork has
a clip-on
type secondary
retention
device, disengage it and
go
to
step
(4).
lf
your
front fork has an integral secondary
retention device,
loosen
the
axle
nuts about six
full turns;
then
go
to step
(4).
d)
Raise the front
wheel a few inches off
the
ground
and
tap the top of
the wheel
with the
palm
of
your
hand to
knock the wheel out
of the fork ends.
2) lnstalling a Bolt-0n
Front Wheel
a) With
the
steering
fork
facing forward,
insert the wheel between
the fork
blades so
that the axle seats
firmly
at
the top of the slots
which are at
the tips
of
the fork blades.
The
axle
nut washers
should be on
the outside. between
the
fork
blade and
the axle
nut. lf
your
E-Bike@
has
a clip-
on
type secondary
retention device, engage
it.
b) While
pushing
the wheel
firmly to the top of the slots
in
the fork
dropouts,
and at
the
same
time centering the
wheel
rim in the fork, use a six-inch adjustable
wrench
or a
1Smm
box
wrench
to tighten the axle nuts as tight
as
you
can.
c) Close
the brake shoes;
then
spin
the wheel
to
make
lig.
l5a
Bolt-on
whed h
Frcnt Drop
23

sure
that it is centered
in the frame
and
clears the brake
shoes.
3) Bemoving
a Bolt-0n
BearWheel
a) Open
the rear brake shoes
(see
Section
5.C.1,
Figs.
16a,
b, c and
d).
b) Shift
the rear derailleur
to high
gear (the
smallest
rear sprocket)
and
pull
the
derailleur
body back
with
your
right hanc.
c) With a
1Smm box
wrench
or
a six-inch adjustable
wrench,
loosen the two axle
nuts.
d)
Remove
the motor torque arm bolt
in the left side
seat stay
above
the drop out.
e)
Disconnect
the motor wire harness at
the
quick-
release
junction
box
on the inside of
the left seat stay
f) Reattach
the motor
harness connectors and
close the
above
the motor torque arm bolt.
junction
box.
0
Lift the
rear wheel off
the
ground
a
few inches and,
g)
Close
the brake;
then spin
the wheel to
make
sure
24
with the derailleur
still
pulled
back,
push
the
wheel
forward and down
until
it
comes
out of
the rear
dropouts.
4) lnstalling a Bolt-0n
Bear Wheel
a).Shift
the rear derailleur
to
its
outermost
position
and
pull
the derailleur
body back
with
your
right hand.
b)
Put the chain on
to the smallest
sprocket. Then,
inserl the wheel
into the
frame dropouts and
pull
it
all
the way
in to the dropouts.
The axle
nut washers should
be on
the
outside,
between
the
frame
and
the axle nut.
c)
Reinstall the
motor torque arm and
bolt.
d)
Tighten
the
axle
nuts as
tightly as
you
can, using a
six-inch
adjustable
wrench or
a 15mm box
wrench.
e) Push
the rear derailleur
back
into
position.
Boll-on
Wh€ol h
Roar &opouls

that
it is
centered
in the frame and clears
the brake
shoes.
B.
SEATPOST
QAICK
NELEASE
Most E-Bike@s are equipped
with
quick-release
seat
post
binders.
The
seatpost
quick-release
binder
works
exactly
like the wheel
quick-release (Section
3.A.1)
While a
quick
release looks like a long bolt
with a lever
on one end and a
nut
on
the other,
the
quick
release
uses
a cam action to firmly clamp
the seat
post
(see
Figs. 78 and 11).
WARlllllG: Eiding wlilr an
improperlylightened seat
post
can allow
ilrc
saddle
to turn or
move and
cause
you
to lose contol and
fall. Thercforet
l, Ask
your
dealer to
help
you
make sare
yoa
know how to
corredly clamp
your
*at
post,
2.
Underctand
and apply tIrc nnect
technique for clamping
your
seat
post quick
rclease
3.
Beforc
you
ride the E-Bike@,lirct check
ffiat tfie seatpost
is
secwely clamped,
Adjusting tfie
quick
rcla*
meohanism
The action of
the
quick
release
cam
squeezes
the seat
collar
around
the seat
post
to hold
the seat
post
securely
in
place.
The amount of
clamping
force is
controlled
by
the tension adjusting
nut.
Turning the
tension adjusting
nut clockwise
while
keeping the cam
lever from rotating
increases clamping
force;
turning it
counterclockwise
while
keeping the cam
lever from
rotating reduces clamping
force.
Less than half a turn of
the tension adjusting
nut
can
make
the
difference
between safe
clamping
force and unsafe clamping
force.
CAU|IOII:
Holding the
nut with one hand and
turning the
lever like a wing
nut with the other hand until
everyfiing
is as tight as
you
can
get
it will not clamp the
seatpost
ntely,
fhe lall lorre of
the
cam
action
is needed
to
clamp
ffie seatpst securcly.
C,
BMKES
NOTE:
For most effective braking,
use both brakes and
apply
them
simultaneously.
25

WAfilllllGt Sudden or excessive application
of the
front brake may
pitch
the
rider
over
the
handlebarc,
causing sertous
iniury
or death,
l) How brakes
wot*
It's important
to
your
safety that
you
instinctively know
which brake
lever
controls
which brake on
your
E-
Bike@. In the U.S., bikes
are required to be set up
with
the right brake
lever controlling the rear brake, and
the
left lever controlling
the front brake.
The braking
action of a
E-Bike@ is a function
of
the
friction between
the brake surfaces
--
usually
the
brake
shoes
and
the wheel rim. To
make
sure
that
you
have
maximum
friction available,
keep
your
wheel rims and
brake
shoes clean and
free
of
lubricants. waxes or
polishes.
Make
sure
that
your
hands
can
reach
and
squeeze
the
brake
levers comfortably.
lf
your
hands are too small
to
operate
the
levers
comfortably,
consult
your
dealer
before
riding
the E-Bike@. The lever reach may be
adjustable;
or
you
may need a different brake
lever
design.
Most brakes have some
form of
quick
release
mechanism
to allow the brake shoes
to clear the tire
when a wheel is
removed
or
reinstalled.
When the
brake
quick
release
is in the open
position,
the
brakes are
inoperative.
Ask
your
dealer
to make
sure
that
you
understand
the way
the
brake
quick
release works on
your
E-Bike@
(see
Fig. 164, B, C &
D)
and check each
time
to
make sure
both brakes
work correctly
before
you get
on the E-Bike@.
Brakes are designed
to control
your
speed,
not
just
to
stop the
E-Bike@. Maximum braking
force for each
wheel occurs at
the
point
just
before
the wheel
"locks
up"
(stops
rotating) and
starts to skid. Once
the tire
skids,
you
actually
lose most of
your
stopping
force
and
all directional control.
You need to
practice
slowing and
stopping smoothly
without locking up a
wheel. The
technique is called
progressive
brake
modulation.
Instead
of
jerking
the
brake
lever to
the
position
where
you
think
you'll generate
appropriate braking
force,
squeeze
the lever,
progressively
increasing
the
braking
force.
lf
you
feel the
wheel
begin
to lock up, release
pressure
just
a
little to
keep the wheel rotating
just
short
of
lockup.
lt's impodant
to
develop
a feel for the
26

amount
of brake lever
pressure
required for each
wheel
at different speeds and
on different surfaces. To better
understand this, experiment a
little
by
walking
your
E-Bike@ and applying different amounts of
pressure
to each brake
lever.
until
the wheel locks.
CAIlfIOltt Sonre E-Bike@ brakes, sach as
linear-pull
and disc bnkes, arc etrfremely
powerful.
You
should
take
ettta carc in Mcomlng tamiliar wiffi these brakes and
exertise
particular
Gare
when
asing
them,
When
you
apply one or both brakes,
the E-Bike@
begins
to
slow, but
your
body
wants to
continue
at the
speed
at which it was
going.
This causes a transfer of
weight to the front wheel
(ot
under heavy braking,
around
the front wheel hub, which could send
you
flying
over the handlebars). A wheel
with more weight
on
it will
accept
greater
brake
pressure
before
lockup; a wheel
with less weight will lock
up
with less brake
pressure.
So,
as
you
apply brakes and
your
weight shifts
forward,
you
need to
shift
your
body
toward the rear of the E-
Bike@,
to transfer weight
back on
to the rear wheel; and
at the same time,
you
need to
both decrease
rear
shift weight
forward .
The keys to effective speed
control and safe stopping
are controlling
wheel
lockup
and
weight transfer.
Practice
braking
and
weight transfer techniques where
there is no
traffic
or other
hazards and distractions.
Everything changes
when
you
ride on loose surfaces
or
in wet weather. Tire
adhesion is
reduced.
so
the wheels have less
cornering and braking
traction and can
lock
up
with less brake force.
Moisture or dirt on
the
brake shoes
reduces
their
ability
to
grip.
The way to
maintain
control on
loose
or
wet sur faces is to
go
more
slowly
to
begin
with.
2, Adjusting
your
brakes
lf either brake lever on
braking and
increase front
braking
force. This is even
more important
on
steep descents, because descents
fio-
16
27
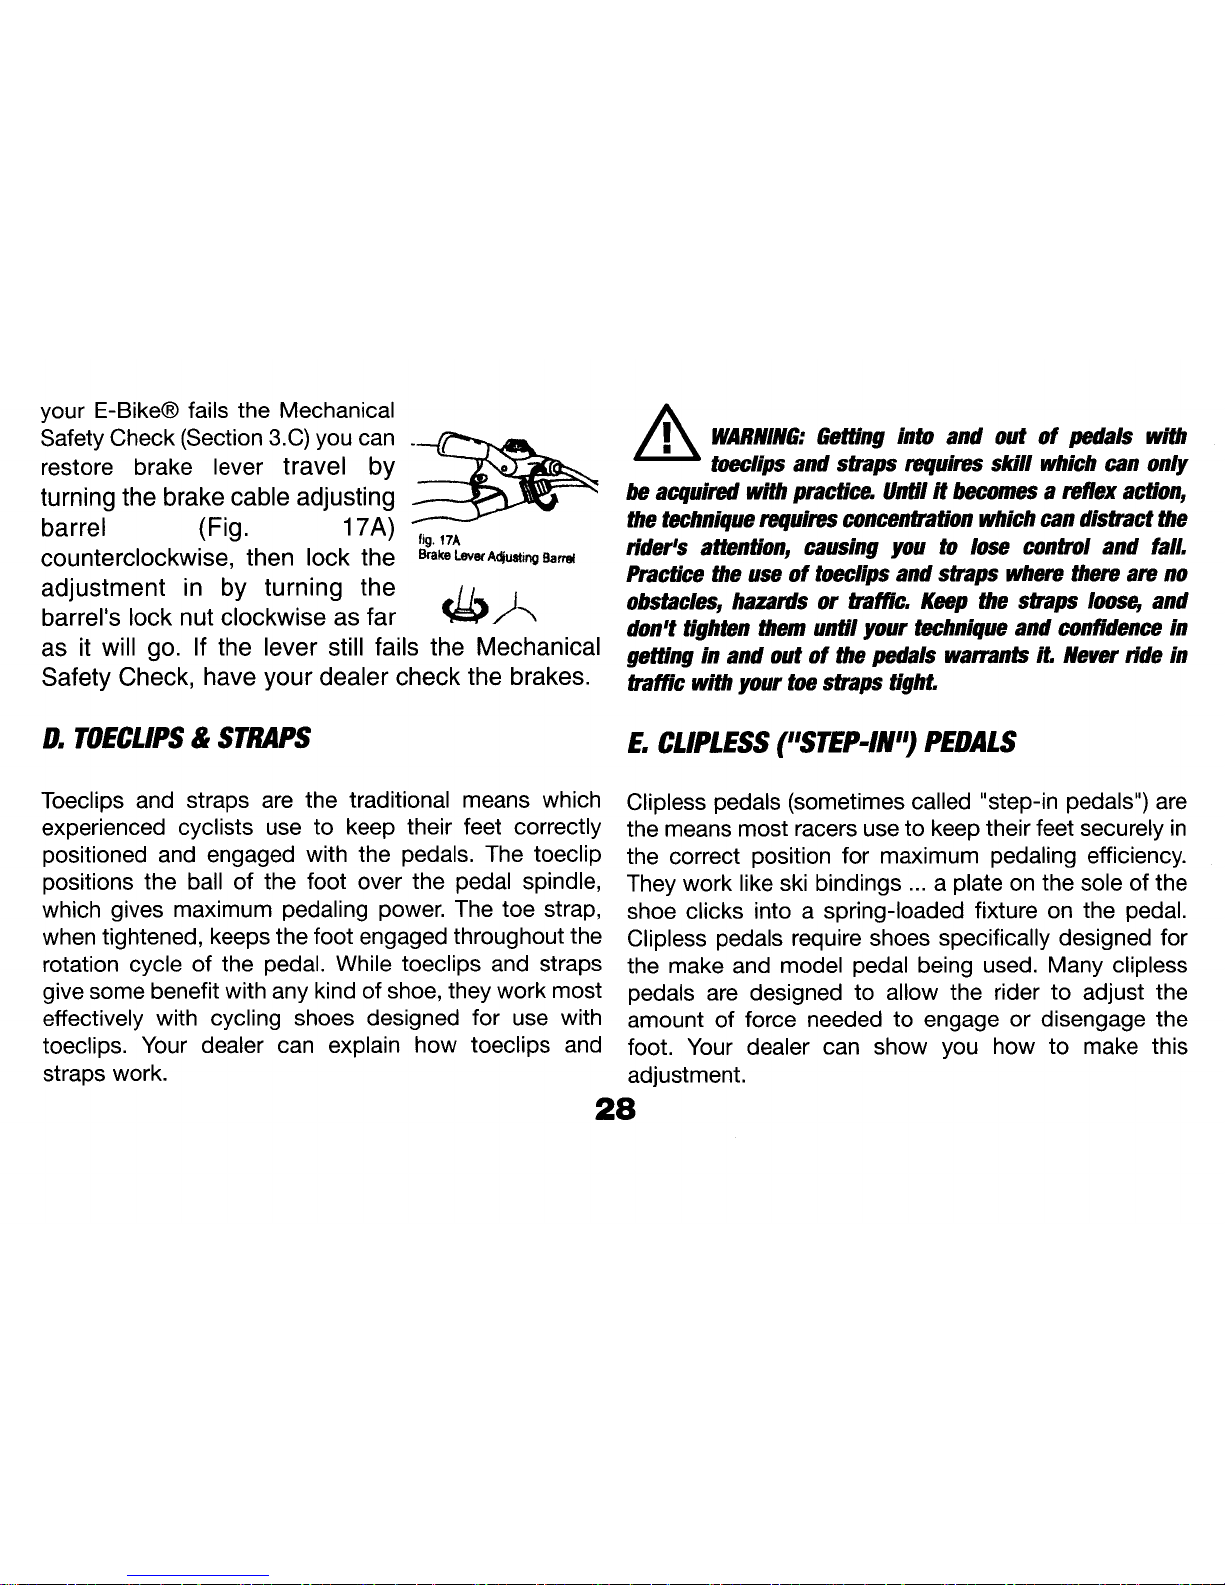
your
E-Bike@ fails the Mechanical
Safety
Check
(Section
3.C)you can
restore brake
lever
travel by
turning the brake cable
adjusting
barrel
(Fig.
17
A)
counterclockwise,
then
lock the
adjustment
in by turning
the
barrel's
lock nut clockwise as
far
lig.
t7A
&ake
[€!re.
Aquding
Barsl
tArl-..
WABlllllG: Getting
into
and out ol
@als
with
toulips and
staps requircs sldll
which
can only
M acquired
with
praclice,
Unfrl
it
Mmes a
reflex
aclion,
the twhnique rquircs aoncentafron
which can distactthe
rider's athnfron,
causing
you
to lose confrol and tall,
Pnc'tice ffie use ol treclips
and staps wherc there arc no
obstacles,
hazards or
taffrc, Kep fie staps
loose,
and
don't tighten
ffiem until
your
tcchnique and @nfldence
in
getting
in
and
out of tfie
pedals
wamnE it llever fide in
tattic with
your
toc staps tight.
as
it will
go.
lf the lever
still
fails the Mechanical
Safety Check,
have
your
dealer check
the brakes.
D. TOECUPS & STNAPS
E.
CLIPLESS
('STEP-ilil',)
PEDALS
Toeclips and
straps are the traditional
means which
Clipless
pedals
(sometimes
called
"step-in
pedals")
are
experienced
cyclists use
to keep their feet correctly
the
means most
racers
use
to keep their feet securely in
positioned
and engaged
with the
pedals.
The toeclip
the
correct
position
for maximum
pedaling
efficiency.
positions
the ball of the
foot
over
the
pedal
spindle,
They
work like ski bindings
...
a
plate
on
the
sole of
the
which
gives
maximum
pedaling power.
The toe strap,
shoe clicks
into a spring-loaded
fixture on
the
pedal.
when
tightened,
keeps the foot
engaged
throughout
the
Clipless
pedals
require shoes specifically
designed for
rotation cycle
of the
pedal.
While toeclips
and straps
the
make
and
model
pedal
being used.
Many clipless
give
some
benefit
with
any
kind of shoe, they work
most
pedals
are designed
to allow the rider
to
adjust
the
effectively
with cycling shoes designed
for
use
with
amount of
force needed
to
engage
or disengage the
toeclips.
Your dealer can explain
how toeclips and
foot. Your dealer
can show
you
how to make this
straps
work.
adjustment.
2A

WABlllllE:
Cllpless
@als
arc
infundd fu
ase
wlflr
shoes
specilically
made to tit them and are
deslgned to fimly kep
fie
toult
engagd
wilh lfie
Nar,
Pncliee is rquitd
fu learn to engage anil di*ngage tfie
toot
sately. Unttl engaging and disengaging
the foot
becomes a rellex
actlon,
the technique
requires
eono;ertflralion nfiid, can dlsfrac't flrc rlderts atbntion,
auslng the
rtdq
b tosc nntol and
tall, Pncfire
engaglng
and dt*ngaging cliples
Nals
in a
place
whqe thqe
arc
no
obstacles, hazails
at
tatfrG,
F, NNES AIII' ilUBES
-
-grg!ge!{€.!Aa_
Bicycle tires
are available in many
designs and specifications,
ranging
from
general-purpose
designs
to
"
------------
tires designed to
perform
best
were
the
best balance
of
performance
and
value for the
use
for which the
E-Bike@ was intended. lf, once
you've
gained
experience
with
your
new E-Bike@,
you
feel that
a
different tire might better suit
your
riding needs,
your
dealer
can help
you
select
the most
appropriate design.
The size,
pressure
rating, and on some
high-
performance
tires the specific recommended use, are
marked on the sidewall of
the
tire
(see
Fig. 20). The
part
of
this information which
is
most important
to
you
is Tire
Pressure.
//\
wABltlltl: ltever intlate a tirc Myond tlrc nnximum
4\
ll.r;ssate
mailrd
onfielirc'ssidewall.
ExMing
ilrc rwmnndd maximum
prmsarc
rmy
blow
tfie frrc
ott
flrc
rtm, whlch
oould
calase damage to fie E-Bike@ anl
iniury tu flrc
rldq
and
bystanderc,
The
best
way to inflate a E-Bike@ tire to the correct
pressure
is with a Bike
pump.Your
dealer can
help
you
select an appropriate
pump.
CAUTION:
Gas station air
hoses move a large volume of
air
very rapidly,
and
will raise the
pressure
in
your
tire
very rapidly. To avoid overinflation
when
using a
gas
L ftues
under
very
specific
weather
or
terrain conditions. Your E-Bike@
has
been equipped
with tires which
the E-Bike@'s manufacturer felt
----.----
-
-
iOlAflXO
Dlltettol
<
tig.20n|r
Martingr
29

station
air
hose,
put
air
into
your
tire in short, spaced
bursts.
Tire
pressure
is
given
either as
maximum
pressure
or as
a
pressure
range.
How a tire
performs
under
different
terrain or
weather conditions depends
largely on
tire
pressure.
Inflating
the tire to
near its maximum recommended
pressure gives
the lowest rolling resistance; but
also
produces
the harshest ride. High
pressures
work best
on smooth,
dry
pavement.
Very low
pressures,
at the bottom of
the recommended
pressure
range,
give
the best
performance
on
smooth,
slick
terrain such as
hard-packed clay, and on
deep,
loose surfaces
such as deep, dry
sand.
Tire
pressure
that is too low
for
your
weight and
the
riding conditions
can cause
a
puncture
of
the tube by
allowing
the
tire to
deform
sufficiently
to
pinch
the
inner
tube between
the rim and the
riding
surface.
CAlIfl0t*
Pencil
ffi
automolive
tire
gauges
and
gas
shtlon air
hose
prcssure
sefiings
are
genual$
inaccuraE and
should
not M depndd on
lor
@rnis&;lti
accurate
pressurc,lnstead,
usc
a
gM qualtU
dial
gaage,
Ask
your
dealer
to recommend
the best
tire
pressure
for
the kind of
riding
you
will most often do, and
have the
dealer
inflate
your
tires
to that
pressure.
Then, check
inflation
as described
in Section
3.C so
you'll
know how
correctly
inflated tires should
look
and
feel.
Some
tires
may
need to be brought
up
to
pressure
every
week
or
two.
Some
special
high-performance
tires have
unidirectional
treads: their
tread
pattern
is
designed
to
work better
in
one
direction
than
in the
other.
The
sidewall
marking of a
unidirectional
tire will have an
arrow
showing
the correct
rotation direction.
lf
your
E-
Bike@
has unidirectional
tires, be sure
that they are
mounted
to rotate
in the correct direction.
2, TNE
UALVES
The
tire valve allows
air
to
enter
the
tire's inner tube
under
pressure,
but
doesn't
let it back out unless
you
want
it to.
30

There
are
primarily
two kinds
of
bicycle
tube
valves
(actually,
there
are other designs,
but
they
are seldom
seen
in the
US
any
more): The
Schraeder Valve
and
the Presta
Valve. The
bicycle
pump you
use must have the
fitting appropriate
to the valve
stems on
your
E-Bike@.
The Schneder
(Fig.
21a) is like
the valve
on a
car
tire. To inflate
a Schraeder valve tube,
remove
the valve
cap and
push
the
air
hose
or
pump
fitting
onto
the
end of
the
valve
stem. To let air
out of a
Schraeder valve,
depress
the
pin
in the
end of
the
valve
stem
with
the
end of a
key
or other
appropriate object.
/---
/-
/
on.21BP6rra\hh,€
lock nut;
and
push
down on
the valve
stem
to free
it up.
Then
push
the
pump
head on to the valve head, and
inflate. To inflate a Presta
valve
with
a
gas
station air
hose,
you'll
need a Presta
adapter
(available
at
your
E-
Bike@
shop)
which
screws on to the valve stem
once
you've
freed
up
the valve. The
adapter fits the end of
the
air
hose fitting. To let
air out of a
Presta
valve, open
up the valve
stem
lock nut
and depress the valve stem.
G, BICYCLE SASPEITSIOIT
There are many different types
of suspension systems
-
--
too many to deal with individually in
this Manual. lf
your
E-Bike@ has
a suspension system of
any
kind,
ask
your
dealer
to
provide
you
with the
appropriate
adjustment and maintenance instructions.
A
WABlllltG: Failure to
check amX
prcperty
adjust the
Zi.\
suspension system may result in
suspension
malfunction, which may
caase
you
to lose
mntol and tall,
the Prcsta valve
(Fig.
21b) has a narrower
diameter and
A
CNIfI1ll: Changing
suspension adlusfitent
can
is only found
on bicycle tires. To inflate a Presta valve
./ ! \
changeffiehandllngandbrakingcharac,terisliesot
tube
using a Presta headed
bicycle
puT.p,
remove the
yow
E-Bike@, lleve. change
suspension adjusfitent
unless
valve cap;
unscrew
(counterclockwise)
the valve
stem
W
arc
ttwoughly tamllar
witlt tfie suspension
system
3l
fig.
214
Sdnsdcr \hlve

manu1acfitrcr's
instuctions and
rccommendalions,
and
always
check
for changes
in the
handling and braking
characteristics
of the
E-Bike@ after
a suspension
adjusfircil
by
taffing a carclul
test
rtde in a
hazard'trce
area
,
CAllfl0ll:
llot all bicyclx
can be salely
rcWitted
with
some types
of suspension
systems.
Belorc
retotitting
a
E-Bike@ with any suspension,
ch@k
with
the
E-Bike@'s
manutacfitrcr to
make sare
tt at what
you
want
to do
is compatible
with the E-BiRe@'s
design,
WABlllllG:
lt
your
E-Bike@
has suspension,
the
increased speed
yoa
may develop also
increases
your
risk, When
bnking,
fie fioil of a suspendd
E-Bike@
dips,
You could
lose confrol and
lall
il
your
skill is
not
up
to
handling
ttris system,
Eet to
Rnow how
to handle
your
suspension
sysbm
sately,
Suspension
can
increase
the handling capabilities
and
comfort
of
your
E-Bike@.
This enhanced
capability
may
allow
you
to ride
faster; but
you
must
not confuse
the
enhanced
capabilities
of the
E-Bike@
with
your
own
capabilities
as a
rider.
Increasing
your
skill
will take
time
and
practice.
Proceed carefully
until
you
are sure
you
32
are competent
to
handle the
full capabilities of
your
E-
Bike@.

6. SENVICE AIID MAIITTEITAITGE
NOTE: Technological
advances have made
E-Bike@s
and
E-Bike@
components more
complex than
ever
before, and the
pace
of
innovation
is increasing. This
on-going evolution makes it impossible
for this manual
to
provide
all the information required
to
properly
repair
and/or
maintain
your
E-Bike@.
ln order to help minimize
the chances
of an accident
and
possible
injury,
it is
critical that
you
have
any repair or maintenance which
is not specifically
described in this manual
performed
by
your
dealer.
Equally important
is that
your
individual maintenance
requirements will
be determined
by everything from
your
riding
style to
geographic
location.
Consult
your
dealer
for help
in
determining
your
maintenance
requirements.
How much
of
your
E-Bike@'s
service and maintenance
you
can do
yourself
depends on
your
level
of skill
and
experience,
and on
whether
you
have the
special tools
required.
require
spial knotildgp
and tools,
Do not
bqtn any
adjusfrnenb or service
on
yoar
E-Bike@ if
you
haye the
slighhst doubt atuut
your
ability to
proprly
eomplete
fiem, Impoper adlusfllreil
or seruice
may result in
damage
to fie E-Bike@ or in an accident which
Gan caase sertoas
iniury
or death,
lf
you
want to learn to
do
major
service and repair work
on
your
E-Bike@,
you
have
three
options:
1. Ask
your
dealer
whether
copies
of
the manufacturer's
installation
and service instructions for the
components
on
your
E-Bike@ are available.
2. Ask
your
dealer
to recommend
a book on E-Bike@
repair.
3.
Ask
your
dealer about the
availability of E-Bike@
repair
courses
in
your
area. Regardless
of
which
option
you
select,
we recommend
that
you
ask
your
dealer to
check
the
quality
of
your
work the first
time
you
work
on
something and before
you
ride the E-Bike@,
just
to
make sure that
you
did everything correctly.
Since that
will require the time
of a
mechanic,
there may
be a
WABIIilIA: Many
E-BiRe@
service and
repalr
tasfs
modest
charge
for this
service.
33

A,
SENWCE
&
MAITTTEITANCE SCHEDALE
Some
service and
maintenance can and should
be
performed
by
the
owner, and
require no
special
tools or
knowledge
beyond
what
is
presented
in this
manual.
The following are
examples of
the type of service
you
should
perform yourself.
All other service,
maintenance
and
repair should be
performed
in
a
properly
equipped
facility
by a
qualified
E-Bike@
mechanic using
the
correct
tools and
procedures
specified by
the
manufacturer.
l) Brcak-in
Period:
Your E-Bike@ will
last longer and
work
better
if
you
break
it in
before
riding
it hard.
Control
cables
and
wheel
spokes
may stretch or
"seat"
when a
new E-Bike@
is first used and
may require
readjustment
by
your
dealer.
Your Mechanical Safety
Check
(Section
3.C)
will help
you
identify some
things
that
need
readjustment.
But
even
if everything seems
fine to
you,
it's best to
take
your
E-Bike@ back
to the
dealer
for a checkup.
Dealers typically suggest
you
bring
the
E-Bike@ in
for
a 30 day
checkup.
Another
way
to
judge
when
it's time for the
first
checkup
is
to
bring
the
E-Bike@
in
after
three to
five hours of hard off-road
use. or about
10 to 15 hours of on-road
or more casual
off-road
use.
But if
you
think
something
is wrong with
the E- Bike@,
take it to
your
dealer
before
riding it
again.
2) Betorc eyery
rfde; Mechanical Safety Check
(see
Section
3.C)
3) After every
long
or
hard
fidei il ffie E-Bike@
has
Mn
expsed
to wabr or
gdt;
or at
least
eyery
100
miles: Clean
the
E-Bike@ and
lightly oil
the chain,
freewheel cogs
and
rear derailleur
pulley
bushings.
Wipe off excess oil.
Lubrication
is a
function of climate.
Talk to
your
dealer
about
the best
lubricants and
the recommended
lubrication
frequency
for
your
area.
4) Atter every
long or
hard ride or afhr
every l0 to
20 hourc
of
riding: Squeeze
the front brake and
rock
the E-Bike@
forward and back.
Everything
feel
solid?
lf
you
feel
a
clunk
with each
forward or backward
movement of the
E-Bike@,
you
probably
have a
loose headset. Have
your
dealer check
it.
Lift the
front wheel off
the
ground
and swing
it from
side
to
side.
Feel smooth?
lf
you
feel any binding or
roughness
in the steering,
you
may have a tight
g4

headset. Have
your
dealer check it.
Make sure all bolts, nuts
and
mounting hard w a re are
tight.
Grab
one
pedal
and
rock it toward
and away
from the
centerline of the E-Bike@: then do the same with the
other
pedal.
Does the
bottom bracket feel
loose? lf
so,
have
your
dealer check it.
Take a look at the
brake shoes. Starting
to look worn
or
not hitting the wheel rim
squarely? Time
to have the
dealer adjust or
replace them.
Carefully check
the
control cables and cable
housings.
Any rust? Kinks? Fraying? lf
so,
have
your
dealer
replace them.
Squeeze each adjoining
pair
of spokes on either side of
each
wheel
between
your
thumb
and index
finger.
Do
they all feel about the
same?
lf
any
feel loose, have
your
dealer
check the wheel for tension
and
trueness.
Check the frame,
particularly
in the
area
around all tube
joints;
the handlebars;
the stem;
and
the seatpost for
any deep scratches,
cracks or discoloration.
These are
signs of stress-caused
fatigue
and
indicate that a
part
is at
the
end of
its useful life and
needs to
be
replaced.
Check
to make
sure
that
all
parts
and accessories are
still secure, and
tighten any which are
not.
WAEIIIIIG:
Like
any
mechanical
devicg
a E-Bike@
and iE components arc subirct
to wear
and sf?ss,
Dittercnt mafurlals and
mechanlsms wear or tatigue frum
sfess at diftercnt
ralfas
and
have
dilfercnt
lite cycles, lt a
component's lite cycle
is
exceeded,
ffie
compnent
can
suddenly and catasfrophinlly
fail,
causing
serious lnjury or
death to the rider, Scratches, cracks,
traying and
discoloration
are signs of stress-caused
latigue
and
indicate
fiat a
part
is atfln end
of
iE a$tal lile and nffis
to be rcplaced,
5)
As rquiffi:
Il
either bnke
lever fails tfie Mechanical Salety
Check
(Section
3.C):
restore brake lever travel
by
turning the
brake
cable adjusting barrel counterclockwise, then
lock the adjustment
in
by
turning the
barrel's
lock
nut
clockwise as
far as it will
go.
lf the lever still fails the
35

Mechanical Safety
Check,
have
your
dealer
check
the
brakes.
lf the chain
won't shift smoothly
and
quietly
from
gear
to
gear:
the derailleur
is
out
of adjustment.
The
cause
may be as
simple as cable stretch,
in which case
you
can
compensate
by
turning the shifter or derailleur
cable
adjusting
barrel counterclockwise
1/2 turn.
Try
shifting
again.
lf 1/2 turn to a
full turn
of
the cable
adjusting
barrel
does
not
cure
the
problem,
see
your
dealer.
6)
Every 50
hourc of riding,
lake
your
E-BiRe@ to
your
daler
lor a compleb chdrup
B, GETNilG
HOME WHEIT SOMEnHIIIG
BNEAKS
Unless
you're going
for a short ride
in the neighborhood
,
or
you
can
walk home
or
call someone
to
pick you
up
if
something
breaks,
you
should
never
go
for a E-Bike@
ride
without
the following emergency equipment:
o
4mm, Smm and
6mm Allen
wrenches,
used
to tighten
various clamping bolts
that
may loosen
o
Patch kit and
a spare inner
tube
.
Tire levers
.
Tire
pump
or caftridge
inflator
with
correct
head to fit
your
tire
valves
(see
Section 5.G.2)
.
Some
kind of identification
(so people
know who
you
are
in
case
of accident)
.
A couple of dollars
in
cash
(for
a
candy bar, cool drink
or
emergency
phone
call)
l) lt
yoa get
a
flat tirc: Please
reter to
page
30 to rcmove
rear
wheel, Depress
the tire valve
to let
all
the
air out of
the tube
(see
Section
5.G.2).
Remove
the wheel
from
the E-Bike@
(see
Section 5.A.3
or 4).
Remove
one bead
of
the tire
from the rim by
grasping
it at a
point
opposite
the
valve stem
with
both
hands and,
at the same time,
lifting and
peeling
one side
of the
tire
off
the rim. lf the
bead
is
on
too tight
for
you
to unseat
it with
your
hands,
use
tire levers
to lift the bead carefully
over
the tire rim.
Remove the
valve lock
nut
(if
the valve
has
one) and
push
the
valve stem through
the wheel
rim. Remove the
inner
tube.
Carefully
check
the outside and
inside of
the tire for the
cause of
the
puncture
and
remove the cause if
it
is still
there.
lf the tire
is cut,
line the inside of
the tire in the
area
of
the
cut
with something
handy
--
tape,
a spare
36

patch, a piece
of inner tube, a
dollar
bill
--
whatever will
keep
the
cut from
pinching
the inner tube.
Either
patch
the tube
(follow
the instructions in
your
patch
kit), or use a new
one.
Reinstall the tire
and
tube.
Slip one
tire
bead over the rim. Insert the tube
valve
through its hole in the rim,
but don't secure it
with the
locknut
yet.
Feed the tube
carefully
into the
cavity of
the
tire. lnflate the tube
just
enough
to
give
it
some shape.
Starting at the valve stem
and
working
around
both
sides of the rim to the
side opposite
the valve
stem, use
your
thumbs
to
push
and seat the other bead of the tire
inside the rim. Be careful not to
pinch
the tube
between
the tire
bead and
the wheel rim. lf
you
have trouble
getting
the last few inches
of bead over
the
edge of
the
rim with thumb
pressure
,
use a tire lever and be careful
not
to
pinch
the tube.
CAllflOllt
lt
you
use a ssewdrivq or any tool offier
fltan
a
tirc lever,
yoa
arc
likely
fu
punefrtrc
tfie fuba
Check
to
make sure the tire is evenly seated around
both sides of the rim and that the tube is inside the tire
beads.
Push the valve
stem
into'the tire to make
sure
that
its
base is seated within the tire's beads. Inflate the
tube slowly
to the recommended
pressure (see
Section
3.G), all
the while
checking
to make sure that
the
tire
beads stay seated
in the rim.
Screw
down
the valve
stem
locknut
finger-tight.
Secure
the valve locknut
(Presta
valve).
Replace the valve
cap.
Replace the
wheel
in the E-Bike@
(see
Section 3.A.3 or 4).
WABlllllG: Hiding
your
E-Bike@
wiilt a flat
or
under-inflahd tirc can seriously damage tfie tire,
fube and
E-Bike@,
and can caase
you
to lose
oontol
and fall,
2) lf
you
b,eak a spd<et
A wheel with a loose or broken spoke is much weaker
than a
fully tensioned wheel. lf
you
break a spoke
while
on a ride,
you
will have to ride home much more
slowly
and carefully
because the weakened wheel could
break
additional
spokes and become useless.
WABIINA: A
broken spoke serlously
weakens
the
wheel
and
may Gaase it to wobble,
sfriffing the
brakes or tfie
fnme Biding with
a bruken spke
can
cause
you
to lose confrol and tall,
Twist
the
broken spoke around
the
spoke
next
to it to
37

keep
it from flopping around and
getting
caught
between
the wheeland
the frame.
Spin
the wheelto see
if the rim clears
the
brake shoes.
lf the wheel will
not
turn because
it is rubbing against a brake shoe,
try
turning the brake cable adjusting barrel(s)
clockwise to
slacken
the cable and open up
the
brakes
(see
Section
5.C.2).
lf the wheel still won't
turn,
open
the
brake's
quick
release
(see
Figs. 16a through 16d) and secure
any
loose cable as best
you
can.
Walk the E-Bike@, or
if
you
must, ride it with extreme caution, because
you
now have only one
working brake.
3) lt
you
cnsh:
WAElllllG:
A
qash
can
Urt
etftaudlnary stess on
E-Bike@ componen8., caasing
tfiem to tafrgue
prumfuely.
calmponanrs, sulffing
fiun sfress
tafrgue @n
talt saddenly and cahstophically, sauslng
losc
of oontol, *rious
inlury or d@Ar,
First, check
yourself
for injuries, and take care of
them
as best
you
can. Seek medical
help if necessary.
Next, check
your
E-Bike@ for damage, and fix
what
you
Then, when
you get
home, carefully
perform
the
checks
described
in Section
3.C and check
for
any other
damaged
parts.
All bent, scored
or discolored
parts
are
suspect
and should be
replaced.
CAllflOll:
lt
you
have
any
doubt about tIrc condltion
of ffie
E-Bike@ u any ot'rls
parb,
take it
tu
your
dalqtor
a fioruugh cheo-k,
C.
AMNADI'IGYOUN
BI'G
AIID YOUN EWIPfiEII|
The variety of
components and accessories
available to
enhance
the comfort,
performance
and appearance of
your
E-Bike@
is almost endless.
Your dealer can help
you
select
those that will work best
for the kind
of
riding
you
do. Even
if
you
are an experienced
rider,
don't
assume
you
can
properly
install
and
operate these
components
or accessories
without
first
reading any
instructions
that are enclosed
with the
product.
Be sure
to
read, and understand,
the
instructions that
accompany
the
products
you purchase
for
your
E-
Bike@.
lf
you
have the slightest doubt as
to their
suitability
or about
your
ability
to install them correctly,
ask
your
dealer
for
help.
38

WABtJItEt Falfino b ltffir,
aN
Mc
any a npwtt u
AE E-Bfre@,
aN stu tfiry u M, b UE
iltbr.
l)ffiaNhwMffi
Once
the E-Bik@ fit
(frame
size, saddle
position
and
angle, stem
length
and
rise) is
correct,
the saddle
becomes the single most
important comfort accessory.
The comfort of a E-Bike@
saddle depends
much more
on how the saddle
shape
relates to the rider's
body
than
on
the thickness
or material of the
padding.
Bicycle
manufacturers
select a saddle
shape
based on their
best
guess
of what's likely to
be comfortable
for most
buyers of
that
particular
E-Bike@ model. But that
doesn't mean it's
going
to
be
the most
comfortable
shape
for
you.
That's
why
your
dealer stocks saddles
which offer a variety
of shapes,
padding,
covering
materials
and
prices.
lf the
saddle on
your
new E-Bike@
is
uncomfodable, ask
your
dealer
to
suggest an
alternative.
lf
you're planning
to spend an hour or
more
at a
time
on
your
E-Bike@,
get
a
pair
of
cycling
gloves.
Their
padded
palms
help keep
your
hands from
getting
numb from
the vibration
of
the handlebars
(the
numbness,
called
carpaltunnelsyndrome,
can become
quite painful
if not
taken care of), and
they'll
provide
some abrasion
protection
for
your
hands if
you
fall.
Cycling shorts and cycling
jerseys
are both
performance
and comfort accessories. There are two
kinds
of cycling shorts:
the traditional
skin-tight Lycra
shorts and
loose-fit cycling
shorts.
Both
are designed
to
reduce friction and chafing. The washable
pad
in the
crotch
of the
shorts
both cushions and
protects
against
chafing.
Wear them without
under
wear to
avoid the
undergarment's bunching up and chafing. Also
available are undergarments designed to reduce
chafing
when
worn
with regular
street clothes. The
jerseys
have
pockets
in the
back, so
that the things
you
carry don't bang around
when
you
ride. Many
are made
of special
materials with
properties
that improve
riding
comfort
and
performance.
It's important to drink
plenty
of liquids before
and during
exercise.
A water
bottle
is
an essential companion on a
89

longer ride.
Some basic
tools are also useful.
The minimum tool kit
you
will need to make adjustments,
perform
maintenance
and handle emergency
repairs
should
include:
r
a set
of
Allen wrenches in 2mm. 4mm. 5mm and 6mm
sizes
.
a set of
tire levers
.
a 6
inch adjustable
wrench
o
a
No. 1 Phillips screwdriver and a
1/4 inch flat blade
screwdriver
.
a
tire
pump
.
a tire
patching
kit and a spare
tire tube
2) Perlormance
Upgndes
GAffiOll:
Changing ffie nmponenE on
your
E-
Bike@ may
vold
fie
wamnV, To avoid voiding
your
wamnty, check
wltfi
your
dealer Morc changlng
the componenb
on
your
E-Bike@,
The
most
popular
way to improve the
performance
of
an E-Bike@
is to substitute
higher
priced
drivetrain or
brake components.
Before
attempting
to upgrade
your
drivetrain
or brakes,
make sure that the components
you
plan
to install are
fully compatible with
the rest
of
the
components
on
your
E-Bike@. Your dealer can help
you
determine
component compatibility
and resolve
compatibi
lity conf I
icts.
Another
popular
way to improve
the
performance
of
an
E-Bike@ is
to substitute lighter
weight
"racing"
components.
Lighter
wheels, tires,
handlebars
and so
on
can enhance
the
performance
of
your
E-Bike@;
but
you
must always
keep in mind that
light weight racing
components
are
not intended
to have the life
expectancy
of
their heavier counterparts, and
you
must
therefore exercise extra
care in checking
for
signs of
stress
fatigue
(See
Section
6.4).
Suspension
forks are also
a
popular
component
upgrade.
Before
installing a suspension
fork
on a
non-
suspension
E-Bike@ or
installing a fork with different
travel or
geometry
characteristics
than
the
original
fork
on
the E-Bike@,
you
must make sure
that the frame is
designed
to
take the change
in
geometry
and the
changes
in stress characteristics
which
the
change in
fork can cause.
Such stresses
can
result in
sudden,
catastrophic
frame
failure, which can cause serious
40

injury or
death.
Disc
brakes are becoming a more
common
performance
upgrade. Most front
suspension
forks
are
designed to accept
a disc brake, and can
take
the
added stresses at
the
brake mounting
points.
Be sure
that the fork
you
are using is designed to accept disc
brakes. Otherwise, such
stresses can
result in
sudden,
catastrophic
frame
failure, which can cause serious
injury or death.
Your
dealer
has many
other
comfort and
performance
accessories
that
can increase
your
cycling enjoyment.
D. ABOUT YOAN DEALEB
Your
dealer
is here
to help
you get
the E-Bike@
and
accessories
which
are most
appropriate
for the kind
of
riding that
you
intend to
do; and
to help
you
maintain
your
equipment
so
that
you
can
get
the maximum
enjoyment from it. Your E-Bike@
shop's staff
has
the
knowledge, tools
and experience to
give you
reliable
advice and competent
service.
Your
dealer carries
the
products
of a variety
of
manufacturers
so
that
you
can
have the
choices
which
best meet
your
needs and
your
budget.
But
your
dealer's staff can't make decisions for
you;
nor
can
they assume responsibility for
your
lack
of
knowledge,
experience, skill or common sense. They
can explain to
you
how somethiirg works, or what
part
or accessory
will meet
your
special
needs,
but they
can't
know
your questions
or
your
needs
unless
you
tell
them.
lf
you
have
a
problem
with
your
E-Bike@
or
your
riding,
talk to
your
dealer. Make sure that the
dealer
understands
your problem
or
question,
and make
sure
that
you
really understand
the
answers.
Please
contact
EV
Global
Motorc
at:
800-87
I
-4545
toll-free
323-2ffi-4799
lax
n ww,evgtobal.com
41

1 603
Nycewheels
Alternative
Transportation
S olutions
www.nycewheels.com
(2L2)
737-3078
York ave
(between
B4th
and
B5th)
New
York,
NY
10028
Business
hours:
11am
-
7pm,7 days
Enjoy
your
ride

NYCeWHEELS
1603
York
Avenue
New
York,
NY
10028
 Loading...