

Page 1

VEHICLE HEATERS | TECHNICAL DOCUMENTATION
OPERATING INSTRUCTIONS
EN
EASYSTART TIMER
CONTROL UNIT FOR
EBERSPÄCHER PARKING HEATERS
QUICK START GUIDE
OPERATING INSTRUCTIONS
INSTALLATION INSTRUCTIONS
A WORLD OF COMFORT
Page 2
2 | VEHICLE HEATERS – TECHNICAL DOCUMENTATION
CONTENTS
CHAPTER CHAPTER TITLE
CHAPTER CONTENTS PAGE
1 INTRODUCTION
Please read first 4
Safety information 4
Range of uses 4
General information 4
2 OVERVIEW
EasyStart Timer 5
Button functions 5
Longpress button 5
Shortpress button 5
Longpress button 5
Shortpress button 5
Press
Press
button 1x / keep pressed 5
button 1x / keep pressed 5
3 OPERATION AND SETTING/ADJUSTMENT
Notes on operation and setting 6
Factory setting 7
Main menu 8
Start display after switching on 9
Displays for activated menu items 9
Heating immediately with Longpress (without settings) 10
HEATING OFF with Longpress 10
HEATING ON with Shortpress and with settings 11
HEATING Off with Shortpress 12
Page 3

CONTENTS
VEHICLE HEATERS – TECHNICAL DOCUMENTATION | 3
Change the temperature setpoint and / or the operating time during operation 12
Set VENTILATION ON with Shortpress and if applicable set the operating time 14
VENTILATION OFF with Longpress 15
VENTILATION OFF with Shortpress 15
ADD-ON UNIT ON – e.g. activate the HEATING function for a 2nd heater 16
ADD-ON UNIT ON – e.g. activate the VENTILATION function for a 2nd heater 17
ADD-ON UNIT OFF with Longpress 19
ADD-ON UNIT OFF with Shortpress 19
General information on programming the preset time 20
Program preset times 22
EasyStart Timer settings 22
Settings 26
4 WHAT TO DO IF …?
In the event of a fault the following displays are possible: 29
5 SERVICE
Hotline 30
Page 4

4 | VEHICLE HEATERS – TECHNICAL DOCUMENTATION
1 INTRODUCTION
PLEASE READ FIRST
Before you start to set and use the timer, always read
through these operating instructions carefully.
These operating instructions contain important information that you require for to set and use the timer.
Please keep these operating instructions in a safe
place for subsequent reference.
SAFETY INFORMATION
DANGER!
Always note and follow all information and notes,
especially the safety instructions in this document
and in the heater's technical description!
RANGE OF USES
The EasyStart Timer is used to select the operating mode, to set the operating time, to preselect the
switching on time and to switch On / Off the heater
and / or add-on unit installed in the vehicle.
PLEASE NOTE!
Improper use and use outside the specified area of
use cancels all liability and warranty.
GENERAL INFORMATION
The EasyStart Timer has a simple operating structure.
All functions can be set and, if necessary, changed
with only 4 buttons.
To use the AUTOMATIC OPERATING TIME CALCULATION function of a water heater, the optionally available temperature sensor must be used.
If a vehicle was without a power supply (battery disconnected) and the power supply is restored, INIT for
automatic heater detection appears in the display of
the EasyStart Timer.
If the detection was successful the time is displayed
flashing in the start display. The time must be set.
Then the weekday must be set, see page 26.
Use of the EasyStart Timer is described in detail from
page 6.
Page 5
2 OVERVIEW
VEHICLE HEATERS – TECHNICAL DOCUMENTATION | 5
EASYSTART TIMER
The EasyStart Timer can be used to make the necessary settings for operation of the heater and / or the
add-on unit.
BUTTON FUNCTIONS
LONGPRESS button
The button must be pressed for longer than
2 seconds.
The heater is switched on immediately if ON or OFF
appears in the display (except if programming is running or while making settings).
SHORTPRESS button
The button must be pressed for less than 2 seconds
– if the display shows OFF EasyStart Timer ON,
the Start display appears.
– a selected function is confirmed.
– inputs are confirmed.
LONGPRESS button
The button must be pressed for longer than
2 seconds
– all functions are ended.
– if the display shows OFF EasyStart Timer ON,
the Start display appears.
SHORTPRESS button
The button must be pressed for less than 2 seconds
– the displayed, activated function is ended, other
activated functions are retained.
– with each SHORTPRESS the display changes to a
next-higher level up to EasyStart Timer OFF.
– the Start display appears and no function is active:
EasyStart Timer OFF.
– EasyStart Timer is in submenu the setting is
exited, already set values are not saved.
– if the display shows OFF EasyStart Timer ON,
the Start display appears.
Press
Press
button 1x / keep pressed
– EasyStart Timer is in the Main menu and the Start
display appears in the Menu bar the next, righthand symbol appears in the middle and flashing.
– EasyStart Timer is in the submenu, the dis-
played value is changed (larger), or the next selection is displayed.
– if the display shows OFF EasyStart Timer ON,
the Start display appears.
button 1x / keep pressed
– EasyStart Timer is in the Main menu and the Start
display appears in the Menu bar the next, lefthand symbol appears in the middle and flashing.
– EasyStart Timer is in the submenu, the dis-
played value is changed (smaller), or the next
selection is displayed.
– if the display shows OFF EasyStart Timer ON,
the Start display appears.
Page 6

6 | VEHICLE HEATERS – TECHNICAL DOCUMENTATION
3 OPERATION AND SETTING/ADJUSTMENT
NOTES ON OPERATION AND SETTING
ACTIVATING THE EASYSTART TIMER
If the display is not lit the EasyStart Timer must be
activated (not if heating ON with LONGPRESS).
SHORTPRESS on one of the four buttons, the Start
display appears in the display, then continue with the
operation or setting.
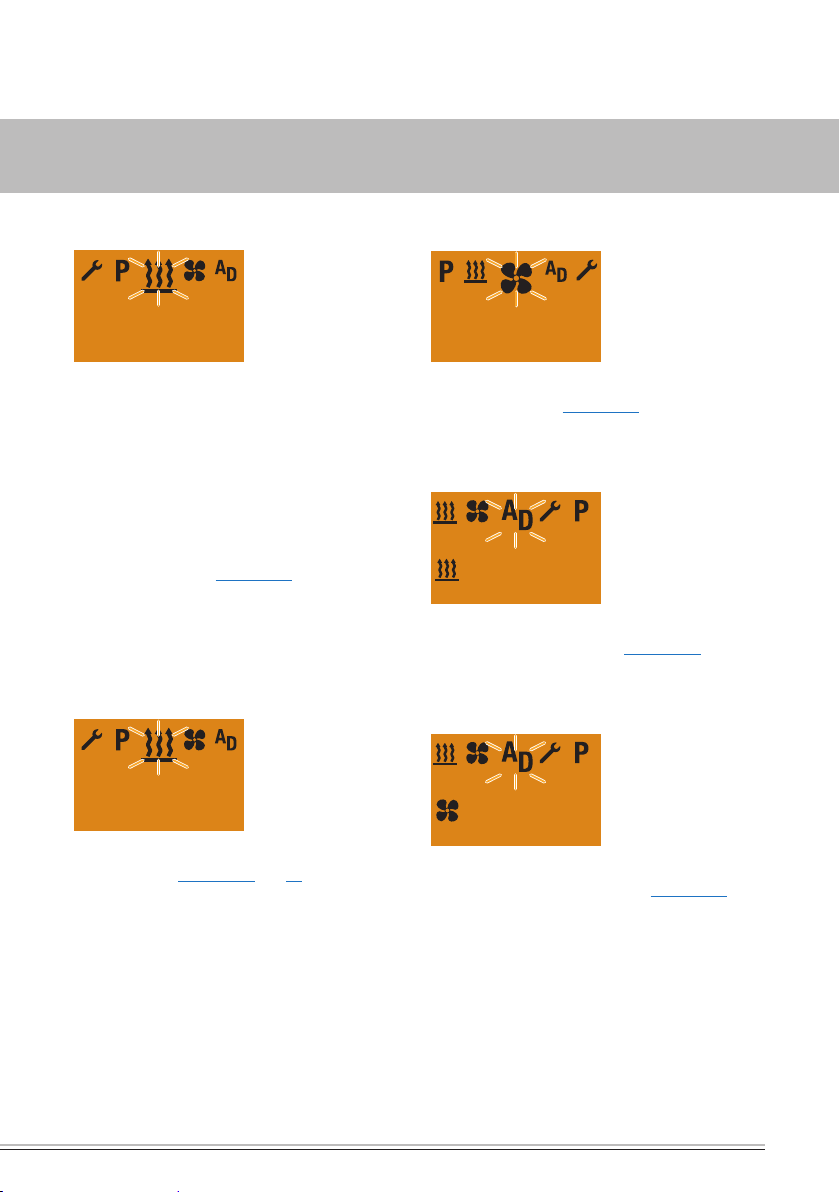
ACTIVATING A MENU ITEM
The symbol of the menu item to be activated appears
in the middle and flashing in the display. In the case
of several activated menu items the symbols are
displayed alternately.
DISPLAY
The display is lit
during use of the EasyStart Timer.
if terminal 58 is connected, with switched on vehi-
cle lighting.
if the heater / add-on heater is ON.
DISPLAY DISAPPEARS
If the vehicle lighting is switched off, no heater or
add-on unit is switched on or if no setting or actuation is made, the display goes out within 10 seconds,
i.e. the EasyStart Timer switches to standby.
For renewed input, one of the four buttons must be
pressed first (not in heating ON with LONGPRESS).
FLASHING SYMBOL / FLASHING VALUE
In the Main menu a flashing symbol in the Menu bar
is activated with the
In the submenu a flashing value can be confirmed or
a selection made using the or button.
HEATING ON WITH LONGPRESS
The heater is switched on immediately. An add-on
heater is not switched on immediately.
HEATING OFF WITH LONGPRESS
If a heater and an add-on unit is in operation both are
switched off.
CANCEL / EXIT SETTINGS
The setting can be cancelled or exited by pressing
the
button.
CONFIRM INPUT
The settings and changes must always be confirmed
by pressing the
SETTING THE OPERATING TIME
The operating time can be set using the
button. Setting range of the operating time min.
10 – max. 120 minutes, the input is made in 1 min.
intervals. Continuous heating mode is additionally
possible for air heaters.
The operating time for a heater and for an add-on
unit can be set independently of each other.
button.
button, otherwise they are lost.
or
Page 7

VEHICLE HEATERS – TECHNICAL DOCUMENTATION | 7
3 OPERATION AND SETTING/ADJUSTMENT
NOTES ON OPERATION AND SETTING
EXTENDING THE OPERATING TIME
The operating time can be extended to up to 720 min,
the input is made from the 120th min. in 5 min intervals. To do this, contact the installation workshop.
VENTILATION OPERATING MODE
VENTILATION mode is not possible with all heater
types (see the Technical Description of the heater for
details).
TEMPERATURE SENSOR
In the settings and operations described in the following it is assumed that a temperature sensor is
connected for a water heater.
In the case of air heaters the temperature sensor
installed in the heater and which is provided for control of the heater can also be used to determine the
interior temperature.
ADD-ON UNIT
An add-on unit can be e.g. a second heater or parking air conditioning. Further, it is also possible to
combine a heater with a fan; the fan is then used for
air distribution in the vehicle interior.
A heater and the add-on unit can be operated simultaneously or independently of each other.
FACTORY SETTING
PROGRAM / PRESELECTION (for all heaters)
Weekday group Mon – Fri
Departure time 07:00
Language DE
Time format 24 h
Operating time for preselection (preset)
30 minutes
AIR HEATERS
Continuous heating operating time
Setpoint temperature 21 °C
WATER HEATERS
Operating time 30 minutes
automatic operating time calculation OFF
PLEASE NOTE!
The number of symbols and displays differs depending on the installed heater and feature options.
Page 8

8 | VEHICLE HEATERS – TECHNICAL DOCUMENTATION
17:30
21 °C
3 OPERATION AND SETTING/ADJUSTMENT
MAIN MENU
Menu bar
Status area
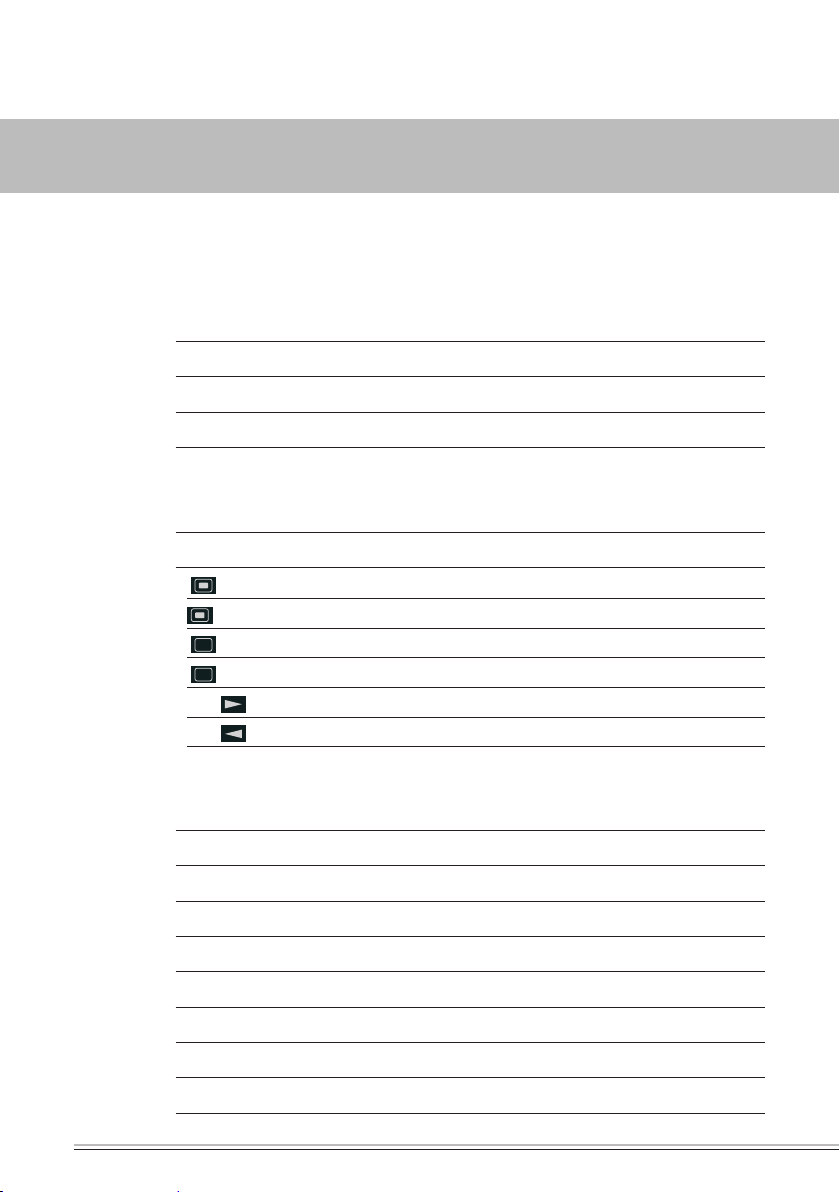
MENU BAR
The following menu items can be selected.
Symbol Function
Heating ON / OFF
Ventilation ON / OFF
Add-on unit ON / OFF
(e.g. a second heater)
Settings
Program / Preselection
PLEASE NOTE!
symbol for the ADD-ON UNIT menu item
The
must be activated in the Workshop menu; contact the
installation workshop.
The symbol for the VENTILATION menu item is
now displayed, if the heater supports this function.
Only the
cles in ADR mode. If the heater supports the VENTILATION function the symbol is also displayed.
and symbols are displayed in vehi-
STATUS AREA
If no menu item is activated, the current time and, if
an (optional) temperature sensor is connected, the
temperature in the vehicle interior are displayed in
the status area.
Start display:
Time, e.g. 17:30
Temperature in the vehicle interior, e.g. 21 °C.
If a menu item is activated (heating, ventilation, addon unit, settings or program / preselection), different information is displayed in the status area; this
appears and described in the relevant sections.
SUBMENU
Menu bar
107 min
Display:
e.g. HEATING ON / Operating time 107 min.
In the submenu, the symbol of the selected menu
item appears in the middle of the display.
The corresponding set value is displayed flashing in
the entry area and can be set using the
button and confirmed with the button.
Input area
or
Page 9
VEHICLE HEATERS – TECHNICAL DOCUMENTATION | 9
17:30
21 °C
3 OPERATION AND SETTING/ADJUSTMENT
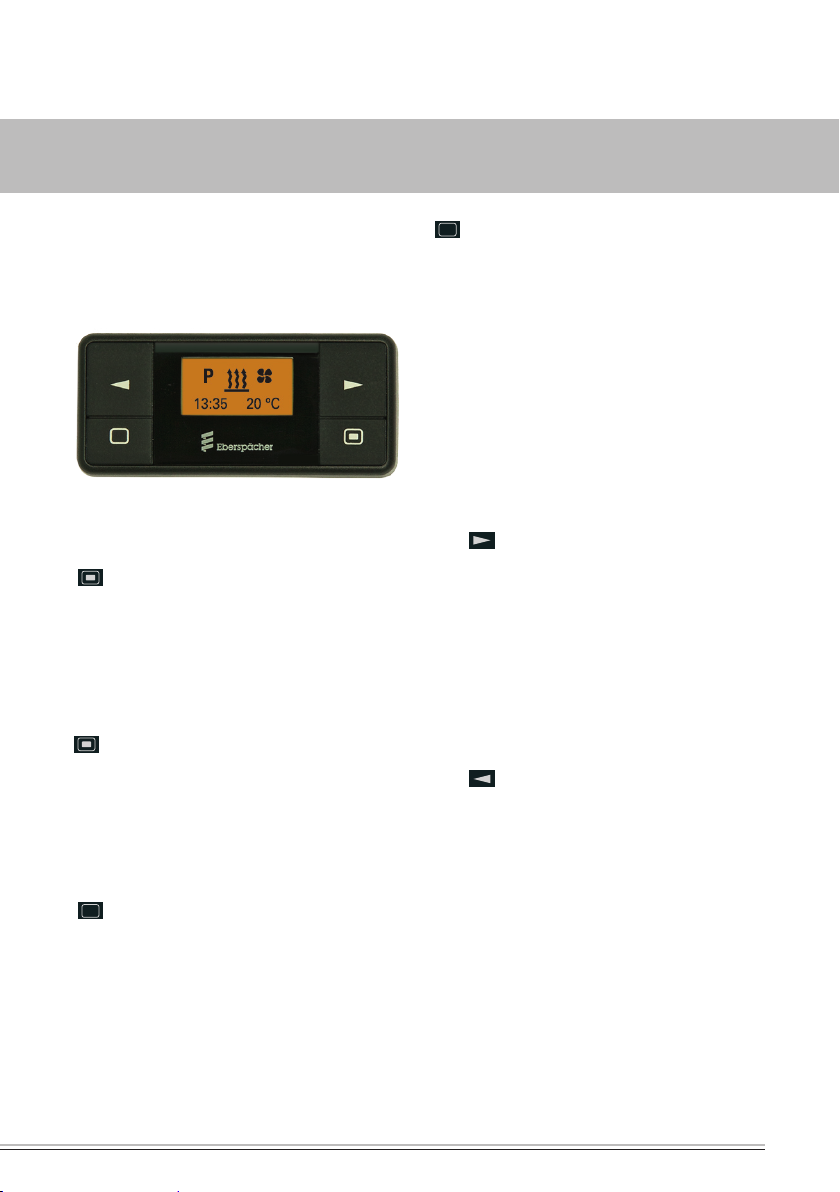
START DISPLAY AFTER SWITCHING ON
If no menu item is activated, the Start display
appears with a flashing heater symbol in the Menu
bar, with the current time and the actual temperature
in the status area.
Other possible actions are:
HEATING IMMEDIATELY with LONGPRESS.
HEATING ON with SHORTPRESS, in addition con-
firm and if applicable set the temperature setpoint
and operating time, see page 11.
select a new menu item.
DISPLAYS FOR ACTIVATED MENU ITEMS
HEATING ON
60 min
Other possible actions are:
HEATING OFF, see page 10 and 12.
select a new menu item.
21 °C
VENTILATION ON
60 min
Other possible actions are:
VENTILATION OFF, see page 15.
select a new menu item.
ADD-ON HEATER HEATING ON
21 °C
90 min
Other possible actions are:
ADD-ON UNIT HEATING OFF, see page 19.
select a new menu item.
ADD-ON HEATER VENTILATION ON
90 min
Other possible actions are:
ADD-ON UNIT VENTILATION OFF, see page 19.
select a new menu item.
Page 10

10 | VEHICLE HEATERS – TECHNICAL DOCUMENTATION
21 °C
∞
21 °C
Off
3 OPERATION AND SETTING/ADJUSTMENT
HEATING IMMEDIATELY WITH LONGPRESS
(WITHOUT SETTINGS)
Press the
2 seconds.
Heater ON.
LONGPRESS button for longer than
30 min
Display for air heaters in continuous heating mode
(factory setting).
PLEASE NOTE!
After switching on, “On” is displayed for 2 sec and
then the remaining operating time or
heaters.
Set values are copied from the previous heating
mode.
If LONGPRESS is pressed during heating mode the
display switches to the HEATING submenu SET
TEMPERATURE SETPOINT – (only for air heater) and
SET OPERATING TIME.
During heating mode it is possible to switch to
another menu item. Under the VENTILATION menu
item, check the operating time and if necessary
adjust.
21 °C
for air
HEATING OFF WITH LONGPRESS
Display ON, the HEATING menu item is displayed.
Press the
2 seconds.
Heater OFF.
After the HEATING OFF the Start display appears. If
the vehicle lighting is OFF the display lighting goes
out after 10 seconds.
LONGPRESS button for longer than
17:30
PLEASE NOTE!
With HEATING OFF with LONGPRESS all active functions are ended.
The following actions are possible during the
HEATING OFF display:
Use the
SHORTPRESS button, the Start display appears,
if the SHORTPRESS button is pressed again,
Display OFF.
SHORTPRESS button, the HEATING submenu is
displayed.
21 °C
or button to select a menu item.
Page 11

VEHICLE HEATERS – TECHNICAL DOCUMENTATION | 11
17:30
21 °C
60 min
21 °C
21 °C
∞
3 OPERATION AND SETTING/ADJUSTMENT
HEATING ON WITH SHORTPRESS AND WITH
SETTINGS
Display ON, the Start display appears.
Press the SHORTPRESS button for less than
2 seconds.
PLEASE NOTE!
The following settings and confirmations (temperature setpoint and operating time) are always required.
SET TEMPERATURE SETPOINT – FOR AIR HEATERS
ONLY
If applicable, use the
temperature setpoint.
Temperature setpoint setting range:
8 °C – 36 °C in 1 °C increments,
46 °F – 97 °F in 1 °F increments.
or button to set the
SETTING THE OPERATING TIME
If necessary, use the
operating time.
Operating time setting range:
Min 10 – max 120 min in 1 min. increments, continuous heating mode is possible for air heaters.
60 min
Press the button to confirm the operating time.
Heater ON.
Display for air heaters in continuous heating mode
(factory setting).
or button to set the
21 °C
Press the button to confirm the temperature
setpoint.
PLEASE NOTE!
After switching on, “On” is displayed for 2 sec and
then the remaining operating time or
heaters.
During heating mode it is possible to switch to another
menu item. Under the VENTILATION menu item, check
the operating time and if necessary adjust.
The changed operating time is offered again the next
time the system is started.
for air
Page 12

12 | VEHICLE HEATERS – TECHNICAL DOCUMENTATION
21 °C
Off
17:30
21 °C
3 OPERATION AND SETTING/ADJUSTMENT
HEATING OFF WITH SHORTPRESS
Display ON, the HEATING menu item is displayed.
Press the
2 seconds.
Heater Off.
After the HEATING OFF the Start display appears.
If the vehicle lighting is OFF the display lighting goes
out after 10 seconds.
The heater switches off, an active add-on unit
remains in operation.
The following actions are possible during the
HEATING OFF display:
Use the
SHORTPRESS button, the Start display appears,
if the SHORTPRESS button is pressed again,
Display OFF.
SHORTPRESS button, the HEATING submenu is
displayed.
SHORTPRESS button for less than
PLEASE NOTE!
or button to select a menu item.
CHANGE THE TEMPERATURE SETPOINT AND / OR
THE OPERATING TIME DURING OPERATION
Display ON, the HEATING / VENTILATION / ADD-ON
UNIT HEATING or ADD-ON VENTILATION menu item is
displayed.
Press the
2 seconds.
The temperature setpoint set before switching on the
heater or confirmed temperature setpoint and the
current remaining operating time (lower limit 10 min)
are displayed as set values.
The operating time and the temperature setpoint are
changed once.
Both set values must be confirmed.
SET TEMPERATURE SETPOINT – ONLY FOR AIR
HEATERS, NOT FOR THE VENTILATION FUNCTION
Use the
setpoint.
Temperature setpoint setting range:
8 °C – 36 °C in 1 °C increments,
46 °F – 97 °F in 1 °F increments.
Press the button to confirm the temperature setpoint. The temperature setpoint is changed once.
SHORTPRESS button for less than
PLEASE NOTE!
or button to set the temperature
21 °C
Page 13

VEHICLE HEATERS – TECHNICAL DOCUMENTATION | 13
21 °C
∞
3 OPERATION AND SETTING/ADJUSTMENT
SETTING THE OPERATING TIME
Use the
Operating time setting range:
Min 10 – max 120 min in 1 min. increments, continuous heating mode is possible for air heaters.
Press the button to confirm the operating time.
The operating time is changed once.
or button to set the operating time.
60 min
60 min
Display for air heaters in continuous heating mode.
21 °C
Page 14

14 | VEHICLE HEATERS – TECHNICAL DOCUMENTATION
3 OPERATION AND SETTING/ADJUSTMENT
SET VENTILATION ON WITH SHORTPRESS AND IF
APPLICABLE SET THE OPERATING TIME
Display ON, the Start display appears.
Use the
tion symbol in the Menu bar.
Off
Confirm the VENTILATION menu item by pressing the
The following setting or confirmation is absolutely
necessary.
SETTING THE OPERATING TIME
If necessary, use the
operating time.
Operating time setting range:
Min 10 – max 120 min in 1 min. increments, continuous VENTILATION mode possible for air heaters.
or button to select the ventila-
21 °C
button.
PLEASE NOTE!
or button to set the
30 min
The operating time is changed permanently.
30 min
Display for air heaters in continuous VENTILATION
mode
∞
PLEASE NOTE!
After switching on, “On” is displayed for 2 sec and
then the remaining operating time or
heaters.
During ventilation mode it is possible to switch to
another menu item. Under the HEATING menu item,
check the operating time and if necessary adjust.
If the
function is not activated or is not available for the
heater.
The changed operating time is offered again the next
time the system is started.
21 °C
21 °C
for air
symbol is not displayed the VENTILATION
Press the button to confirm the operating time.
Page 15

VEHICLE HEATERS – TECHNICAL DOCUMENTATION | 15
3 OPERATION AND SETTING/ADJUSTMENT
VENTILATION OFF WITH LONGPRESS
Display ON, the VENTILATION menu item is displayed.
Press the
2 seconds
Heater OFF.
Off
After the VENTILATION OFF display the Start display
appears.
If the vehicle lighting is OFF the display lighting goes
out after 10 seconds.
LONGPRESS button for longer than
21 °C
17:30
PLEASE NOTE!
With VENTILATION OFF with LONGPRESS all active
functions are ended.
The following actions are possible during the
VENTILATION OFF display:
Use the
SHORTPRESS button, the Start display appears,
if the SHORTPRESS button is pressed again,
Display OFF.
SHORTPRESS button, the VENTILATION submenu
is displayed.
21 °C
or button to select a menu item.
VENTILATION OFF WITH SHORTPRESS
Display ON, the VENTILATION menu item is displayed.
Press the
2 seconds.
Heater OFF.
Off
After the VENTILATION OFF display the Start display
appears.
If the vehicle lighting is OFF the display lighting goes
out after 10 seconds.
SHORTPRESS button for less than
21 °C
17:30
PLEASE NOTE!
The heater switches off, an active add-on unit
remains in operation.
The following actions are possible during the
VENTILATION OFF display:
Use the
SHORTPRESS button, the Start display appears,
if the SHORTPRESS button is pressed again,
Display OFF.
SHORTPRESS button, the VENTILATION submenu
is displayed.
21 °C
or button to select a menu item.
Page 16

16 | VEHICLE HEATERS – TECHNICAL DOCUMENTATION
3 OPERATION AND SETTING/ADJUSTMENT
ADD-ON UNIT ON – E.G. ACTIVATE THE HEATING
FUNCTION FOR A 2ND HEATER
Display ON, the Start display appears.
Use the
in the Menu bar.
or button to select the symbol
Off 21 °C
Confirm the ADD-ON UNIT menu item by pressing the
button.
Use the
or button to select the symbol.
Confirm the HEATING function using the
button.
PLEASE NOTE!
The following settings or confirmations are absolutely
necessary.
SET TEMPERATURE SETPOINT – FOR AIR HEATERS
ONLY
Use the or button to set the temperature
setpoint.
Temperature setpoint setting range:
8 °C – 36 °C in 1 °C increments,
46 °F – 97 °F in 1 °F increments.
21 °C
Press the button to confirm the temperature
setpoint.
SETTING THE OPERATING TIME
Use the
Operating time setting range:
Min 10 – max 120 min in 1 min. increments, continuous heating mode is possible for air heaters.
90min
Press the button to confirm the operating time.
The operating time is changed permanently.
or button to set the operating time.
Heater ON.
90 min
Page 17

VEHICLE HEATERS – TECHNICAL DOCUMENTATION | 17
3 OPERATION AND SETTING/ADJUSTMENT
Display for air heaters in continuous heating mode
(factory setting).
∞
PLEASE NOTE!
After switching on, “On” is displayed for 2 sec and
then the remaining operating time or
heaters.
During heating mode it is possible to switch to
another menu item. Under the VENTILATION menu
item, check the operating time and if necessary
adjust.
If the symbol is not displayed the ADD-ON UNIT
function is not activated or is not available for the
heater.
The add-on unit, e.g. a 2nd heater, can be operated
simultaneously with the 1st heater yet with a different operating mode and with different values for the
temperature setpoint and the operating time.
The changed operating time is offered again the next
time the system is started.
for air
ADD-ON UNIT ON – E.G. ACTIVATE THE
VENTILATION FUNCTION FOR A 2ND HEATER
Display ON, the Start display appears.
Use the
in the Menu bar.
or button to select the symbol
Off 21 °C
Confirm the ADD-ON UNIT menu item by pressing the
button.
Use the
Confirm the VENTILATION function by pressing the
The following setting or confirmation is absolutely
necessary.
or button to select the symbol.
button.
PLEASE NOTE!
Page 18

18 | VEHICLE HEATERS – TECHNICAL DOCUMENTATION
3 OPERATION AND SETTING/ADJUSTMENT
SETTING THE OPERATING TIME
Use the
Operating time setting range:
Min 10 – max 120 min in 1 min. increments, continuous VENTILATION mode possible for air heaters.
Press the button to confirm the operating time.
The operating time is changed permanently.
Heater ON.
or button to set the operating time.
60 min
60 min
Display for air heaters in continuous VENTILATION
mode (factory setting).
PLEASE NOTE!
After switching on, “On” is displayed for 2 sec and
then the remaining operating time or
heaters.
During ventilation mode it is possible to switch to
another menu item. Under the HEATING menu item,
check the operating time and if necessary adjust.
If the
symbol is not displayed the ADD-ON UNIT
function is not activated or is not available for the
heater.
The add-on unit, e.g. a 2nd heater, can be operated
simultaneously with the 1st heater yet with a different operating mode and with different values for the
temperature setpoint and the operating time.
The changed operating time is offered again the next
time the system is started.
for air
∞
Page 19

VEHICLE HEATERS – TECHNICAL DOCUMENTATION | 19
Off 21 °C
3 OPERATION AND SETTING/ADJUSTMENT
ADD-ON UNIT OFF WITH LONGPRESS
Press the
2 seconds
Add-on unit OFF.
After the ADD-ON UNIT OFF display the Start display
appears. If the vehicle lighting is OFF the display
lighting goes out after 10 seconds.
LONGPRESS button for longer than
17:30
PLEASE NOTE!
With ADD-ON UNIT OFF with LONGPRESS all active
functions are ended.
The following actions are possible during the ADD-ON
UNIT OFF display:
Use the
SHORTPRESS button, the Start display appears,
if the SHORTPRESS button is pressed again,
Display OFF.
SHORTPRESS button, the HEATING submenu is
displayed.
21 °C
or button to select a menu item.
ADD-ON UNIT OFF WITH SHORTPRESS
Display ON, the ADD-ON UNIT – HEATING menu item
is displayed.
Press the
2 seconds.
Add-on unit OFF.
SHORTPRESS button for less than
Off 21 °C
After the ADD-ON UNIT OFF display the Start display
appears. If the vehicle lighting is OFF the display
lighting goes out after 10 seconds.
17:30
PLEASE NOTE!
The following actions are possible during the ADD-ON
UNIT OFF display:
Use the
SHORTPRESS button, the Start display appears,
if the SHORTPRESS button is pressed again,
Display OFF.
SHORTPRESS button, the HEATING submenu is
displayed.
21 °C
or button to select a menu item.
Page 20

20 | VEHICLE HEATERS – TECHNICAL DOCUMENTATION
3 OPERATION AND SETTING/ADJUSTMENT
GENERAL INFORMATION ON PROGRAMMING THE
PRESET TIME
The programming of the preset time is carried out in
menu item
The EasyStart Timer can be used to program 3 preset
times. The 3 preset times can either all take place on
one weekday or can be distributed between different
weekdays.
3 weekday ranges are available to choose from,
these can each be started daily with a preset time.
Weekday ranges:
Sat – Sun 2x HEATING / VENTILATION
Mon – Fri 5x HEATING / VENTILATION
Mon – Sun 7x HEATING / VENTILATION
If the system is activated with programmed weekday
range, all weekdays are worked through consecutively; after that renewed programming is required.
Example:
If the EasyStart Timer with a programmed weekday
range Mon – Fri is activated on Sunday, the heater
heats or ventilates from Monday to Friday with the
set defaults (5x HEATING / VENTILATION).
If the EasyStart Timer with a programmed weekday range Mon – Fri is activated on Wednesday, the
heater heats or ventilates on Thursday and Friday, the
heater is not operated on Saturday and Sunday. From
Monday to Wednesday of the following week the
operation is continued with the set defaults
(5x HEATING / VENTILATION).
After a weekday range has been worked through
renewed programming is required.
.
BITTE BEACHTEN!
If the
symbol is not displayed in the Menu bar, the
heater is in ADR mode; preselected heating mode is
not possible here.
When programming the EasyStart Timer, note the
operating mode as described in the following.
DEPARTURE TIME OPERATING MODE (FACTORY
SETTING)
Under the following conditions the preselected heating mode is not started on the current day.
The current day and the preselected day are iden-
tical.
The current time lies within the time period, depar-
ture time minus operating time.
Example:
Current day / preselected day: Thu
Current time: 18:45
Departure time: 19:00
Operating time: 30 minutes
Duration: 18:30 to 19:00
The current time lies within the time period, the
heater is not switched on.
The program will be run during the next week.
START TIME OPERATING MODE
In Start Time operating mode the heater is started
on the preselected day and when the set time is
reached.
Page 21

VEHICLE HEATERS – TECHNICAL DOCUMENTATION | 21
3 OPERATION AND SETTING/ADJUSTMENT
AUTOMATIC OPERATING TIME CALCULATION
(for water heaters only)
For water heaters and a temperature sensor connected to the EasyStart Timer the heating start is
calculated automatically depending on the measured
room temperature and the selected heating level
(ECO or HIGH).
The operating time can lie between 10 and 60
minutes; operation is always ended 5 minutes after
the programmed departure time. This can result in a
minimum operating time of 15 minutes and a maximum operating time of 65 minutes.
The operating time set in the Program / Preselection
menu is ineffective in this case.
In all other configurations the start takes place
according to the preset operating time.
PLEASE NOTE!
The ECO and HIGH heating levels are only effective
in conjunction with a programmed preset time.
The preset times are always departure times, even
if the operating time calculation is deactivated.
It is not possible to program more than 3 pre-
set times.
The max. operating time of 65 minutes for the
automatic operating time calculation is a factory
setting. This can be reduced to 15 minutes if necessary by the installation workshop.
If the automatic operating time calculation function
is activated for water heaters, the operating time
for determining the time period is 60 min.
Page 22

22 | VEHICLE HEATERS – TECHNICAL DOCUMENTATION
1
Mo. - Fr. 21 °C
07 : 00 30 min.
2
Off
On
2
Off
On
3 OPERATION AND SETTING/ADJUSTMENT
PROGRAM PRESET TIMES
Display ON, the Start display appears.
Use the
the Menu bar.
Display, if no preselection is activated.
or button to select the symbol in
2
1
Display, if a preselection is activated e.g. P2.
1
Confirm the PROGRAM menu item by pressing the
button.
PLEASE NOTE!
symbol is marked with , a or several pro-
If the
gram memories is/are already activated.
Activated program memories are marked in the display with a .
3
2
3
Program memory P1 display, factory setting.
Program memory P2 display with programmed
preselection.
2
Mi. 21 °C
06 : 30 60 min.
Press the button to confirm the selected program memory.
ACTIVATING / DEACTIVATING THE PROGRAM MEMORY
Use the
setting.
or button to select the “On” or “Off”
EASYSTART TIMER SETTINGS
SELECTING THE PROGRAM MEMORY
The P1 program memory is displayed, if applicable,
use the
memory P2, P3 or P1 again.
or button to select the next program
Confirm the “On” or “Off” setting with the button, the program, e.g. P2 is activated or deactivated.
Page 23

VEHICLE HEATERS – TECHNICAL DOCUMENTATION | 23
3 OPERATION AND SETTING/ADJUSTMENT
SELECTING THE WEEKDAY GROUP / WEEKDAY
2
Mi. 21 °C
06 : 30 60 min.
Use the
group Mon – Fri, Sat – Sun, Mon – Sun or a weekday
Mon, Tue, Wed, Thu, Fri, Sat, Sun.
or button to select the weekday
2
PLEASE NOTE!
After editing the program, press the
return to the PROGRAM / PRESELECTION menu item
or wail until
if the vehicle lighting is ON the PROGRAM / PRESE-
LECTION menu item is displayed,
if the vehicle lighting is OFF the display lighting
goes out.
Do not press the
setting switches to “Off” and vice versa.
EDITING THE PROGRAM MEMORY
Use the
memory, e.g. P2.
Use the or button to select the symbol.
button, as otherwise the “On”
button to confirm the selected program
button to
Press the button to confirm the setting.
SETTING THE DEPARTURE TIME / START TIME
Use the
Press the button to confirm the setting.
Use the
Mi.
or button to set the hours.
2
06 : 00
or button to set the minutes.
2
Off
Press the button to confirm the setting.
On
2
06 : 30
Press the button to confirm the setting.
Page 24

24 | VEHICLE HEATERS – TECHNICAL DOCUMENTATION
3 OPERATION AND SETTING/ADJUSTMENT
SELECTING THE OPERATING MODE
Use the
bol or the symbol.
or button to deselect the sym-
2
2
Confirm the HEATING or VENTILATION function by
pressing the button.
SET TEMPERATURE SETPOINT – FOR AIR HEATERS ONLY
Use the or button to set the temperature
setpoint.
Temperature setpoint setting range:
8 °C – 36 °C in 1 °C increments,
46 °F – 97 °F in 1 °F increments.
Select ECO heating level or HIGH heating level using
the or button.
2
ECO
2
HIGH
Press the button to confirm the heating level.
SETTING THE OPERATING TIME
Use the
Operating time setting range:
Min. 10 – max. 120 min. in 1 min increments.
or button to set the operating time.
2
60 min
2
21 °C
Press the button to confirm the temperature
setpoint.
SELECTING THE HEATING LEVEL
only for water heaters with automatic operating time
calculation
ECO heating level = normal heating, approx. 20 °C.
HIGH heating level = convenient / comfortable heat-
ing, approx. 23 °C.
Press the button to confirm the operating time.
PLEASE NOTE!
In the case of water heaters with automatic operating
time calculation the operating time is limited to max.
65 min. The operating time cannot be set.
For air heaters and preset mode the operating time is
limited to 120 min. Continuous heating mode is not
possible.
Page 25

VEHICLE HEATERS – TECHNICAL DOCUMENTATION | 25
2
Off
On
2
Off
On
3 OPERATION AND SETTING/ADJUSTMENT
ACTIVATING THE PROGRAM MEMORY
Press the button to confirm the “On” setting.
2
Mi. 21 °C
06 : 30 60 min.
PLEASE NOTE!
After editing the program, press the
return to the PROGRAM / PRESELECTION menu item
or wail until
if the vehicle lighting is ON the PROGRAM / PRESE-
LECTION menu item is displayed,
if the vehicle lighting is OFF the display lighting
goes out.
Do not press the
setting switches to “Off” and vice versa.
button, as otherwise the “On”
button to
DEACTIVATING THE PROGRAM MEMORY
Use the
Press the button to confirm the “Off” setting.
The settings remain saved.
After editing the program, press the
return to the PROGRAM / PRESELECTION menu item
or wail until
if the vehicle lighting is ON the PROGRAM / PRESE-
if the vehicle lighting is OFF the display lighting
Do not press the
setting switches to “Off” and vice versa.
EDIT THE PROGRAM MEMORY AGAIN
Use the
or button to select the “Off” setting.
PLEASE NOTE!
button to
LECTION menu item is displayed,
goes out.
button, as otherwise the “On”
or button to select the symbol.
2
Off
Use the button to confirm the setting and continue as described on page 23, 24 and 25.
On
Page 26

26 | VEHICLE HEATERS – TECHNICAL DOCUMENTATION
3 OPERATION AND SETTING/ADJUSTMENT
SETTINGS
SETTING THE TIME
Display ON, the Start display appears.
Use the
in the Menu bar.
or button to select the symbol
Mo.
Confirm the SETTINGS menu item by pressing the
button.
10:30
Confirm the SET THE TIME by pressing the button.
Use the
or button to set the hours.
PLEASE NOTE!
Do not press the
TIME appears in the display again.
After making the setting, press the
return to the SETTINGS menu item or wail until
if the vehicle lighting is ON the SETTINGS menu
item is displayed,
if the vehicle lighting is OFF the display lighting
goes out.
button, as otherwise SET THE
button to
06 : 00
Press the button to confirm the setting.
Use the
06 : 30
Press the button to confirm the setting.
or button to set the minutes.
Page 27

VEHICLE HEATERS – TECHNICAL DOCUMENTATION | 27
10:30
Mo.
Mo.
3 OPERATION AND SETTING/ADJUSTMENT
SETTING THE WEEKDAY
Display ON, the Start display appears.
Use the
in the Menu bar.
Confirm the SETTINGS menu item by pressing the
or button to select the symbol
button.
The SET THE TIME symbol is displayed
Use the
day symbol.
or button to select the Week-
PLEASE NOTE!
Do not press the
WEEKDAY appears in the display again.
After making the setting, press the
return to the SETTINGS menu item or wail until
if the vehicle lighting is ON the SETTINGS menu
item is displayed,
if the vehicle lighting is OFF the display lighting
goes out.
button, as otherwise SET THE
button to
Press the button to confirm the setting.
Use the
Press the button to confirm the weekday.
or button to select the weekday.
Page 28

28 | VEHICLE HEATERS – TECHNICAL DOCUMENTATION
3 OPERATION AND SETTING/ADJUSTMENT
SETTING THE TIME FORMAT
Display ON, the Start display appears.
Use the
in the Menu bar.
or button to select the symbol
24 h
Mo.
Confirm the SETTINGS menu item by pressing the
button.
10:30
The SET THE TIME symbol is displayed
Use the
FORMAT symbol.
or button to select the TIME
Press the button to confirm the setting.
Use the
or button to select the time format.
Press the button to confirm the time format.
PLEASE NOTE!
Do not press the
TIME FORMAT appears in the display again.
After making the setting, press the
return to the SETTINGS menu item or wail until
if the vehicle lighting is ON the SETTINGS menu
item is displayed,
if the vehicle lighting is OFF the display lighting
goes out.
button, as otherwise SET THE
button to
12 h
Page 29

VEHICLE HEATERS – TECHNICAL DOCUMENTATION | 29
4 WHAT TO DO IF …?
IN THE EVENT OF A FAULT THE FOLLOWING DISPLAYS ARE POSSIBLE:
DISPLAY DESCRIPTION REMEDY / CUSTOMER
INIT
NO SIGNAL
Error
Error
Automatic detection is active.
The EasyStart Timer has been dis-
connected from the power supply
and then reconnected.
No communication. Check and if necessary renew the heater
1st heater fault. Visit your vehicle workshop.
2nd heater fault. Visit your vehicle workshop.
Voltage too low. Charge battery, if necessary visit your
Temperature sensor is defective Visit your vehicle workshop.
Wait until the automatic detection has
finished, then set the time and weekday.
fuse.
Visit your vehicle workshop.
vehicle workshop.
18:30 °C
PLEASE NOTE!
If you are unable to remedy the error or fault, please
contact an authorised JE workshop or dial the following service phone number.
Page 30

30 | VEHICLE HEATERS – TECHNICAL DOCUMENTATION
5 SERVICE
HOTLINE
If you have any technical questions, a problem with
the EasyStart Timer or the heater, dial the following
service phone number from within Germany:
Hotline: 0800 1234300
Fax hotline: 01805 262624
Outside of Germany, please contact the respective
Eberspächer national representative.
Page 31

VEHICLE HEATERS – TECHNICAL DOCUMENTATION | 31
Page 32

Headquarters:
Eberspächer Climate Control Systems
GmbH & Co. KG
Eberspächerstraße 24
73730 Esslingen
Hotline: 0800 1234300
Fax hotline: 01805 262624
info@eberspaecher.com
www.eberspaecher.com
22 1000 34 15 05 EN 06.2013 Subject to change without notice © Eberspächer Climate Control Systems GmbH & Co. KG
 Loading...