

Page 1
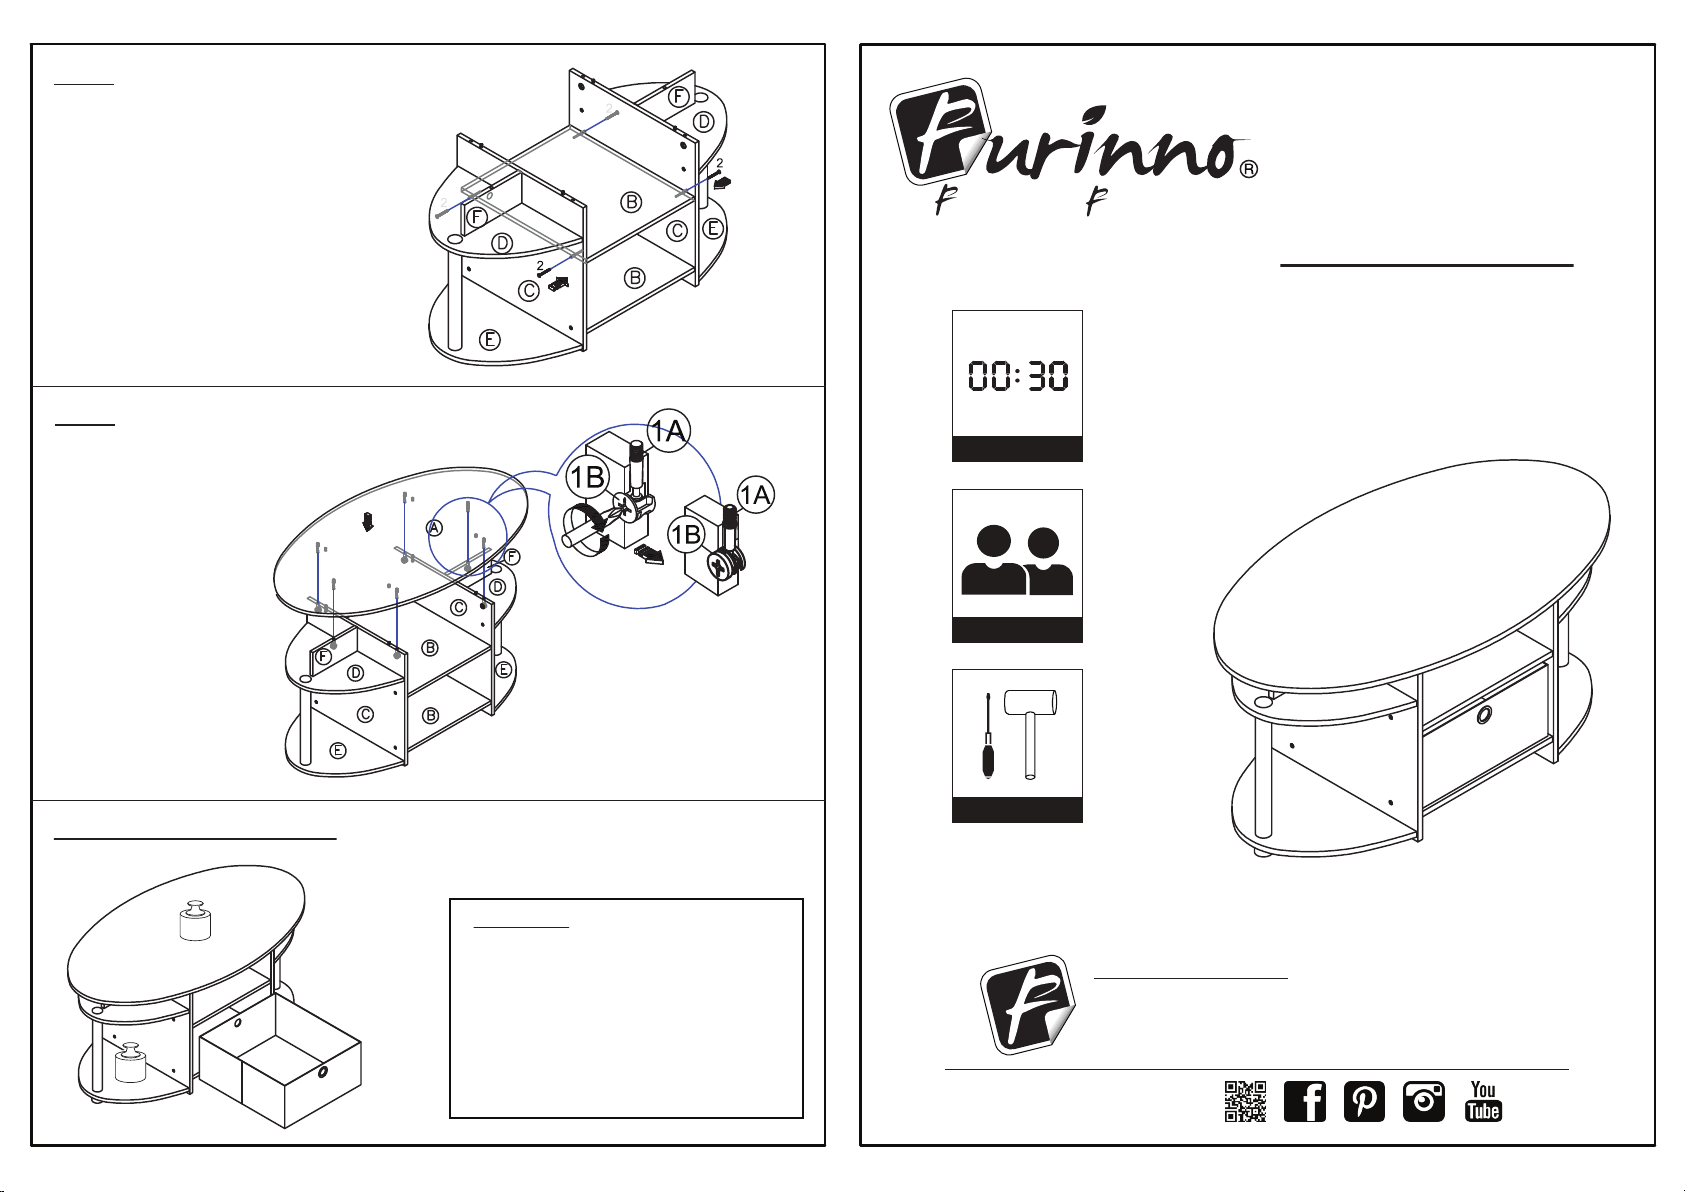
STEP 6
Attach another Center Shelf Panel (B) in the middle and
tighten with Screw (2) as shown.
its Space. its Budget
Assembly Instruction
STEP 7
Attach Panel (A) to the top of assembled unit and
tighten with Mini Fix Bolt (1A) & Cam (1B)
using screwdriver as shown.
Recommended Maximum Weight
Approx. 30 minutes
Recomm. 2 Person
Tool RequiredTool Required
Furinno JAYA Simple Design Oval
Coffee Table with Bin
MODEL : 15079
35.4”(W) x 16.4”(H) x 19.7”(D)DIMENSION :
10
30
WARNING:
>This unit has been designed to support the
maximum loads shown. Exceeding these
load limits could cause sagging, instability,
product collapse, and/or serious injury.
>DO NOT allow children to climb on unit.
>Put heavier items on lower shelves.
Customer Support
NEED HELP? For help with assembly, or if you are missing a
part, please call Furinno Customer Service, 1-773-299-8111
from Mon-Fri, 9am-5pm (CST) or email: [email protected]
www.furinno.com
1507920160227
Page 2
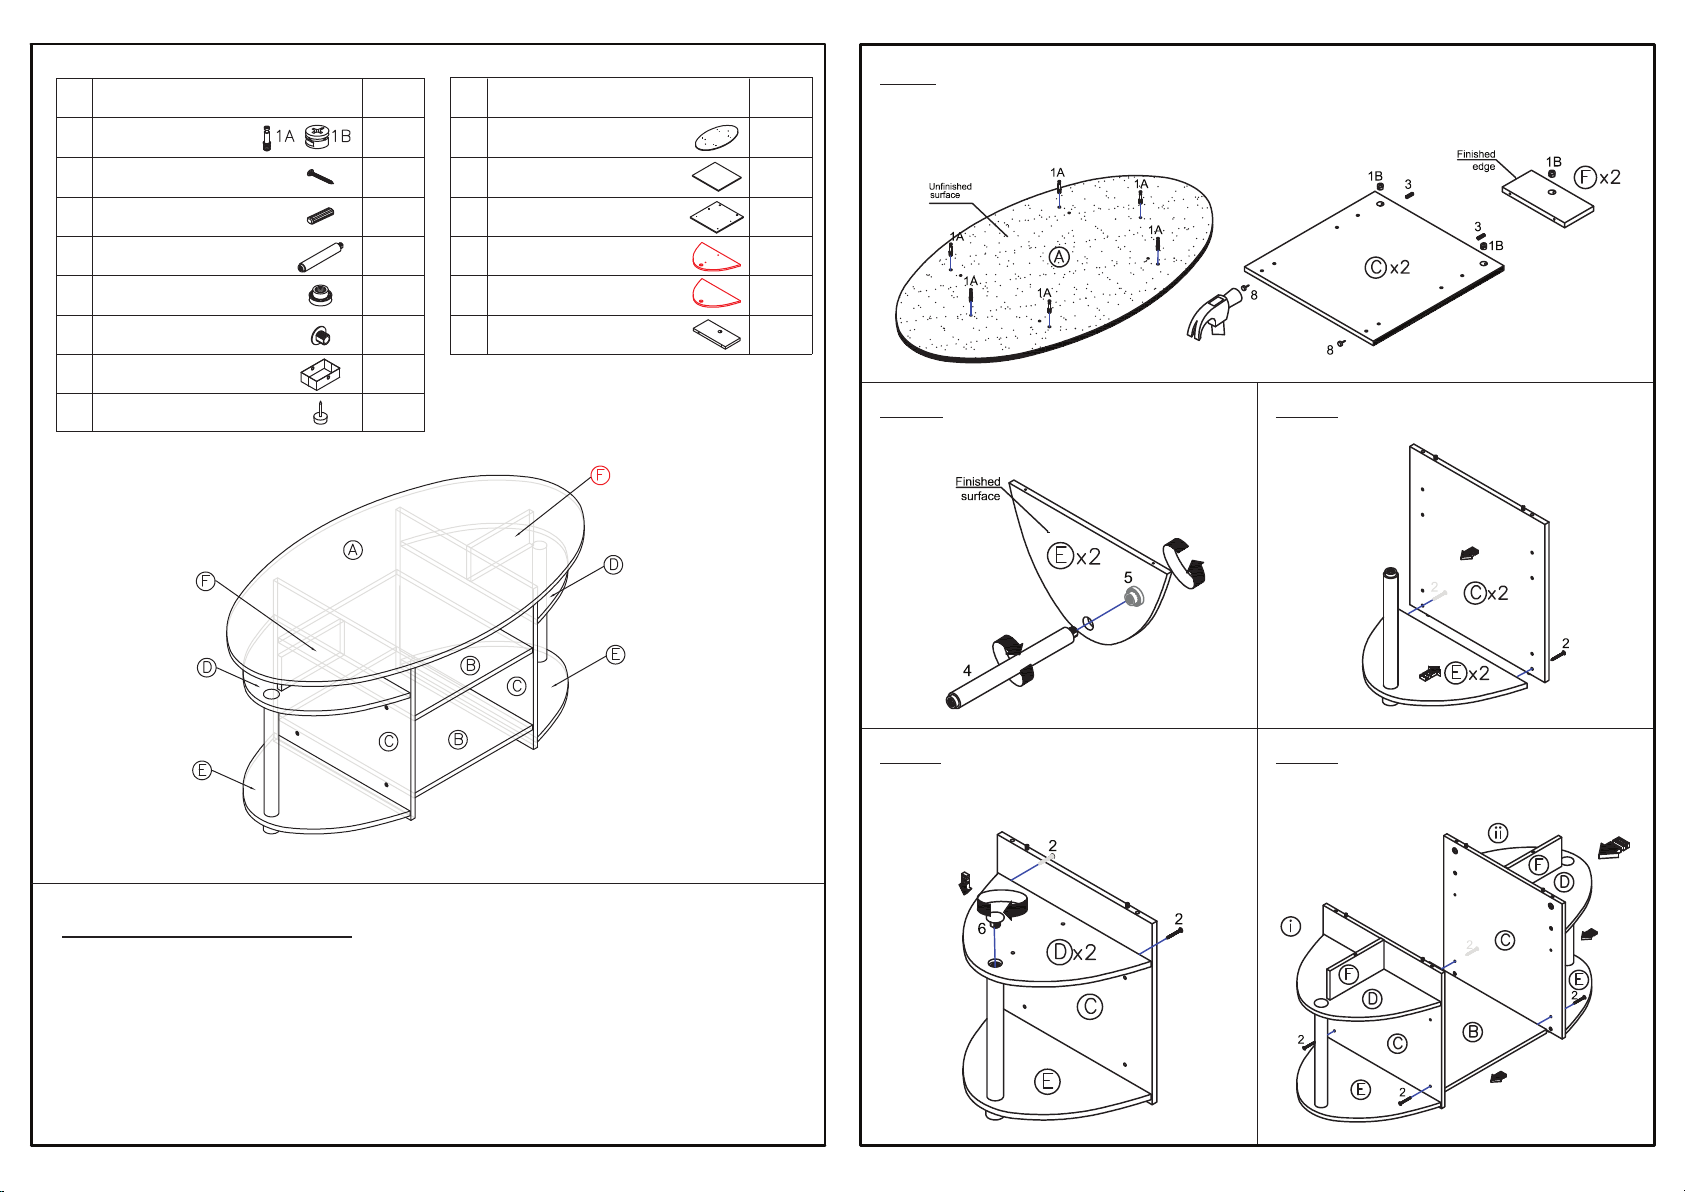
No Hardware List Qty No QtyParts List
Top Panel
Mini Fix Bolt & Cam
1
C/B Screw
2
6pcs
20pcs
A 1pc
Center Shelf Panel
B
STEP 1
1.1 Insert Mini Fix Bolt (1A) into Panel (A) using screwdriver.
1.2 Insert Mini Fix Cam (1B) into Panel (C)&(F).
1.3 Attach Dowel (3) & Nail Leg (8) into Panel (C) using hammer.
2pcs
Dowel
3
Round Pole
4
Short Round Leg
5
Top Cap
6
Non Woven Bin
7
Nail Leg
8
4pcs
2pcs
2pcs
2pcs
1pc
4pcs
Side Panel
C
Side Shelf Panel (L/R)
D
Side Bottom Panel (L/R)
E
L/R Upper Support Panel
F
2pcs
2pcs
2pcs
2pcs
STEP 2
Attach Short Round Leg (5) together with Round
Pole (4) into Panel (E) as shown.
STEP 4
Attach Panel (D) to assembled unit with
Screw (2) and Top Cap (6) as shown.
STEP 3
Attach Panel (C) to assembled unit and tighten it
with Screw (2).
STEP 5
Attach two assembled unit with Center Shelf
Panel (B) and tighten with Screw (2).
USEFUL HINTS BEFORE YOU START:
1. Read each step carefully before starting.
2. It is important that each step is performed in correct order to avoid difficulties.
3. Identify, sort and count the parts before assembly.
4. Assemble your furniture on packaging cardboard to prevent scratch or damage.
5. Clean the product with mild cleanser using soft damped cloth. Do not use harsh or abrasive cleanser.
6. Using uncompatible hardware might cause damage to product.
 Loading...