

Page 1

ASSEMBLY INSTRUCTIONS
COMPUTER DESK
Page 2

CONTENTS
EXTRA HARDWARE INCLUDED FOR YOUR CONVENIENCE. ITEMS ARE NOT SHOWN TO SCALE.
PARTS
PART DESCRIPTION STOCK# QTY.
1
Desktop
Keyboard Tray
2
3 Back Board
4 Bottom Shelf 1
1
1
1
PART DESCRIPTION
M5 X 60MM
A
B M6 X 90MM
M4 X 12MM
C
D Hex Wrench
E M5 X 55MM
Extra Hardware Pack 1
QT
Y.
4
4
4
1
4
5
Left Stand
6
Right Stand
7 Extenders
Front Leg Cap
8
9
Back Leg Cap
1
- READ THE INSTRUCTION MANUAL BEFORE ASSEMBLING.
- REMOVE ALL PIECES BEFORE BEGINNING INSTALLATION.
- OPEN THE HARDWARE AS NEEDED .
- ASSEMBLE IN AN AREA WITH PLENTY OF SPACE.
- READ EACH STEP BEFORE BEGINNING CONSTRUCTION.
- NEVER FORCE THE SCREWS OR FITTINGS.
- KEEP THIS MANUAL FOR FUTURE REFERENCE.
- TIGHTEN ALL THE SCREWS EVERY 6 MONTHS.
- HAVE THE TOOL BELOW BEFORE YOU BEGIN ASSEMBLING.
- THE FOLLOWING TOOL IS NOT INCLUDED.
1
4
CLEANING AND CARE
- CLEAN SURFACES WITH A DRY OR DAMP CLOTH.
2
2
- DO NOT USE ABRASIVE CLEANERS.
2 of 6
Page 3

ASSEMBLY INSTRUCTION
DO NOT TIGHTEN SCREWS UNTIL COMPLETELY ASSEMBLED
STEP 1
Attach back board (3) to right stand (6) and left stand (5)
using four (A) screws as shown.
CAUTION: DO NOT overtighten screws
A x 4
A
Next attach two back leg caps (9) to the back of stands (5)
and (6). Also attach two front leg caps (8) to the front of
stands (5) and (6).
9 x 2
8 x 2
A
STEP 2
Position the four extenders (7) as shown in the diagram.
Attach the desktop (1) using four screws (B) as shown.
3
6
9
5
8
9
8
7
B x 4
7 x 4
3 of 6
1
7
7
B
7
B
B
B
Page 4
ASSEMBLY INSTRUCTION
DO NOT TIGHTEN SCREWS UNTIL COMPLETELY ASSEMBLED
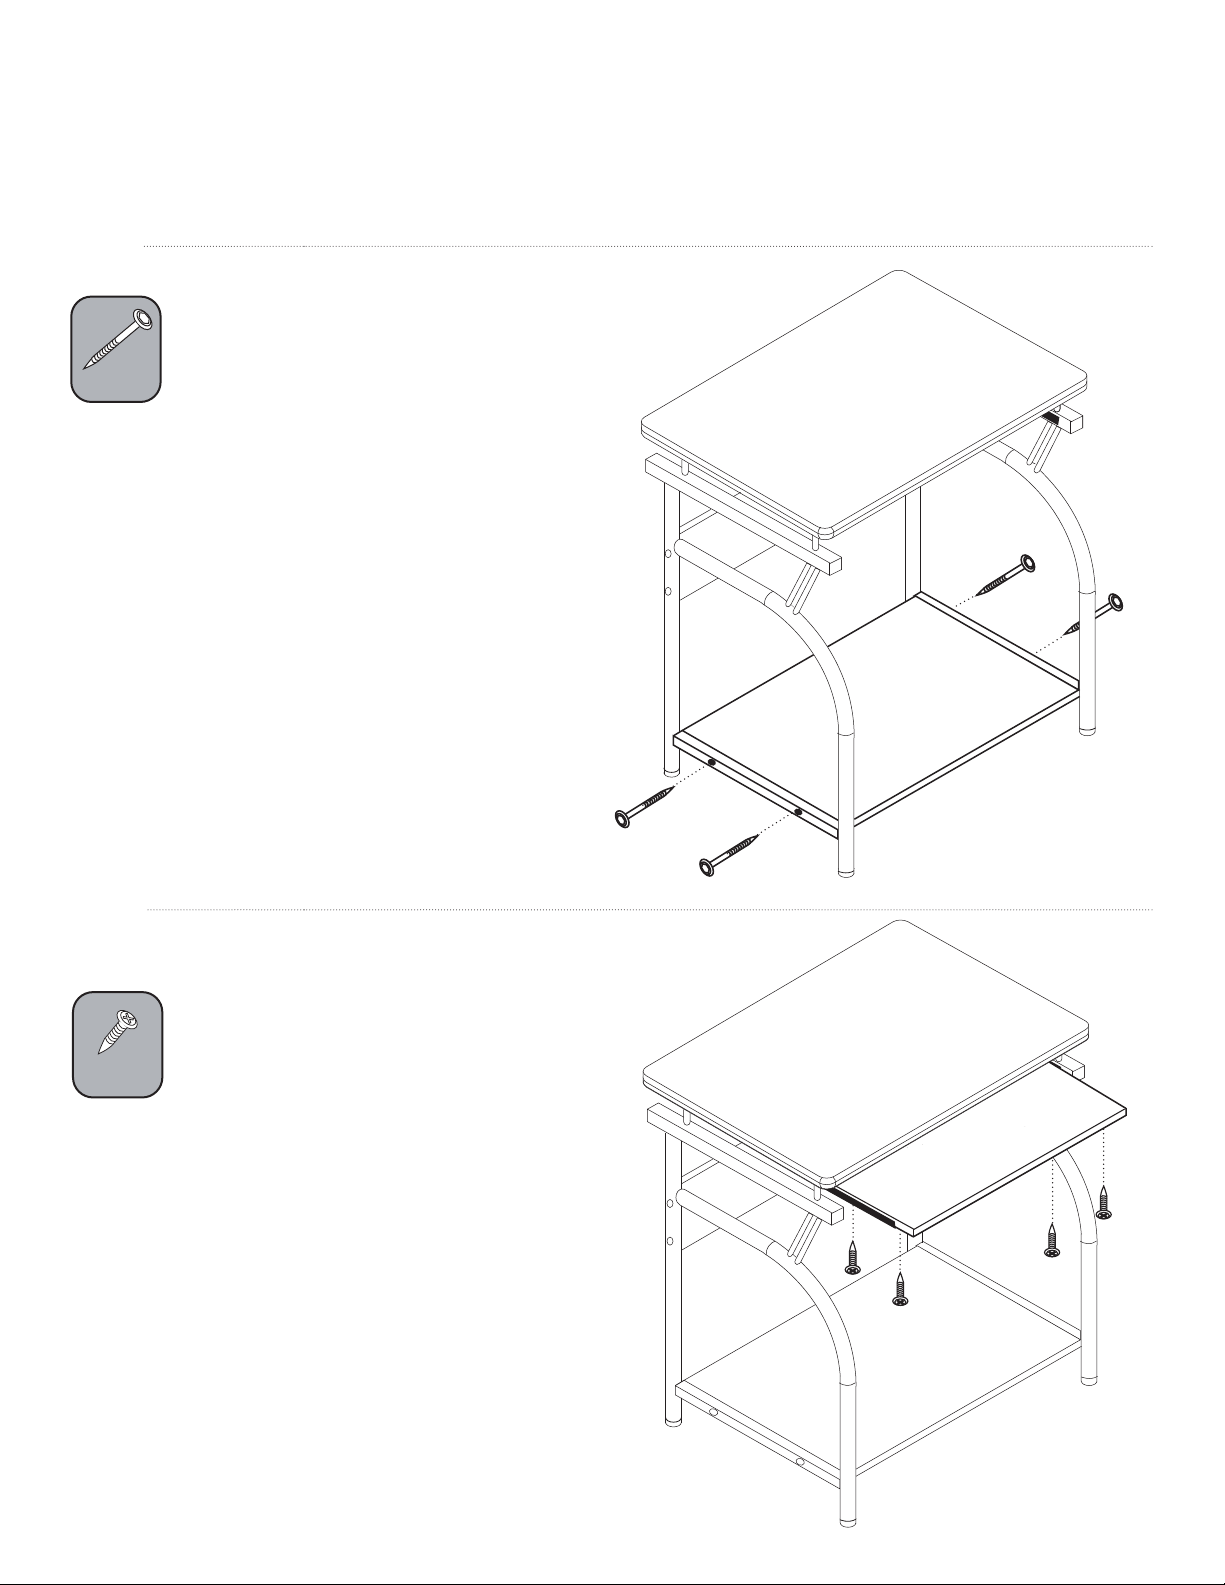
STEP 3
Attach bottom shelf (4) using four screws (E) as shown.
E x 4
E
E
STEP 4
Attach keyboard tray (2) using four screws (C) as shown.
NOTE: You will need a phillips head screwdriver.
C x 4
4
E
E
2
C
4 of 6
C
Page 5
ASSEMBLY INSTRUCTION
DO NOT TIGHTEN SCREWS UNTIL COMPLETELY ASSEMBLED
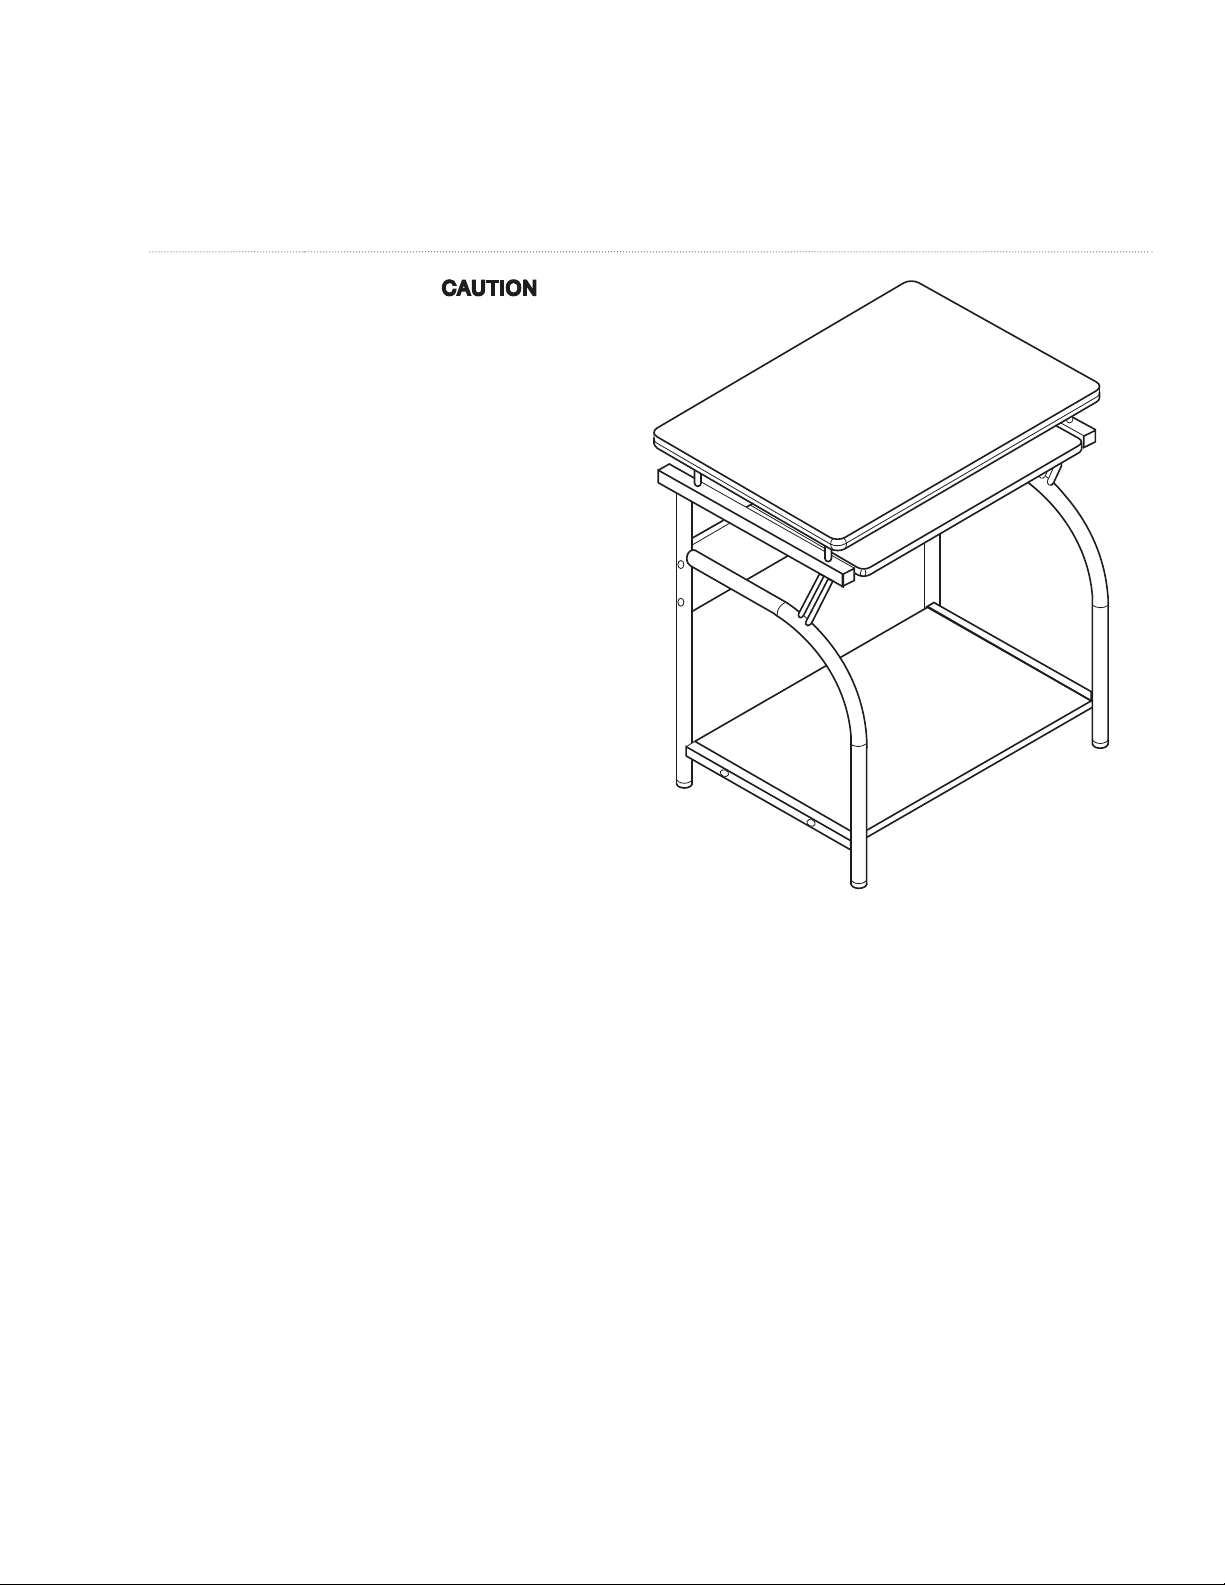
STEP 5
Make sure all screws are securely fastened.
NOT overtighten screws. Check screws every 6 months to
ensure they are still tight.
CAUTION
: DO
5 of 6
Page 6

6 of 6
 Loading...