

Eaton 615M-1 Configuring
Configuring NMS to monitor the RSSI of 615M-1 cellular modem routers
Technical Application Note
Purpose
This application note describes how to configure the
Network Management System (NMS) to monitor the
received signal strength (RSSI) of 615M-1 routers.
You may need to monitor RSSI to find out why a 615M
is dropping connections. Monitoring can reveal that
the 615M has poor RF reception in some areas, or
interference from other devices at particular times—
conditions that may cause unstabile connections.
The 615M has built-in SNMP functionality for remote
monitoring, and NMS can track and monitor devices over
time. This combination provides a powerful solution for
monitoring RSSI. Data is reported systematically and
graphically, allowing you to quickly identify the cause of a
signal strength issue.
Before you begin
This document assumes that you have already installed
and configured NMS (version 1.0.7 or earlier) and have
added the 615M devices you want to monitor to the NMS
system. For installation and setup instructions, refer to
the NMS installation guide and the NMS quick start guide.
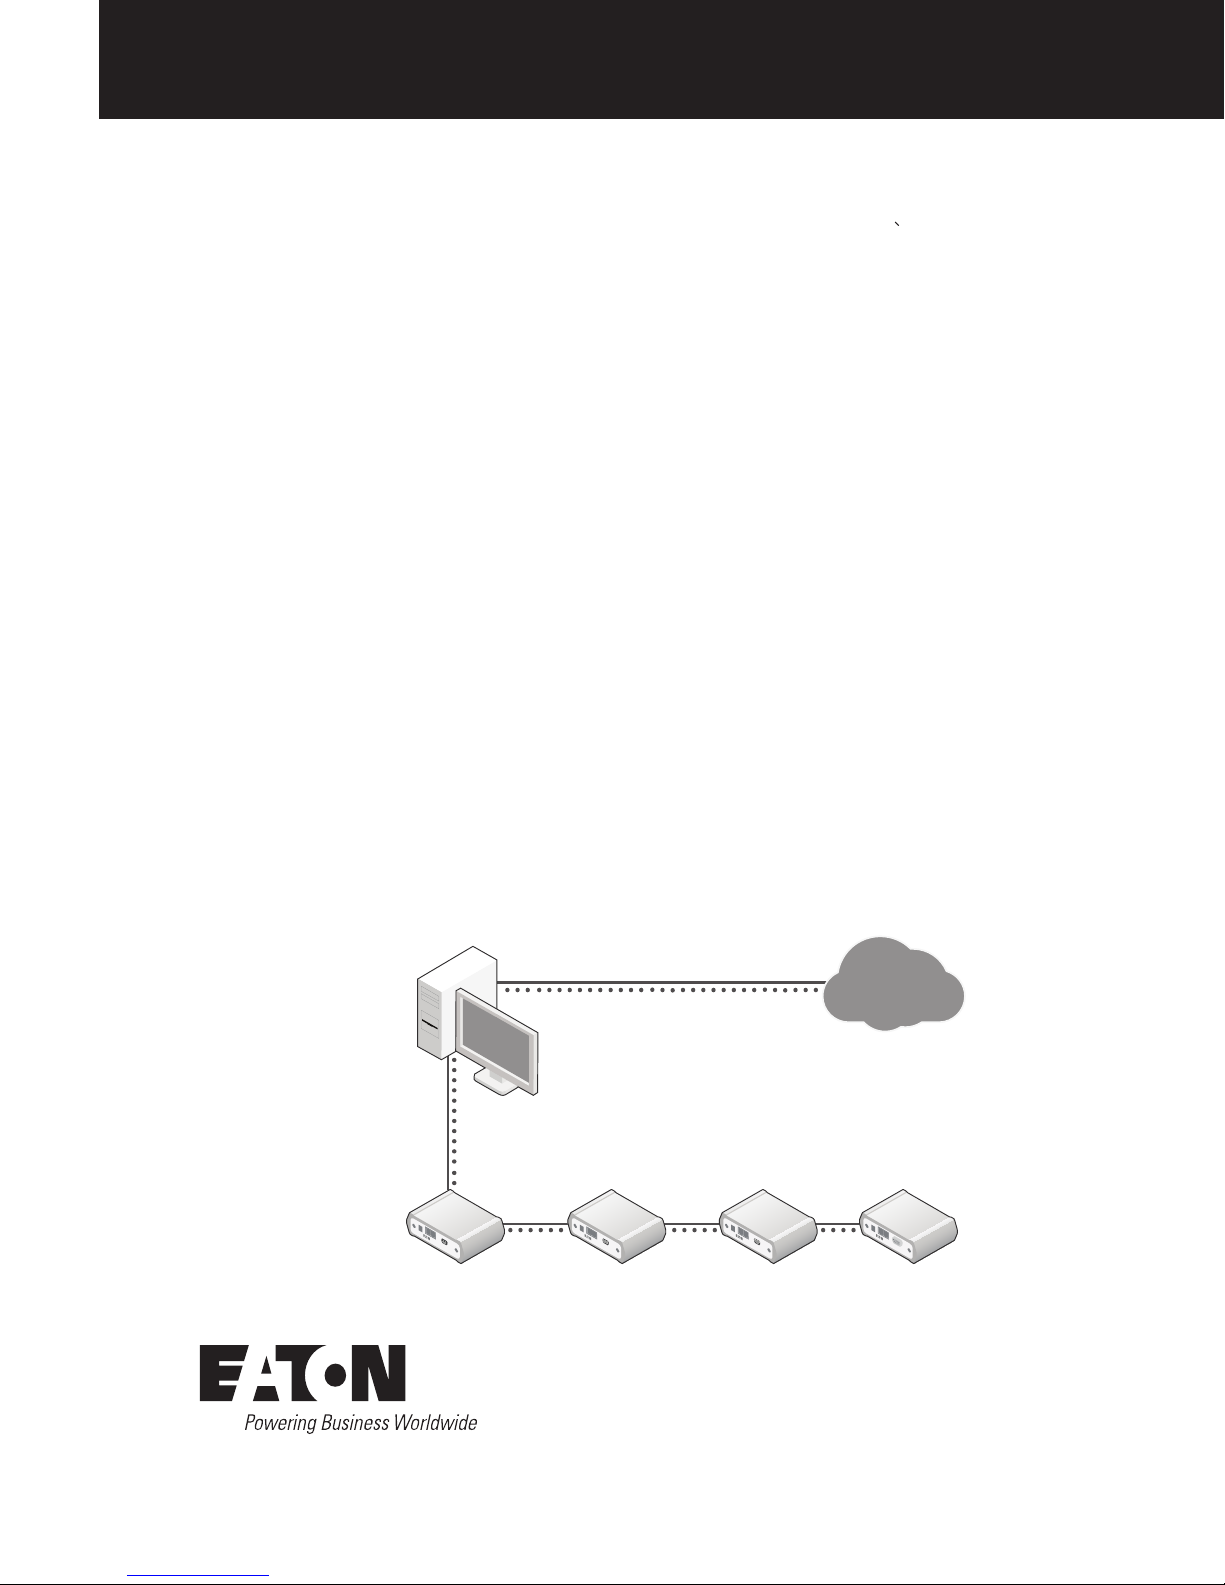
Figure 1. Configuration Setup
PC running NMS
virtual machine
To configure NMS to monitor RSSI you need:
•
PC with Ethernet or wireless network access (see
Figure 1)
•
Ethernet cables to connect (daisy chain) 615M routers
to the PC for configuration purposes (not needed if
connecting wirelessly)
•
Merged 615M SNMP MIB file for NMS. To obtain this
file, contact your ELPRO support help desk (see below)
•
If you plan to use SMS (text messaging) for alert
notification, you also need:
• SMTP email server settings (host address, port,
username, password and security settings) provided
by your IT group,
OR
A gmail account if you are unable to obtain SMTP
settings from your IT group
• Cell phone number for text message notifications
• The
“resolv.conf” file. Obtain this file from your
ELPRO support help desk (see below)
If you do not plan to use text messaging for alert
notification, you can use the default internal email
utility within NMS for notifications. No additional
information is needed to use this option.
ELPRO support help desk: For customers within the US,
go to ELPRO-US-Support@Eaton.com. For customers
outside the US, go to Elpro-Support@eaton.com.
Figure 1 shows the configuration setup. Detailed
instructions are provided in the procedures that follow.
Ethernet
connection
615M-1 Cellular
Modem and
Router
Ethernet connection (wired or wireless)
Ethernet connection
615M-1 Cellular
Modem and
Router
615M-1 Cellular
Modem and
Router
Internet
615M-1 Cellular
Modem and
Router
Enabling SNMP on the 615M routers
The first step is to enable Simple Network Management
Protocol (SNMP) functionality on the 615M routers that you
want to monitor. SNMP is used by NMS to monitor network
devices.
1. Connect the 615M routers to the PC using Ethernet
connection (wired or wireless). You can daisy chain the
routers, as illustrated in Figure 1.
2. Repeat the following steps for each 615M:
a. Log on to the 615M Web interface.
For detailed instructions refer to the 615M-1 users
manual.
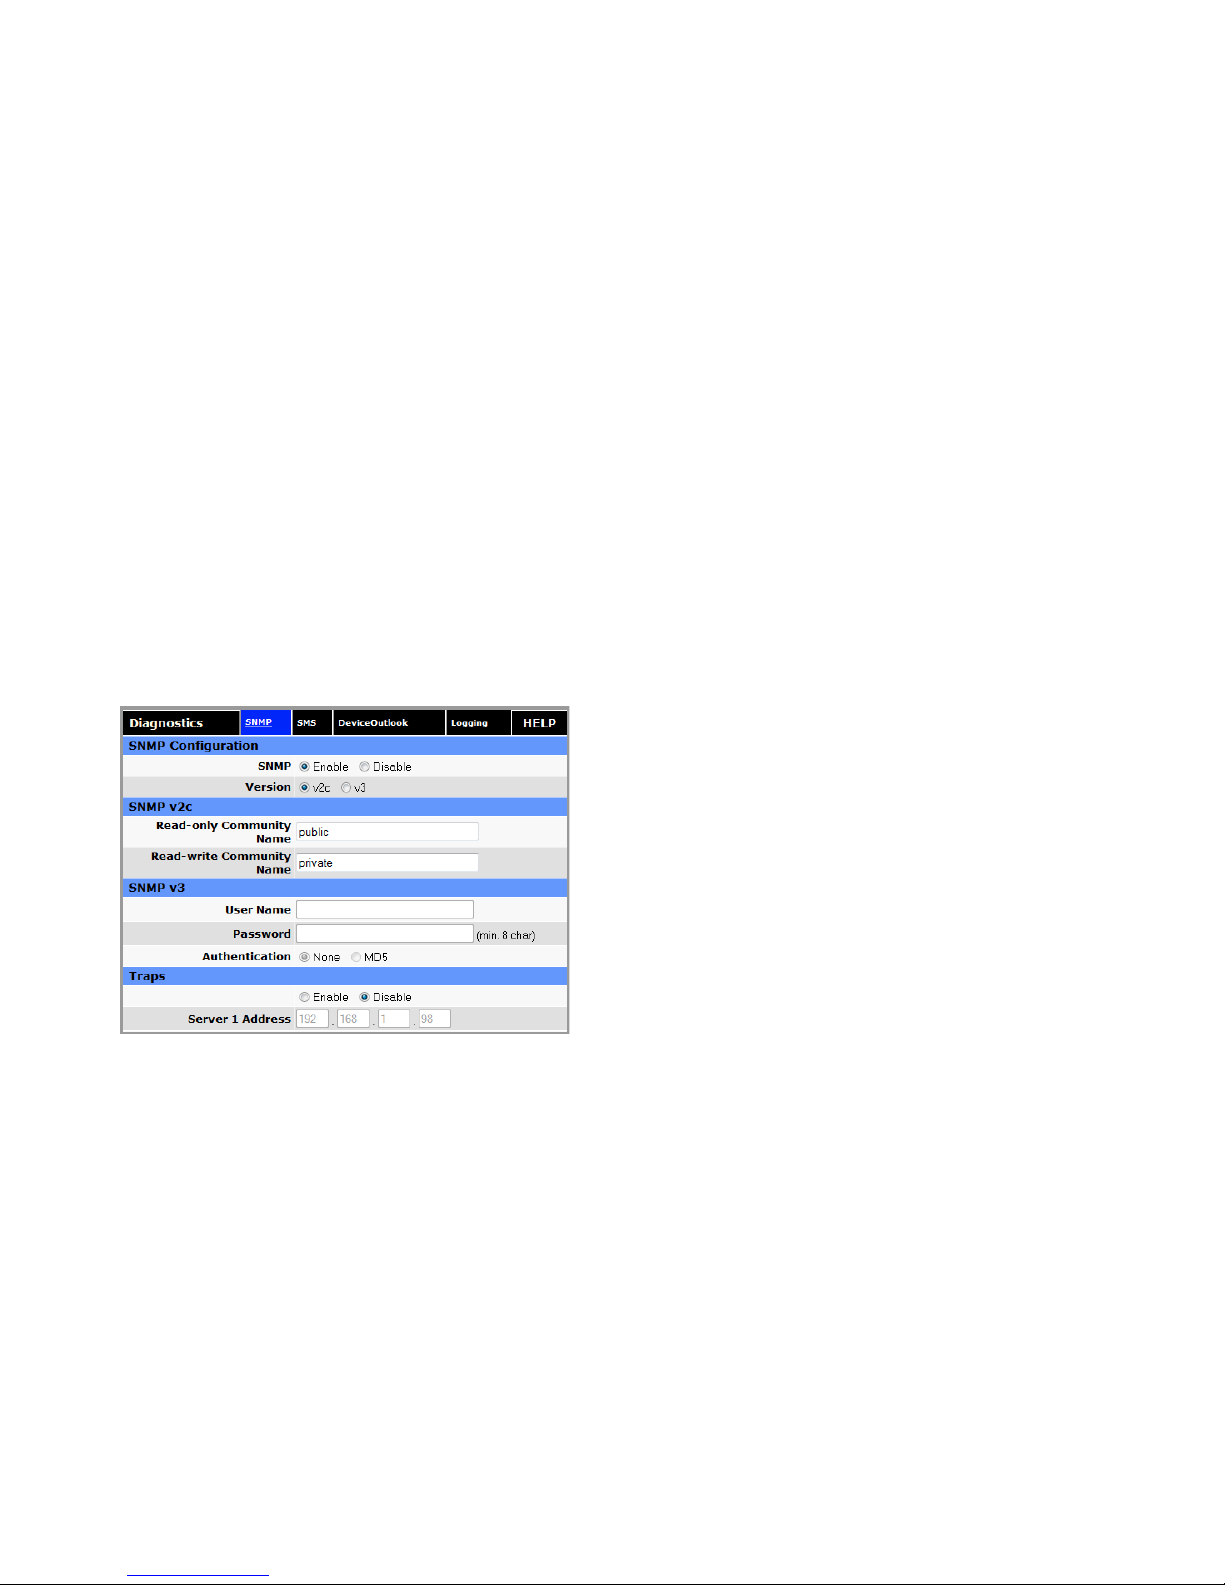
b. On the main menu, click Diagnostics.
c. In the Diagnostics window, click the SNMP tab and
configure the following settings:
• For SNMP, select Enable
• For Version, select “v2c”
• Under Traps, select Disable
d. Click Save and Reset.
Loading the 615M SNMP MIB file into NMS
The next step is to load the merged 615M SNMP MIB
file you received from your ELPRO support help desk into
NMS. In this procedure, the example MIB file is named
“615-5-02-A-final.txt”.
1. Make sure that your PC has Internet connection.
2. On the PC, open the CooperNMS shared directory,
c:\CooperNMS, and create a subdirectory named
“mibfiles”, as shown below.
c:\CooperNMS\mibfiles
3. Copy the merged 615M SNMP MIB file into the
c:\CooperNMS\mibfiles directory.
4. Verify that VMware Player can access the
c:\CooperNMS\mibfiles directory:
a. Open VMware Player.
b. On the Virtual Machine menu, click Virtual Machine
Settings.
c. Click the Option tab, and then click Shared Folders
in the Settings column.
d. Verify the following folder settings:
• Under Folder Sharing, make sure that the
“Always enabled” option is selected.
• Under Folders, make sure that the check box for
the CooperNMS folder is selected.
5. Log on to the NMS virtual machine:
a. From the main VMware Player window, click the
cooperNMSvx.x.x image on the left.
b. Click “Play virtual machine.”
c. At the localhost login, type “root” and press Enter,
and then type the password “cooperadmin” and
press Enter.
For detailed instructions on running the NMS virtual
machine, see the NMS installation guide.
6. Enter the following command to change the directory
to the mibfiles shared directory:
# cd /mnt/hgfs/mibfiles
7. Enter the following command to list the directory
contents. Verify that the MIB file appears in the list.
# ls
8. Enter the following command to install the MIB file
(in this example, “615--5-0-2-A-final.txt”) into the NMS
Linux system:
# addmib addmib
# addmib 615‐5‐0‐2‐A ‐final.txt
The SNMP OID entries are now ready to use for 615M
RSSI monitoring.
2
Technical Application Note September 2014 www.eaton.com
 Loading...