

Eaton 105U-1, 105U-1-5W Installation Manual
Instruction Leaflet IL032001EN
Effective December 2015 Version 2.0
105U-1 wireless extension I/O
installation guide
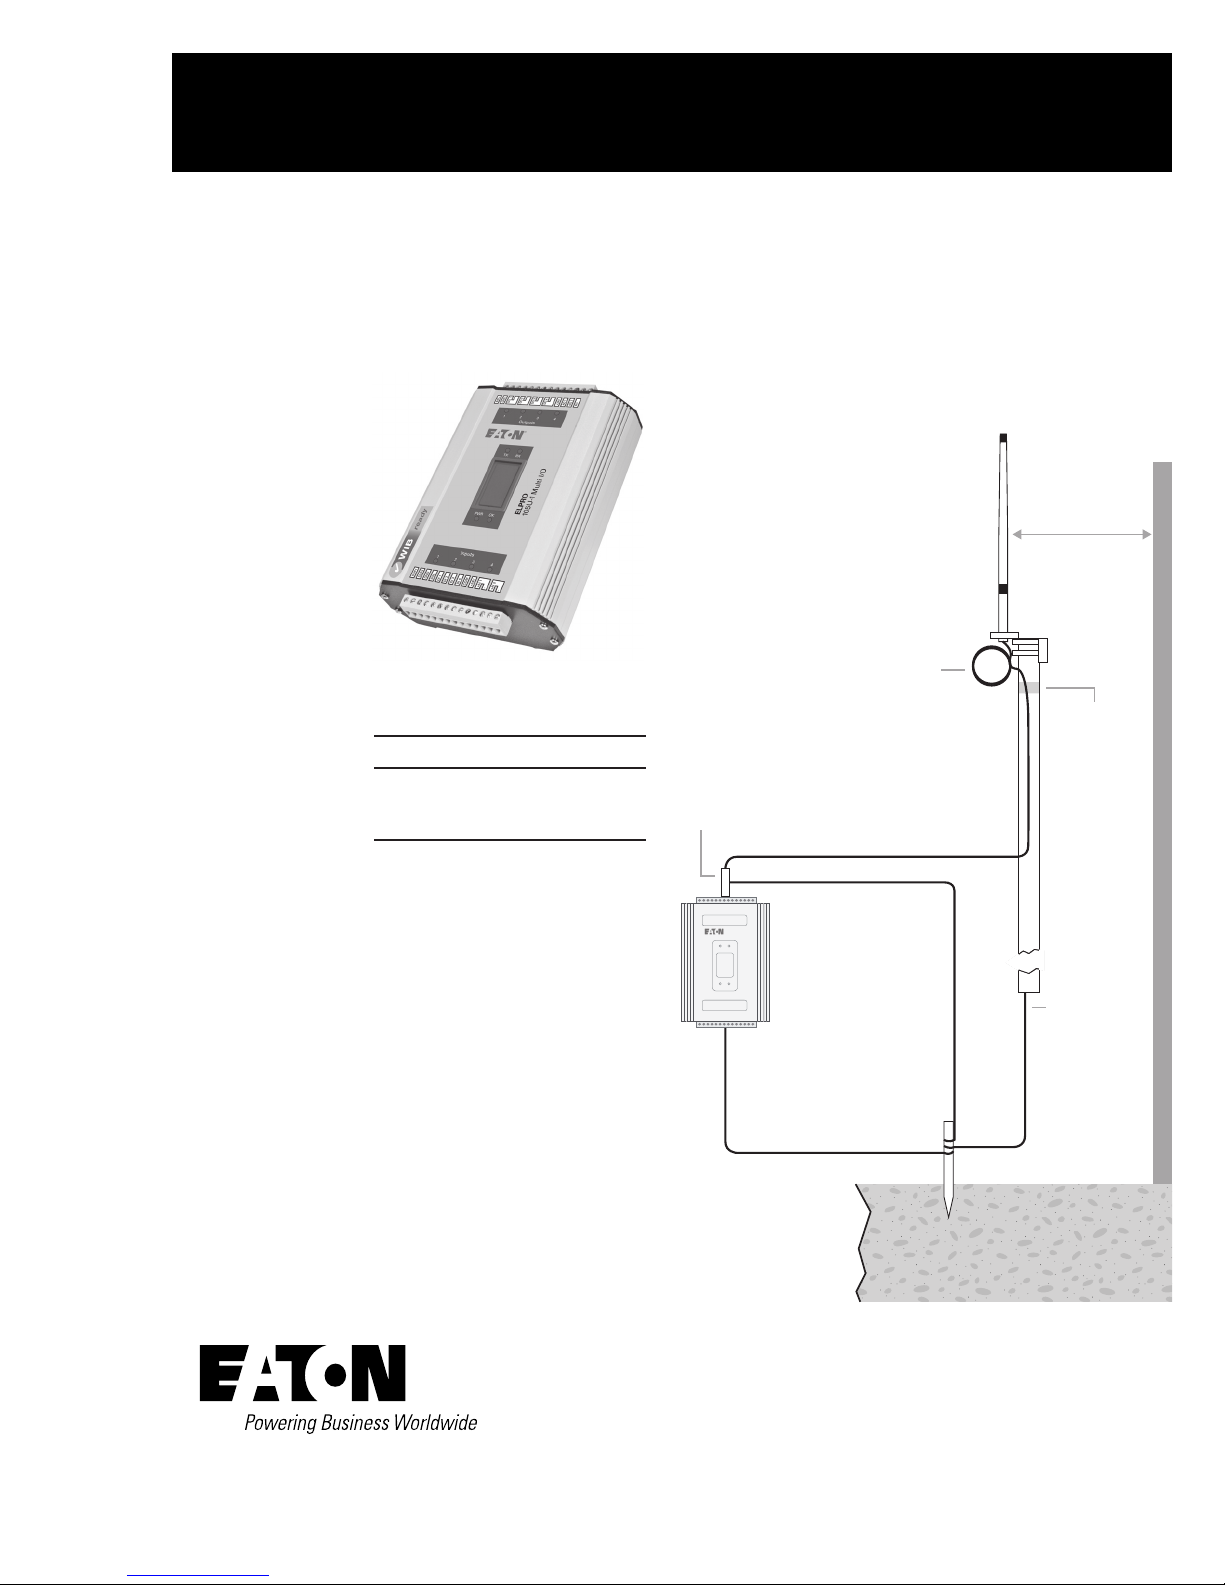
Figure 1. Antenna Installation
CAUTION
For continued protection against risk
of fire, replace the module fuse only
with the same type and rating.
Statutory requirements
EC: Unlicensed operation limits the
radio power. High gain aerials may
only be used to compensate for
cable losses.
Antenna installation
Use Figure 1 as a guide for
installing an antenna and attaching
it to the module.
Wavelengths:
360 MHz = 32.7" (83 cm)
512 MHz = 22.8" (58 cm)
869 MHz = 13.4" (34 cm)
Surge
Arrestor
(optional)
105U-1
ELPRO
105U-1 Multi I/O
at least 11 AWG (4 mm
Coaxial Cable
GND
GND
Stress
Relief
Loop
2
)
Antenna*
1 Wavelength
(minimum)
Weatherproof
Connections
(recommended:
™
3M
23 self-
bonding tape)
Mast
Earth Conductor
at least 5 AWG
2
)
(16 mm
*
For maximum
range, install
above local
obstructions.
Provide good ground
connection to mast,
module, and surge
arrestor.
If ground conditions
are poor, use more
than one stake.
Earth Stake
Instruction Leaflet IL032001EN
11–15 Vdc Supply or
Optional 12V Backup Battery
to 12 Ah for AC/DC
to 100 Ah for Solar
–
+
DC Relay
Supply
AC Relay
Supply
+24V
Loop
Supply
Analog Outputs
+
To Com
-
+AI 2
-
+AI 1
+24V
DI 3
SOL
DI 2
DI 1
GND
COM
DI 4
SUP2
SUP1
BAT+
DO 1
DO 2
DO 4
DO 3
GND
+24V
AO 1
AO 2
PO
1
2
3
4
OUTPUTS
1
3
4
INPUTS
2A
+
–
–
+
+
–
To Com
–
–
–
+
+
–
+
External–Powered
Analog Transducer
LoopPowered
Analog
Transducer
Digital Input
Voltage-Free
Contact or
Transistor
Device
To Earth Stake
DC Supply
15–30 VDC;
Min. 17 VDC
for Battery
Charging
SOL
GND
SUP2
SUP1
AC Supply
12–24 Vac;
Min. 15 Vac
for Battery
Charging
Do not earth
SUP1 or SUP2
connection.
12V Solar
Panel Supply;
Max. 20 Vdc
Max. 30W Panel
Output Counter
External DC Supply
Max. 30 Vdc, 500 mA
Digital Outputs
ELPRO
105U-1 Multi I/O
Effective December 2015
Version 2.0
105U-1 wireless extension I/O installation guide
EATON_105U-1 Install Guide
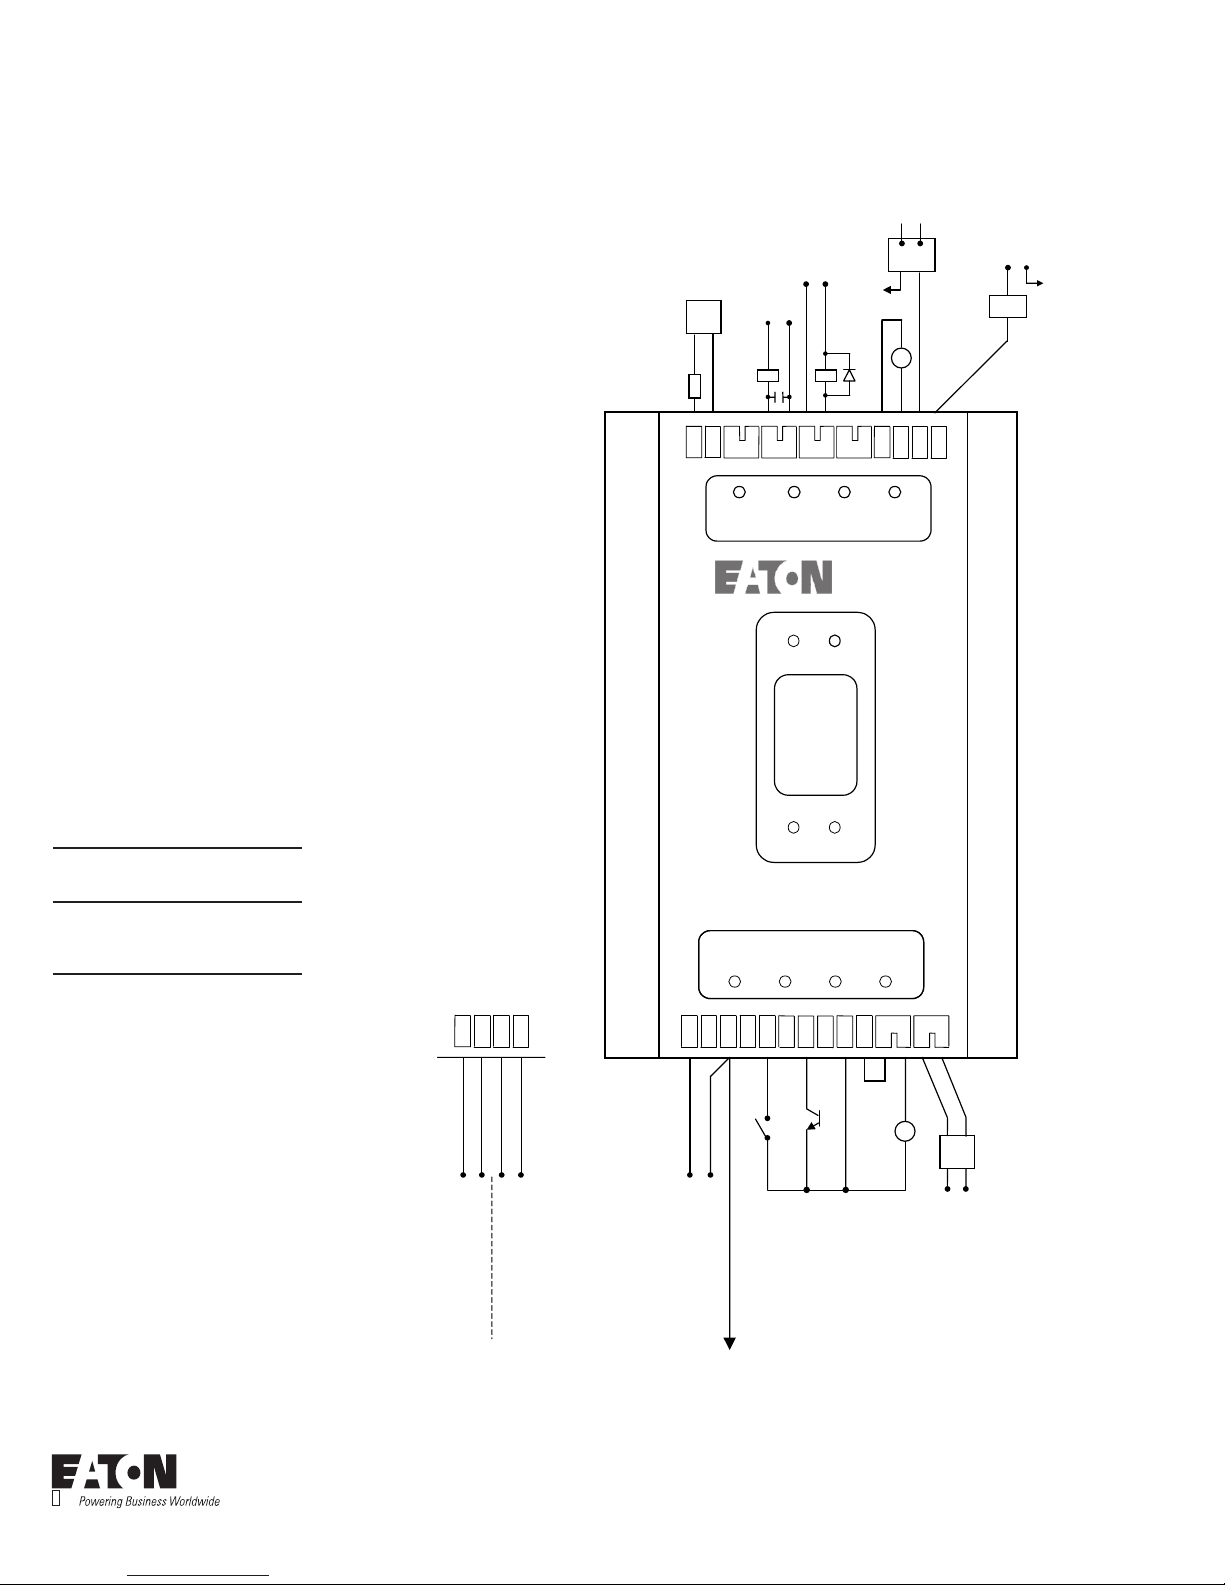
Installation
Choose a power supply option:
•
12–24Vac, 1.5A CSA certified
Class 2
•
15–30Vdc, 1.5A CSA certified
Class 2
•
11–15Vdc, 1.5A
•
Solar panel with battery
After choosing a power supply
option, wire the module as
shown in Figure 2.
ote:N All I/O must be SELV.
a
Digital outputs are relay contacts. For ratings
see your product user manual. For AC supply,
use 10nF 250V surge capacitor.
For DC supply, use bypass diode.
b
Analog outputs are either loop powered or
externally powered. Output loops are earthed
(not floating).
When the wiring is completed,
connect the module to a
computer (PC) and configure
it using the configuration
software. For details, refer to
the user manual.
Before operating the module,
read the sections on operation
and configuration in the user
manual to take advantage of all
product features.
Figure 2. Wiring Diagram
WARNING
EXPLOSION HAZARD
Do not disconnect while circuit
is live unless area is known to be
non-hazardous.
Eaton
1000 Eaton Boulevard
Cleveland, OH 44122
United States
Eaton.com
Eaton’s wireless business
www.eaton.com/wireless
© 2014 Eaton
All Rights Reserved
Printed in USA
Publication No. IL032001EN
December 2015
Eaton is a registered trademark.
All other trademarks are property
of their respective owners.
 Loading...