

Eastman Kodak DPFW1020, DPFW820 User Manual
See the extended user guide – for more information about using your frame, visit
www.kodak.com/go/digitalframesupport. See the frame package for package contents.
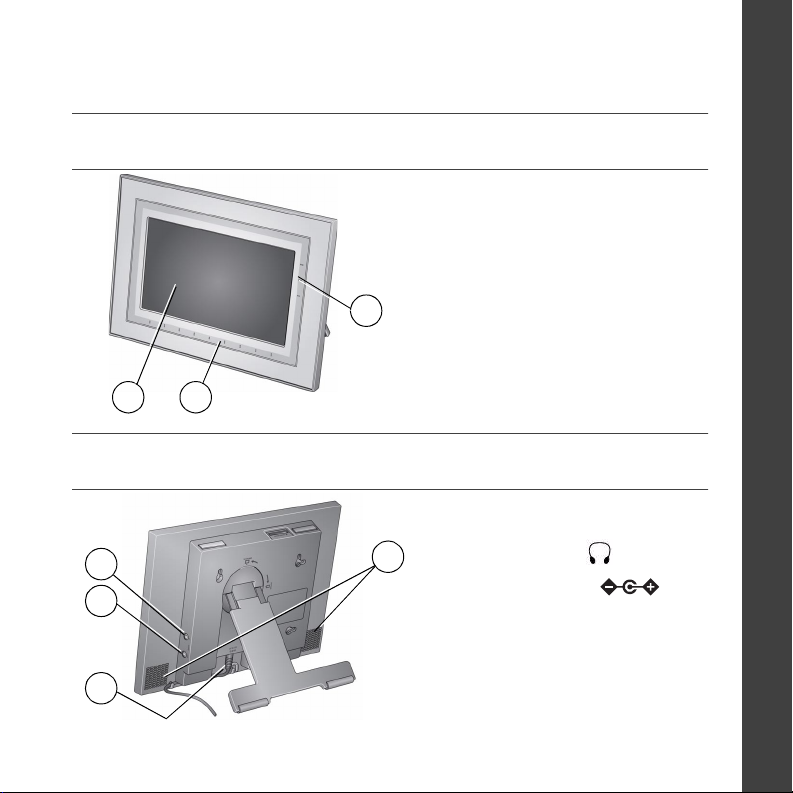
Front View
1 LCD screen
2 Quick Touch border (Tap/Slide)
3
1 2
3 Quick Touch border (Tap only)
To use the touch border,
see page 4.
Back/Right View
1 Audio In
1
2
4
2 Audio Out
3 DC-In (12V)
4 Speakers
ENGLISH
3
www.kodak.com/go/digitalframesupport 1
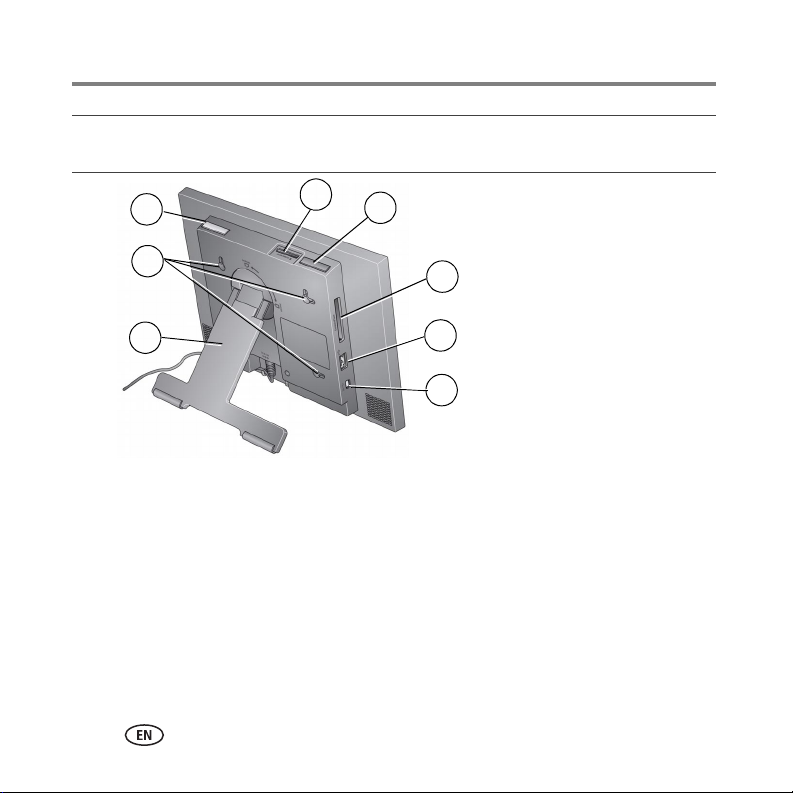
Back/Side View
1
2
3
1 Power button 5 Volume button
2 Wall mounting holes 6 Memory card slot - CF, MD
3 Rotating/extending stand 7 USB connector (to camera/USB device)
4 Memory card slot - SD, MMC, MS, xD 8 USB connector (to computer)
2 www.kodak.com/go/easysharecenter
4
5
6
9
7
8
1 Getting started
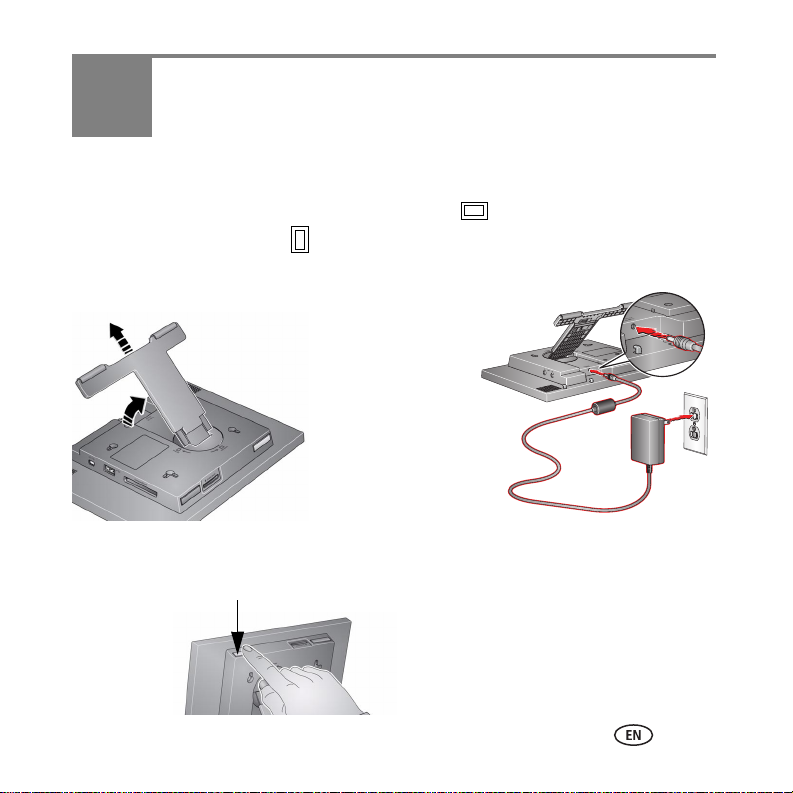
Setting up the stand; attaching the power cable
Your frame is set up to display pictures in landscape orientation. You can turn the
stand to change it to portrait but you must also change the setting (see the
extended user guide).
Stand (pull out to adjust the frame angle)
Your power cable may look
different from the one
pictured. Use the plug that
accommodates your type of
power outlet.
Turning on your frame
Power button- press and hold for 2 seconds, then release.
www.kodak.com/go/digitalframesupport 3
Getting started
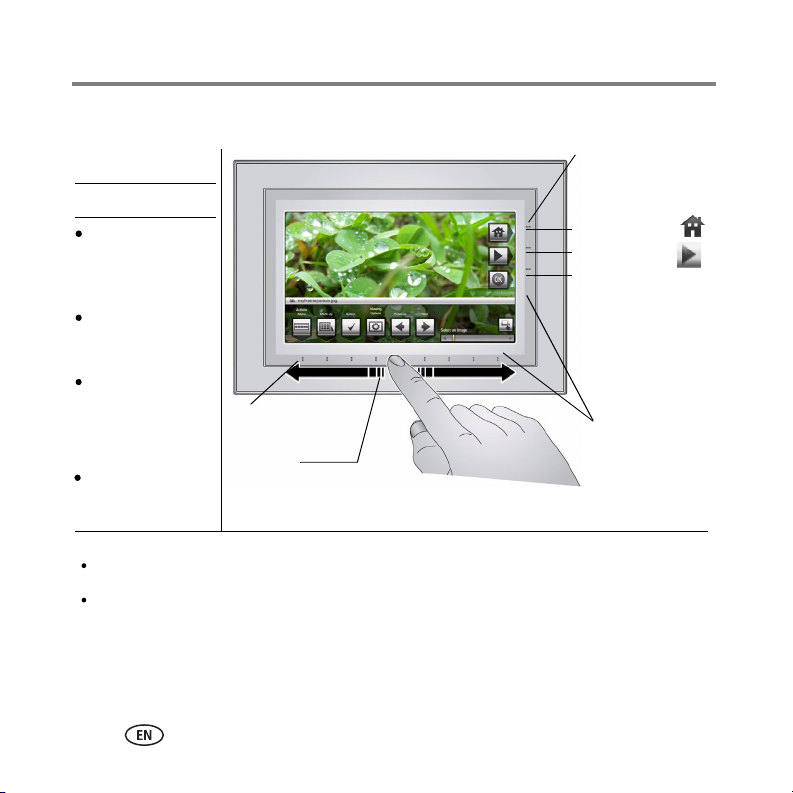
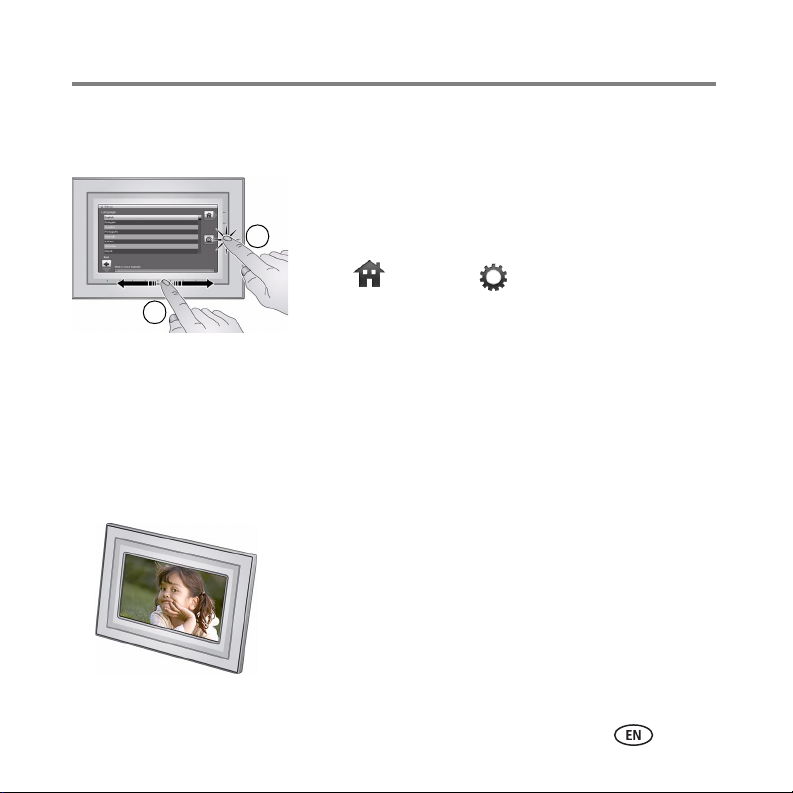
Using your frame’s Quick Touch Borders
Touc h ti ps
Tap and slide on the Quick
Touch Borders* only.
Tap a border to
display the icons.
Tap (C lose) t o
dismiss them.
Tap the light
Tap lights next to
buttons
(No sliding here)
Home
Play slide show
OK
Done
Close
closest to a button
to select it.
Slide to highlight
menus, pictures,
videos, options.**
Tap OK to se lect
them.
Don’t hover,
borders can be
Tap lights
below buttons
Slide on
bottom border
only
*Quick Touch
Borders
sensitive.
Slide to scroll:
Scroll through images—Like turning the pages of a book, slide left ← to go forward, slide right → to go back. For
faster scrolling through larger numbers of pictures, touch and hold (3 seconds), then slide to the end of the border.
Scroll through menus—Slide right → to scroll down, slide left ← to scroll up.
** Tap below small arrows at the ends of the scroll bar to move the highlight one picture, menu, or item at a time.
Important:
The screen is not touch-sensitive. Do not touch it.
Only use your finger to touch the borders. Sharp or metal objects may damage the border or screen
4 www.kodak.com/go/easysharecenter
Getting started
Setting your language
The language screen appears the first time you turn on your frame.
■ 1) Slide or tap below arrows to find your language.
2) Then tap OK.
2
To change the language at a later time:
■ Tap (Hom e) → (Settings) → Language.
1
■ 1) Slide or tap below arrows to find your language.
2) Then tap OK.
Connecting to your wireless network
After you set your language, your frame scans for available wireless networks. See
Connecting to your wireless network, page 7.
Enjoying your pictures immediately!
■ To view your pictures or play a slide show,
insert a memory card, or connect a camera or other
USB device (see page 6). Your pictures play
automatically.
If your frame has preloaded sample pictures, they
start playing automatically.
www.kodak.com/go/digitalframesupport 5
Getting started
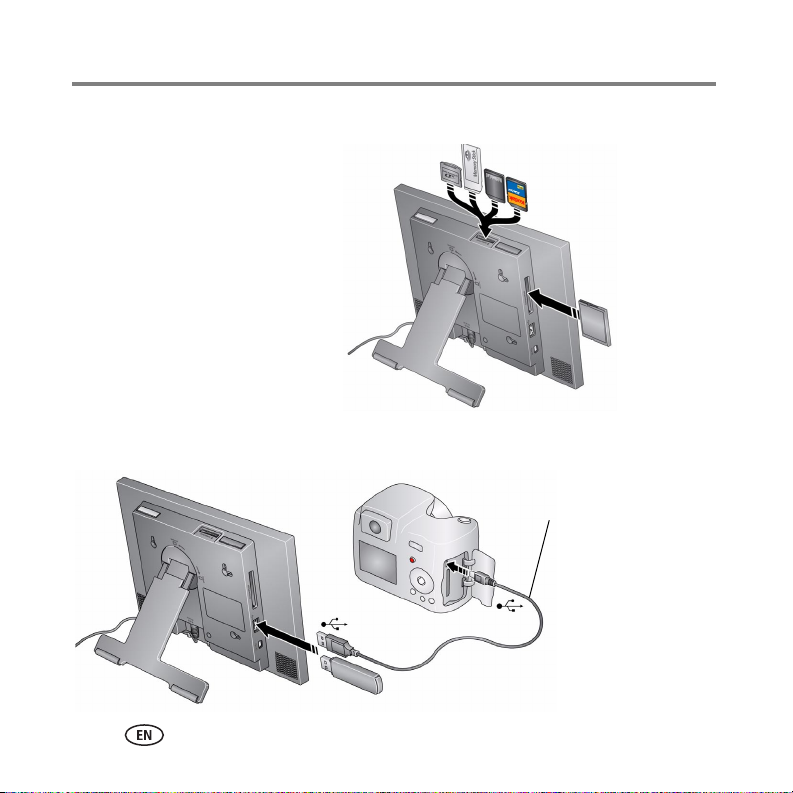
Inserting a memory card
To insert a card, push the card firmly
■
into the slot until it stops.
■ To remove a card from:
- top card slot, push in the card to release it.
- side card slot, pull out the card
Secure Digital
MultiMedia Card
Memory Stick
xD
IMPORTANT:
Do not insert a micro or mini memory
card without an adapter.
CompactFlash
MicroDrive
Connecting a digital camera or other USB device
USB cable included
with your USB device
USB devices: camera, flash drive, card
reader, etc. (sold separately)
6 www.kodak.com/go/easysharecenter
2 Setting up for wireless
operation
If you have problems with your wireless setup or connection, see
Troubleshooting starting on page 22. Or open EasyShare digital display software on
your computer and click Tools
troubleshooting wizard.
Connecting to your wireless network
To allow your frame to access the contents of your computer wirelessly, connect your
frame to your wireless home network.
NOTE: If you are not sure you have a wireless network, ask the person who set up your computer.
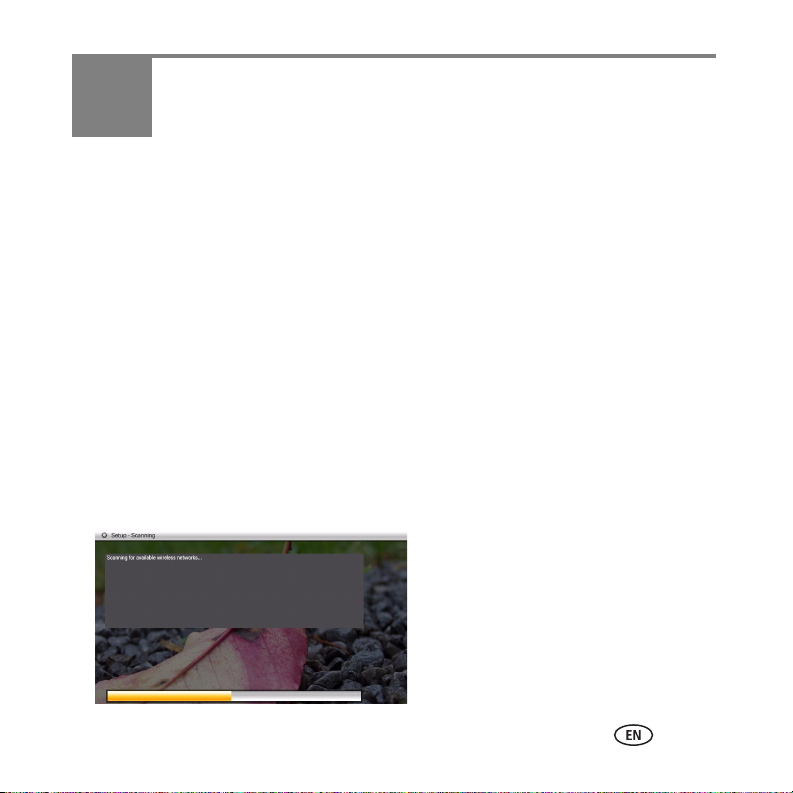
1 First time—If this is the first time you turned on your frame, tap OK after you set
your language (page 5).
The Scanning for available wireless networks... screen appears.
→ Wireless Troubleshooter. Follow the automated
www.kodak.com/go/digitalframesupport 7
Setting up for wireless operation
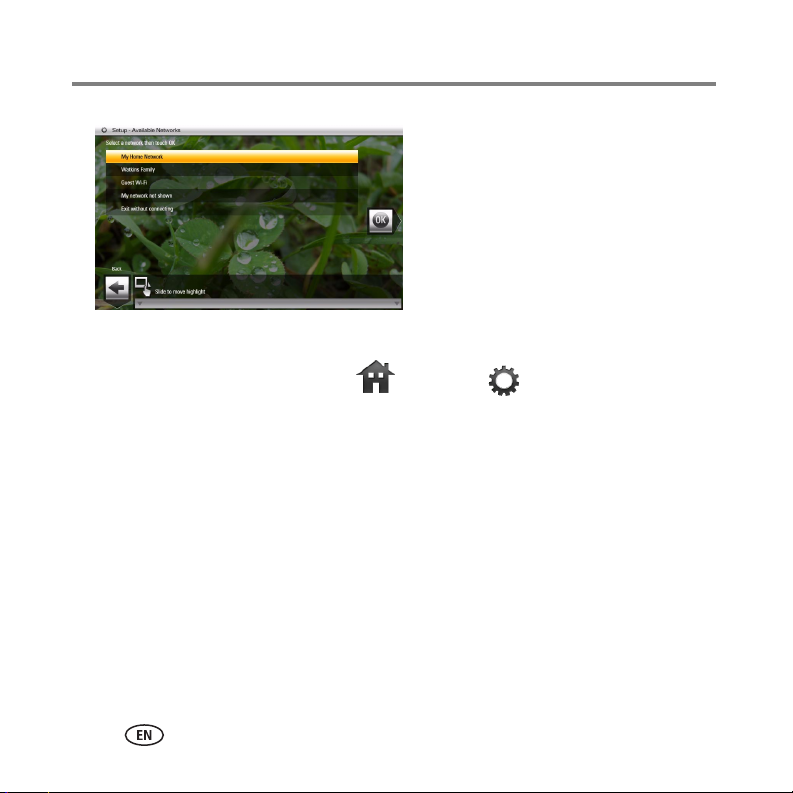
Available wireless networks are listed.
NOTE:
If the scan finds multiple networks,
your home network (with the highest
% signal strength) is usually listed
first and highlighted.
Or, to select another network, slide or
tap below the arrows to highlight a
network, then tap OK.
Tap Back to dismiss the screen and connect later.
Later—To connect later, tap Home
wireless networks. Then follow the screen prompts and continue with step 2 below.
If your wireless network is not found, select Scan again. You may need to enter the
network SSID (sometimes called the network name) manually. The person who set
up your network can help you with this information. Or, tap Help me connect for
more information.
2 With your home network highlighted, tap OK to connect to your home network.
The Connecting... screen appears.
Or, select Exit without connecting and go to the Home screen (page 14).
Enter security key (if you have security enabled)
If you have wireless network security enabled, enter your security key (WEP or WPA)
on the on-screen keyboard. Slide along the bottom of the touch border to highlight
→ Settings → Network → Scan for
8 www.kodak.com/go/easysharecenter
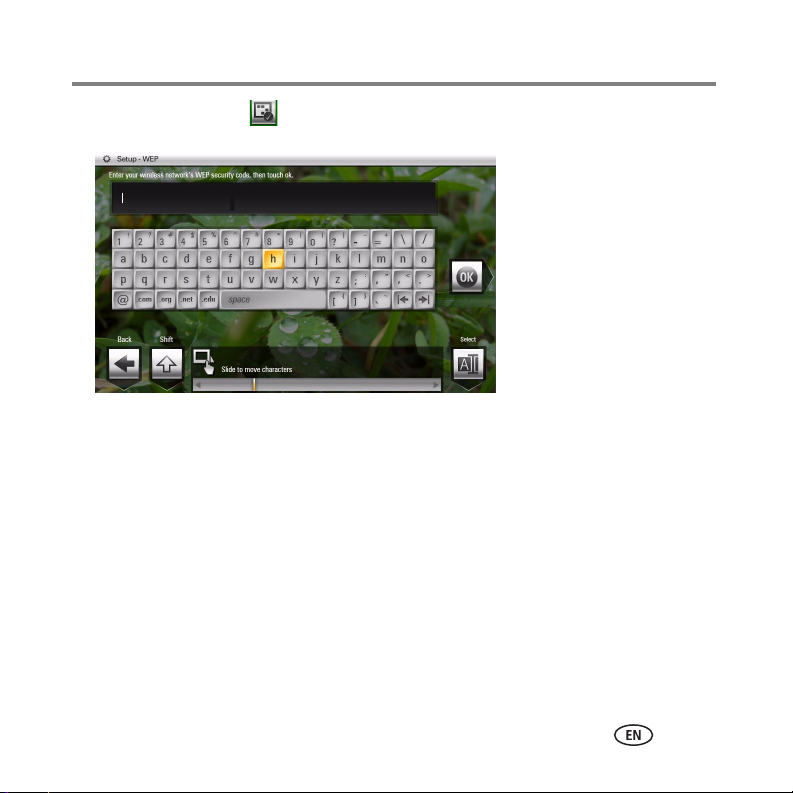
Setting up for wireless operation
a character then tap (Select). The character appears in the text box. Tap Done
when finished.
If you do not have security enabled, go to step 1.
NOTE: The screen identifies your security as either
WEP
security key can be either:
A
WEP
or
WPA
.
5 or 13 characters (0-9, A-Z, some special characters, case sensitive),
10 or 26 characters (0-9, A-F, not case-sensitive).
A
WPA
key is 8-63 characters, case sensitive.
The person who set up your network can provide you with this information.
Congratulations! You have successfully connected to your network. Return to this
screen later to make sure the wireless network and software are working properly.
3 If you haven’t done so already, install the Kodak EasyShare digital display software
(see page 10) so your frame can display wireless content properly.
www.kodak.com/go/digitalframesupport 9
 Loading...