

Eastman Kodak 8E1587 User Manual

FCC ID: PA48E1587 User Manual Part 3
Returned cartridges are carefully inspected. Only components that meet
strict quality standards are reused. Components that do not meet the
standards are sent to recycling centers for reclamation.
This program is part of Kodak’s commitment to reduce the environmental
impact of our products.
To recycle your empty film cartridges:
1. Replace your empty film cartridges in their original packages. Return
as few or as many as you like each time. You can tape up to three
packages together and return them with a single label.
2. Apply a prepaid bar-coded shipping label to each package. Kodak
labels are free of charge.
3. Call FedEx Ground at 1-800-463-3339 (U.S. only). Mention this
program, and arrange for pickup the next working day. Include a
signed “Return Pickup Record” with the packages when they are
picked up. You will find one on the back of each shipping label.
To get your Kodak mailing labels, contact your authorized Kodak
distributor.
For additional information on the Kodak Recycling Program in the U.S. and
Canada, visit the Kodak Web Site: www.kodak.com/go/KES
Operation and Maintenance
Requesting a Calibration
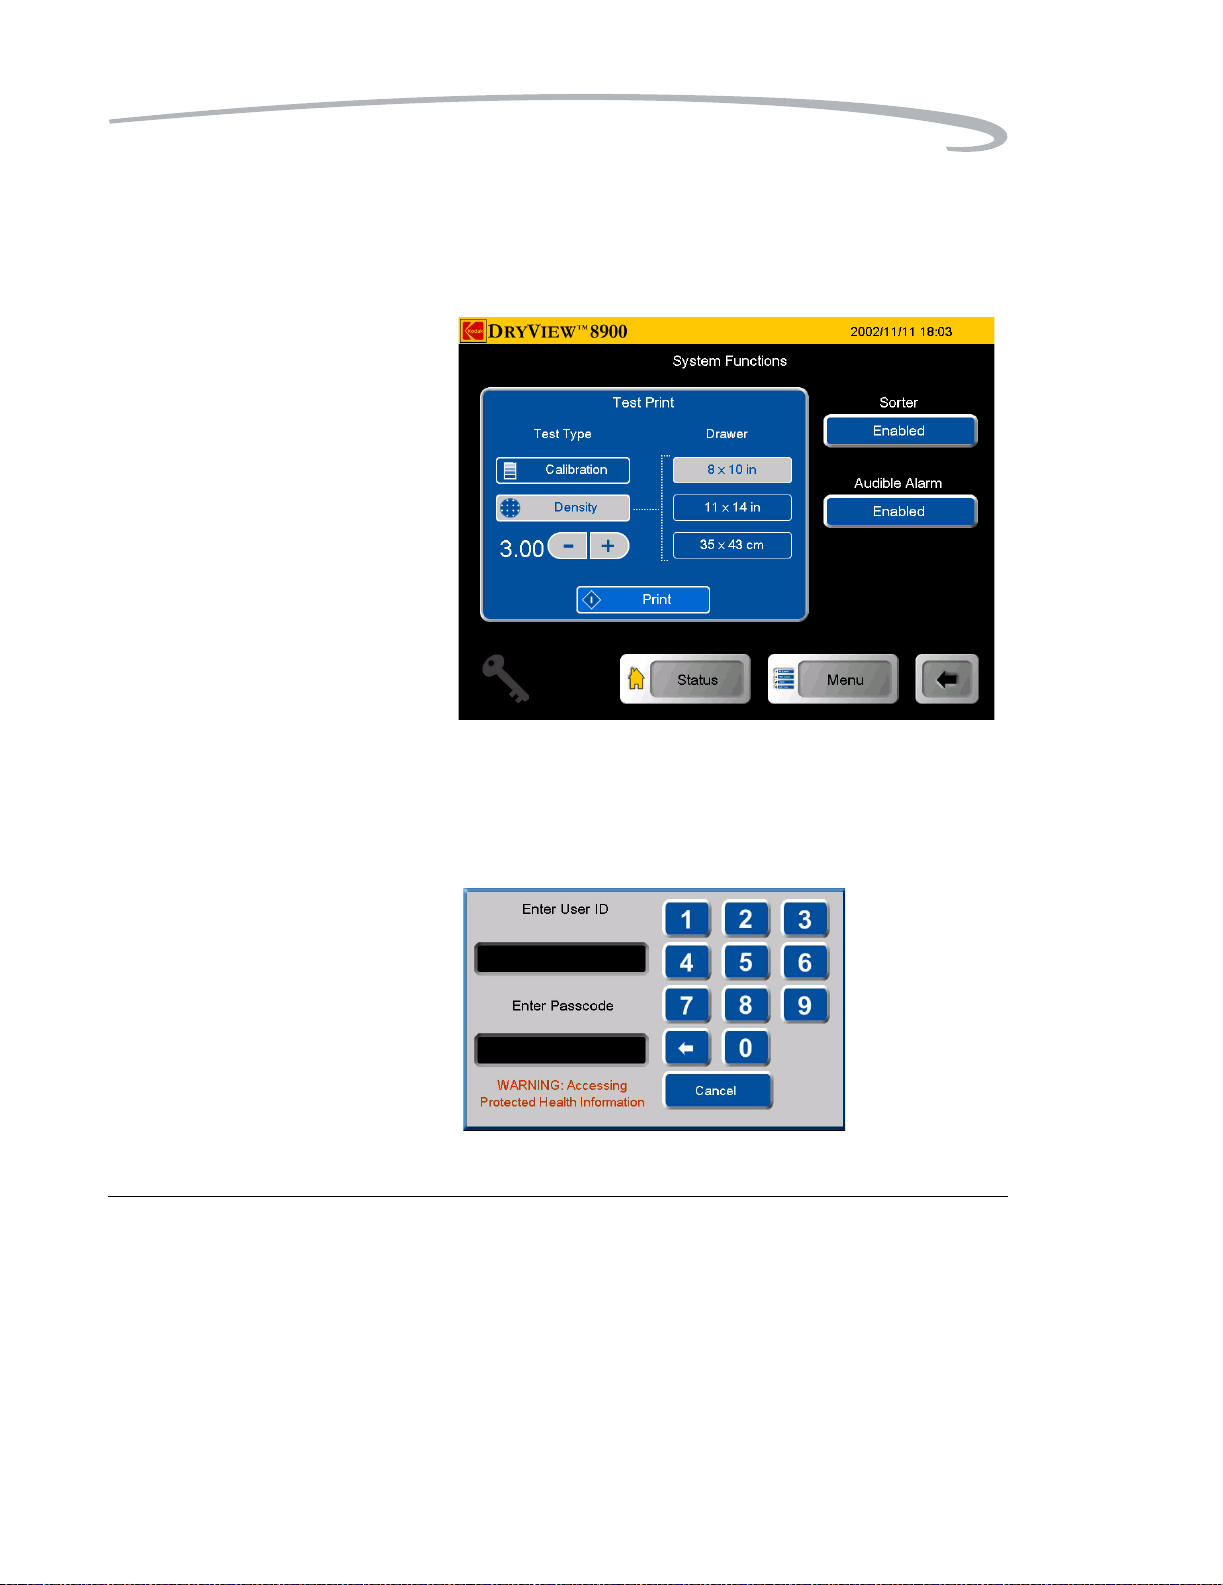
Test Print
To request a calibration print (step wedge):
NOTE: The system will interrupt a multi-sheet print job to produce the
calibration print.
1. On the System Functions screen, touch the Calibration button.
2. Touch the desired Drawer button.
3. Touch the Print button.
Requesting a Density Test To request a Density test print:
1. On the System Functions screen, touch the Density button.
2. Touch the desired Drawer button.
3. Touch the Print button.
Automatic Image Quality
Control (AIQC)
June 12, 2003 5E6155 3-18
The built-in densitometer is a key component in the patented Automatic
Image Quality Control (AIQC) process. The AIQC feature allows the laser
imager to automatically monitor and adjust density, contrast, and other
Operation and Maintenance
image quality parameters to ensure optimum image quality by monitoring
the density patch printed on each film.
The laser imager adjusts the parameters each time the laser imager prints a
calibration film to ensure image consistency from film-to-film and lot-tolot. A calibration film is printed whenever:
• AIQC detects that a new film lot number has been loaded.
• You request a calibration test from the local panel.
• A calibration has not been performed on a film cartridge for 7 days.
Operating in Manual Mode Under normal conditions, the AIQC is running to maintain consistent
image-quality parameters. If errors occur, such as calibration failure, you
will have the option to operate in manual mode until the error is corrected.
A film calibration failure is often film related. If you load a new film
cartridge, the error is usually corrected. If the error reoccurs with a new
film cartridge, call for support (see “Calling for Support” on page 4-25).
Until the condition is corrected, you can run the laser imager in manual
mode, without AIQC.
Operator Maintenance
Cleaning the Laser Imager Clean the outside surfaces of the laser imager as necessary. Use a soft cloth
with warm water and mild soap.
CAUTION
Do not use isopropyl alcohol to clean the exterior surfaces
of the laser imager. Isopropyl alcohol can dissolve the
exterior paint on the laser imager.
Installing New Charcoal
Filters
June 12, 2003 5E6155 3-19
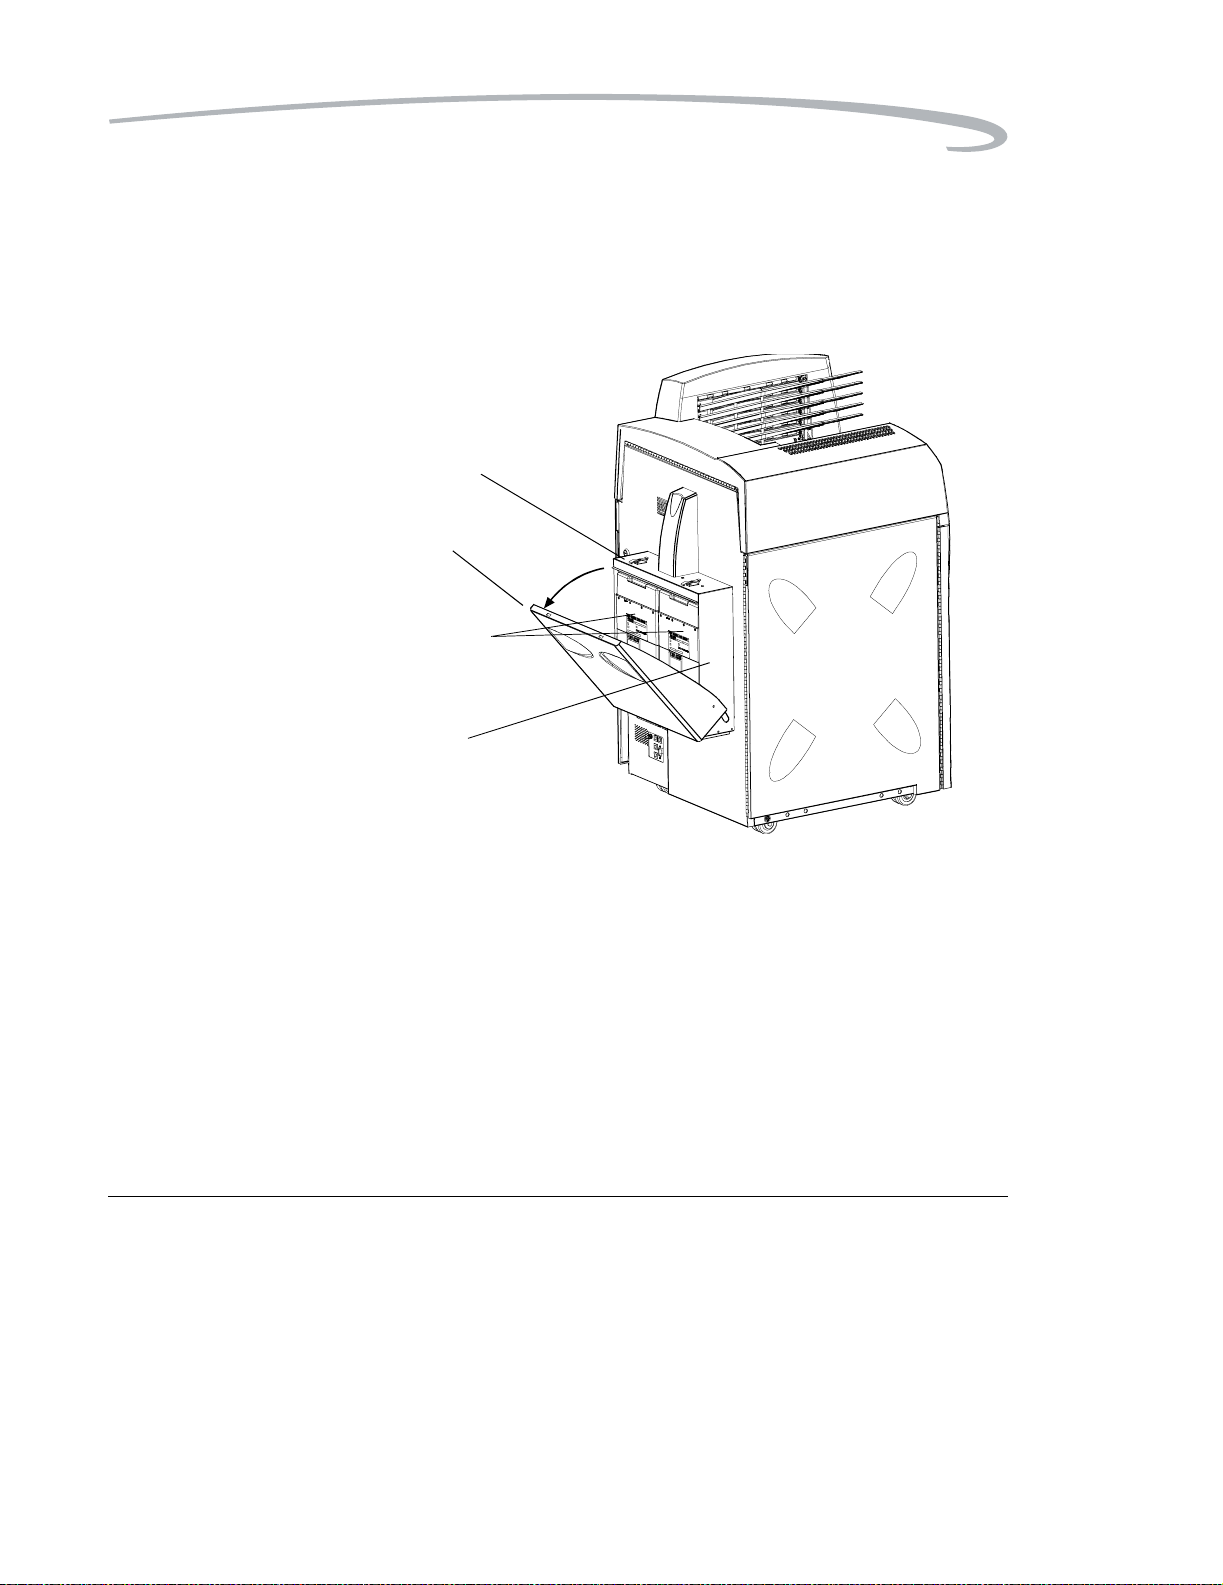
T wo charcoal filters are in a filter hol der that is mounted on the back of the
laser imager.
Install new filters after every 20,000 film cycles.
NOTE: Kodak Field Engineers routinely install new filters during the
20,000 film cycle Preventive Maintenance procedure. You only
need to change filters if you do not have a Kodak Preventive
Maintenance Plan.
CAUTION:
Filters are considered to be non-hazardous waste by the US
:
Operation and Maintenance
EPA Resource Recovery Act. Under RCRA, you may dispose of
the filters in a landfill or incinerator with energy recovery in
a municipal, commercial or industrial facility. Contact your
state or local government to determine if additional
disposal requirements apply.
Latches
Filter
cover
Charcoal
filters
Filter
holder
Replacing the Charcoal Filters
To install new filters:
1. Open the 2 latches and pull the filter holder forward.
2. Remove the two used charcoal filters.
3. Vacuum the filter holder, if necessary.
4. Record on the label of each of the new filters:
• Cycle count
•Date
5. Install the two new filters.
6. Close the filter holder and the 2 latches.
June 12, 2003 5E6155 3-20

Operation and Maintenance
7. Discard the 2 used filters.
Preventive Maintenance To maintain optimum performance from the laser imager, Kodak
recommends that preventive maintenance is completed by a Kodak
authorized Service Provider after every 20,000 film cycles.
The Status screen displays a “Preventive Maintenance” icon when the film
count reaches 20,000 sheets of film. You can also monitor the “Prints to
PM” line on the System Information screen.
Preventive Maintenance includes:
• Installation of new charcoal filters
• Image assembly cleaning
• Film processor cleaning
Call Service to schedule preventive maintenance (see “Calling for Support”
on page 4-25).
June 12, 2003 5E6155 3-21
Operation and Maintenance
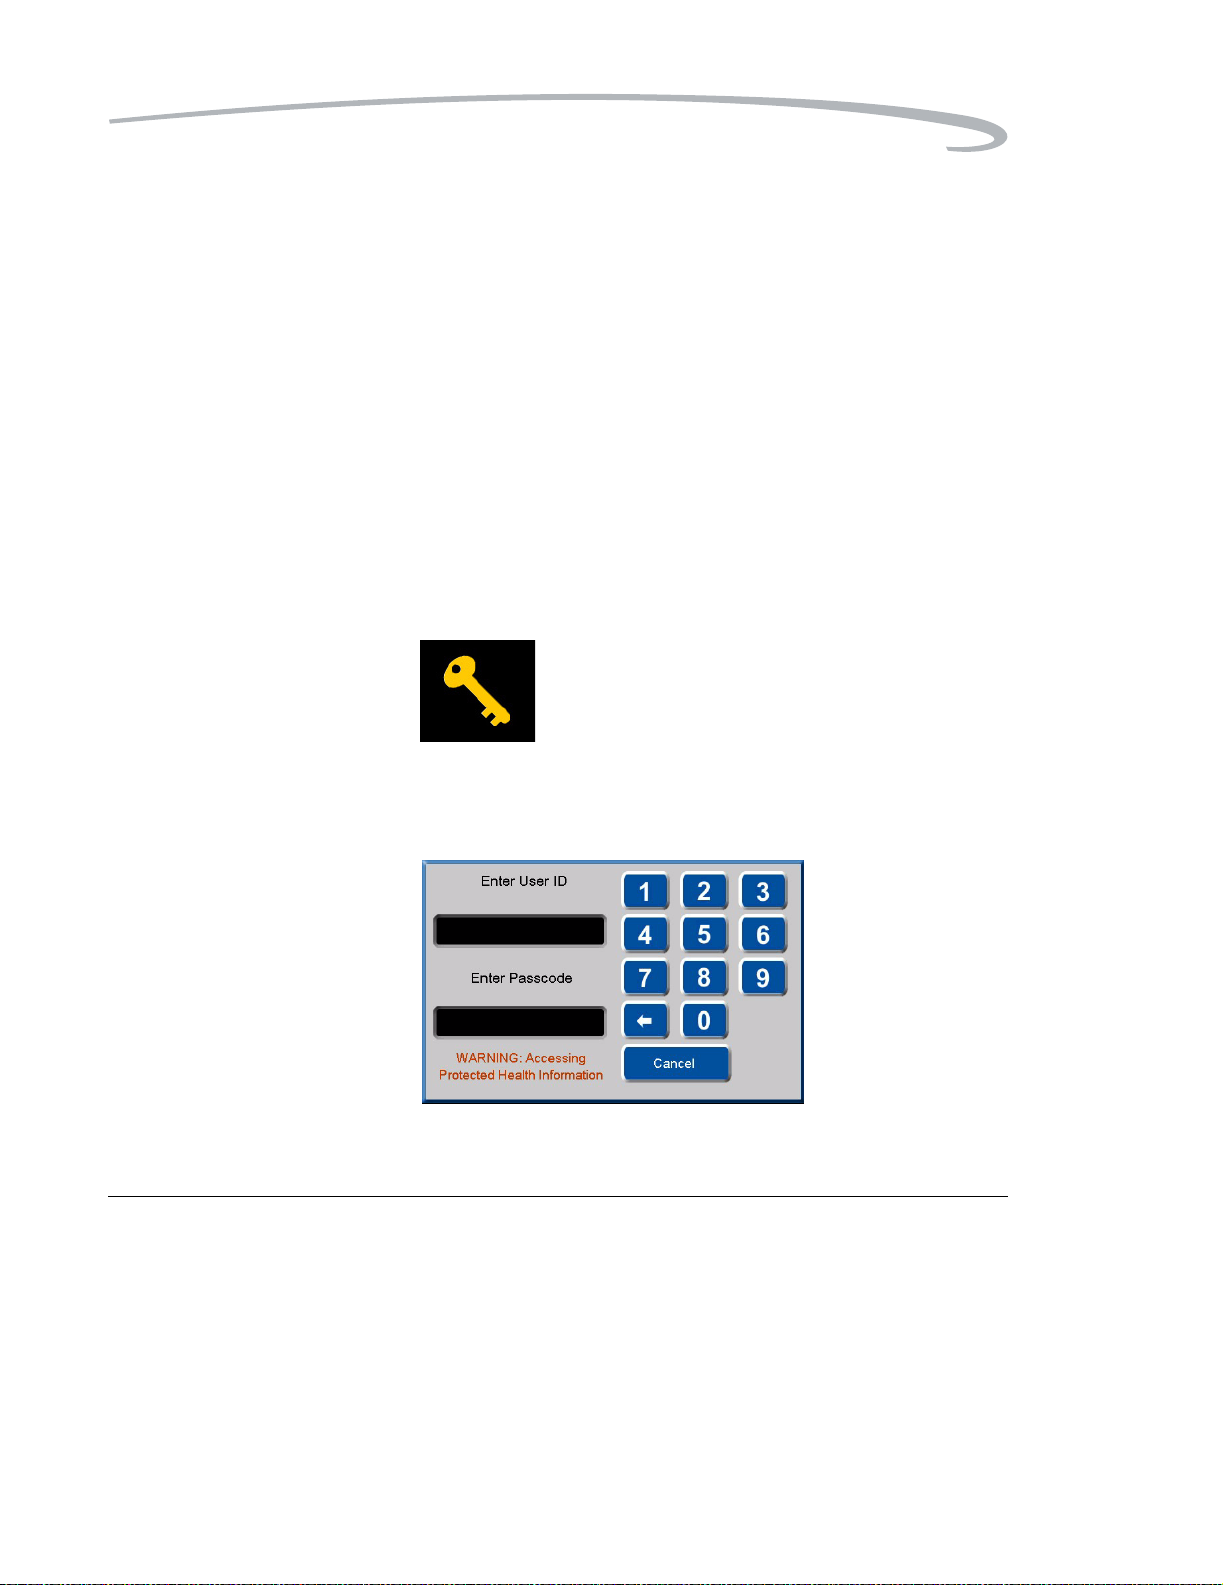
Key Operator Information
A Key Op icon appears on every screen where Key Operator access is
possible. This icon indicates when the Key Operator level is active. When
active, the icon is hightlighted.
Key Operator access remains until any of the following conditions occurs:
• The system times out (xx minutes) and returns to the Status screen.
• You use the Key Op icon to cancel the access level.
Up to 10 Key Operator accounts are allowed. Accounts are identified by a
number between 1 and 10.
Passcodes are determined by the customer and activated by Kodak
Authorized Service Providers.
Key Operator Passcode To access the Key Operator Login screen, touch the Key Op icon or
select a screen that requires Key Operator access.
To enter your passcode:
1. Touch the Key Op icon on the local panel. The Key Op Login screen
appears.
2. Enter your ID and touch the Enter Passcode box.
June 12, 2003 5E6155 3-22
Operation and Maintenance
3. Enter your passcode. Touch OK.
When the Key Op access is activated, the icon appears highlighted.
Key Op access deactivates if the laser imager times out and returns to the
Status screen or if you cancel the access level.
To deactivate Key Op access:
• Touch the Key Op icon.
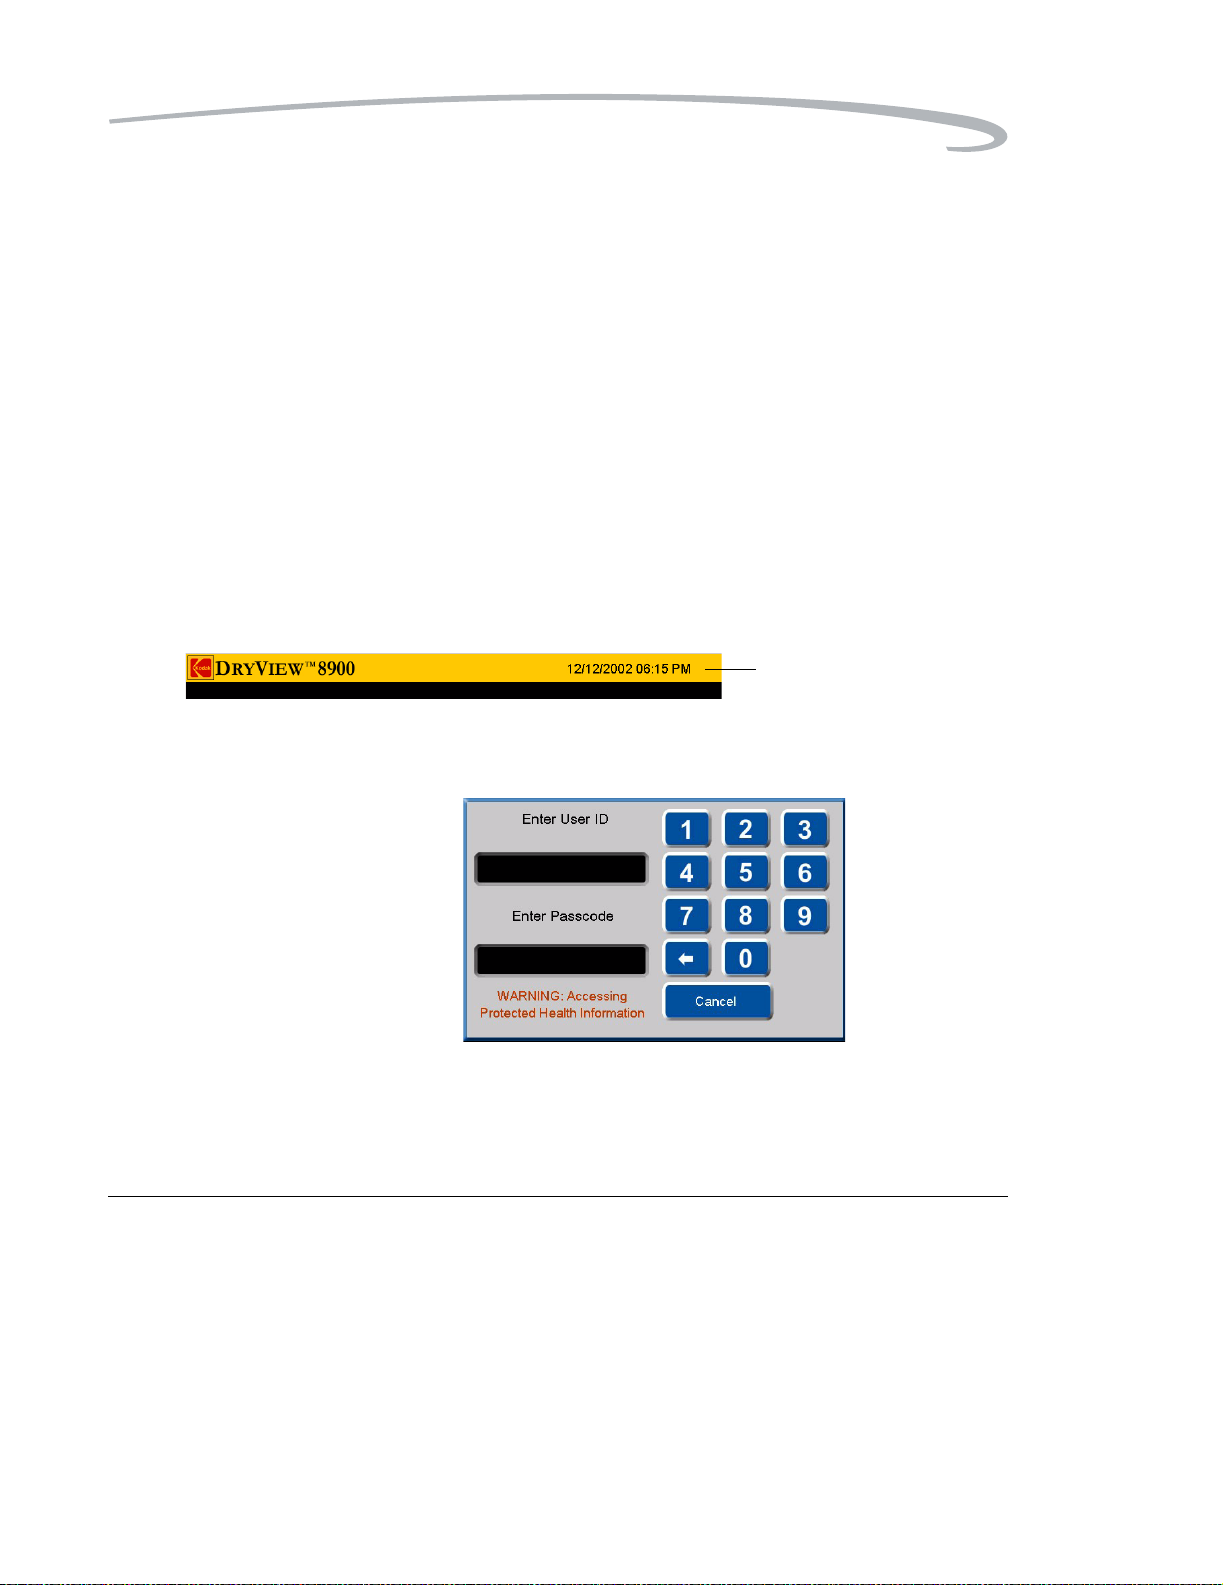
Setting Time and Date The time and date appears in the right side of the title bar.
Key Operators have the ability to set the time, time format, and date format.
• Formats for time include AM/PM or 24-hour (military).
• Formats for date include
– MM_DD_YYYY
– DD_MM_YYYY
– YYYY_MM_DD
To change the time and time format or date format:
Date and time display
1. Touch the time and date display on the title bar. The Key OP Login
screen appears.
2. Enter your ID and touch the Enter Passcode box.
3. Enter your passcode. Touch OK. The Time and Date Properties
screen appears.
June 12, 2003 5E6155 3-23

Operation and Maintenance
4. Use the left and right arrows to navigate to your desired time or date
value.
5. Use the up and down arrows to change the time or date values.
6. Touch OK.
June 12, 2003 5E6155 3-24
Operation and Maintenance
Audible Alarm (On/Off) An audible alarm alerts operators when an error message or notice
appears on the local panel. Key Operators have the ability to disable or
enable the audible alarm function.
To enable or disable the audible alarm:
1. At the Main Menu screen, touch the System Function button.
2. At the System Functions screen, touch the Audible Alarm button.
The Key OP Login screen appears.
3. Enter your ID and touch the Enter Passcode box.
June 12, 2003 5E6155 3-25
Operation and Maintenance
4. Enter your passcode. Touch OK.
5. At the System Function screen, touch the Audible Alarm button.
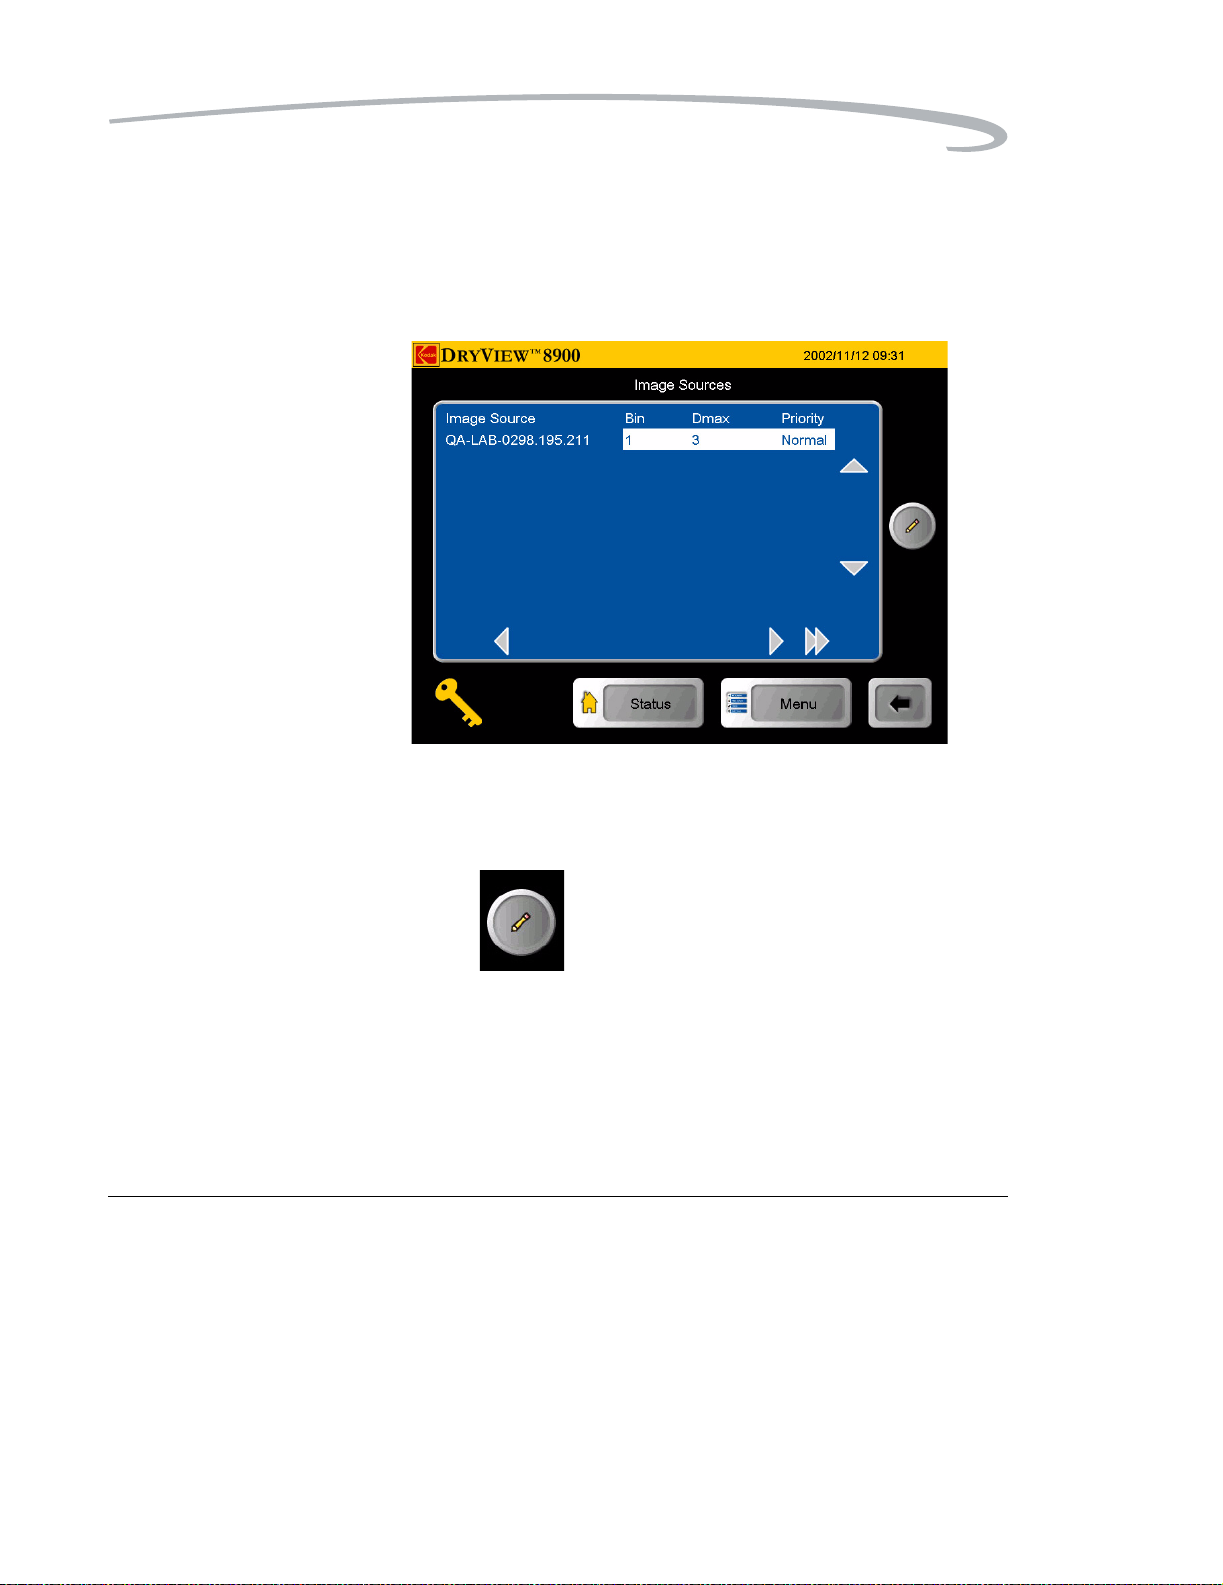
Selecting Bins Key Operators have the ability to select bins for each available modality.
To assign a modality to a bin:
1. At the Image Sources screen, use the up and down arrow icons to
select a modality.
2. Touch the Edit button. The Key Op Login screen appears.
June 12, 2003 5E6155 3-26
Operation and Maintenance
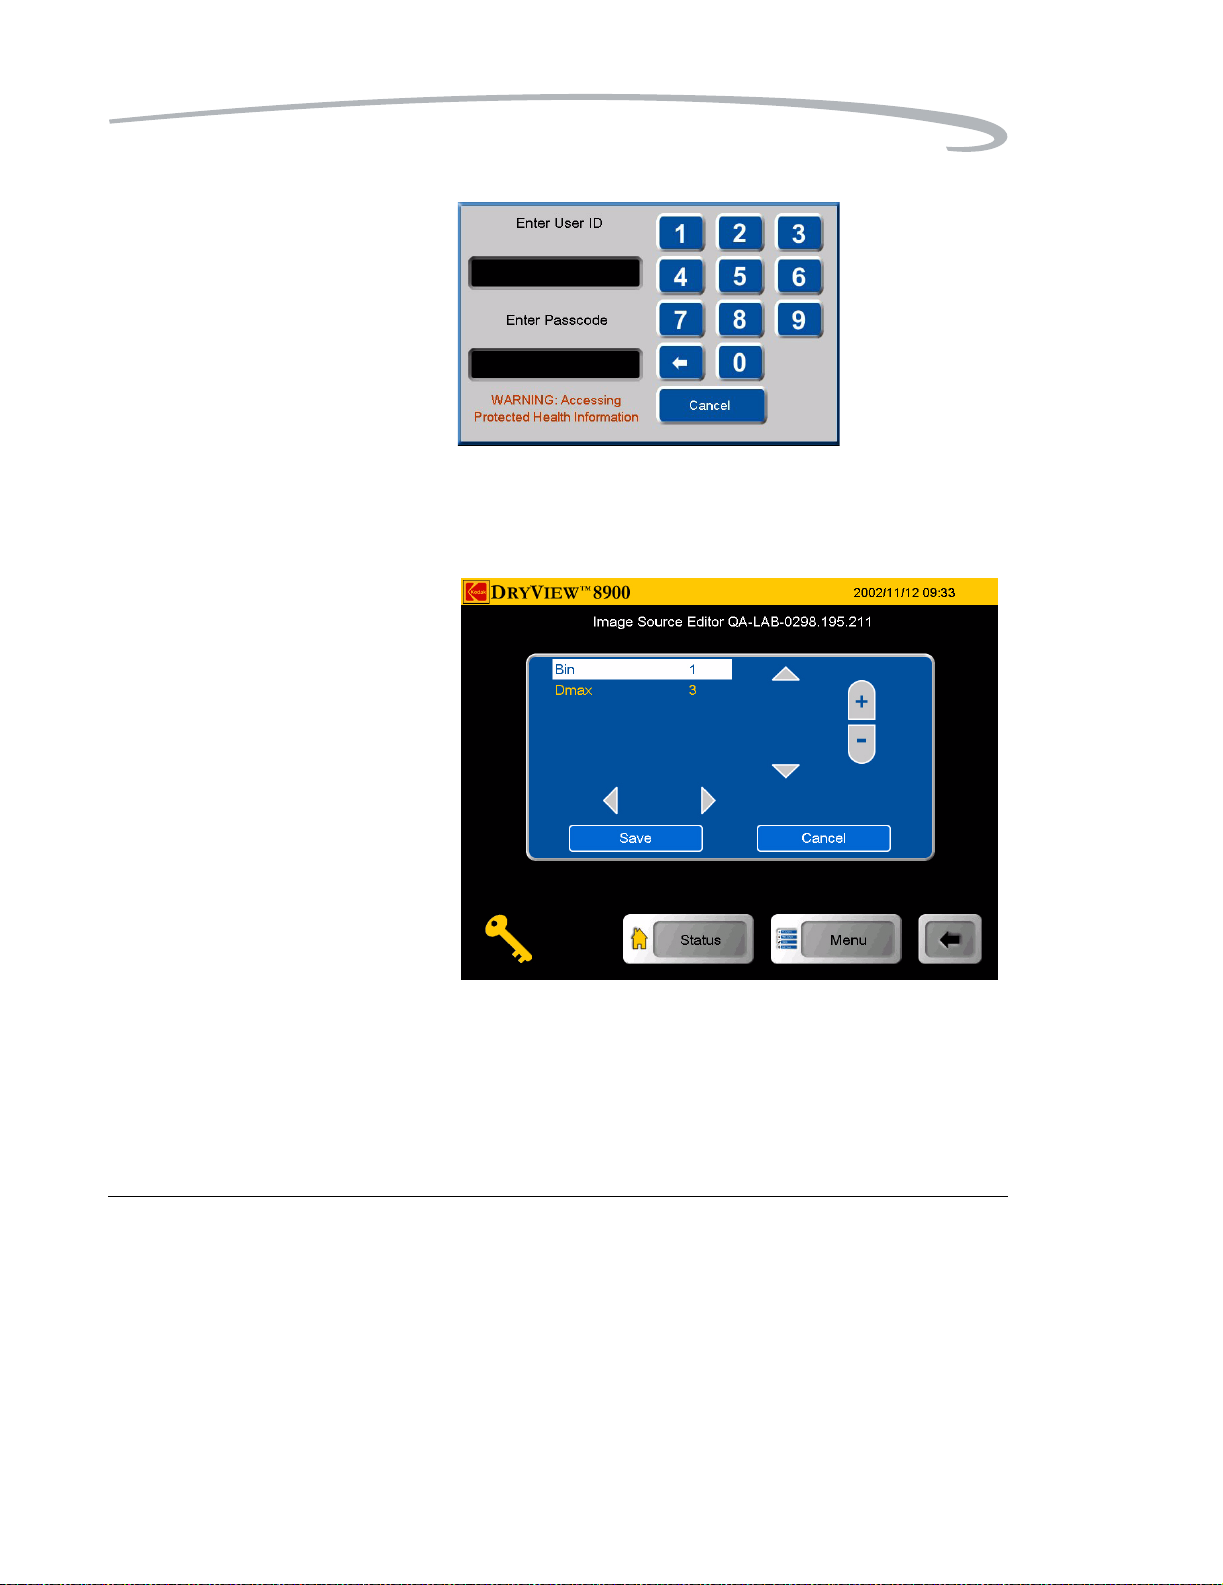
3. Enter your ID and touch the Enter Passcode box.
4. Enter your passcode. Touch OK. The Image Source Editor screen
appears.
5. Touch the up or down navigation icons to hightlight Bin.
6. Touch the + or - icon to select your desired bin.
7. Touch the Save icon.
June 12, 2003 5E6155 3-27

Operation and Maintenance
Changing Dmax Key Operators have the ability to change the Dmax value for each for each
available modality.
To ch a n ge a Dmax val ue :
NOTE: Modality settings may override these settings.
1. At the Image Sources screen, use the up and down arrows to select
a modality.
2. At the Image Sources screen, touch the Edit button. The Key Op
Login screen appears.
June 12, 2003 5E6155 3-28
Operation and Maintenance
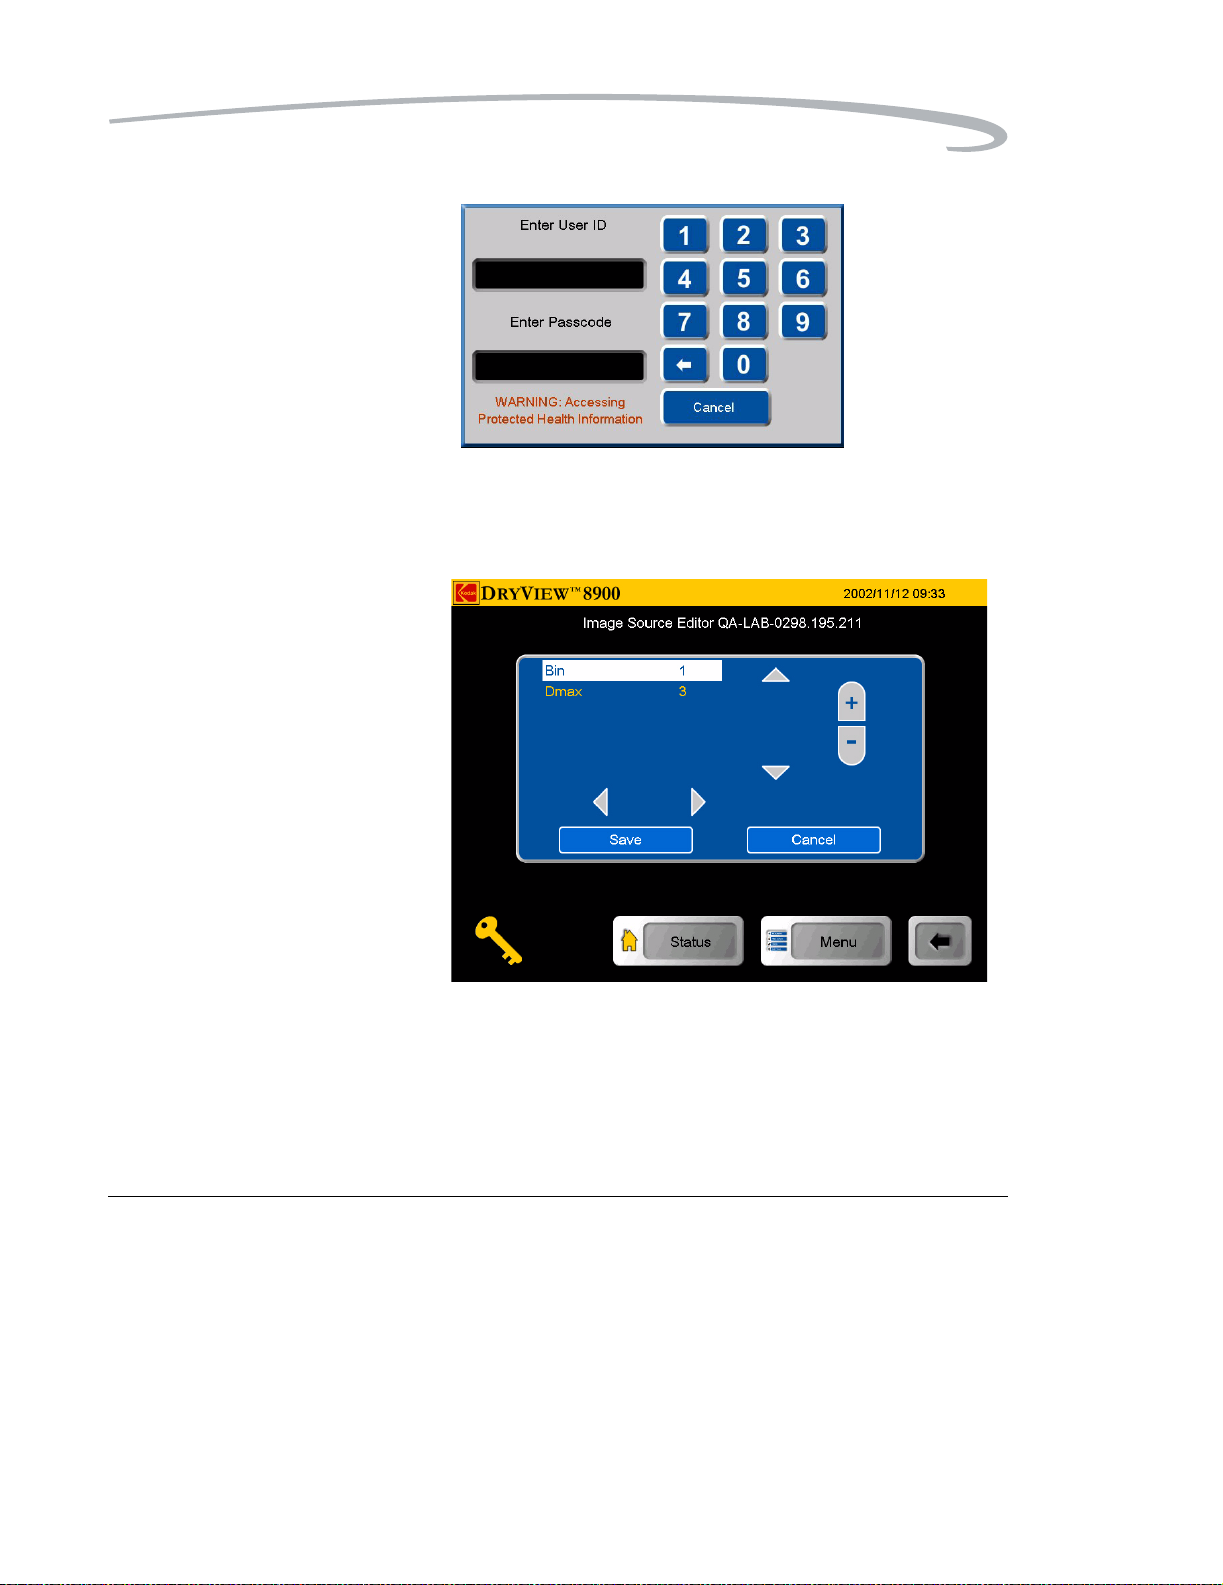
3. Enter your ID and touch the Enter Passcode box.
4. Enter your passcode and touch OK. The Image Source Editor
screen appears.
5. Use the up and down arrow icons to hightlight Dmax.
6. Touch the + or - icon to select your desired Dmax value.
7. Touch the Save icon.
June 12, 2003 5E6155 3-29
Operation and Maintenance
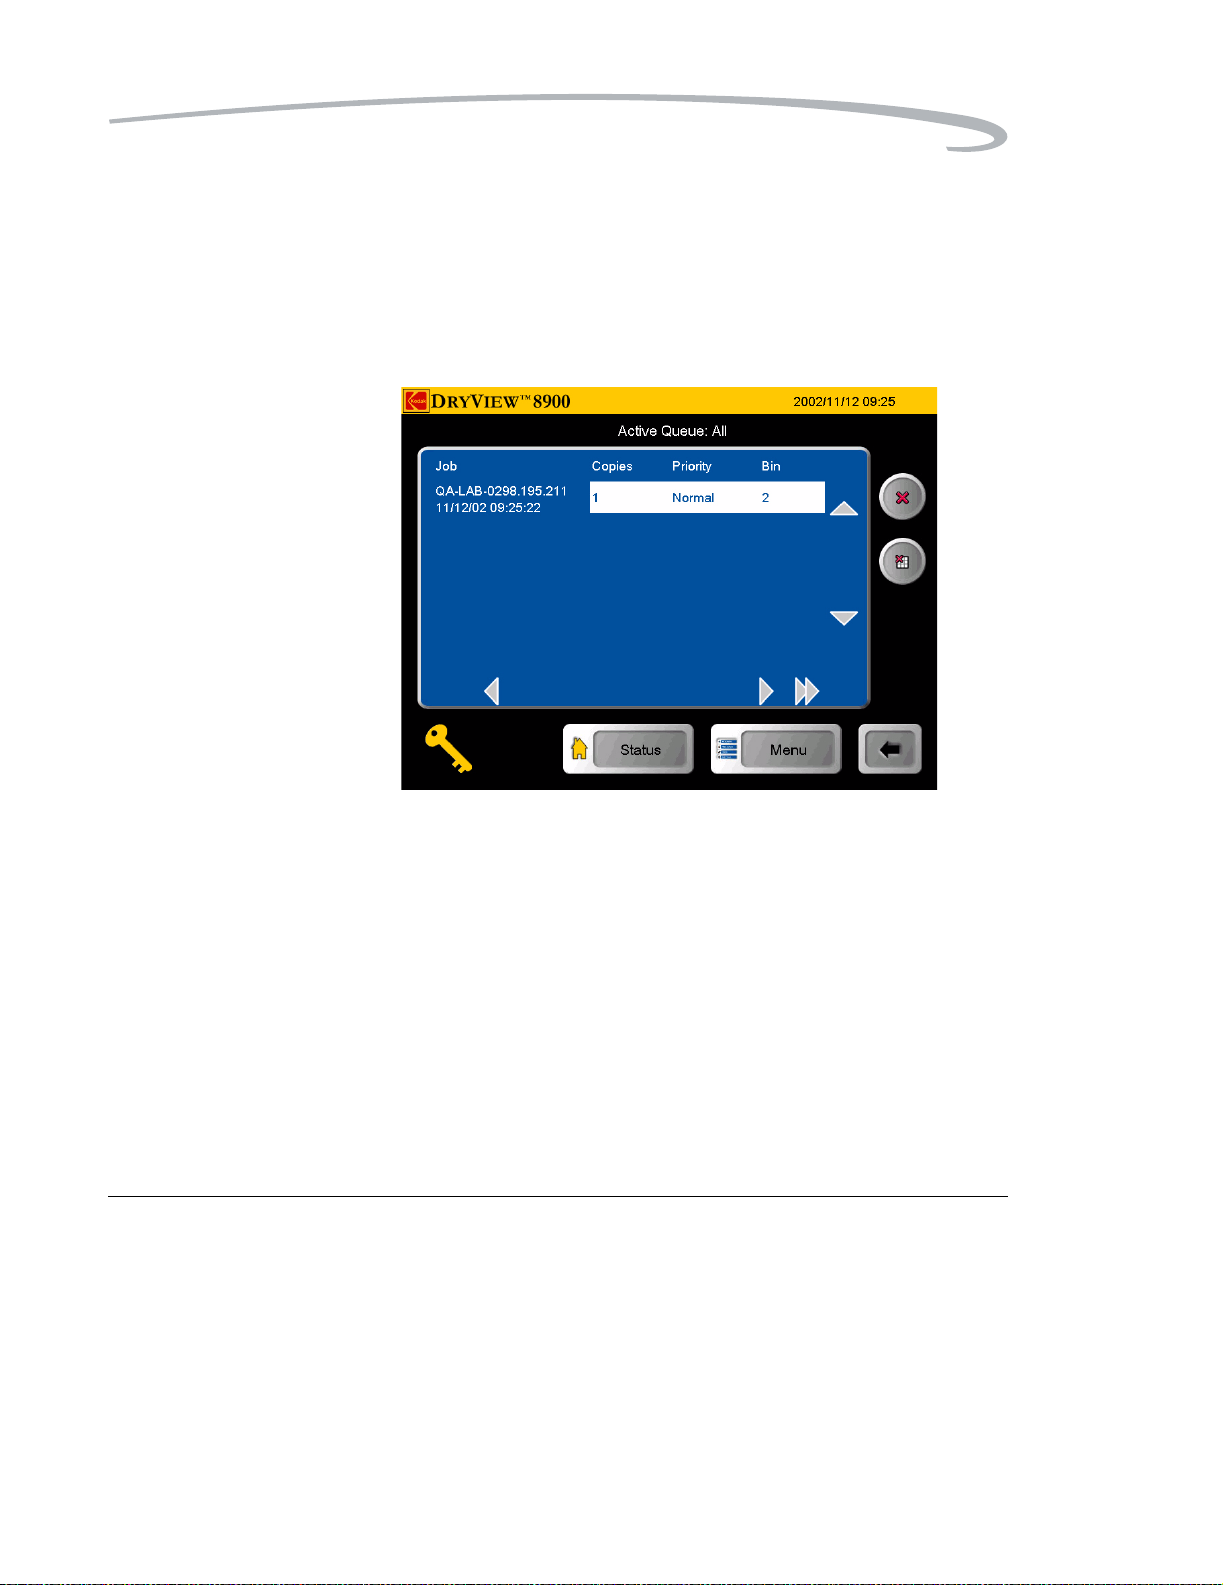
Deleting Print Jobs Key Operators have the ability to delete one or all print jobs in the print
queue.
To delete a print job or all jobs in the queue:
1. At the Job Management screen, use the up and down arrow icons to
select Active, No Media or Undelivered - print queue.
2. Touch the View List button. The Selected Queue: screen appears.
3. Use the up or down arrow icons to navigate to your desired print job.
NOTE: Jobs can be deleted from the active queue as long as the delivery
of that job has not started. After selecting a job(s) to del ete from
the Active Queue screen, there is no indication of deletion until
the jobs which are currently printing are completed. When the
current job is finished printing, the Status screen and Job
Management screens show the selected jobs have been
deleted.
June 12, 2003 5E6155 3-30

Operation and Maintenance
Delete job
Delete all jobs
4. Touch the Delete icon or the Delete all Jobs icon. The Key Op
Login screen appears.
5. Enter your ID and touch the Enter Passcode box.
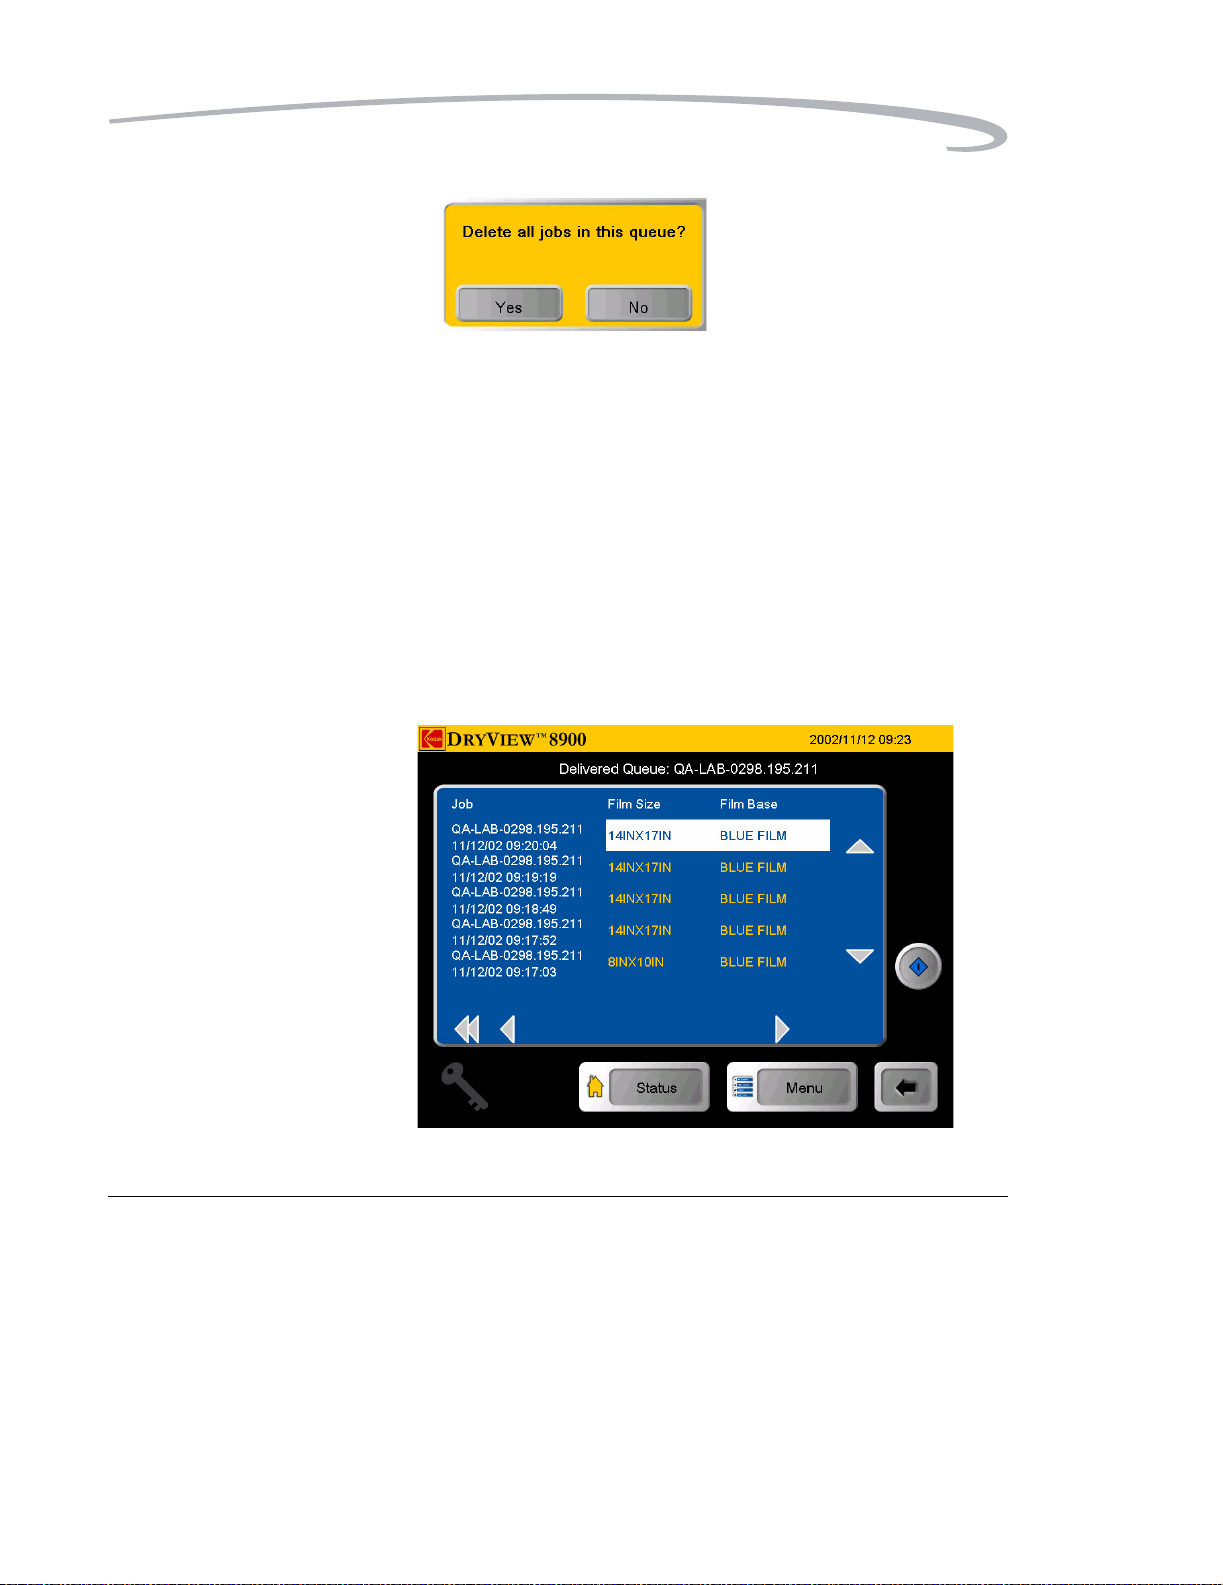
6. Enter your passcode and touch OK. The Delete this job or the
Delete all jobs in the queue pop up menu appears.
June 12, 2003 5E6155 3-31
Operation and Maintenance
7. Touch Yes.
Reprinting Print Jobs Key Operators have the ability to reprint completed print jobs.
To reprint a print job:
NOTE: The reprint capability of the laser imager enables Levels 2, 3, and
4 operators to command reprinting of images that may contain
patient-identifiable data. Therefore, operation of the laser imager
by operators at these levels is controlled by a login procedure that
can assist operators in meeting requirements to control access to
such information.
1. At the Job Management screen, use the up and down arrow icons to
select Delivered.
2. Touch the View List button. The Delivered Queue: screen appears.
3. Use the up or down arrows to navigate to your desired print job.
June 12, 2003 5E6155 3-32
Operation and Maintenance
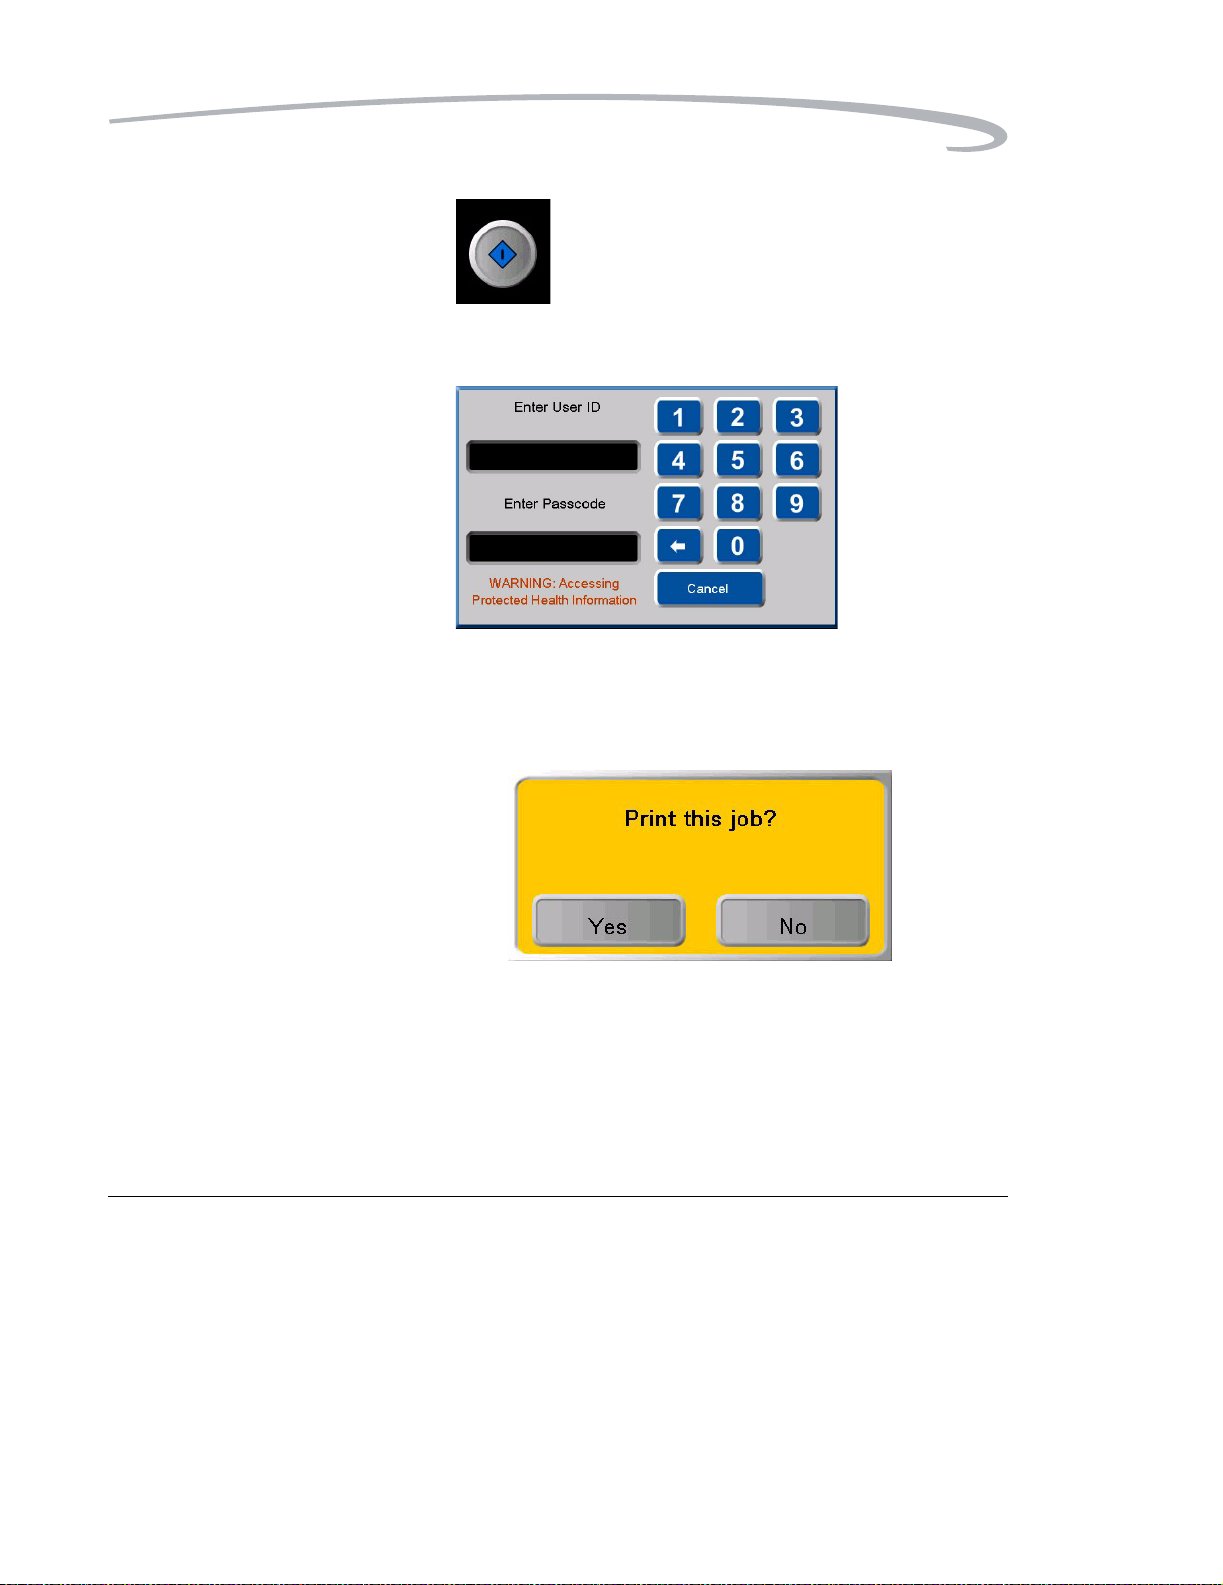
4. Touch the Reprint icon. The Key Op Login screen appears.
5. Enter your ID and touch the Enter Passcode box.
6. Enter your passcode and touch OK. The Print Requested pop up
menu appears.
7. Touch OK.
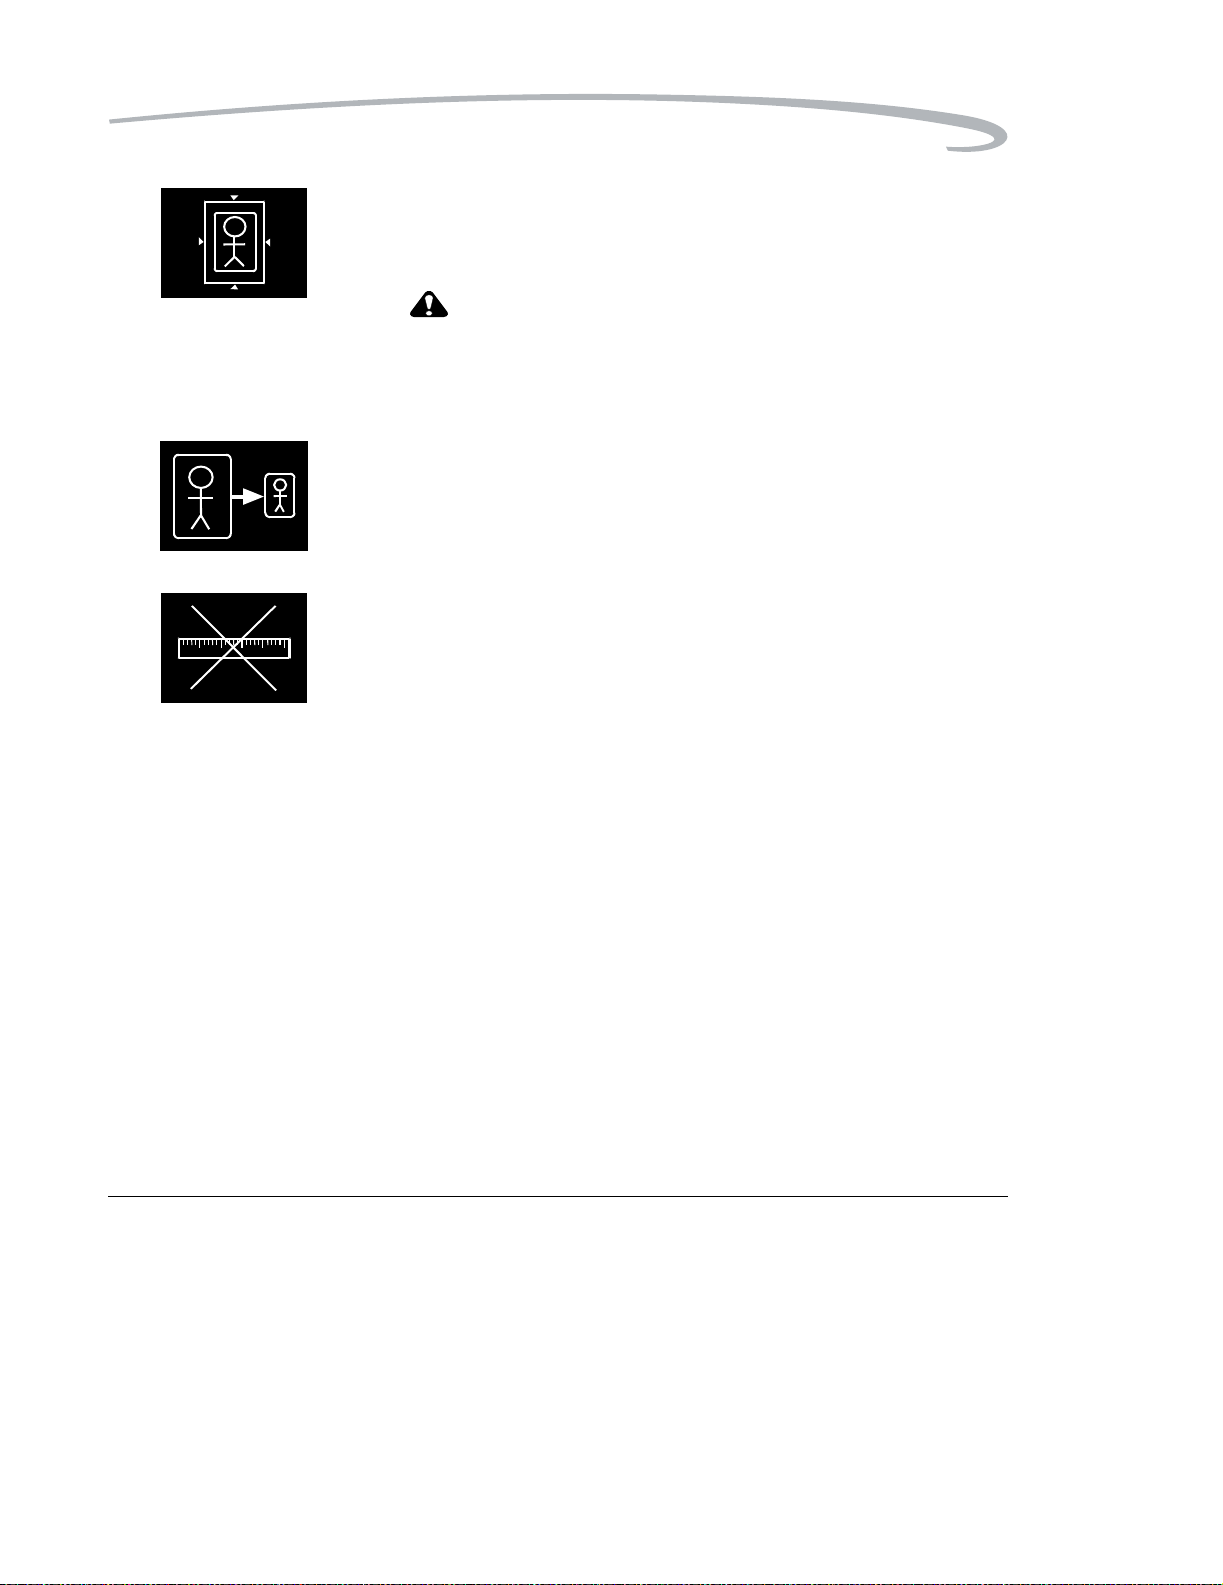
Image Resizing Icons If an image has been resized or cropped, an icon appears on the bottom
corner of the film. There are three types of icons that appear.
June 12, 2003 5E6155 3-33
Operation and Maintenance
• Crop. The image perimeter is removed to allow the image to fit on the
film and print at the same scale as the anatomical area of interest.
An image might be cropped if it is too large to print on the selected film
size, and the size of the area of interest is important to retain.
CAUTION
:
If anatomical areas of interest are near an outer edge of the
image, they might be removed from the image when it is
printed.
• Minify. The image file is reduced by the removal of pixel data.
An image might be minified if the image size is larger than the media in
the imager. For example, a computer radiography (CR) image is
requested to print 35 x 43 cm at the imager with 8x10 in. (20.32x25.4
cm) film selected. The image is minified and printed.
• Scale. The image file is reduced in scale.
An image file is reduced in scale if it is sent from an image source with a
requested image size that is not supported by the imager. The full image
is printed, but the size of the image is reduced to allow it to print on the
media size that is closest to the requested size.
June 12, 2003 5E6155 3-34

4
Troubleshooting
Status, Error Messages, and Notifications
Occasionally, you may have to correct minor problems. If more serious
malfunctions occur, you must contact a trained Kodak Authorized Service
Provider. See “Calling for Support” on page 4-25 for more information.
To determine the operator action required, you should monitor imager
operation and note the imager status and error messages.
Local Panel Status
Messages
The local panel Status screen displays messages to provide information on
the overall status and activities of the laser imager. The Status screen also
displays more detailed information on each film drawer.
Main Status Screen Details
Self Test Occurs when the power is first applied
to the machine control system.
Ready The printer is online and the processor
has reach operating temperature.
Warning = xx The processor is currently warming. xx
represents the number of minutes
estimated until ready.
Stopped A n error has occurred that prevents
printing.
Printing The imager is currently printing.
Door Open The front or back door is open.
Hood Open The hood is open.
Printer Offline Printing has been suspended.
Service Mode On The Service Override switch is enabled.
June 12, 2003 5E6155 4-1
 Loading...