

EAST COAST Rocking Assembly Manual
WARNING
YOUR CHILDREN’S SAFETY
IS YOUR RESPONSIBILITY
Important notes5
WARNING: Use only on a firm ground which is horizontal, level and dry.
WARNING: Do not let other children play unattended near the carry cot and stand.
WARNING: Do not use if any part is broken, damaged or missing.
There are no user replaceable par ts present.
Do not place carry cot and stand in close proximity to a wall or other obstacle.
This is intended to prevent entrapment.
This stand is not intended for use as a bath stand.
Once assembled, this product should not be taken apart and reassembled.
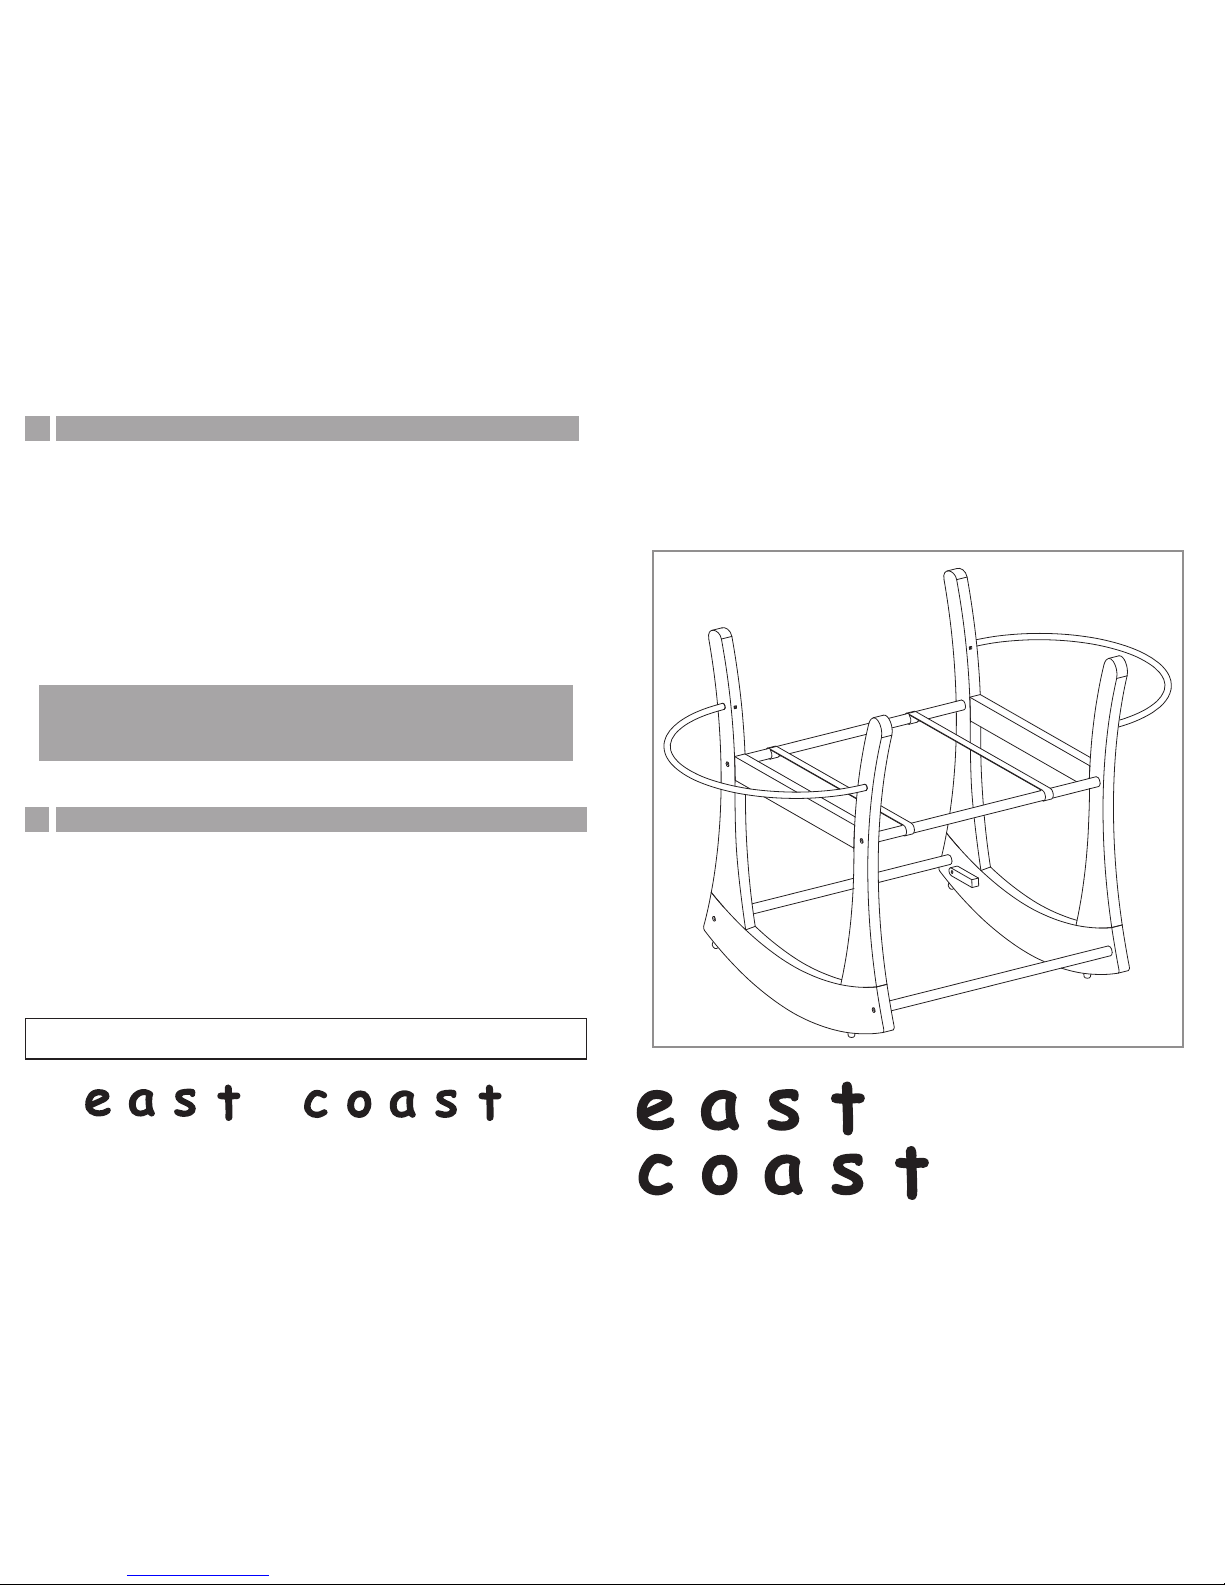
Rocking
Moses Basket Stand
Care of your product4
Before using the stand, ensure that it is positioned away from any obstacles which might
cause damage to the stand or injury to your baby.
The frame may be wax polished or wiped with a dampened cloth.
Do not allow older children to use the stand as a toy or climbing frame.
When not in use, the stand should be stored in a safe place.
Periodically check the screw fixtures to ensure that none have come loose. If they have
come loose they must be tightened using a cross-point screwdriver.
East Coast Nursery Ltd.
Robertson House, North Walsham, Norfolk NR28 0BX
For Customer Care or enquiries, Tel. 01692 408802
b
a
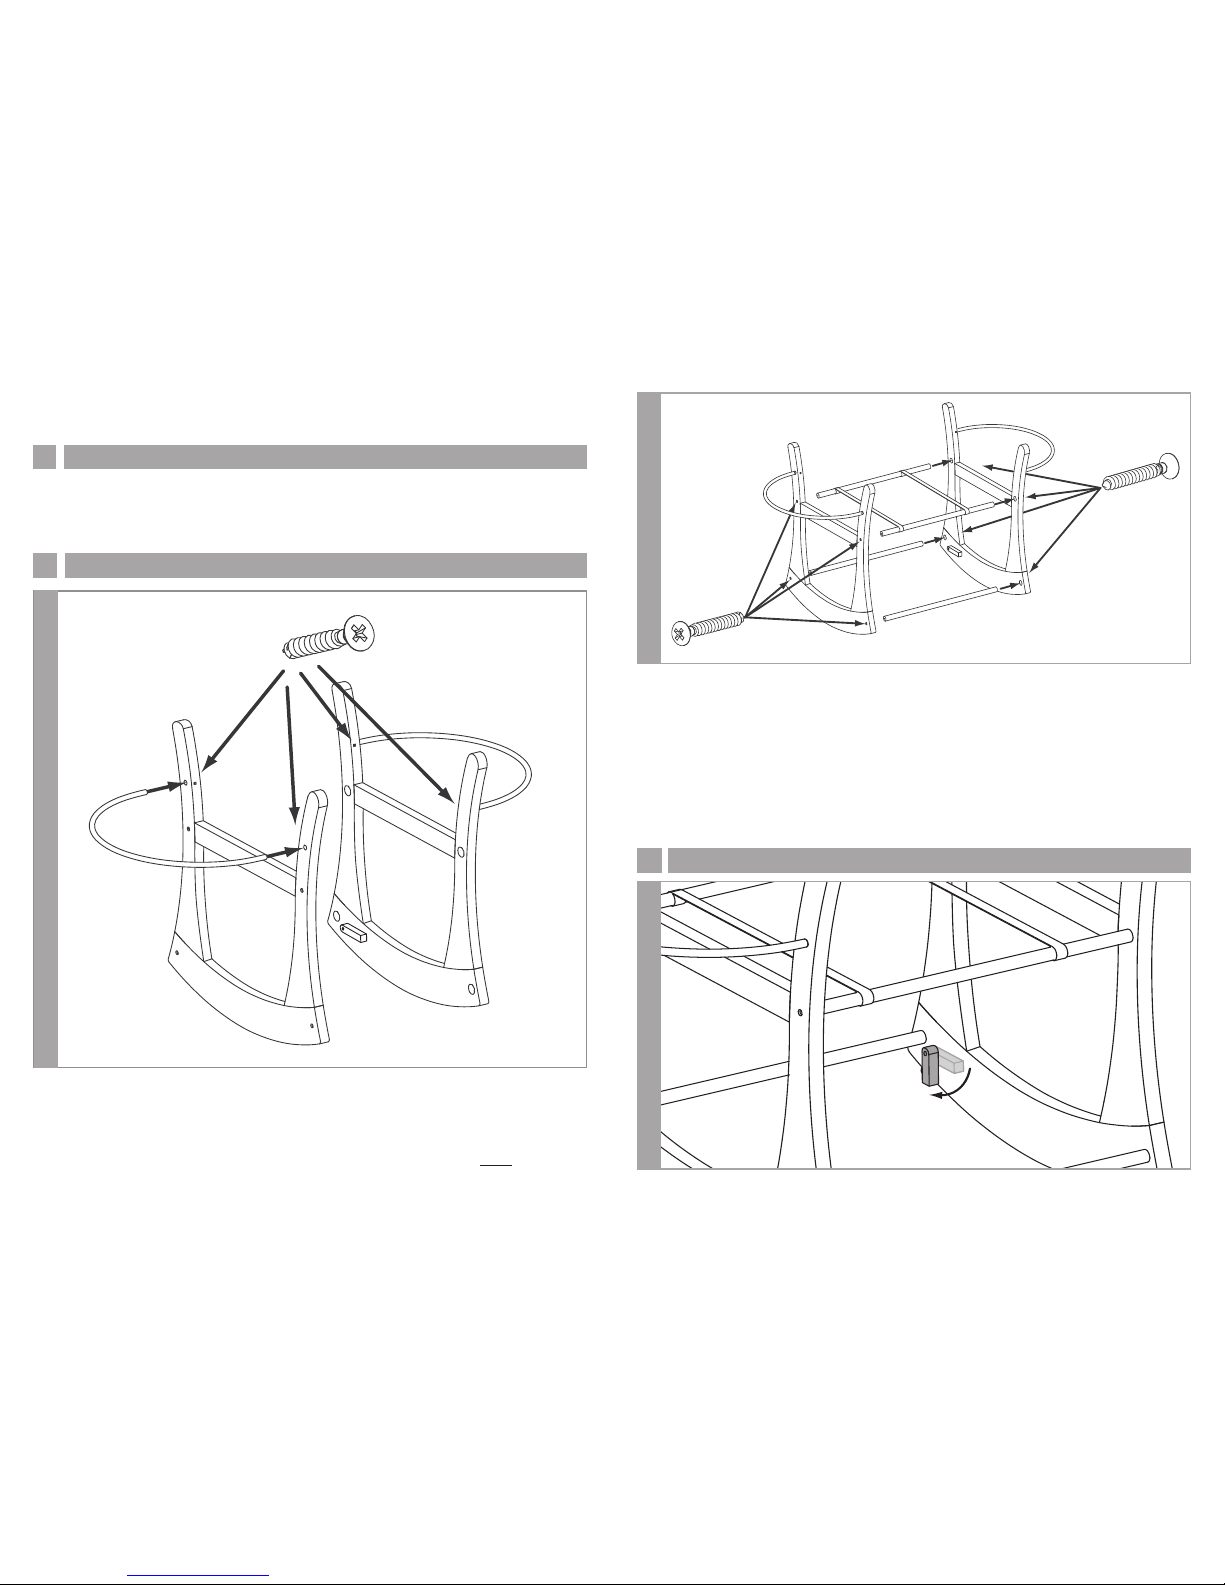
Assembly2
Final assembly
Push the lower dowels into the holes at the bottom of one of the end panels.
Fit the upper dowels and straps so that the straps lie across the TOP of the dowel as shown
in illustration b above.
Once all dowels are fully inserted into one end panel, attach the second end panel.
Ensure that the dowels are fully inserted into each end panel and stand the cradle upright
to check that the end panels are aligned with each other.
When the panels are aligned, secure using the 8 large screws as shown. Tighten the
screws to the point where the flat head of the screw is in full contact with the frame. Do not
over tighten.
In use3
To stop the stand from rocking, fold down the stop on each end frame of the stand.
Attach the plastic tubes.
Take the two plastic tubes and insert them into the upper holes in the end Frames.
(Diagram a).
Ensure that they are pushed fully into the holes and secure using the four small screws as
shown.
Introduction1
This product meets the requirements of BSEN 1466:2014
This stand is designed for a crib with maximum dimensions of 800mm x 320mm and
minimum of 690mm x 270mm.
IMPORTANT. READ THE INSTRUCTIONS CAREFULLY BEFORE USE AND KEEP FOR FUTURE
REFERENCE
c
 Loading...