

east coast Alby Dresser Instruction Manual
Alby Dresser
Assembly and care
instructions
IMPORTANT!
READ CAREFULLY AND KEEP FOR
FUTURE REFERENCE
Thank you for purchasing an East Coast product. It’s been carefully designed and constructed to oer
quality, safety and reliability for you and your baby.
If you have a query about this product or require replacement parts, please contact 01692 408802.
Your child’s safety is your responsibility. Keep children clear during assembly as the fittings pack contains
small parts which may present a choking hazard. Please read the instructions and warnings carefully before
use.
Lay out the parts on a soft level surface and compare to the parts checklist. Don’t throw away any
packaging until you’re sure that you have all the parts.
You will need the following tools to complete assembly:
Flat-headed screwdriver and cross-point screwdriver
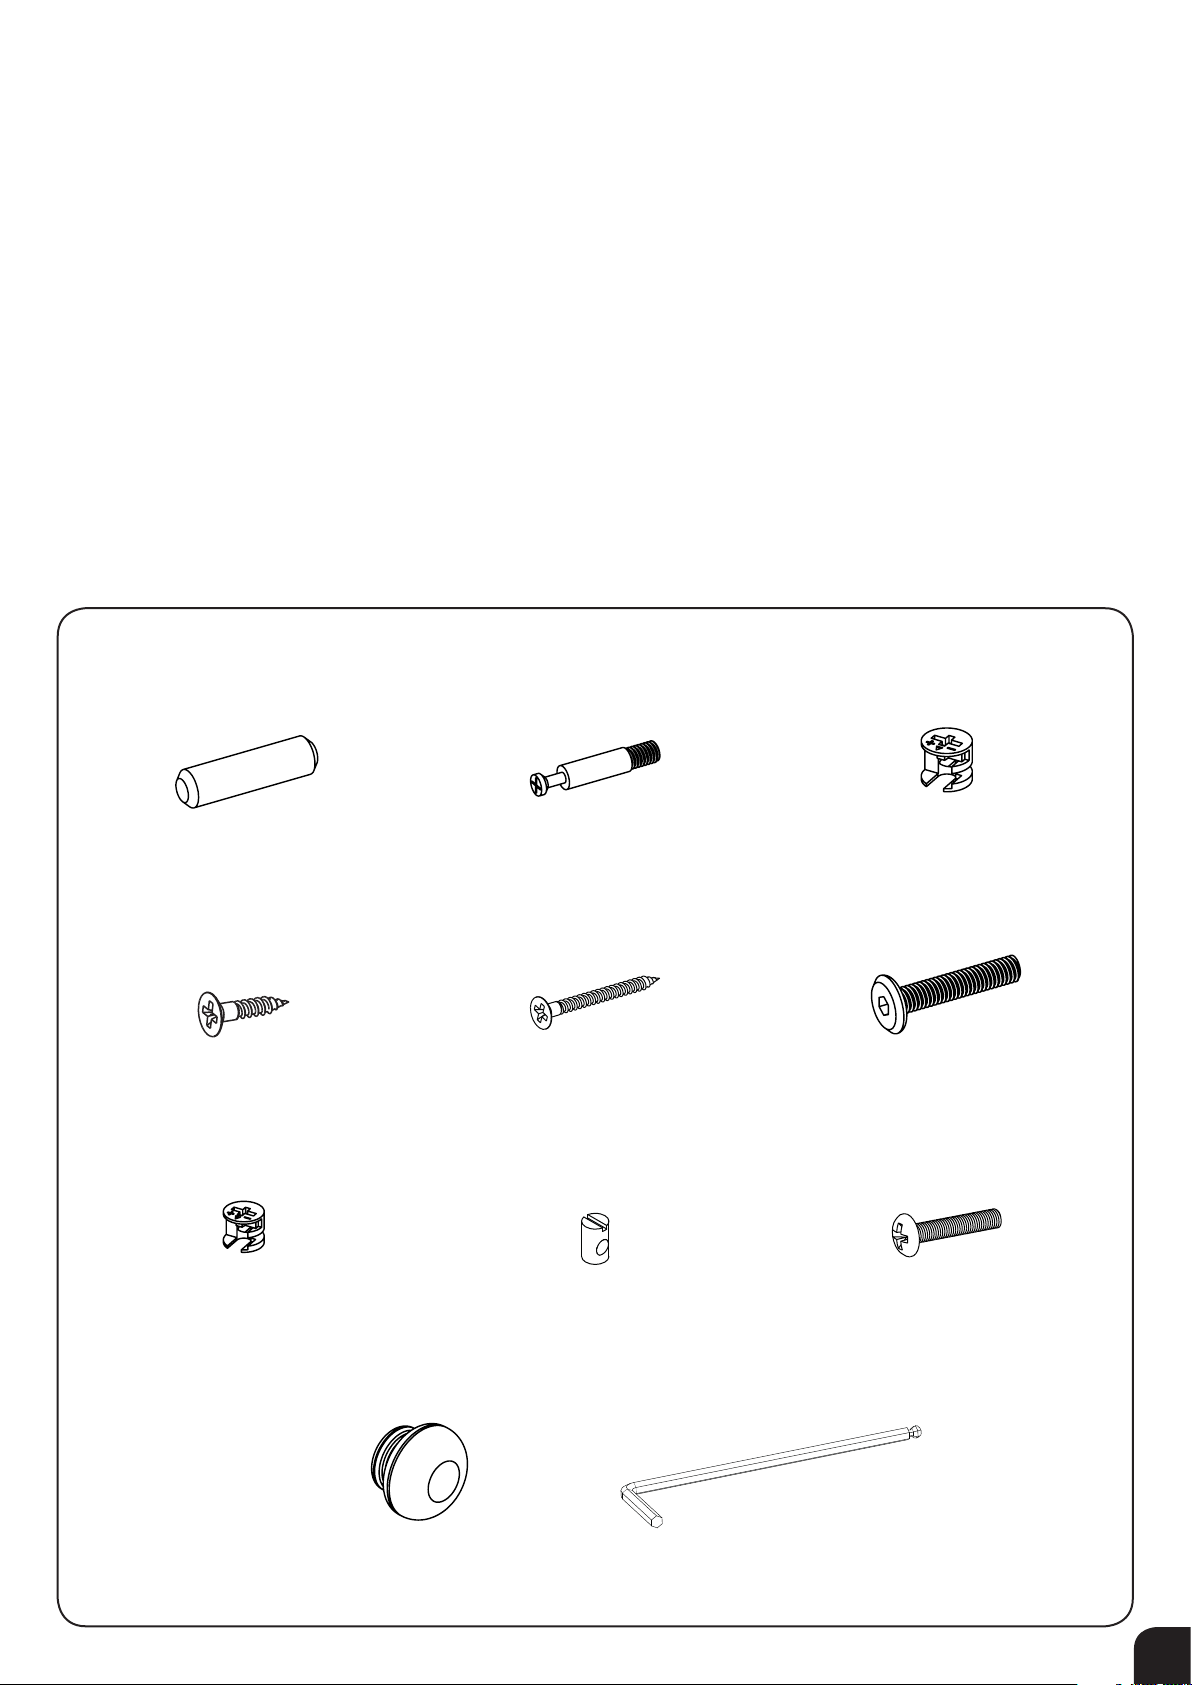
Hardware
D x 20
G x 12
(12mm)
B x 26A x 16 C x 14
(15mm)
E x 14
H x 12
F x 5
I x 6
J x 6
Hexagon Key
1

Wooden Parts
To p
Sides (L + R)
Panel Joiner
Rear Bar
Front Bar
Upper Back
Panel
Lower Back
Panel
Changer Sides
(L + R)
Changer Back
Changer Front
Drawer Front
x 3
Drawer Back
x 3
Drawer Sides
(L + R) x 3
Drawer Base
x 3
2
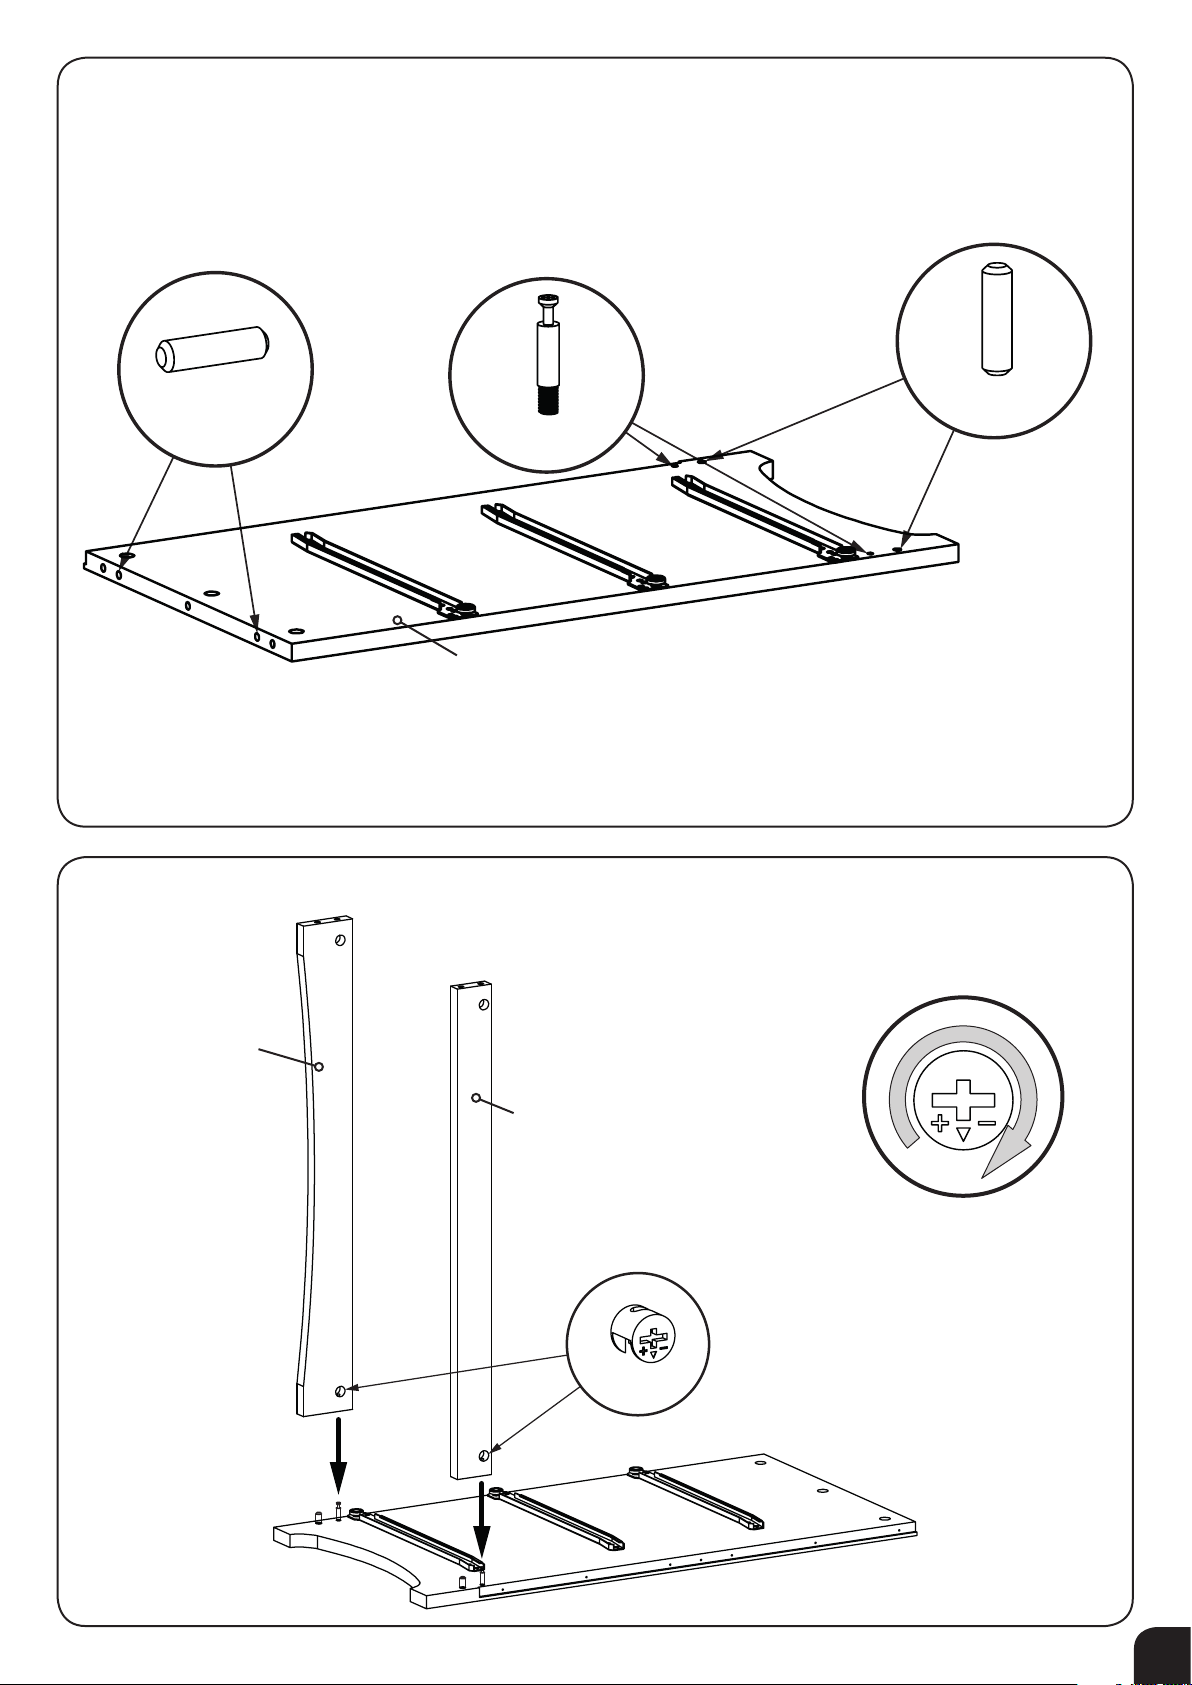
Assembly 1
A x 2
Assembly 2
A x 2
B x 2
Side (L)
Note: Repeat for
other side (R)
With cam pin inserted, turn
cam nut clockwise to tighten.
Front Bar
Rear Bar
C x 2
3
Assembly 3
Side (R)
With cam pin inserted, turn
cam nut clockwise to tighten.
C x 2
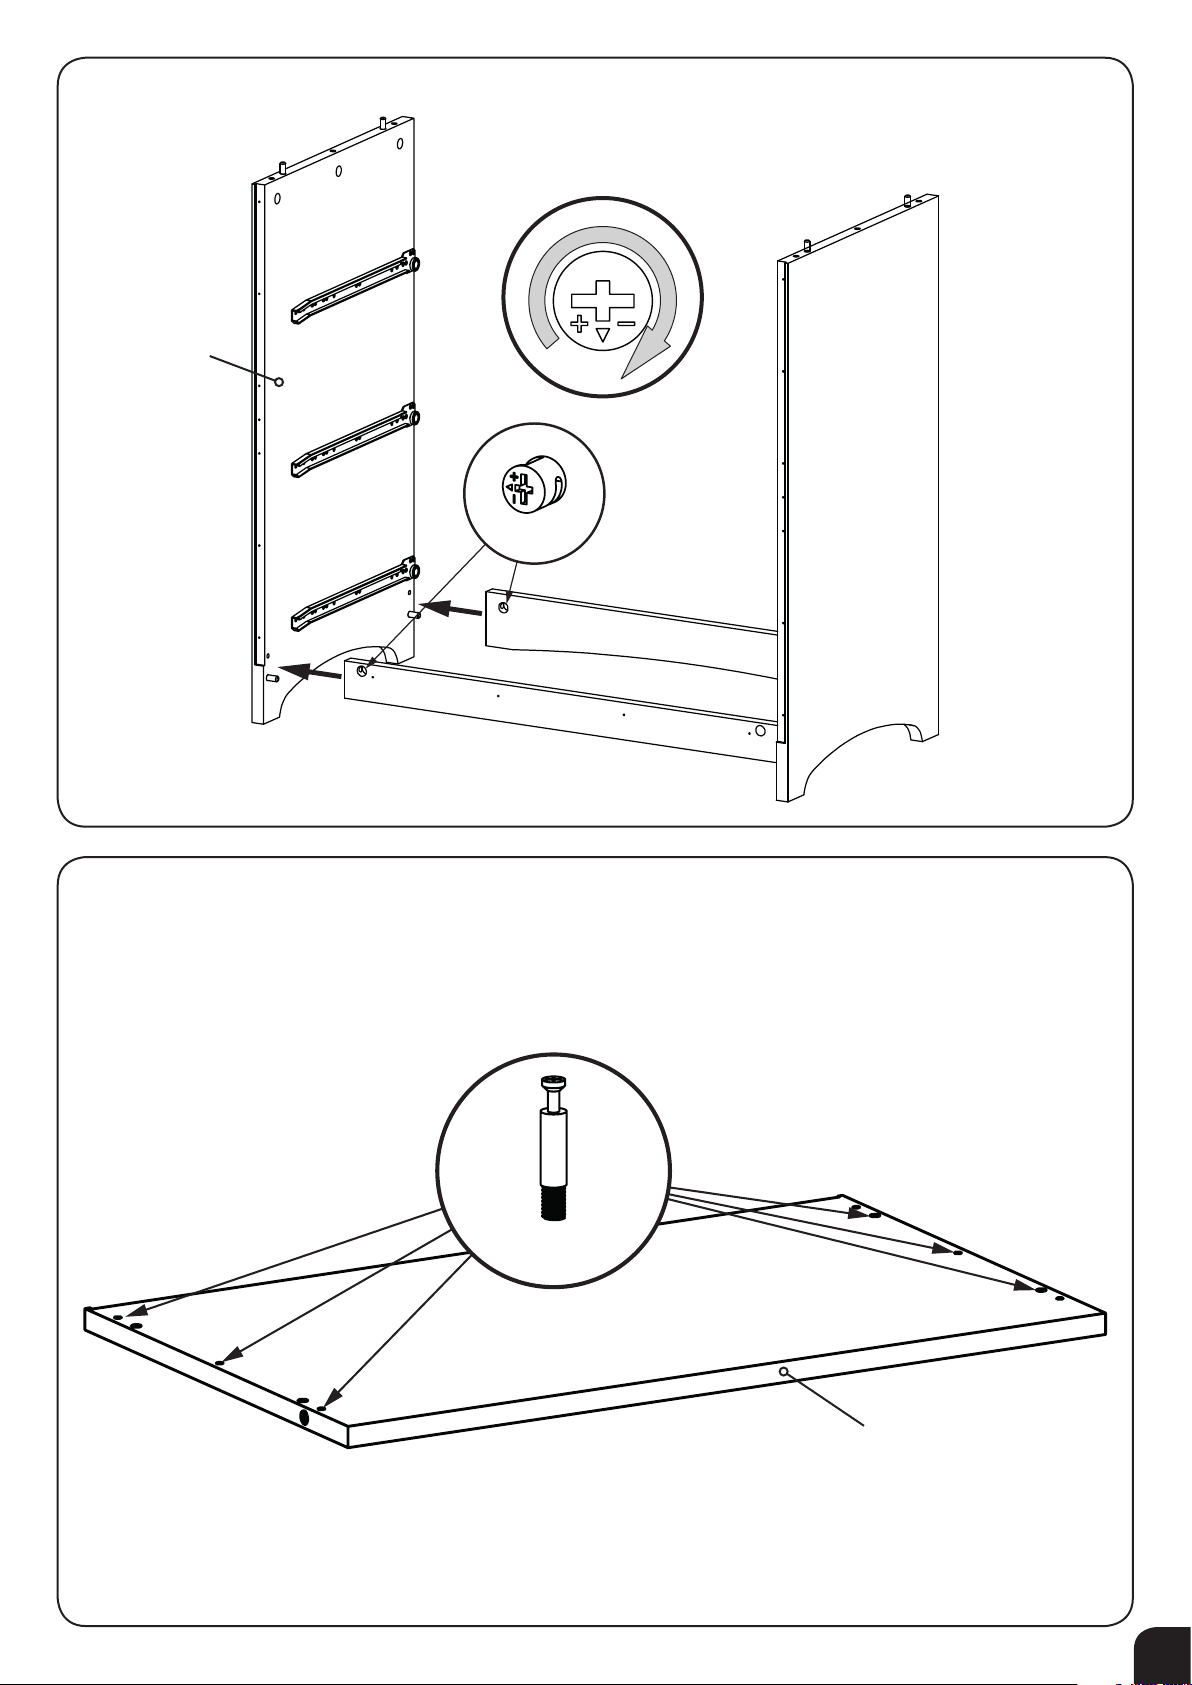
Assembly 4
B x 6
To p
4
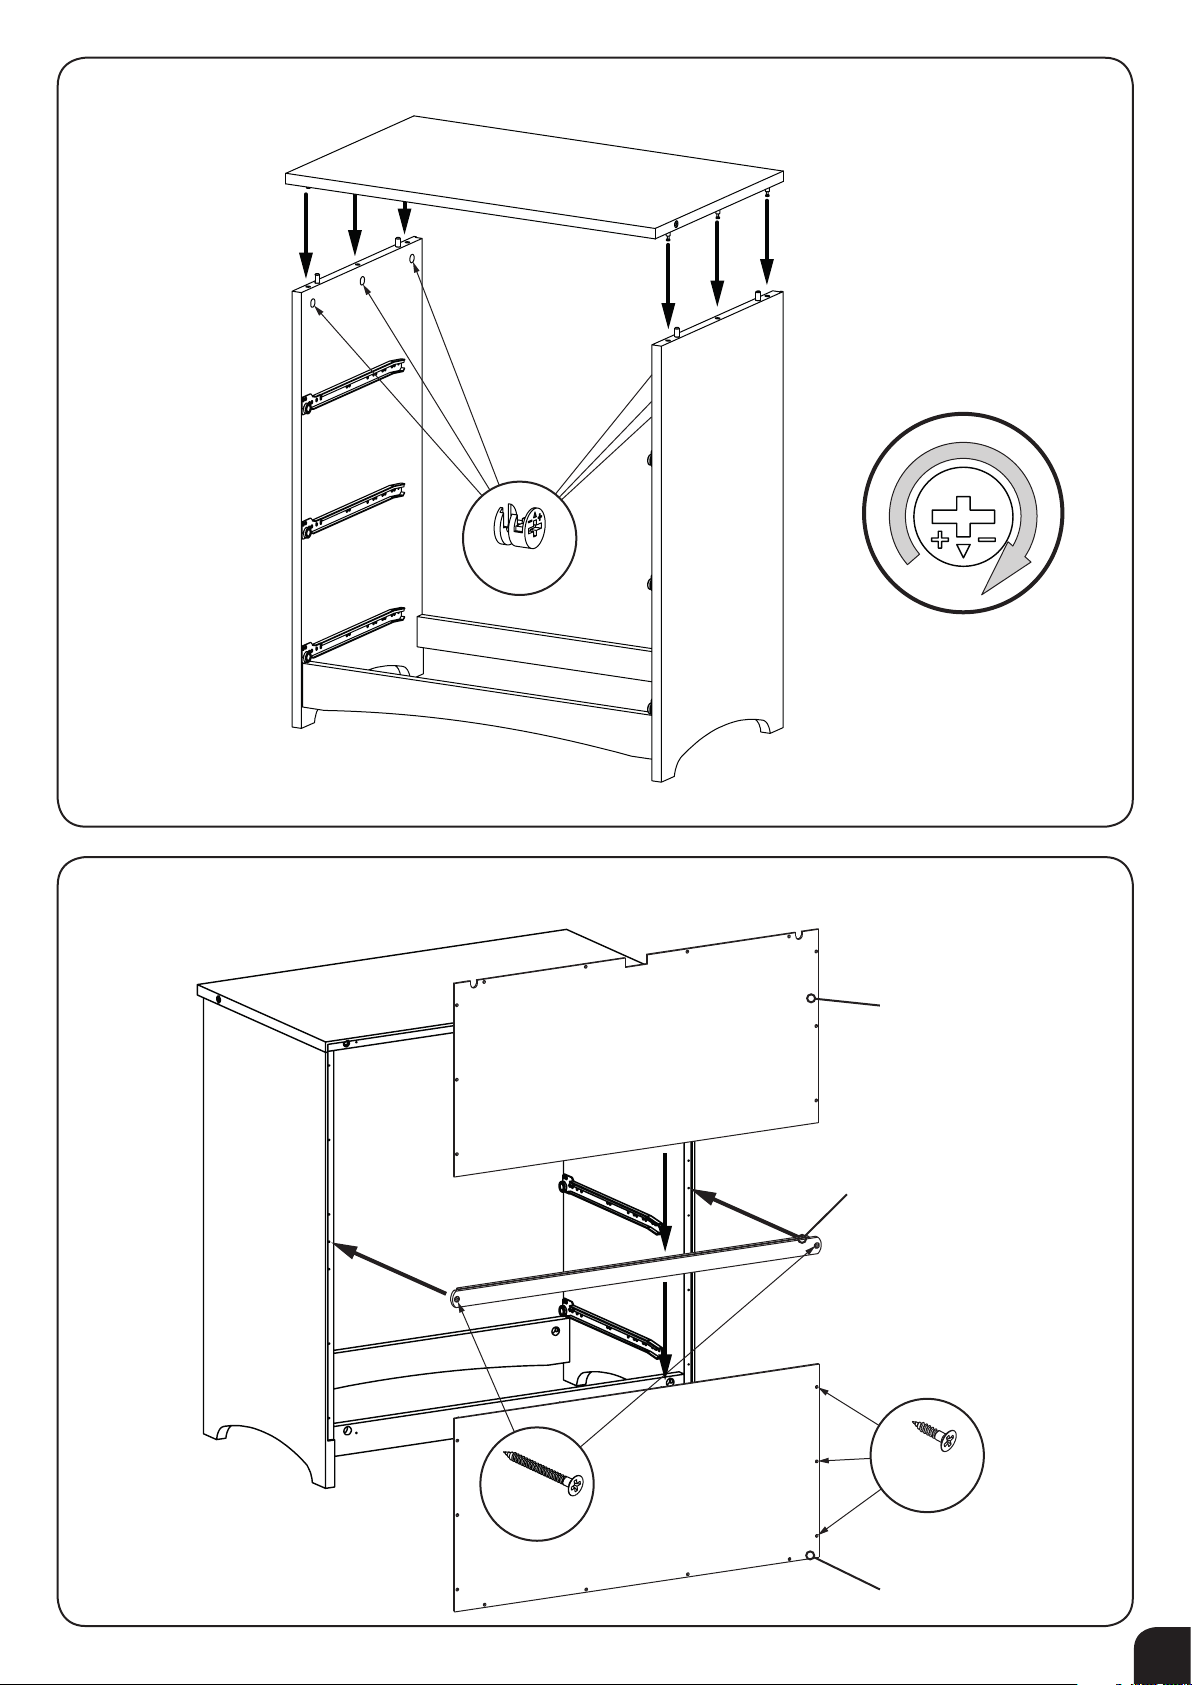
Assembly 5
With cam pin inserted, turn
cam nut clockwise to tighten.
C x 6
Assembly 6
Upper Back Panel
Panel Joiner
E x 2
D x 20
Lower Back Panel
5
 Loading...