

Page 1
OPERATION MANUAL
Page 2
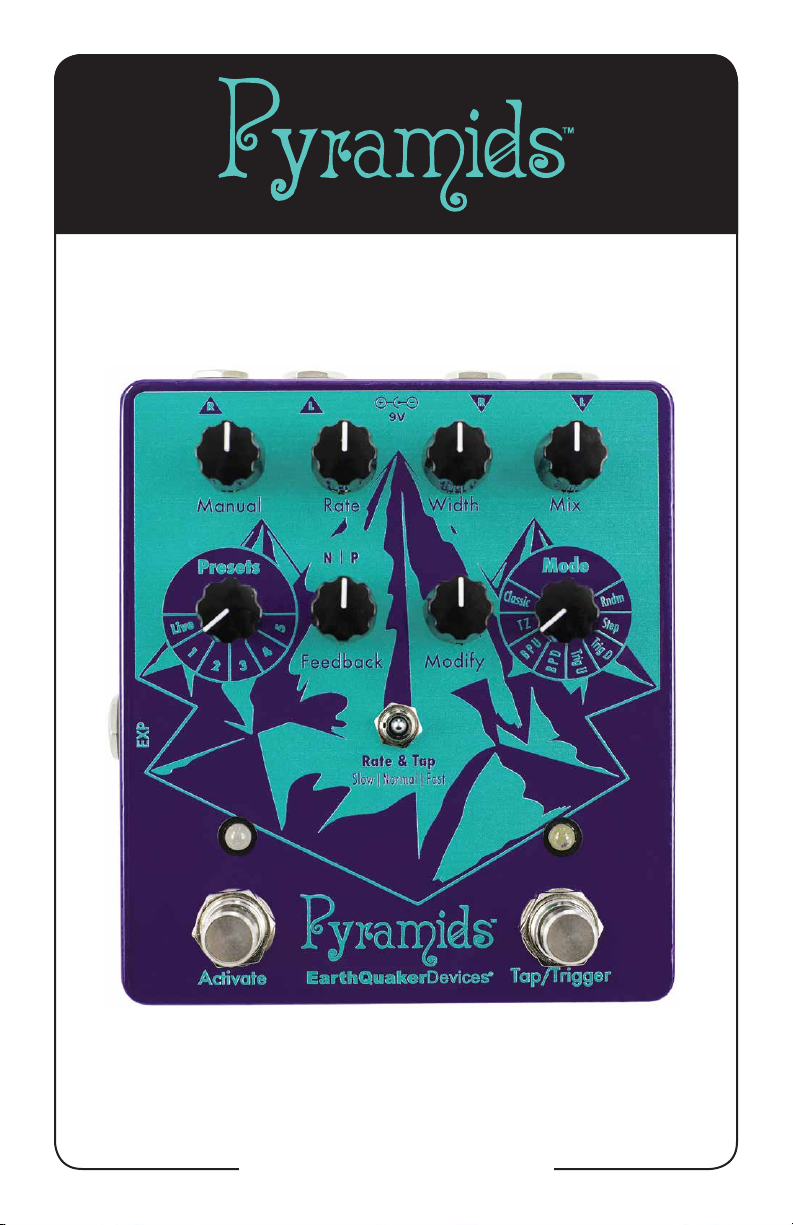
You hold in your hands the instruction manual for the EarthQuaker Devices® Pyramids™ Flanger.
Well, a reproduction, actually. The original dates to 138 BC and lives behind layers of bulletproof
glass in the Ark of the Covenant Jamie Stillman keeps in his basement. Pyramids is built upon
the same proprietary DSP architecture as the Avalanche Run, only this time it’s way angier.
Pyramids is a stereo anging Device with ve presets, eight anger modes, tap tempo, tap
subdivision via the Rate & Tap mini-toggle, a multifunction Modify control, positive and negative
Feedback, and a variable Mix control, which is something you don’t see on a anger every day.
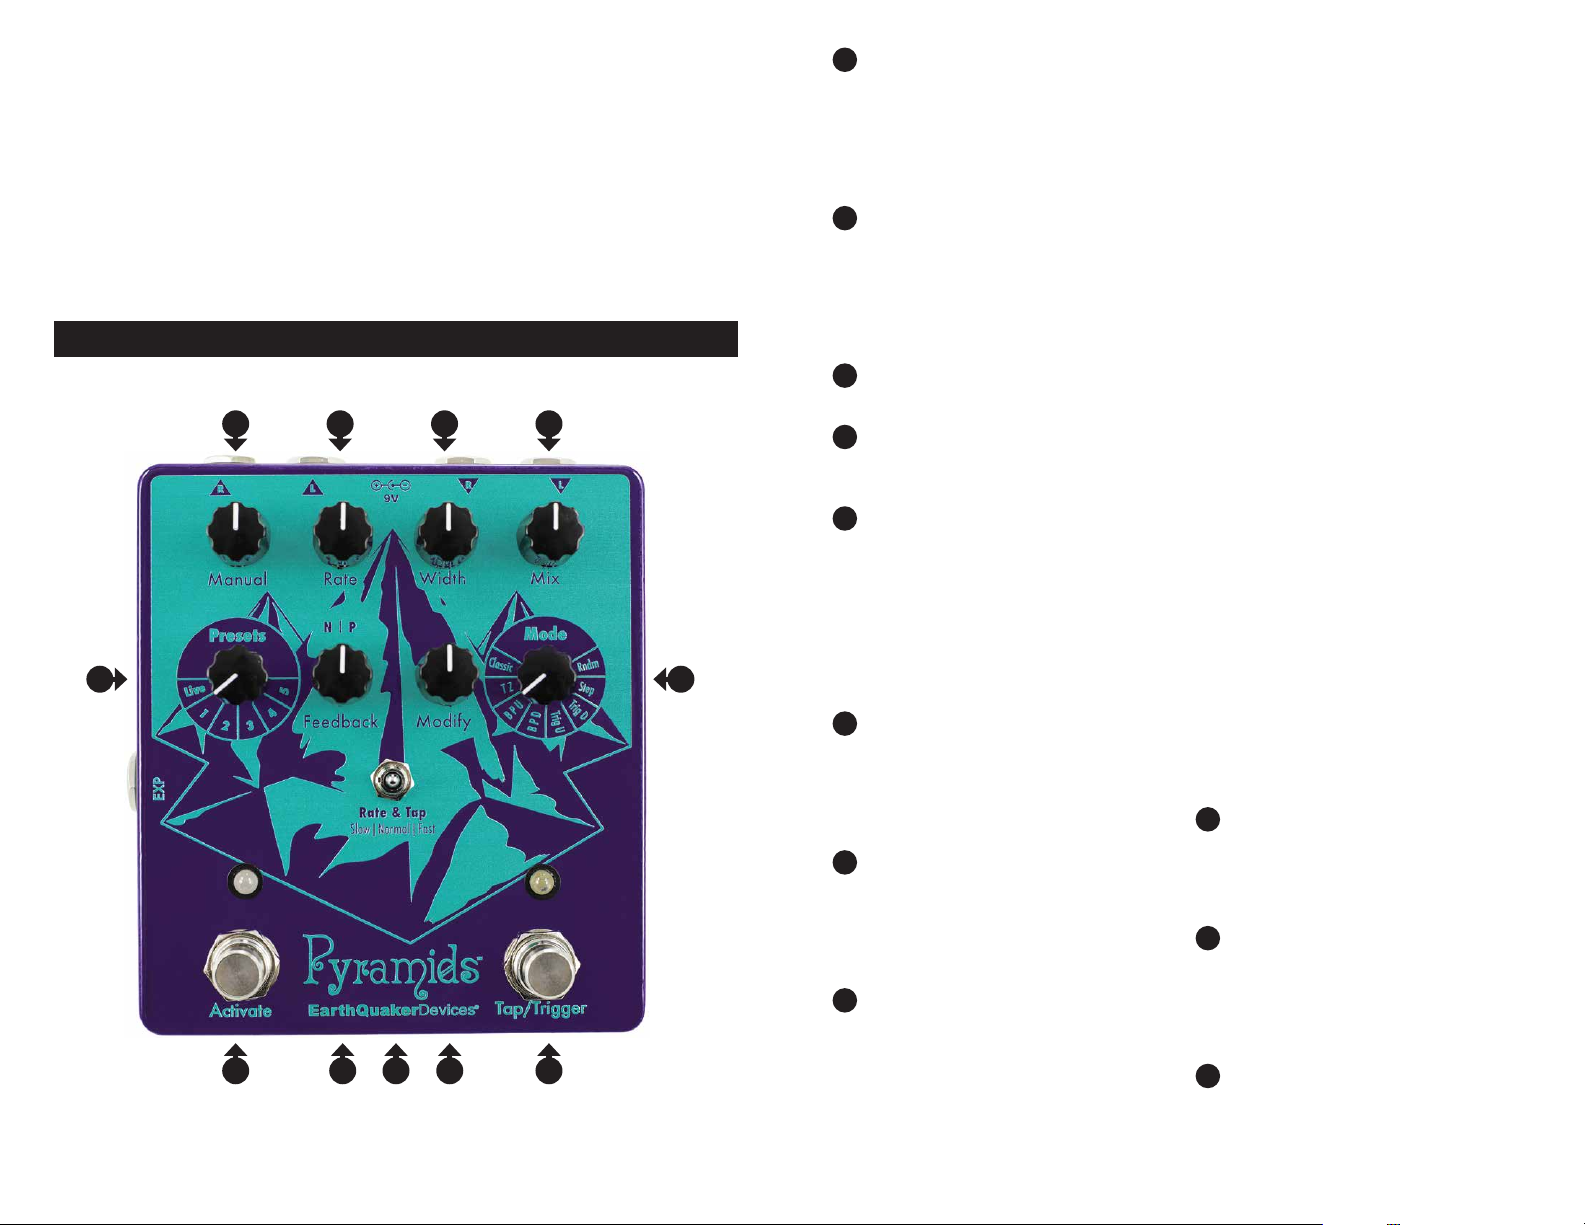
Pyramids has six knobs, three switches, two footswitches, and ve jacks.
The knobs are Manual, Rate, Width, Mix, Feedback, and Modify. We’re going to tell you what
they do more than once, because while they generally affect similar parameters, they react
differently in each mode, so please pay attention. There will be a test.
<<< Controls >>>
1
10
2 3 4
11
5 6 7 8 9
Manual: Controls the delay time of the
1
modulated signal. Turn it clock wise for a
shorter delay time and a higher-pitched ange
sound. Turn it counter clockwise for longer
delay times and a lower- pi tc he d ange sou nd.
This parameter may be controlled by an
expression pedal. When using an expression
pedal, the Manual control is defeated.
Rate: Controls the speed of the LFO as well
2
as the rise time in “Trigger Up” mode and fall
time in “Trigger Down” mode. Turn it up for
faster modulation or turn it down for slower
modulation. The Rate control has three
ranges of operation: Slow, Normal and Fast.
These modes are selected by the Rate & Tap
toggle switch.
Width: Controls the frequency range of the
3
LFO sweep. You might also think of it as a
depth control for the LFO.
Mix: This is the volume control for the
4
modulated signal. The modulated signal gets
louder when you turn it clockwise and quieter
when you turn it counterclockwise.
Activate Footswitch: The activate switch
5
features our Flexi-Switch™ technology! This
relay-based true-bypass switch allows for
momentary or latching operation.
• For standard latching operation, tap the
footswitch once to activate the effect and
tap again to bypass.
• For momentary operation, hold down the
footswitch for as long as you’d like to use
the effect. Release to bypass.
Feedback: Regeneration control for the
6
modulated signal. There is a center-detent for
zero feedback. Increasing this control from
noon introduces positive feedback for a lush
“whooshing” sound. Decreasing this control
from noon produces negative feedback,
which has a hollowed-out tubular sound.
Rate & Tap Toggle Switch: “Normal” (center
7
position) is 1:1. The tempo you tap in is the
tempo Pyramids will spit out. When set to
“Slow” (left position), the tempo you tap is
divided for a slower sweep. When set to
“Fast” (right position), the tempo you tap is
multiplied and delivers a faster sweep.
Modify: The behavior of this control depends
8
upon which mode you’re using.
• Classic: Tone control for the modulated
signal. Clockwise from center is a high pass
lter. That means it cuts the low end and
allows the high frequencies to pass through.
Counterclockwise from center is a low pass
lter. That means it cuts the high end and
allows bass frequencies to pass through.
• Through-Zero: Delay time for the
unmodulated dry signal. This controls
where in the LFO cycle the through-zero
point occurs, which is where you’ll hear
the most drastic cancellation. Clockwise
Modify settings lower the frequency
of the cancellation. Counterclockwise
Modify settings produce higher frequency
cancellation. This is probably backwards
from what you’d expect, but let’s roll with it.
• Barber Pole Up: Tone control for the
modulated signal. Clockwise from center
is a high pas s l ter. Counterclo ck wis e from
center is a low pass lter.
• Barber Pole Down: Tone control for the
modulated signal. Clockwise from center
is a high pas s l ter. Counterclo ck wis e from
center is a low pass lter.
• Trigger Up: Sensitivity control for
the sweep. This controls how quickly
the re-triggering reacts to your pick
attack. Clockwise is higher sensitivity,
counterclockwise is lower sensitivity.
• Trigger Down: Sensitivity control for
the sweep. This controls how quickly
the re-triggering reacts to your pick
attack. Clockwise is higher sensitivity,
counterclockwise is lower sensitivity.
• Step: Adjusts the glide between steps.
Low Modify settings produce sharp, stairstepped transitions between steps. Higher
Modify settings introduce a smoother
glissando effect.
• Random: Adjusts the glide between steps.
Low Modify settings produce sharp, stairstepped transitions between steps. Higher
Modify settings introduce a smoother
glissando effect.
Tap / Trigger Footswitch: In Classic,
9
Through-Zero, Barber Pole Up, Barber
Pole Down, Step, and Random modes, this
footswitch is a tap tempo control. In Trigger
Up and Trigger Down modes, this footswitch
triggers the effect whenever it is pressed.
Presets Rotary Switch: Selects between
10
Live mode and one of ve presets. Pyramids
comes with our favorites programmed in, but
you’re allowed to re-write them if you want.
We don’t mind. Setting this switch to Live will
give you the sound which corresponds to
Pyramids’ current setting.
Mode Rotary Switch: Selects between
11
Pyramids’ eight anger modes (see the
following Modes section.)
Page 3

<<< Modes >>>
Classic
Pyramids’ Clas sic Mode deliver s the “classic” jet-p lane liquid -silk ang ing sound we all know and love
and have come to expect from any reputable anging Device. Try this mode to recreate the sounds
of old-school ADT (Automatic Double Tracking) effects as heard on records by those loveable moptops from England (you know which ones) and on the most ripping riffs to come from the NWOBHM.
Through-Zero
Try this one in stereo. In Through-Zero Mode, Pyramids gives you authentic tape-style anging
without all the calibration, biasing, demagnetizing of heads, and so on that a real tape machine - two
of ‘em, actually - requires.
In ye olden days of real tape anging, one tape was played straight through on one machine, while on
another machine, a tape containing a copy of the guitar track played simultaneously as the recording
engineer pressed down on the ange (tape reel) of the second machine, causing the second signal
to vary in tempo and pitch. When the two signals are combined, the result is a psychedelic comb-
ltering effect that sounds like a black hole collapsing on itself while the rest of the stars in the galaxy
go supernova in unison.
Savvy recording engineers discovered that if they introduced a delay on the dry signal by doing
the exact same thing - pressing down on the ange of the other tape machine - they could achieve
intensied, swirly, and dramatic cancellation as the two signals being anged at different speeds
nearly disappear at what’s called the “zero-point,” hence the term Through-Zero anging.
We don’t recommend Through-Zero anging and driving, as the resulting sound is quite disorienting
and may impair your ability to operate heavy machiner y. But it’s probably okay for playing heavy metal.
And if you’re going to Djent, please Djent responsibly.
In Through-Zero Mode, the Modify control adjusts the delay of the dry signal and Manual controls
the delay time of the wet signal. Experiment with these controls in unison to dial in the sweet spot for
the dropout!
Barber Pole Up
“Barber Pole” anging refers to an innitely sweeping upward ange with no beginning, middle, or end.
This, depending on your point of view, sounds either like Ms. Poppins taking ight with her umbrella, or
a nightmarish, Kafkaesque hellscape where time is meaningless and we spend the rest of our natural
lives staring into the void, forever dwellers on the threshold.
Barber Pole Down
Barber Pole Down is exactly like Barber Pole Up, except the anging effect goes downward in pitch,
rather than upward.
Trigger Up
Trigger Up Mode is similar to Barber Pole Up mode, minus the existential dread. The anger still
produces a continuous upwards sweep; except in this mode, your pick attack (or pressing the Tap/
Trigger Switch) re-t rigger s the ange from the beginning. It’s like getting a fresh star t with ever y note!
In Trigger Up mode, the Rate control adjusts how quickly the sweep reaches the top and Modify acts
as a sensitivity control for the re-triggering effect.
Trigger Down
Trigger Down is exactly the same as Trigger Up, only the anger sweeps downward. Cool, huh?
Pro Tip
In Trigger Up/Down modes, you may re-trigger the anger using an external source in what we call
Side Chain Flanging.
To trigger Pyramids using an external source, plug your primary instrument (the signal on which
you want to hear the anger) into the Right Input and connect Pyramids’ Right Output to your amplier
or DAW.
Connect the external trigger source (drum machine, sequencer, or CV) to Pyramids’ Left Input.
To hear only the affected primary instrument signal (as modulated by the external trigger source), do
not connect the Left Output. Your primary instrument’s signal will pass through Pyramids’ Right Input /
Output, but the flanger will react to changes in the external trigger signal instead of your
primary instrument.
To monitor the trigger source, connect Pyramids’ Left Output to a separate amplier or DAW input.
Step
Step mode tries to restore order to the universe by sweeping up and down in stepped increments, kind
of like the sequencer on a synthesizer. In Step mode, the Modify control adjusts the glide between
steps. Low Modify settings produce sharp, stair-stepped transitions between steps. Higher Modify
settings introduce a smoother glissando effect.
Random
Random mode is like Step mode, except the sweep is randomized without reason or rhyme. Some
men just want to watch the world burn.
Page 4

<<< Inputs & Outputs >>><<< Presets >>>
Pyramids ships with ve example factory presets:
1- Classic
2- Barber Pole Up
3- Trigger Up
4- Step
5- Random
These are intended to get you started and are by no means the be-all-end-all examples of these
modes. Please feel free to modify or overwrite these as you’d like!
To Modify an Existing Preset
• Turn the Preset Rotary Switch to the preset you wish to change.
• Adjust the controls to your desired settings. When a control has been changed, the Activate
LED will turn from yellow to red to indicate a change is being made. The red LED is a warning
that a preset is being edited. Any changes made at this point will be lost unless the preset
is saved.
• To save your changes, press and release both the Activate Footswitch and the Tap/Trigger
Footswitch at th e same time . Th e Act iv at e LE D will th en ash yello w. Onc e the LED is ye ll ow,
your modied preset is saved!
To Write Your Own Preset
• Adjust the controls to your desired settings.
• Press and hold the Activate Footswitch.
• While holding the Activate Footswitch, press and hold the Tap/Trigger Footswitch.
• While holding down both footswitches, turn the Preset Rotary Switch to the desired preset
location (1-5) and release both footswitches.
• The Activate LED will ash and then turn yellow.
• Once the Activate LED turns yellow, your preset is saved!
To Restore Factor y Presets
• Turn the Preset Rotary Switch to the Live position.
• Unplug Pyramids’ power supply from the power jack.
• Press and hold both the Activate Footswitch and the Tap/Trigger Footswitch.
• Insert the power plug into Pyramids’ power jack.
• Release both footswitches.
• Voila! Your Pyramids sounds as fresh as the day it left the factory.
To Use Pyramids in Mono
Plug your instrument into the Left Input and use either the Left Output or the Right Output.
To Use Pyramids with a Mono Input and Stereo Output
Plug your instrument into the Left Input and connect both the Left Output and Right Output to the next
stereo pedal in your chain, to two inputs of your DAW, or to two ampliers.
To Use Pyramids with a Stereo Input and Stereo Output
Plug your stereo instrument into the Left Input and Right Input and connect both the Left Output and
Right Output to the next stereo pedal in your chain, to two inputs of your DAW, or to two ampliers.
Pyramids is true stereo and will pan across the stereo eld.
To Use Pyramids with Two Mono Sources
Plug one instrument into the Left Input and connect the Left Output to the next pedal in your chain, to
a DAW input, or to an amplier. Then, plug another instrument into the Right Input and connect the
Right Output to the next pedal in a separate effects chain, to a separate DAW input, or to a separate
amplier. I have no idea why anyone would want to do this, but it’ll work.
Page 5

<<< LED Behavior >>>
In Live mode, the Activate LED is always green. When using a saved preset, the Activate LED
is yellow, and will change to red when a preset setting is changed. When saving a change to
a preset or writing an entirely new preset, the Activate LED will ash and turn yellow once the
change/preset has been saved. The Tap/Trigger LED is white and will ash in tempo regardless
if the tempo is set via the Rate control or the Tap/Trigger Footswitch. The Tap/Trigger LED is not
used in both Trigger up and down modes and will remain dark.
<<< Power Requirements >>>
• Current Draw: 425mA
• For best results, please use the included 9v center-negative 1-amp DC power supply.
• To use with multiple output transformer-balanced isolated pedal-specific power supplies,
Pyramids’ may be powered from two outlets combined using a current-doubling cable. DO NOT
USE A VOLTAGE- DOUBLING CABLE BECAUSE THAT WILL SEND 18V TO PYR AMIDS
AND FRY IT LIKE AN OVEREASY EGG AT A GREAZ Y SPOON DINER.
<<< Tech Specs >>>
• 24-bit 96kHz A/D & D/A converters
• S/N Ratio: 115dB typical
• Input Impedance: 1M Ohm
• Output Impedance: 100 Ohm
• All analog dry signal path
• All digital wet signal path with
20Hz – 20kHz frequency response
• PCBs populated by a combination of ar ticial
and human intelligence in the Akron, Ohio
of America.
• Each and every Pyramids is completely
assembled, wired, and tested by total human
beans in the Great Sphinx of Akron, Ohio,
which, coincidentally, looks exactly like the
cover of Iron Maiden’s Powerslave.
<<< Warranty >>>
This Device has a limited lifetime warranty. If it breaks, we will x it. Should you encounter any
issues, please email info@earthquakerdevices.com.
www.earthquakerdevices.com
©2018 EarthQuaker Devices LLC
 Loading...