

Page 1
ARDISAM
.com
OPERATOR’S MANUAL & PARTS
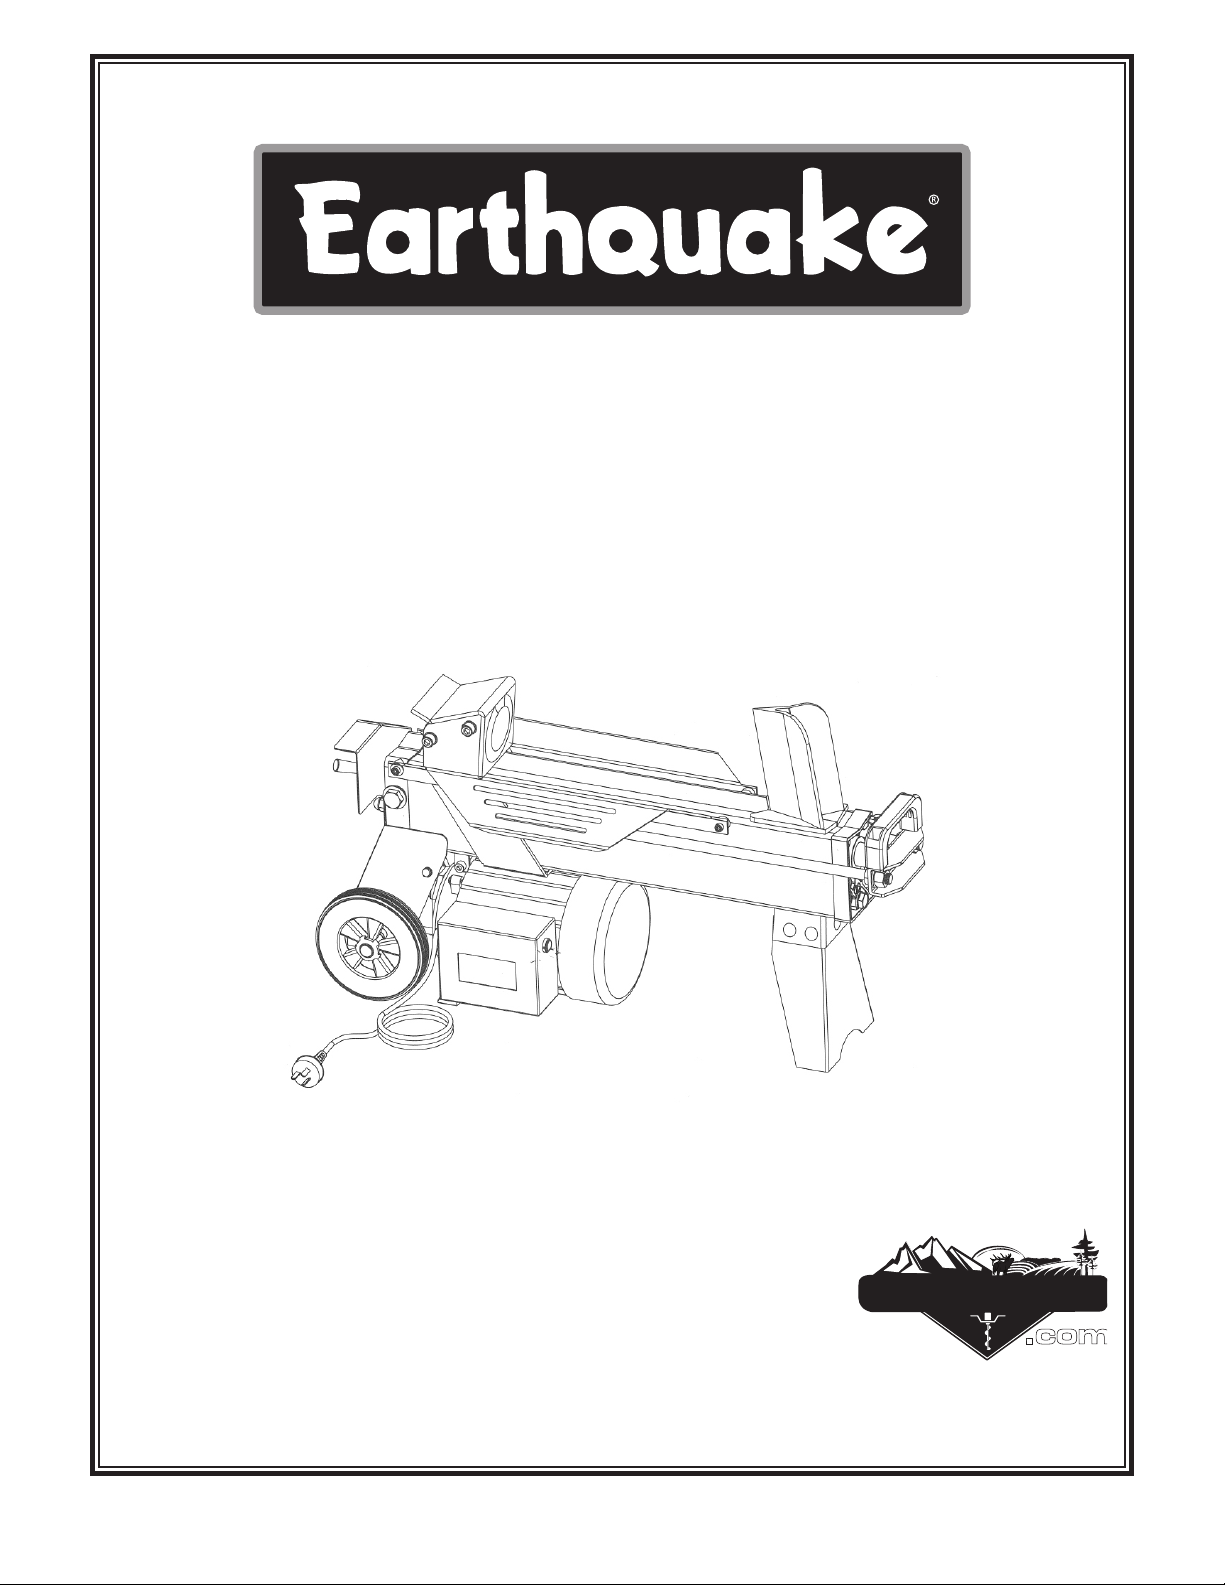
W1000 4-TON Mini Electric Log Splitter
OMW1000
Rev. 8/9/07
2007 Ardisam, Inc.
All Rights Reserved.
Page 2
ARDISAM
.com
INTRODUCTION, REGISTRATION AND WARRANTY
ARDISAM
.com
Thank You . . .
for purchasing an Earthquake® Mini Electric Log
Splitter from Ardisam, Inc. We have worked to ensure
that the splitter meets high standards for usability and
durability. With proper care, your log splitter will provide
many years of service. Please take the time to read
this manual carefully to learn how to correctly operate
and maintain your log splitter Congratulations on your
investment in quality.
CONTENTS
Registration/Warranty ...................................................2
Safety ....................................................................... 3-4
Specs ............................................................................5
Operation .................................................................. 6-7
Maintenance & Storage ................................................8
Service, Troubleshooting, and Repair ..................... 9-11
WARRANTY
One Year Limited Warranty
The Ardisam, Inc., Manufacturing Company warrants
this Earthquake Mini Electric Log Splitter to be
free from defects in material and/or workmanship.
Conditions of this warranty include:
What is covered under warranty:
For the first year from the date of purchase, Ardisam
will furnish 100% parts and labor to correct any defect
caused by faulty material or workmanship. All repairs
made under warranty must have prior approval from
Ardisam, Inc.
What is not covered under warranty:
This warranty applies only to products which have
not been repaired or altered outside our factory. It
covers only defects resulting from normal use, and
does not cover defects arising from misuse, alteration,
negligence, or accident. Items subject to normal wear
and tear, due to the nature of their function are not
covered under this warranty. This warranty applies only
to the original purchaser, and is not transferrable. Any
REGISTRATION
Fill out and mail the registration card located in your
Owner’s Manual packet. Warranty is valid only if your
completed registration card is received by Ardisam, Inc.,
at time of purchase.
Model Number _______________________________
Serial Number _______________________________
Date of Purchase _____________________________
Place of Purchase ____________________________
unit used in a commercial application is not covered.
How to obtain warranty service:
Call 800-345-6007 for service assistance, or
return the product to us at the address below with
transportation charges prepaid.
This warranty supersedes all other warranties
either expressed or implied, and all other obligations
or liabilities on our part. Ardisam, Inc., does not
assume, and does not authorize any other person
to assume for us, any liability in connection with the
sale of our products. This guarantee is void unless
the warranty card is properly filled out and returned
to Ardisam, Inc., Cumberland, Wisconsin, within two
weeks of the purchase date.
Earthquake, A Division of Ardisam, Inc.
1690 Elm Street; P.O. Box 666
Cumberland, Wisconsin 54829
EARTHQUAKE, Division of Ardisam, Inc.
800-345-6007 · Fax (715) 822-2223
Email: info@ardisam.com
Page 2
800-345-6007
Page 3
ARDISAM
.com
SAFETY
OWNER’S RESpONSIbIlITY
Safe and effective use of the mini electric log splitter
is the owner’s responsibility.
• Read and follow all safety instructions.
• Maintain the log splitter according to directions and
schedule, included in this Earthquake Operator’s Manual.
• Check your log splitter before turning it on. Keep
guards in place and in working order. Replace damaged,
missing or failed parts before using it.
• Ensure that anyone who uses the log splitter is
familiar with all controls and safety precautions.
SpECIAl MESSAGES
Your manual contains special messages to bring
attention to potential safety concerns, machine damage,
as well as helpful operating and servicing information.
Please read all the information carefully to avoid injury
and machine damage.
CAUTION
Avoid injury! This symbol and text highlight’s
potential hazards or death to the operator or
bystanders that may occur if the hazards or
procedures are ignored.
IMpORTANT SAFETY pRECAUTIONS
Please read this section carefully. Operate the mini
electric log splitter according to the safety instructions
and recommendations outlined here, and stated
throughout the text. Anyone who uses this log splitter
must read the instructions carefully and be familiar with
the controls.
This symbol signifies important safety
instructions, which, if not followed could
endanger your personal safety. Read and
follow all instructions in this manual before
attempting to operate this equipment.
• Do not transpor t the log splitter with the motor
running.
• Dress appropriately when operating the log splitter.
Always wear sturdy footwear. Do not wear sandals,
sneakers, or open toed shoes, and never operate the
log splitter with bare feet. Do not wear loose clothing
or jewelry that may get caught in moving parts. Always
wear safety goggles for eye protection. Everyday glasses
have only impact resistant lenses and are not effective
safety glasses.
• Always pay full attention to the movement of the
log pusher. Do not attempt to load the log onto the log
splitter until the log pusher has come to a complete stop.
Always keep hands, feet, hair and loose clothing away
from any moving parts on the log splitter.
Avoid damage! This text is used to tell the operator
of actions or conditions that may result in damage
to the machine.
NOTE: General information is given throughout
the manual that may help the operator perform the
operation or service of the machine.
• Do not allow children to operate this log splitter.
Adults should not operate the log splitter without proper
instruction.
• Do not operate any power equipment under the
influence of drugs, alcohol, or any medication that could
affect your ability to use the equipment properly.
• Always keep your work area clean and well lit.
• Keep all screws, nuts and bolts tight.
• Always inspect the logs to be split for nails or other
foreign objects. The ends of the logs must be cut square.
Branches must be cut off flush with the trunk.
• Do not overreach. Keep proper footing and balance at
all times. Never stand on the log splitter. Do not use the
log splitter as a step.
• Do not operate the log splitter from ground level.
Place log splitter at a comfortable height (24-32 inches),
on a stable, flat, and level work surface where there is
plenty of room for handling material. Bolt the log splitter
to the work surface if it tends to slip, walk, or slide.
EARTHQUAKE, Division of Ardisam, Inc.
Page 3
800-345-6007
Page 4

ARDISAM
.com
SAFETY AND SAFETY RUlES
• Do not use the log splitter in wet or damp areas or
expose to rain.
• Never try to split logs larger than those indicated in
the specifications table. Failure to do so may damage the
machine. Do not use the log splitter for anything other
than splitting logs. Do not force log through splitter.
• Never use an extension cord that is not rated for
outdoor use. The cord should not be longer than 30 feet.
• Check that the electric circuit is adequately protected
and that it corresponds with the power, voltage and
frequency of the motor. Check that there is a ground
connection, and a regulation differential switch upstream.
Ground the log splitter. Prevent body contact with
ground surfaces: pipes, radiatiors, ranges, refridgerator
enclosures, etc. Never open the pushbutton box on the
motor. Make sure your fingers do not touch the plug’s
metal prongs when plugging or unplugging the log
splitter.
• Do not remove jammed logs with your hands. If an
object becomes lodged in the ram, unplug electric motor
before attempting to remove the foreign object.
• Do not use the log splitter in areas where fumes from
paint, solvents, or flammable liquids pose a potential
hazard.
• Use only original equipment parts from Ardisam, Inc.,
including all nuts and bolts.
• Disconnect power by unplugging power cord when
not in use, before making adjustments, changing parts,
cleaning, or working on the log splitter.
• Maintain and keep the log splitter clean for the best
and most safe performance.
Part No. LBLW1000SH
Warning Decal W1000
Frame Decal
STEpS FOR WORkING ON MINI ElECTRIC lOG
SplITTER
1. Turn off motor switch. Unplug motor.
2. Replace or repair the part on the log splitter.
3. Check all parts that were repaired, or removed during
repair, to ensure they are secure and fit correctly.
NOTE: All repair parts must come from the factory.
Never replace parts that are not specifically
designed for this log splitter.
SAFETY DECAl
The Earthquake Mini Electric Log Splitter has been designed and manufactured to provide you with the safety
and reliability you would expect from an industry leader
in outdoor power equipment manufacturing.
Reading this manual, and the safety instructions it contains, will provide you with the necessary knowledge to
operated this equipment safely and effectively. We have
placed a safety decal on the log splitter to remind you of
some of the important information while you are operating the unit.
This important safety decal is illustrated below, and is
shown here, to help familiarize you with the location and
content of the safety messages you will see as you perform normal log splitting operations. Please review this
decal now, and if you have any questions regarding its
meaning or complying with these instructions, reread the
complete safety instruction text in this manual, or contact
your local dealer.
Should this decal become unreadable, because of being
worn, faded, or otherwise damaged during the use of
your log splitter, please use the part number information
provided to order a replacement label from your local authorized dealer. These decals are easily applied, and will
act as a constant visual reminder to you, and others who
may use the equipment, to follow the safety instructions
necessary for safe, effective operation of your log splitter.
EARTHQUAKE, Division of Ardisam, Inc.
Page 4
800-345-6007
Page 5

ARDISAM
.com
SpECIFICATIONS AND ElECTRICAl REQUIREMENTS
ApplICATION CONDITIONS
The Earthquake Mini Electric Log Splitter has been
designed as a home use model only. It is designed for
operating under ambient temperatures between 40° F.
and 105° F. and install at altitudes no more than 3,250 ft.
above M.S.L. The surrounding humidity should be less
than 50% at 100° F. The log splitter can be stored or
transported under ambient temperatures between -10° F.
and 130° F.
SpECIFICATIONS
Model Number W1000
Motor 120V~50Hz
1500W IP54
Log Capacity
Splitting Force 4 ton
Hydraulic Pressure 2,300 psi
Hydraulic Oil Capacity 3.75 quarts
Overall Size
Weight 93 lbs.
Diameter * 2 - 10 inches
Length 20 inches
Length 37 inches
Width 11 inches
Height 20 inches
ElECTRICAl REQUIREMENTS
Connect the main leads to a standard 110V ±10% electrical supply which has protection devices under-voltage,
over-voltage, over-current, as well as a residual current
device (RCD) with a maximum residual current of 0.03A.
*The diameter of the log is indicative - a small log can be difficult to split when it contains knobs or a particularly tough fiber.
On the other hand, it may not be difficult to split logs with regular fibers even if its diameter exceeds the max. figure indicated
above.
EARTHQUAKE, Division of Ardisam, Inc.
Page 5
800-345-6007
Page 6

ARDISAM
.com
OpERATION
SET Up AND pREpARATION
1. Bolt the support leg to the log splitter. Lift the log splitter by the handles at both ends and place it on a 24-32 inch
high, stable, flat and level work surface.
2. Familiarize yourself with the controls and features of this log splitter as shown below.
NOTE: Before operating the log splitter, the bleed screw should be loosened by 3-4 rotations so air can go in
and out of the oil tank smoothly. Air flow thru the bleed screw hole should be detectable during log splitter
operation. Before moving the log splitter, make sure the bleed screw is tightened to avoid oil leakage from
this point.
Failure to loosen the bleed screw will result in
air being compressed and decompressed in the
hydraulic system. Continuous air compression
and decompression will blow out the seals of the
hydraulic system and cause permanent damage
to the log splitter.
EARTHQUAKE, Division of Ardisam, Inc.
CAUTION
CAUTION
DO NOT adjust the maximum pressure limiting
screw. The pressure limiting screw has been sealed
at the factory to prevent unauthorized adjusting.
Resetting the screw will cause the hydraulic pump
to fail to output enough splitting pressure or cause
too much pressure, which may result in serious
injury, as well as damage to the machine.
Page 6
800-345-6007
Page 7

ARDISAM
.com
OpERATION
lOG SplITTER OpERATION
The Earthquake Mini Electric Log Splitter requires
the use of both hands to operate. The user’s left hand
controls the hydraulic control lever, while the right hand
controls the pushbutton switch. The log splitter will freeze
upon absence of either hand. The log pusher will return
back to the starting position only after boths hands release the controls.
hydraulic
contol lever
CAUTION
Never force pressure on the log splitter for more
than 5 seconds in order to split excessively hard
wood.
CAUTION
Always set logs firmly on the log retaining plates
and work table. Make sure logs will not twist, rock
or slip while being split. DO NOT force the blade by
splitting the upper part of the log. This will break
the blade or damage the machine.
Split log in the direction of its grain. Placing logs across
the log splitter for splitting is dangerous and may seriously damage the machine. Do not attempt to split two
logs at the same time.
FREEING A JAMMED lOG
1. Release both controls.
2. Once the log pusher completely stops at its starting
position, insert a wood wedge under the jammed log.
pushbutton
switch
wood wedge
3. Start the log splitter to push the wood wedge under
the jammed log.
4. Repeat above procedure with sharper sloped wood
wedges until the log is completely freed.
DO NOT try to knock the jammed log off the wedge
using a hammer or other device.
EARTHQUAKE, Division of Ardisam, Inc.
CAUTION
Page 7
800-345-6007
Page 8

ARDISAM
.com
MAINTENANCE
REplACING hYDRAUlIC OIl
Replace the hydraulic oil in the log splitter after every
150 hours of use. Take the following steps to replace the
oil.
1. Make sure all moving parts are stopped and the log
splitter is unplugged.
2. Remove oil drain bolt and dipstick. Make sure bleed
screw is closed tight.
3. Turn the log splitter on the support leg side over using
a one gallon or larger capacity container to drain the
hydraulic oil.
4. Turn the log splitter on the motor side.
5. Refill with 3.75 quarts of fresh hydraulic oil.
6. While keeping the log splitter vertical, clean the surface of dipstick on the oil drain bolt and put it back into
the oil tank.
7. Make sure the level of the refilled oil is between the 2
grooves around the dipstick.
8. Clean the oil drain bolt before re-threading it back in.
Make sure the bolt is tightened to avoid leakage before
placing the log splitter horizontally. Loosen bleed screw
3-4 turns before operation.
oil drain container
Periodically check oil level to ensure it is between the 2
grooves around the dipstick. If the level is it is below the
lower limit, fill until level is correct.
The following hydraulic oils, or equivalent, are recommended for the log splitter’s hydraulic transmission
system:
SHELL Tellus 22
MOBIL DTE 11
ARA Vitam GF 22
BP Energol HLP-HM 22
ShARpENING WEDGE
When the log splitter wedge becomes dull and/or worn,
sharpen the wedge using a fine-toothed file and smooth
any burrs or crushed areas along the cutting edge.
EARTHQUAKE, Division of Ardisam, Inc.
Page 8
800-345-6007
Page 9

ARDISAM
.com
SERvICE, TROUblEShOOTING AND REpAIR
ARDISAM
.com
SERvICE INFORMATION
IN CASE OF A SERVICE PROBLEM, DO NOT SEND
UNIT BACK TO RETAILER. CONTACT ARDISAM,
INC. AT 1-800-345-6007. WE WELCOME YOUR
In the event you experience trouble operating your mini
log splitter, follow the suggestions in the troubleshooting
guide in this section.
The guide will help you pinpoint the causes of common
problems and identify remedies.
For more complicated repairs you may want to rely on
your retailer, an authorized mechanic, or Ardisam, Inc.
(contact your retailer for a list of authorized mechanics in
your area). A parts catalog is included in this section.
We will always be glad to answer any questions you
have, or help you find suitable assistance. To order parts
or inquire about warranty, call or write us at the address
found in the next column, under the section ordering
repair parts.
ORDERING REpAIR pARTS
Parts can be obtained from the store where your mini log
splitter was purchased or direct from the factory. To order
from the factory, call or write to:
Ardisam, Inc.
1690 Elm Street, Cumberland, WI 54829
Phone (715) 822-2415 Main Fax (715) 822-2223
800-345-6007
Email info@ardisam.com
Please include the following information with your order:
1. Part numbers
2. Part description
3. Quantity
4. Model number and serial number
TROUblEShOOTING
Problem Possible cause Remedy/Action
Fails to split logs
The log pusher moves with a jerking
motion, makes an unfamiliar noise or
vibrates excessively
Oil leak occurs around cylinder ram or
from other points
1. Log is improperly positioned
2. The size or hardness of the log exceeds
the capacity of the machine
3. Wedge cutting edge is blunt
4. Oil leaks
5. Unauthorized adjustment was made onto
the maximum pressure limiting screw
1. Lack of hydraulic oil and excessive
air in the hydraulic system
1. Air sealed in hydraulic system while operating
2. Bleed screw is not tightened before moving the log splitter
3. Oil drain bolt with dipstick is not tight
4. Hydraulic control valve assembly and/or
seal(s) worn
1. Refer to Log Splitter Operation Section for perfect log loading
2. Reduce the log size before splitting
on the log splitter
3. Refer to Sharpening Wedge Section
to sharpen the cutting edge
4. Locate leak(s) and contact the dealer
5. Contact the dealer
1. Check oil level for possible oil
refilling. Contact the dealer.
1. Loosen bleed screw 3-4 rotations
before operating the log splitter
2. Tighten the bleed screw before moving the log splitter
3. Tighten the oil drain bolt with dipstick
4. Contact the dealer
EARTHQUAKE, Division of Ardisam, Inc.
Page 9
800-345-6007
Page 10

ARDISAM
.com
W1000 MINI ElECTRIC lOG SplITTER bREAkDOWN
MINIMUM ORDER ..................................................................................................................$10.00
EARTHQUAKE, Division of Ardisam, Inc.
Page 10
800-345-6007
Page 11

ARDISAM
.com
W1000 MINI ElECTRIC lOG SplITTER pARTS lIST
Key # Part # Description Qty.
1 300101 CYLINDER ...................................................... 1
2 300102 O-RING, PISTON ............................................ 1
3 300103 PISTON ........................................................... 1
4 300104 O-RING ........................................................... 1
5 300105 SPRING .......................................................... 1
6 300106 POSITION ROD WELDMENT......................... 1
7 300107 NUT, M14 ........................................................ 2
8 300108 WASHER ........................................................ 2
9 300109 HANDLE, ABS MOVING ................................. 1
10 300110 BOLT, HEX M6X16 .......................................... 2
11 300111 NUT, M14 ........................................................ 2
12 300112 SEAL, PLASTIC .............................................. 1
13 300113 SCREW, WING/BLEED................................... 1
14 300114 O-RING ........................................................... 1
15 300115 STUB, LONG .................................................. 4
16 300116 BOLT, HEX M6X8 ............................................ 6
17 300117 WASHER, SPRING ......................................... 4
18 300118 NUT, M8 .......................................................... 5
19 300119 PLATE, SUPPORT .......................................... 2
20 300120 FRAME, TUBE/TANK, OIL .............................. 1
21 300121 BOLT, HEX M10X25 ........................................ 4
22 300122 WASHER ........................................................ 4
23 300123 INSERT, UPPER PLASTIC ............................. 1
24 300124 LOG PUSHER WELDMENT ........................... 1
25 300125 NUT, M10 ........................................................ 4
26 300126 O-RING ........................................................... 1
27 300127 COVER, LEFT CYLINDER ............................. 1
28 300128 GASKET, COPPER ......................................... 4
29 300129 SPRING, SAFETY VALVE ............................... 1
30 300130 SCREW, M8X8 ................................................ 1
31 300131 BOLT, SAFETY VALVE .................................... 1
32 300132 O-RING ........................................................... 1
33 300133 NUT, ROUND HD M10 .................................... 3
34 300134 GUARD, LEVER .............................................. 1
35 300135 NUT ................................................................. 2
36 300136 LEVER WELDMENT ....................................... 1
37 300137 HEAD, LEVER................................................. 1
38 300138 NUT, LEVER ................................................... 1
39 300139 WHEEL FRAME PLATE WELDMENT ............ 1
40 300140 BALL, STEEL 6 ............................................... 1
41 300141 CIRCLIP .......................................................... 1
42 300142 SPRING, RESTORE VALVE ........................... 1
43 300143 ROD, VALVE .................................................... 1
44 300144 O-RING ........................................................... 1
45 300145 SLEEVE, VALVE ............................................. 1
Key # Part # Description Qty.
46 300146 O-RING ........................................................... 5
47 300147 O-RING ........................................................... 2
48 300148 SPRING, SLIDING SLEEVE ........................... 1
49 300149 SLEEVE, SLIDING .......................................... 1
50 300150 WASHER ........................................................ 1
51 300151 PLUG, VALVE .................................................. 1
52 300152 INSERT, LOWER PLASTIC ............................ 1
53 300153 DRAWING WELDMENT ................................. 1
54 300154 NUT, LOOSE M8 ............................................. 1
55 300155 BOLT, HEX M8X35 .......................................... 1
56 300156 WASHER ........................................................ 2
57 300157 SEAL, MOTOR SHAFT ................................... 1
58 300158 BALL, STEEL 2.5 ............................................ 1
59 300160 LEG, SUPPORT .............................................. 1
60 300159 BOLT, CARRIAGE M8X12 .............................. 5
61 300161 COVER, RIGHT CYLINDER ........................... 1
62 300162 GASKET, DIPSTICK ....................................... 1
63 300163 DIPSTICK ....................................................... 1
64 300164 MOTOR W/SWITCH........................................ 1
65 300165 MOTOR ........................................................... 1
66 300166 BOX, SWITCH................................................. 1
67 300167 BOLT ............................................................... 1
68 300168 NUT ................................................................. 1
69 300169 WASHER, SPRING ......................................... 3
70 300170 BOLT ............................................................... 3
71 300171 COVER, MOTOR ............................................ 1
72 300172 SHOE, LEFT MOTOR SUPPORT ................... 1
73 300173 SHOE, RIGHT MOTOR SUPPORT ................ 1
74 300174 WASHER ........................................................ 9
75 300175 PIN .................................................................. 2
76 300176 BODY, GEAR................................................... 1
77 300177 GEAR .............................................................. 2
78 300178 WASHER, SNAP GEAR SHAFT ..................... 2
79 300179 PIN .................................................................. 1
80 300180 SHAFT, GEAR................................................. 1
81 300181 BEARING, SLIDING ....................................... 4
82 300182 O-RING ........................................................... 2
83 300183 COVER, PUMP ............................................... 1
84 300184 BOLT ............................................................... 3
85 300185 WASHER, SPRING ......................................... 9
86 300186 WASHER ........................................................ 9
87 300187 BOLT ............................................................... 6
88 300188 COVER, WHEEL ............................................. 2
89 300189 SNAP RING, WHEEL SHAFT ......................... 2
90 300190 WHEEL ........................................................... 2
EARTHQUAKE, Division of Ardisam, Inc.
Page 11
800-345-6007
Page 12

ARDISAM
.com
Visit www.ardisam.com and discover more innovations that will
benefit you throughout the year.
Earthquake, Division of Ardisam, Inc.
1690 Elm Street; P.O. Box 666
Cumberland, Wisconsin 54829
800-345-6007 · Fax (715) 822-2223
E-mail: info@ardisam.com
 Loading...