

EAL SUPER BIKE User Manual

2
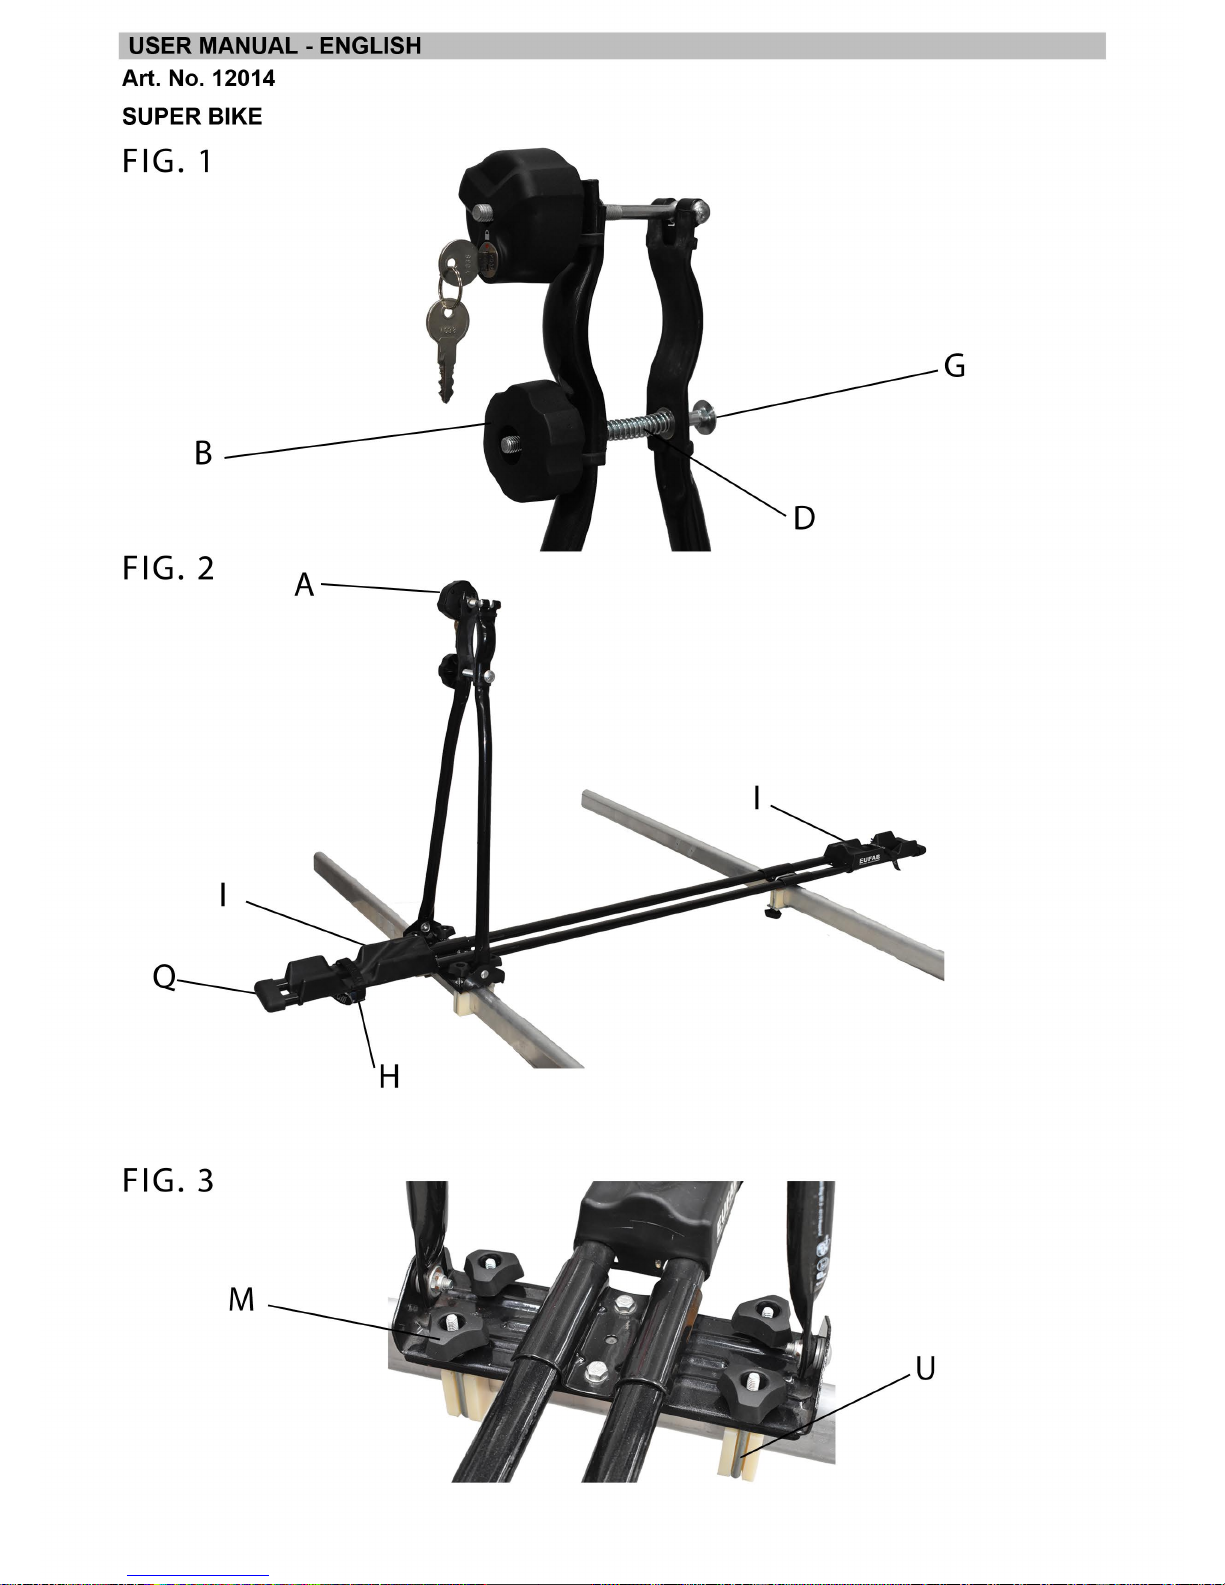
USER MANUAL - ENGLISH
Art. No. 12014
SUPER BIKE
Assembly instructions
Mount the hand wheel B to the tubular frame using the screw Gwasher ( and the spring D.
(Fig. 1) Mount the cycle rack to the front load-bearing bars: Using the supplied U-bracket U, the
washers L and knurled nuts M, mount the cycle rack to the roof rack (Fig. 3). Assembly of the
cycle rack on the rear load-bearing bars: Place the cycle rack onto the roof rack and align. Using
the assembly plates J+K, the U-bracket 8, washers L and knurled nuts M, attach the cycle rack.
Place the clamp pads of the tubular frame to the front, sloping frame part of the cycle and tighten
using the hand wheel B. Attach the pivot screw with the toggle nut $. Slide the wheel mounts , onto
each end followed by the end caps 4.Tighten the wheels in the wheel groove using the holding belt
H (Fig 2).
Safety information
:
Check the screws for the first time after driving a short distance and then at regular intervals.
Please note that the load on the roof will change the driving properties of your vehicle during
braking, in the case of side winds and when driving round bends. Adjust your driving speed accordingly. In particular, observe the information provided by the manufacturer of the vehicle
about the permitted roof loads. Parts of the cycles, such as e.g. handlebars or pedals, should
not protrude over the edge of the roof. If not needed, the cycle rack should be dismantled for
reasons of safety for other road users and economy (petrol consumption). CAUTION: When the
cycle is mounted, note the greater height of your vehicle when entering underground car parks,
tunnels etc. Before setting off on your journey, always check that the attachments are all correct. IMPORTANT: Always use the supplied holding belt. Deadweight of the cycle rack: 2.9 kg
EAL GmbH, Otto-Hausmann Ring 107, D-42115 Wuppertal
 Loading...