

E3D NANO 3D printer User manual

USER'S MANUAL
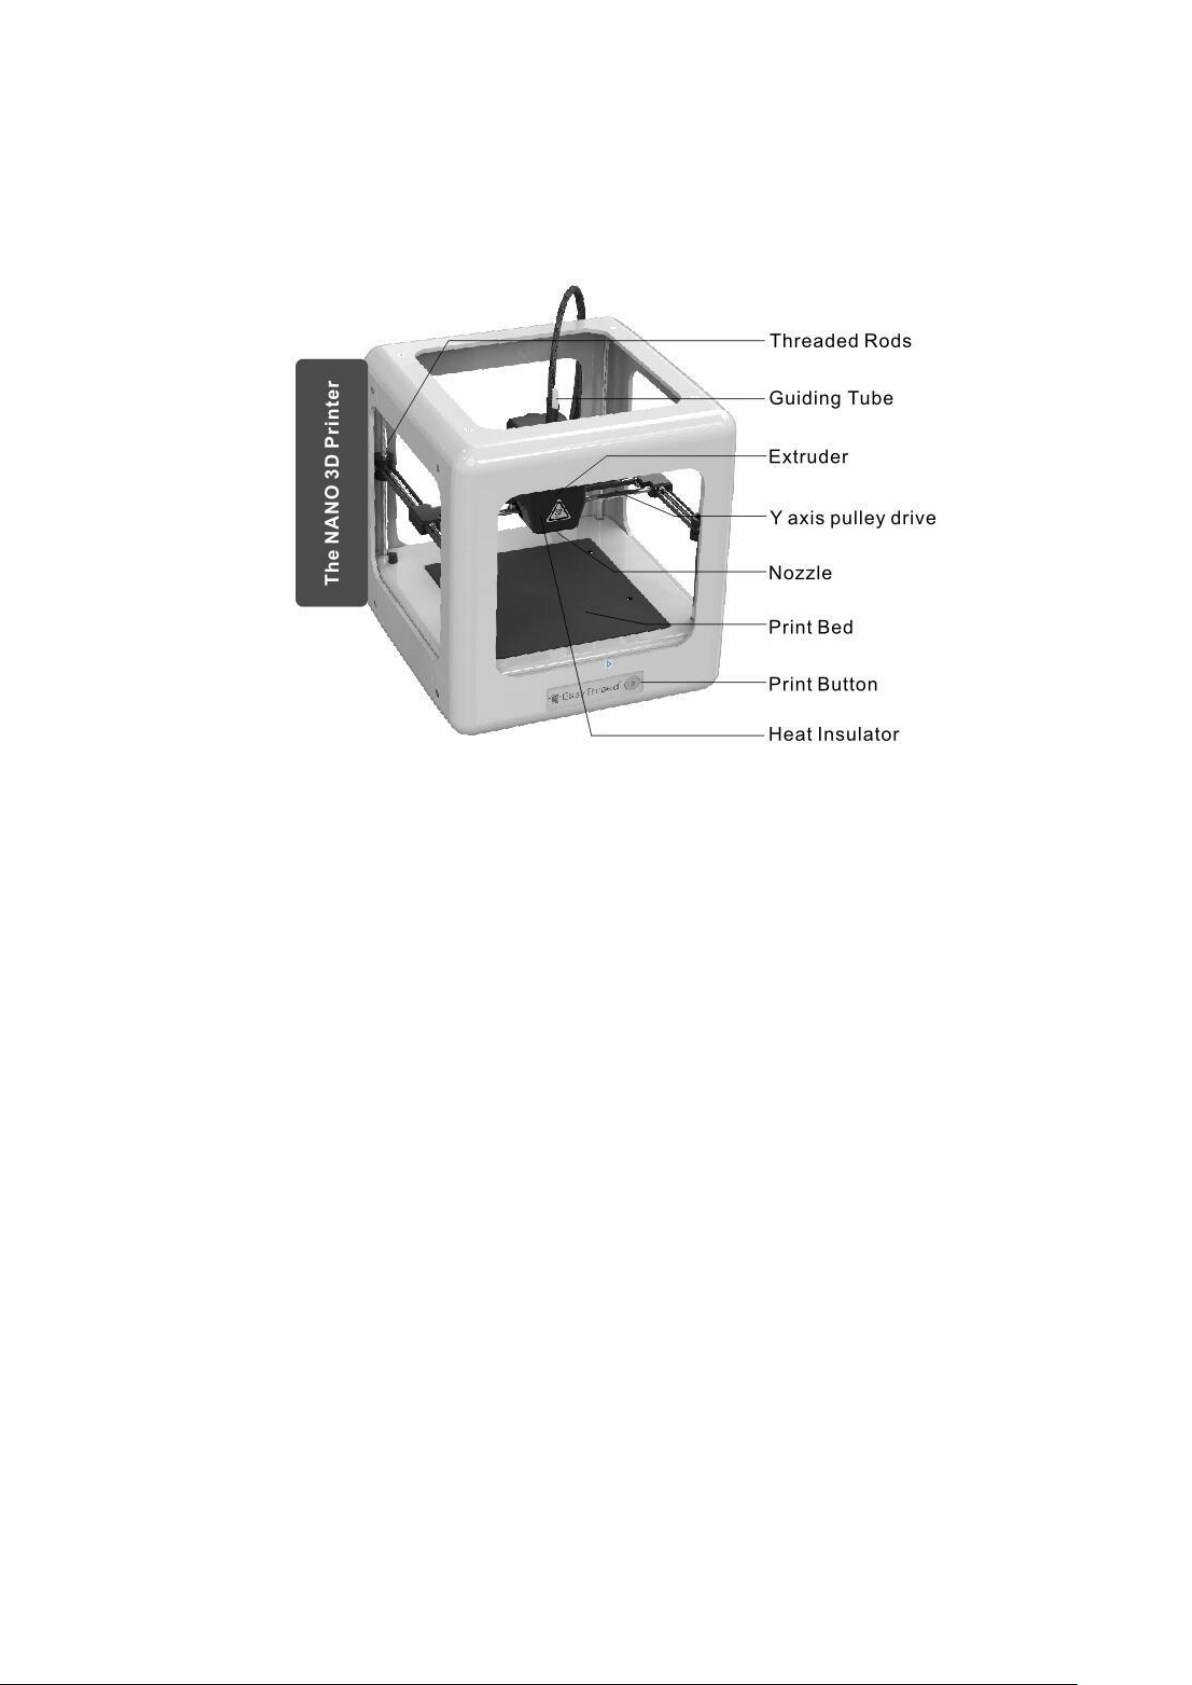
Thank you for purchasing E3D NANO 3d printer. NANO is a consumer 3D printer. It can make your
custom creations come to life. Just plug in the printer, download the models, hit print and watch
as you bring an object into the world through 3D printing.
This Manual is subject to change. For updated information, please visit www.easythreed.com
NANO Specification:
Building size:90*110*110mm
Layer thickness:0.1-0.3mm Nozzle diameter:0.4mm
Supported filament:PLA Printing temperature: 180℃-210℃
Filament diameter:1.75mm Print speed:10-20mm/s
Resolution :0.1-0.2mm Slicing software:E3D NANO
Supported file format:.STL Support OS:Windows XP/7/8/10 (32 bit/64bit)
Machine size:188X188X198mm Machine net weight:1KG
1 Un-Boxing NANO 3d printer
1, Lift The NANO from its packaging box. Remove all bubble wrap, foam and tape (may require
scissors).
2, Inside The NANO is an NANO 3d printer and an accessories box with a user manual, 3D filament,
USB Cable, power adapter, SD card, SD card reader, scraper, filament holder and screw driver.
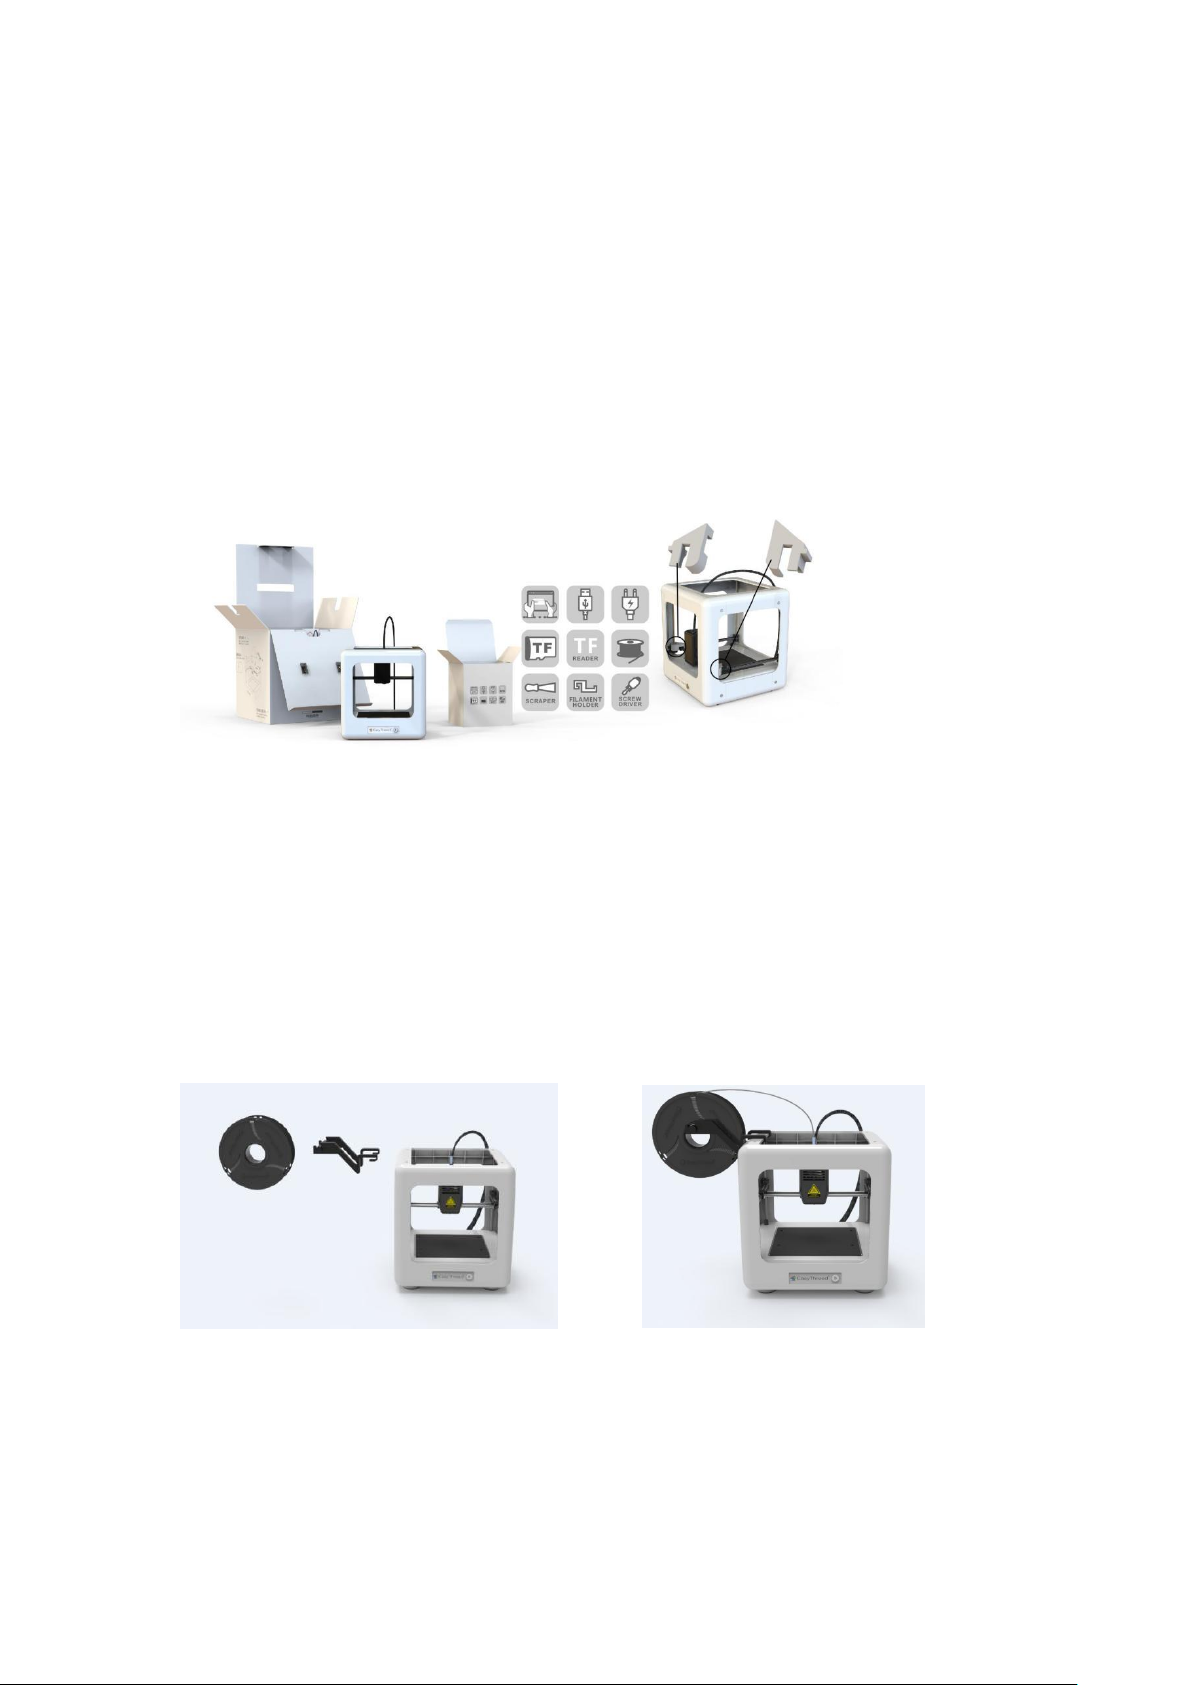
3, Be sure to remove the ”Gantry Clips” located on the front left and front right corners of the
printer. The clips are only for protection during transportation. (As shown in figure 1)
(figure 1)
4, Place the filament holder at the left or right side of the printer, then attach the filament on the
side (As shown in figure 2)
Precaution: Do not place the filament holder at the front or back of the printer, which will affect
the printing quality.
(figure 2)
2 Installing NANO Slicing Software
This NANO 3d printer runs with our own developed slicing software called E3D NANO. It is installed
on the SD card which you can find in the accessories box. Please copy the file to your computer to
run the installation program and complete the installation.
3 Connect and Power The NANO
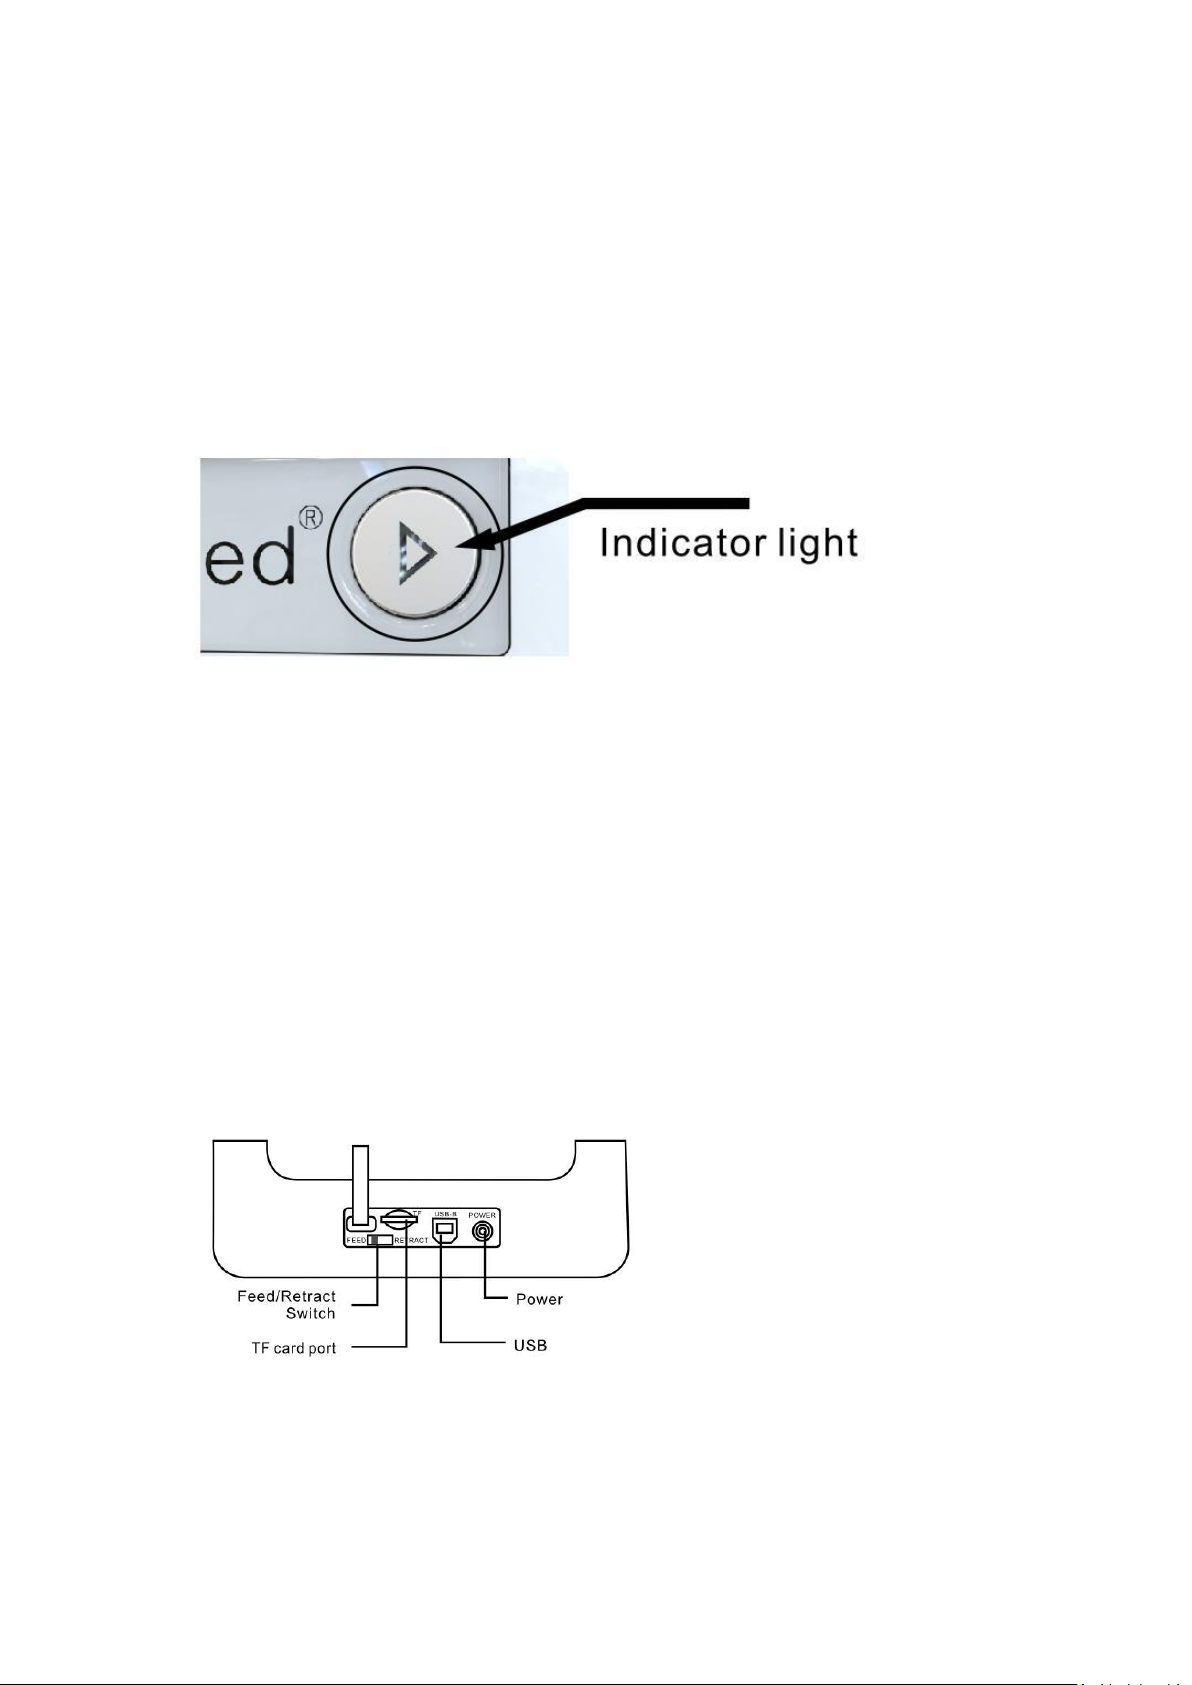
1, Plug the provided original NANO power adaptor into the power plug and the print button
indicator light should be on.
2, To power off the NANO 3d printer, unplug the power adaptor from the back of the machine
when it’s not operating.
4 3 Steps Easy Printing
4.1 Install 3D filament
Feed:
Insert filament into the guiding tube until it cannot goes further and gently press the filament to
stop it runs back. Then use another hand to slide the switch (at the back of printer) to ”Feed” gear
(As shown in figure 3). The print button in front will flash green light at fast rate or at steady rate.
(figure 3)
 Loading...