

1 3
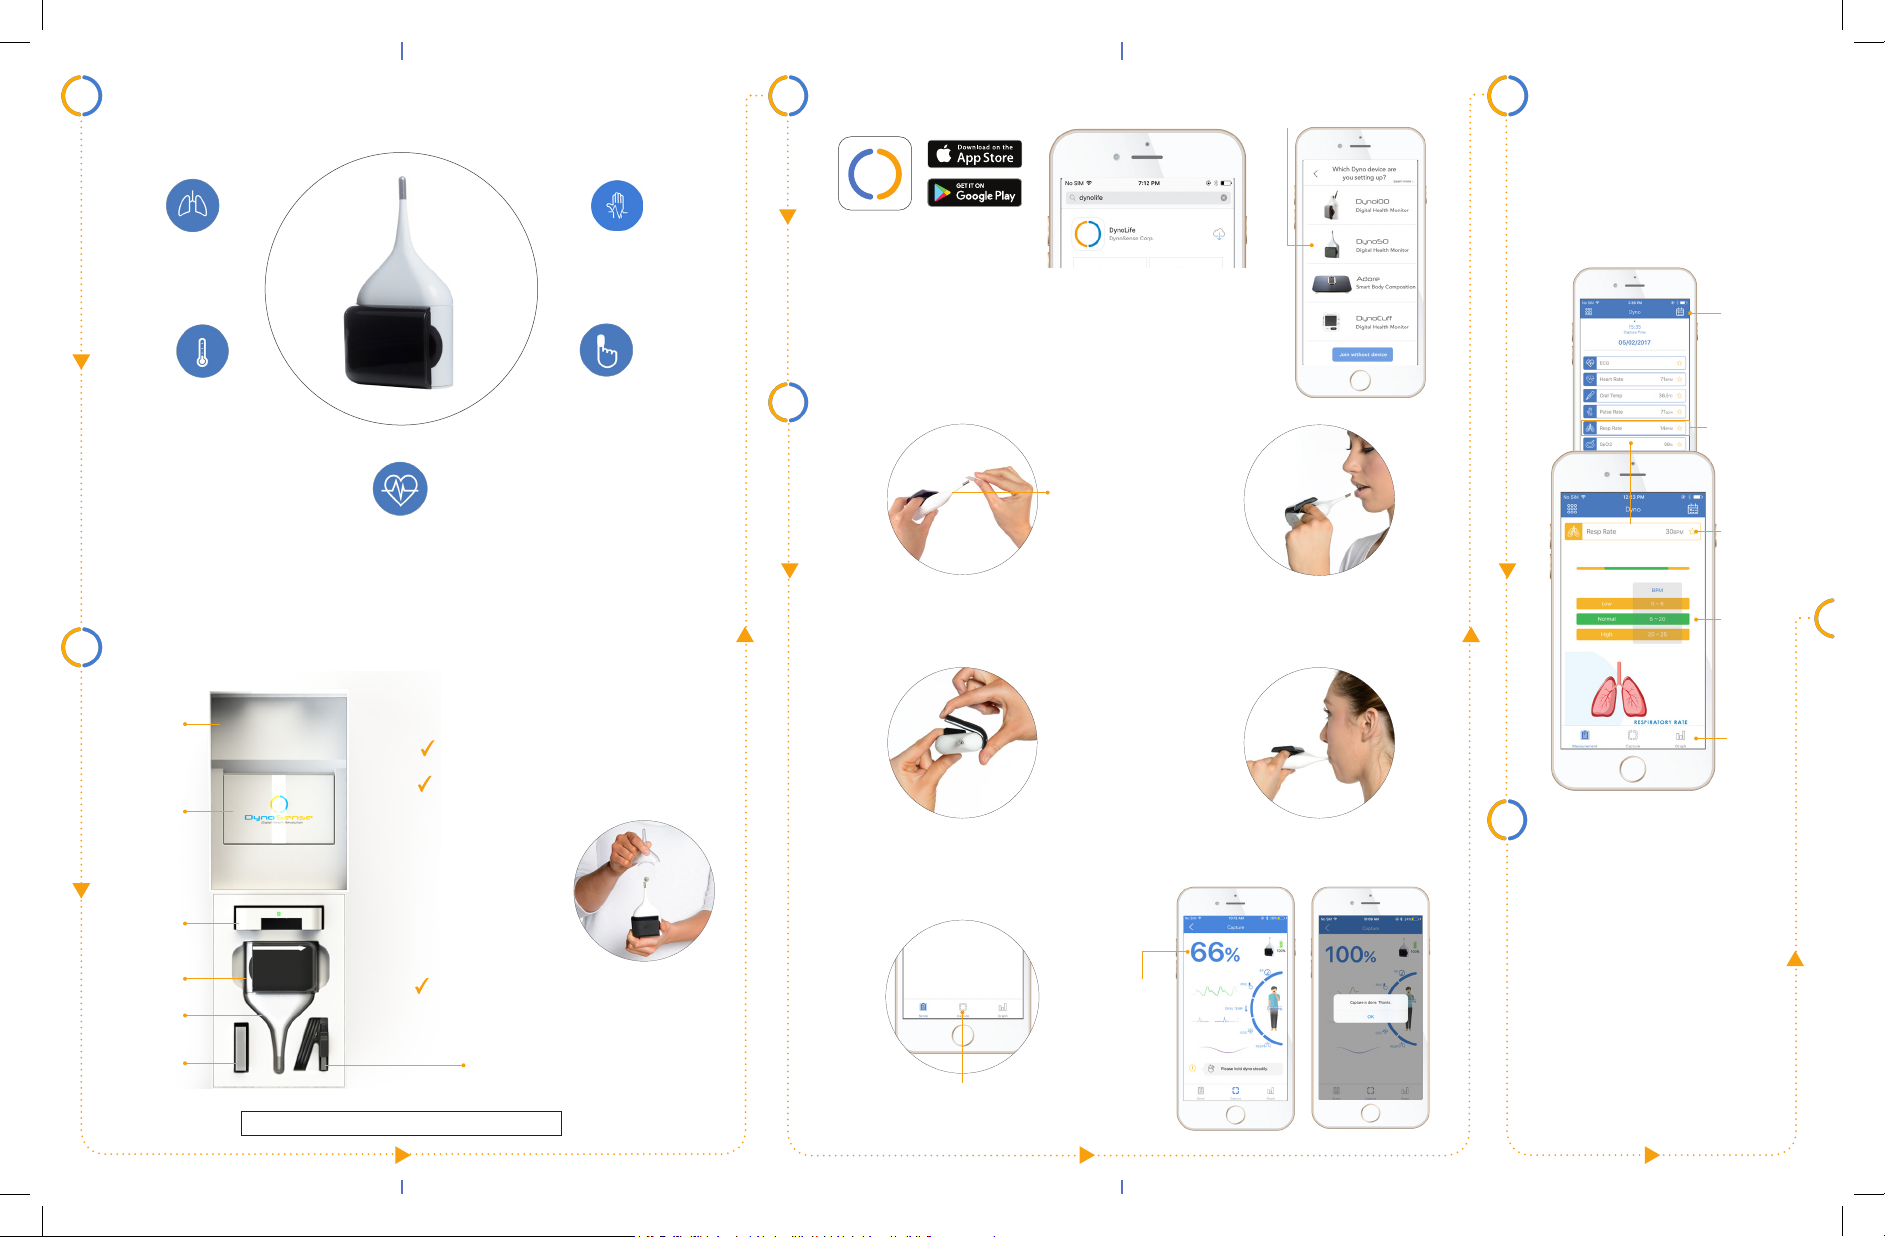
What We Measure
DYNO 50
Respiration rate
High resolution oral
body temperature
Instant capture of a medical-grade ECG
for tracking your heart electrical pattern
The device is intended for use in home environment.
2
Unpack & Verify Contents
Heart rate and
pulse rate
Accurately determine
your SpO2 (blood
oxygen saturation
levels)
Set Up & Login Procedure
DynoLife
Download and install DynoLife from the App Store
or Google Play. Sign up and follow the instructions
on the app to complete the process and log in. For
1st time users, follow on-screen instructions to
add a device.
4
Take a Measurement
Coming Soon
1 4
mouth
piece
Remove the glass cover and
clean the mouthpiece using
an alcohol wipe.
Pair device
Dyno50
Place thermometer tip under
tongue and close lips around
the mouthpiece.
5
Review Result
Know more about your health
metrics by expanding each block.
All the metric data are intended
as information only and do not
suggest a diagnosis. Consult your
physician for proper diagnosis.
View
past data
Press to
expand
Favorite
Range
table
Carrying/
Charging
Case
Quick
Guide
Charging
Base
Device
Glass
Cover
Alcohol
Wipes
Before we move to Section 3,
double check:
You have all the accessories.
Remove glass cover by gently lifting
the bottom section, make sure
device is TURN
ON. (See Sec-
tion 7 to learn
more about
status indicator)
Your smartphone bluetooth is ON.
Note: Device requires DynoLife
installation to view result.
USB Cable
For support, see Section 13
Insert LEFT index finger
into slot and left thumb on
the metallic surface.
3
Press “Capture” to
start a measurement.
52
Hold the device gently and breathe
normally through your nose until
capture is done.
Progress
indicator
During capturing Capture is done
6
Clean and Care
Use alcohol wipe to clean the
device after each use.
Rinse gently under warm water
prior to alcohol wipe.
CAUTION: Do not submerge
the device in water. Make sure
to drip out excess water after
rinse.
PLACE THE GLASS COVER
AND RETURN THE DEVICE TO
CHARGING BASE TO TURN
OFF THE DEVICE.
View
trends
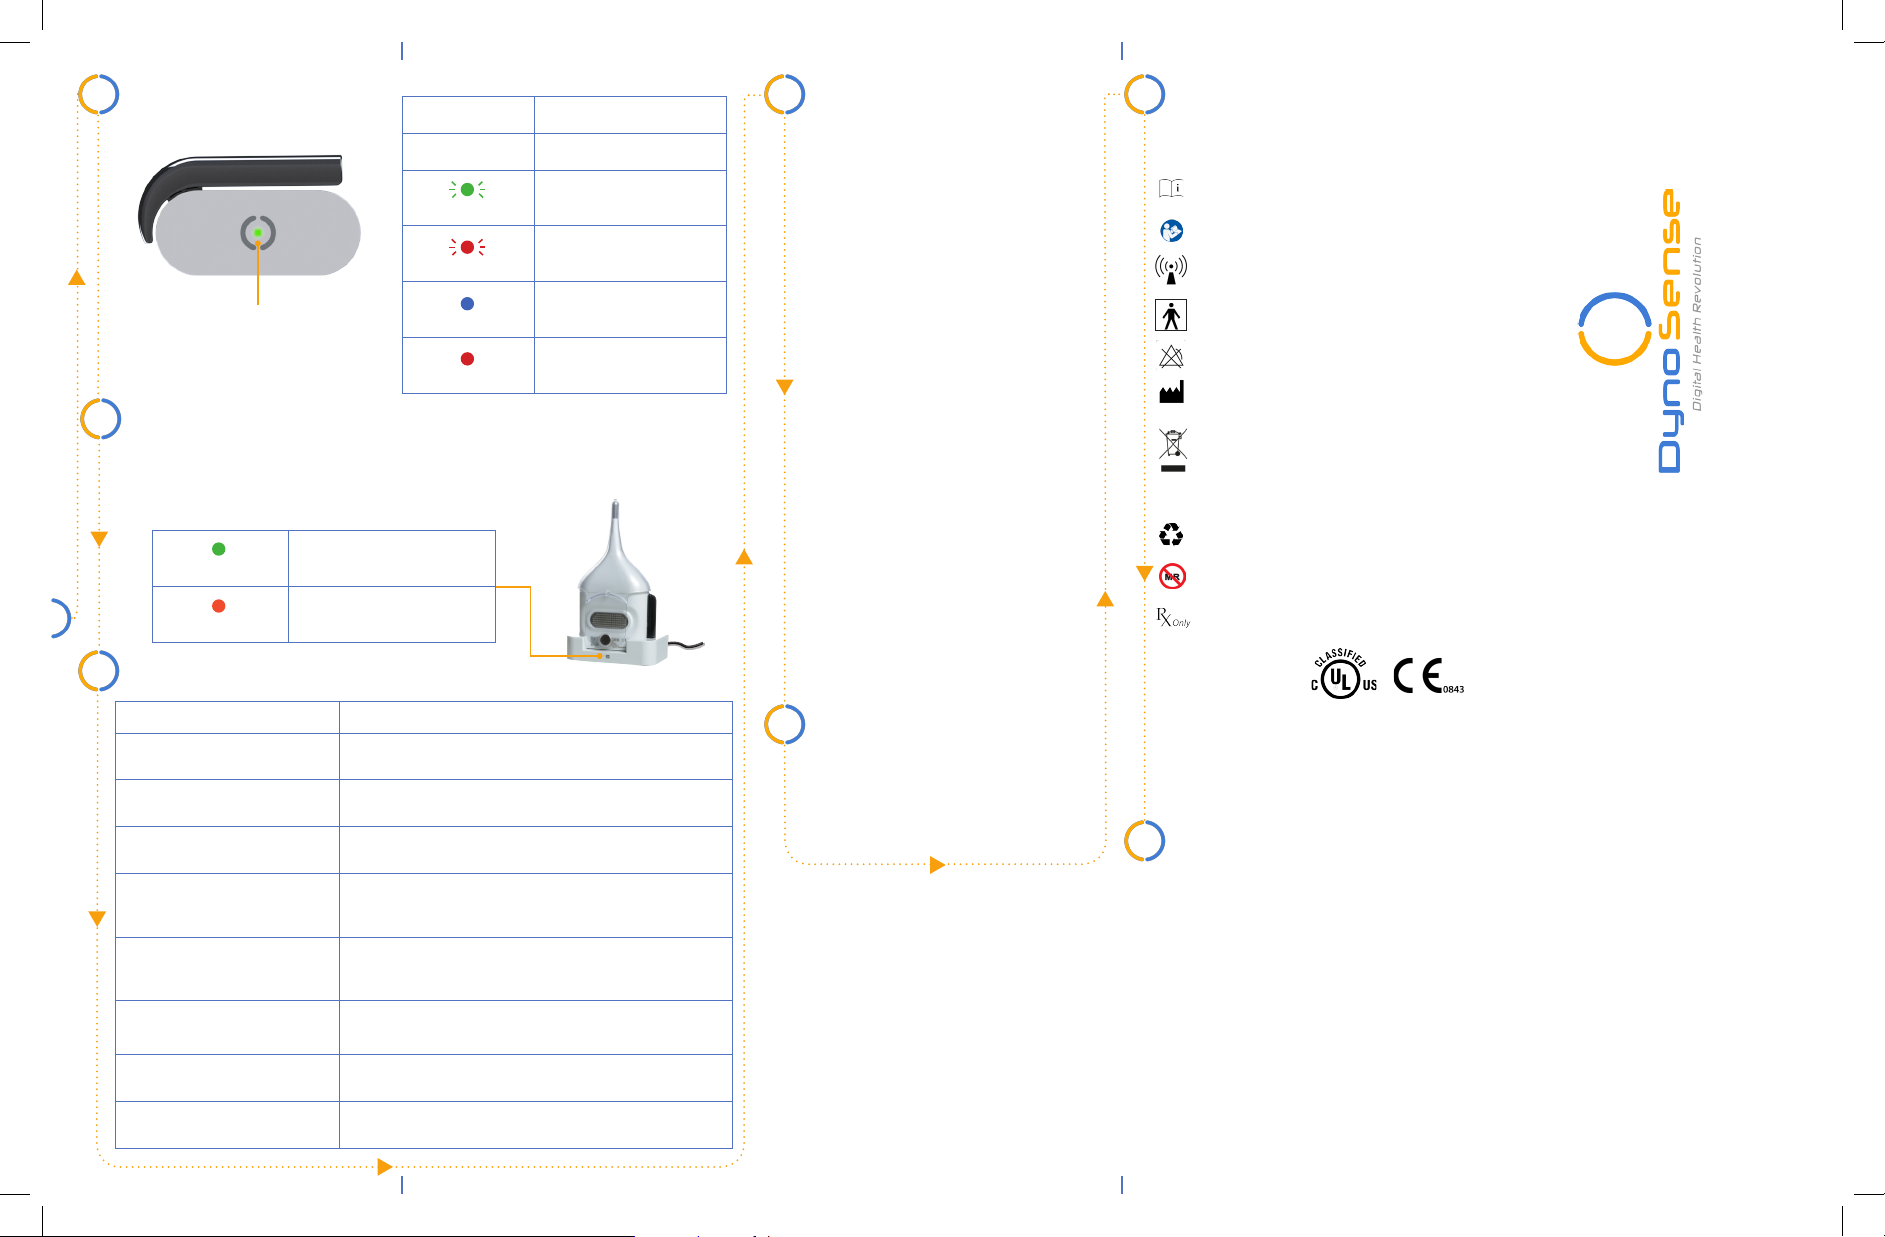
7
Status Indicator
Status indicator
8
Charging and Storing
Status indicator Description
no light Battery off
blinking green
blinking red
solid blue
solid red
Device is ready for use
Device is in rmware
update mode
Device is connected
Device Fault. Contact
support team
1. Plug the small end of the USB cable into the charging base, and then
plug the other end of the cable into a USB power supply or a computer
USB port.
solid green
solid orange
9
Troubleshooting
Device is powered and
fully charged
Device is charging
Contraindications
10
Do not use this device if you have
a pacemaker and/or implanted
cardio-defibrillators (ICD).
Do not use the device if your left
hand index finger or thumb or
tongue has cuts or open wounds.
Do not use the device if you have
trouble breathing normally.
Do not use the device if you are
under 18 years of age.
Do not use the device if you are sensitive to Polycarbonate, UPS Class
VI material. This material has been
tested for biocompatibility and has
been confirmed to be safe when it
comes in contact with human tissue
but some individuals maybe hypersensitive to this material when they
become in contact.
Do not share your device with others
to avoid potential risk of contamination.
12
Equipment Symbol
IPX4
Protected against splashing water
Operating instructions
Follow instructions for use
Non-ionizing radiation
Type BF applied part
No Alarms
Manufacturer
Do not dispose this product as
unsorted municipal waste. Collection of such waste separately for
special treatment is necessary
Recycle
MR Unsafe
Prescription only
Dyno50
Quick Start Guide
Problem Solution
Device does not turn on, no
status indicator
No valid heart rate/ECG on result
screen (HR ----/ECG ---)
No valid respiration rate on result
screen (Resp Rate ----)
No valid SpO2 data on result
screen (SpO2 ---)
Temperature reading too low Repeat the measurement by pressing tongue against the
The App can’t nd the device
when trying to add new device
Bluetooth connection failed Turn off and turn on the Bluetooth of your mobile device.
“Can’t connect to Cloud” 1. Make sure you are connected to the internet.
Charge the battery and try again. If the problem persists
contact the distributor.
Try a new data collection/capture by wetting your lips. Pay
attention to the on-screen data collection progress indicator.
Breathe normally through the nose.
Reinsert the left index nger under the ap. Hold the device
steadily and gently without too much pressure. Repeat the
measurement. Warm your nger prior to use.
thermometer tip. Do not move the thermometer tip during
the measurement.
Make sure the device is taken out from the charging base
and is on. Device status indicator should be blinking green.
2. If the internet connection is not good, please try later.
11
Warnings & Cautions
Please refer to Instruction for Use
Section 5 Safety Warnings and
Cautions.
The symbols may appear in this manual, on the label, on the device, or on
its accessories. Some of the symbols
represent standards and compliances
associated with the device and its use.
Additional Information
13
For more information about warranty,
patents, and specification, please visit
www.dynosense.com for a detailed
instruction manual.
P/N: 370-00104-01
Version: B August 2017
For support, please contact
at +1-650-397-6103 or visit
www.dynosense.com
“Smarter Me”
Welcome to Dyno Family
 Loading...