

Page 1

Cross-Cut Paper Shredder
DX-PS06CC
USER GUIDE
Before using your new product, please read these instructions to prevent any damage.
Page 2

Cross-Cut Paper Shredder
Contents
Important safety instructions....................................................................2
Features ....................................................................................................4
Package contents......................................................................................4
Setting up the shredder ............................................................................6
Using the shredder....................................................................................6
Maintaining ..............................................................................................7
Troubleshooting........................................................................................8
Specifications............................................................................................9
One-year limited warranty......................................................................11
Important safety instructions
1 Read these instructions.
2 Keep these instructions.
3 Heed all warnings.
4 Follow all instructions.
5 Keep out of reach of children and pets.
6 Do not use this unit near water.
7 Clean only with dry cloth. The housing can be cleaned with a cloth dampened with mild soap
and water, then dried thoroughly.
8 Do not defeat the safety purpose of the polarized plug. A polarized plug has two blades with
one wider than the other. The wide blade is provided for your safety. If the provided plug does
not fit into your outlet, consult an electrician for replacement of the obsolete outlet.
9 Protect the power cord from being walked on or pinched particularly at plugs, convenience
receptacles, and the point where they exit from the apparatus.
10 The wall plug is the disconnecting device. The plug must remain readily operable.
11 RISK OF FIRE. Never use any petroleum based or flammable oils or lubricants in or around the
machine as some oils can combust causing serious injury.
Page 3
Cross-Cut Paper Shredder
12 NEVER dispose of flammable chemicals or materials that have come into contact with
flammable chemicals (for example, nail polish, acetone, gasoline) in the shredder basket.
13 Never shred plastic (except credit cards), any hard materials, continuous forms, newsprint, or
anything with adhesives including labels and envelopes.
14 Do not activate the reverse function while shredding credit cards.
15 Plug the shredder into a nearby, easily accessible power outlet.
16 Always turn the shredder off and unplug the power cord from the AC outlet before cleaning it,
moving it, or emptying the wastebasket.
17 Never let the wastebasket become full. This will lead to shredded material being pulled back up
into the shredder and cause jams.
18 Never place the shredder near water or any heat source.
19 Keep the wastebasket emptied so that the shredder output is not impeded.
20 Do not use the shredder if the power cord is damaged in any way.
21 Do not attempt to service this product yourself as doing so may expose you to sharp cutting
blades and/or electricity and will void the manufacturers warranty.
22 Never try to clean the shredder blade.
23 Never shred beyond the specified sheet capacity. May result in extensive damage to the
machine.
24 Operate the shredder from the power source specified on the label. If you are unsure about the
power source, contact an electrician.
25 If an extension cord is used, make sure that the total amp rating of the products plugged into
the extension cord do not exceed the extension cord amp rating and that the total of all
products plugged into the wall out do not exceed 15 amps.
3
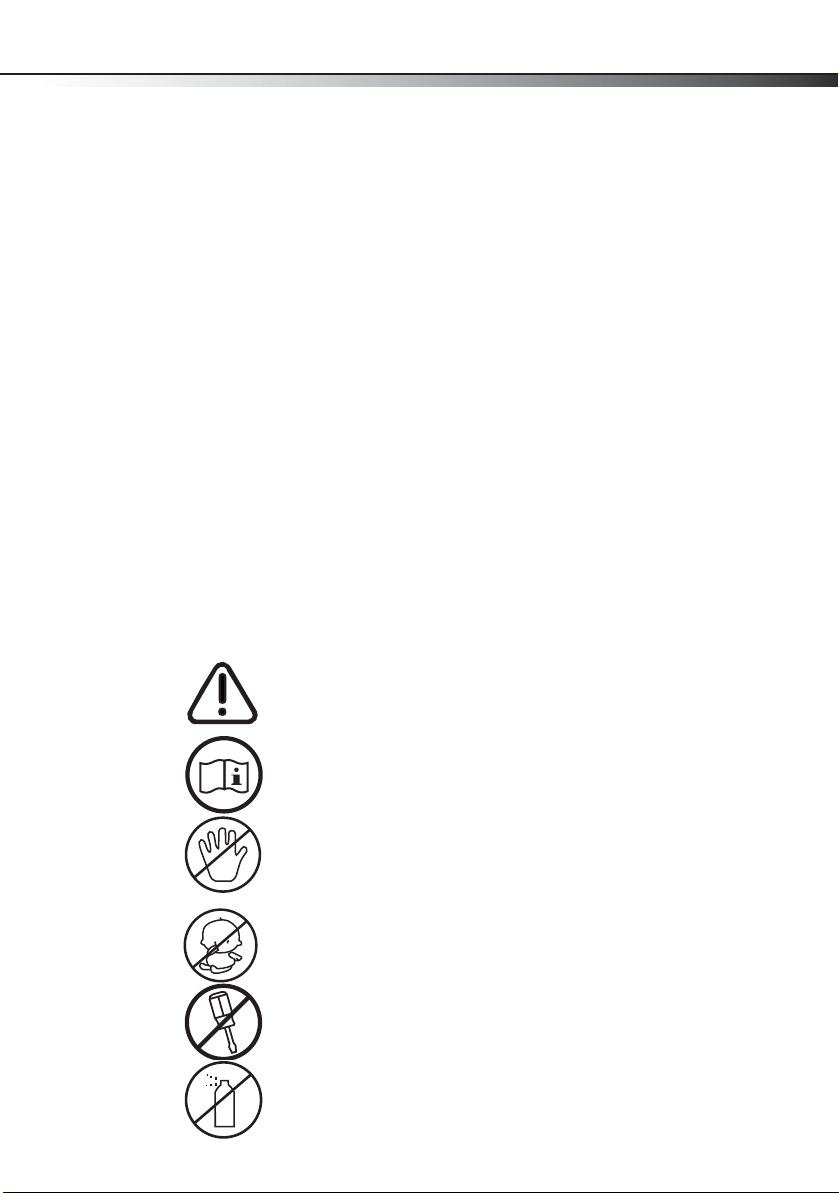
Warning: To avoid injury to yourself and others, please follow safety
instructions before operating this device.
Read instructions before use.
Avoid touching the document feed opening with your hands. Never insert
your hand or fingers into the feed opening.
Product is not intended for use by children (product is not a toy).
Do not insert foreign objects into the document feed opening.
Do not spray or keep any aerosol products in or around shredder.
Page 4
4
DX-PS06CC
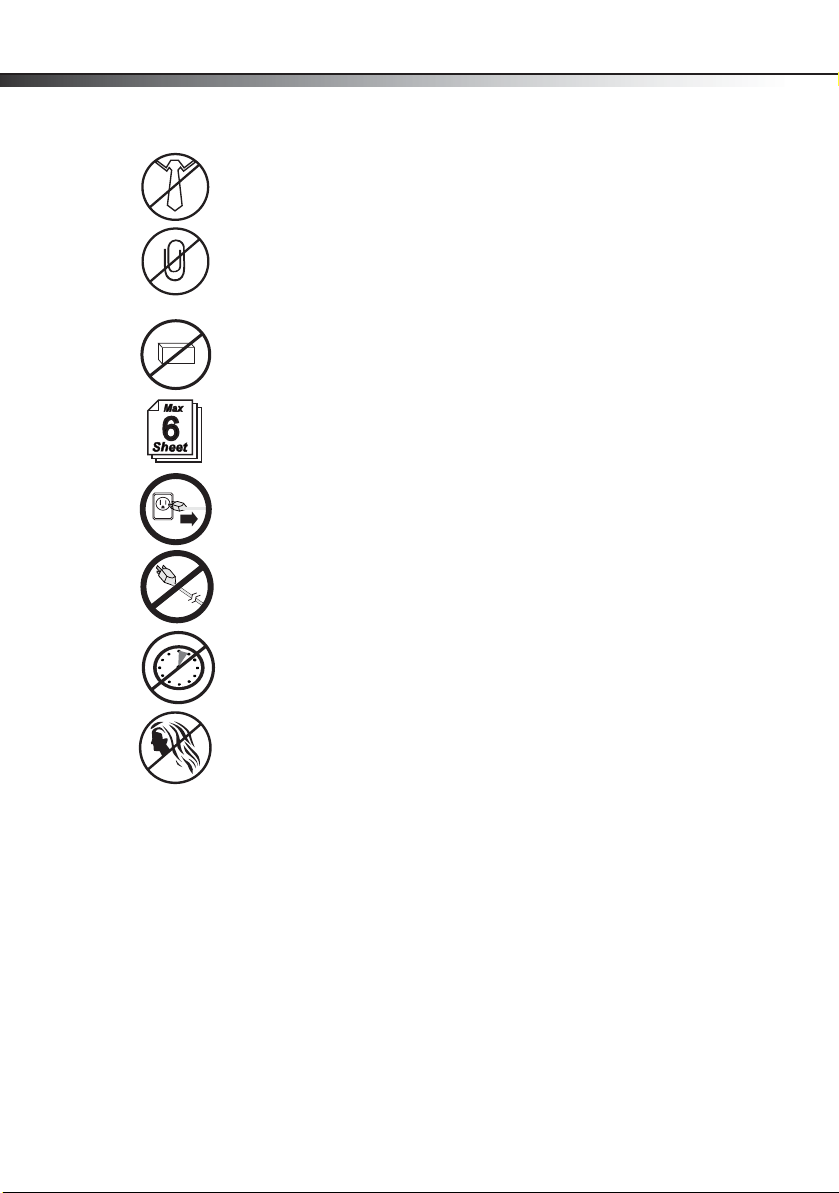
Avoid loose clothing or jewelry touching the document feed opening.
Do not shred paper with paperclips or staples. Do not shred gummed or wet
paper.
Shred paper and credit cards only. No cardboard, plastic sheets, or CD/DVDs.
Do not exceed the shredders maximum capacity of six sheets.
Always unplug the unit when not in use to prevent accidents.
Do not operate the unit with a damaged power cord.
Do not shred continuously for more than two minutes.
Avoid getting your hair or face near the document feed opening. Do not let
hair touch the document feed opening. Serious injury may result.
Features
• 6-sheet capacity (20-lb paper) (Note: One folded sheet is equivalent to two sheets.)
Package contents
•Wastebasket
• Shredder head
•User Guide
Page 5

Cross-Cut Paper Shredder
3
Ready Overheat
DX-PS06CC
6
4
5
6
7
Shredder details
# Feature Description
1 Shredder head Contains the control panel and the cutting head.
2 Waste basket Shredded paper goes into this basket. Keep emptied.
3 Clear window Empty the waste basket when the shredded paper reaches 2/3 of capacity.
4 Switch A three-position slide switch for On/Auto, Off, and Rev.
5Ready LED
indicator
6Overheat LED
indicator
7 Feed opening Put paper (maximum of six sheets) or credit cards into this opening to shred.
Lights green when the power is on.
Lights red when the shredder is overheated.
5
Page 6

6
Setting up the shredder
Warn ing: Crosscut shredders have very sharp exposed blades on the underside. Use care
when mounting the shredder on the wastebasket.
Caution: The shredder should not be plugged in during assembly.
Note: The following illustrations are for information purposes only. Your actual shredder may
look somewhat different than the shredder shown.
To set up the shredder:
1 Position the shredder head over the basket.
DX-PS06CC
2 Place the shredder head on the basket so that it solidly rests on the basket edges.
Note: Always make sure that these two labels are aligned on the same side of the shredder
when you place the shredder head onto the basket. This shredder has a safety interlock
which prevents it from operating unless the shredder head is placed on the basket
correc tly.
Using the shredder
Note: Prepare paper to be shredded by removing staples and paper clips from the paper.
Make sure that each batch of paper does not exceed the recommended capacity of six
sheets.
To use the shredder:
Caution:
• Do not overfeed the shredder: Shredding beyond the specified sheet capacity can
result in extensive damage to the shredder. Overfeeding will strain the machine and
quickly wear and break the cutting blades and internal components.
Page 7

Cross-Cut Paper Shredder
1 Plug in the power cord.
2 To begin shredding, locate the switch on the top of the shredder and select the On/Auto mode.
The green power LED indicates the shredder is on and ready to use.
Caution: Never shred paper clips, window or insulated envelopes, continuous forms,
newsprint, transparencies, laminated documents, cardboard, any items with adhesives,
hard materials, or plastic (except credit cards).
3 Slide the paper or credit card into the feed opening. The shredder automatically starts after the
paper or credit card has been inserted. The shredder stops automatically when it has finished
shredding.
7
Maintaining
Caution: Failure to properly maintain your shredder will void the warranty.
• Crosscut shredders require regular oil lubrication for optimal performance and extended
lifespan. We recommend you oil your shredder once a month. To lubricate your shredder,
drizzle some basic vegetable or cooking oil (nothing flammable or petroleum based) onto a
few sheets of paper and feed it into the shredder.
• Do not spray or keep any aerosol products in or around shredder.
• DO NOT USE CANNED AIR ON THE SHREDDER.
• Be sure to periodically empty the wastebasket to avoid overloading and damaging the cutting
mechanism.
To clean the shredder:
• ALWAYS UNPLUG THE SHREDDER BEFORE CLEANING!
• Only clean the shredder by carefully wiping the unit with a soft cloth or towel moistened with
mild soap and water. Dry the unit thoroughly.
• Do not clean or immerse the shredder in water. Having the unit wet may result in damage or
malfunction to the electrical components. If the shredder happens to get wet, be sure to
completely dry the unit immediately with a cloth or towel.
• Never use anything flammable to clean the shredder. This may result in serious injury or
damage to the product.
Page 8

8
Troubleshooting
If there is a problem with your shredder, check below for the symptoms and steps to resolve. If you
continue to have problems, contact customer support at our Service Center. DO NOT ATTEMPT TO
REPAIR BY OPENING THE SHREDDER HEAD. This will completely void the product warranty.
Symptom Possible Solutions
The shredder does not work at
all.
The shredder runs in Rev mode
but not in On/Auto mode.
There is a paper jam in the
shredder.
The shredder will not stop
running.
• Make sure that the shredder is plugged in and that the outlet it is plugged into is
in good working order.
• The shredder may overheat with extended use. In the event that the shredder has
shred continuously beyond the maximum running time and has overheated, the
shredder will automatically shut off. If this happens, switch the shredder off for
30 minutes or longer before resuming normal operation.
• If using a plastic bag to line the wastebasket, remove it. The bag may be the
cause of the shredder not operating properly.
• The activation sensor of the shredder is located near the center of the feed slot.
Be sure to feed directly into the center area to trigger the machine (especially
applies to smaller pieces of paper or credit cards).
• While in On/Auto mode, the motor will not start running until paper is inserted
into the feed slot. Set the unit to On/Auto and insert the paper to be shredded. It
is normal for the motor to run for a moment after setting it to On/Auto but it
should stop until paper is inserted. The sensor that activates the shredder in On/
Auto mode is located directly in the center of the slot. If the paper you are
inserting is narrow, it may not be detected by the sensor. It is possible that the
sensor, which activates the shredder, has become blocked with paper. Insert an
index card, directly in the center of the feed slot, and apply force. This will usually
clear any paper blocking the sensor.
• Switch the shredder over into Rev (reverse) mode. While in reverse, the shredder
will back up and loosen the jammed paper. If required, you may need to tug and
remove several sheets to effectively clear the machine. When jammed paper is
loosened or removed, switch back to the On/Auto mode to continue shredding.
Repeat steps if needed.
CAUTION: Keep your hands away from the feed opening.
• With stubborn situations where the reverse function does not help, you may
loosen the jammed paper with shredder oil (cooking oil is acceptable, nothing
aerosol). Start by drizzling oil into the blades where the paper is jammed. Let it
soak for about 30 minutes to completely saturate. Return the shredder back to
On/Auto mode. If required, a rigid sheet of cardstock (old greeting card, folded
file folder, or a sheet torn from a cereal box) can be fed into the shredder to help
push the jammed paper through.
• The sensor that activates the shredder may be blocked. Insert a sheet of paper to
clear the sensor.
DX-PS06CC
Page 9

Cross-Cut Paper Shredder
Specifications
9
Product dimensions 14.3 in H x 12.5 in W x 7.3 in D
Duty cycle 2 minutes ON / 30 minutes OFF
Sheet capacity Six sheets of 20 lb. bond paper (one folded sheet
Paper shred size 0.19 x 1.34 in (5 x 34 mm)
Paper entry width 8.8 in (225 mm)
Credit card capacity One at a time
Power source US - AC 120V, 60Hz, 1.5 A
Basket capacity 3.5 gal. (12 L)
(36.2cm x 31.8cm x 18.5cm )
of paper equals two sheets of paper.)
Page 10

10
DX-PS06CC
Page 11

Cross-Cut Paper Shredder
One-year limited warranty
Dynex Products (“Dynex”) warrants to you, the original purchaser of this new DX-PS06CC (“Product”), that the
Product shall be free of defects in the original manufacture of the material or workmanship for a period of one (1)
year from the date of your purchase of the Product (“Warranty Period”). This Product must be purchased from an
authorized dealer of Dynex brand Products and packaged with this warranty statement. This warranty does not
cover refurbished product. If you notify Dynex during the Warranty Period of a defect covered by this warranty
that requires service, terms of this warranty apply.
How long does the coverage last?
The Warranty Period lasts for one year (365 days) from the date you purchased the Product. The purchase date is
printed on the receipt you received with the Product.
What does this warranty cover?
During the Warranty Period, if the original manufacture of the material or workmanship of the Product is
determined to be defective by an authorized Dynex repair center or store personnel, Dynex will (at its sole option):
(1) repair the Product with new or rebuilt parts; or (2) replace the Product at no charge with new or rebuilt
comparable products or parts. Products and parts replaced under this warranty become the property of Dynex
and are not returned to you. If service of products and parts are required after the Warranty Period expires, you
must pay all labor and parts charges. This warranty lasts as long as you own your Dynex Product during the
Warranty Period. Warranty coverage terminates if you sell or otherwise transfer the Product.
How to obtain warranty service?
If you purchased the Product at a retail store location, take your original receipt and the Product to the store you
purchased it from. Make sure that you place the Product in its original packaging or packaging that provides the
same amount of protection as the original packaging. If you purchased the Product from an online web site, mail
your original receipt and the Product to the address listed on the web site. Make sure that you put the Product in
its original packaging or packaging that provides the same amount of protection as the original packaging.
To obtain in-home warranty service for a television with a screen 25 inches or l arger, call 1-888-BESTBUY. Call
agents will diagnose and correct the issue over the phone or will have an Dynex-approved repair person
dispatched to your home.
Where is the warranty valid?
This warranty is valid only to the original purchaser of the Product in the United States, Canada, and Mexico.
What does the warranty not cover?
This warranty does not cover:
• Customer instruction
•Installation
• Set up adjustments
• Cosmetic damage
• Damage due to acts of God, such as lightning strikes
•Accident
•Misuse
•Abuse
•Negligence
• Commercial use
• Modification of any part of the Product
• Plasma display panel damaged by static (non-moving) images applied for lengthy periods (burn-in).
This warranty also does not cover:
• Damage due to incorrect operation or maintenance
• Connection to an incorrect voltage supply
• Attempted repair by anyone other than a facility authorized by Dynex to service the Product
• Products sold as is or with all faults
11
Page 12

12
DX-PS06CC
• Consumables, such as fuses or batteries
• Products where the factory applied serial number has been altered or removed
REPAIR REPLACEMENT AS PROVIDED UNDER THIS WARRANTY IS YOUR EXCLUSIVE REMEDY. DYNEX SHALL NOT BE
LIABLE FOR ANY INCIDENTAL OR CONSEQUENTIAL DAMAGES FOR THE BREACH OF ANY EXPRESS OR IMPLIED
WARRANTY ON THIS PRODUCT, INCLUDING, BUT NOT LIMITED TO, LOST DATA, LOSS OF USE OF YOUR PRODUCT, LOST
BUSINESS OR LOST PROFITS. DYNEX PRODUCTS MAKES NO OTHER EXPRESS WARRANTIES WITH RESPECT TO THE
PRODUCT, ALL EXPRESS AND IMPLIED WARRANTIES FOR THE PRODUCT, INCLUDING, BUT NOT LIMITED TO, ANY
IMPLIED WARRANTIES OF AND CONDITIONS OF MERCHANTABILITY AND FITNESS FOR A PARTICULAR PURPOSE, ARE
LIMITED IN DURATION TO THE WARRANTY PERIOD SET FORTH ABOVE AND NO WARRANTIES, WHETHER EXPRESS OR
IMPLIED, WILL APPLY AFTER THE WARRANTY PERIOD. SOME STATES, PROVINCES AND JURISDICTIONS DO NOT
ALLOW LIMITATIONS ON HOW LONG AN IMPLIED WARRANTY LASTS, SO THE ABOVE LIMITATION MAY NOT APPLY TO
YOU. THIS WARRANTY GIVES YOU SPECIFIC LEGAL RIGHTS, AND YOU MAY ALSO HAVE OTHER RIGHTS, WHICH VARY
FROM STATE TO STATE OR PROVINCE TO PROVINCE.
Contac t Dynex:
For customer service please call 1-800-305-2204 (U.S. and Canada) or 01-800-926-3020 (Mexico)
www.dynexproducts.com
Distributed by Best Buy Purchasing, LLC
7601 Penn Avenue South, Richfield, Minnesota, U.S.A. 55423-3645
© 2013 BBY Solutions, Inc.
All rights reserved. DYNEX is a trademark of BBY Solutions, Inc. Registered in some countries. All other products
and brand names are trademarks of their respective owners.
Page 13

1-800-305-2204 (U.S. and Canada) or 01-800-926-3020 (Mexico)
7601 Penn Ave. South, Richfield, MN 55423 U.S.A.
DYNEX is a trademark of BBY Solutions, Inc. Registered in some countries.
All other products and brand names are trademarks of their respective owners.
© 2013 BBY Solutions, Inc. All rights reserved.
www.dynexproducts.com
Distributed by Best Buy Purchasing, LLC
V2 ENGLISH 13-0652
 Loading...